
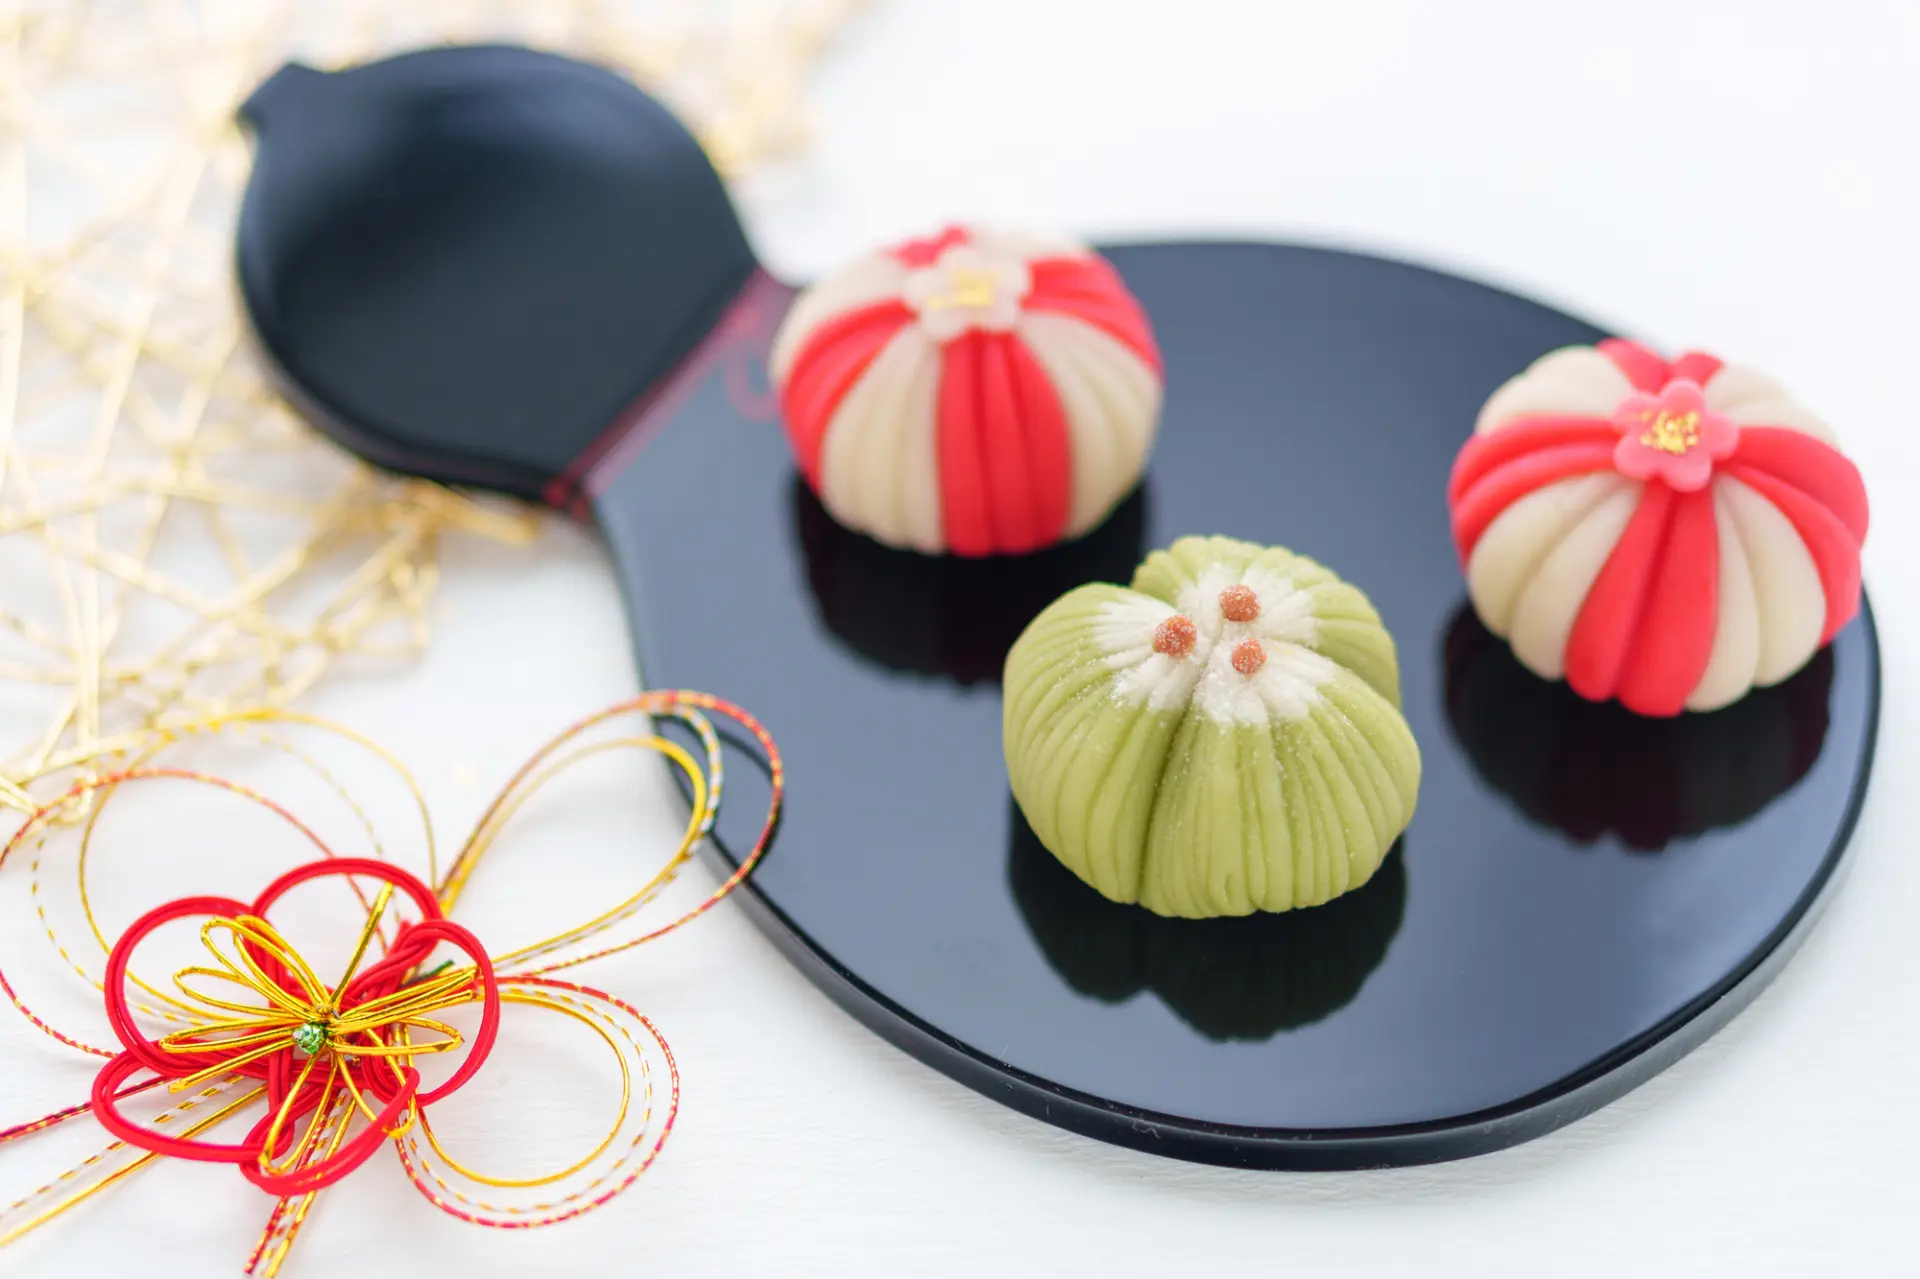
A Complete Guide to Wagashi: Japanese Sweets That Reflect the Four Seasons!
What brings a sense of the seasons into everyday life? Clothing, seasonal greetings, and food are just a few examples. Japan's traditional sweets, known as wagashi, also offer a taste of the seasons, with designs that delicately express the time of year. For example, the fine fresh sweets served at tea ceremonies reflect nature throughout the four seasons, from flowers and landscapes to subtle seasonal changes.
This article introduces the history and varieties of wagashi, which embody a delicate Japanese sense of beauty, along with workshops where you can try making them yourself! Read on for a deeper appreciation of their beauty and flavor when you try wagashi on your travels in Japan.
What Is Wagashi?
Wagashi are traditional Japanese sweets. More than simply delicious treats, their designs express the seasons and capture the beauty of nature. They also have close ties to Japan's long-standing celebrations and customs. Here is an introduction to their history, essential ingredients, and varieties.
History
The history of wagashi dates back to ancient times, when people in Japan ate nuts and fruit between meals. These fruits are thought to have become known as kashi, a term that distinguished them from staple foods. Later, from the Nara through the Heian periods, Chinese sweets called togashi began to be eaten at the imperial court and in temples. During the Kamakura period, a culture of light meals and snacks arrived alongside Zen Buddhism, and early forms of steamed manju buns and yokan began to spread throughout Japan. Wagashi then reached a turning point in the Muromachi period. As the tea ceremony developed, the sweets became more refined, laying the foundations for the fine fresh sweets served at tea gatherings. In the Azuchi-Momoyama period, European-style sweets such as castella sponge cake and konpeito sugar candy arrived from Portugal and elsewhere. By the Edo period, sugar, previously a luxury, was becoming more widely available, and confectioners' skills were improving. A diverse wagashi culture flourished. From the Meiji period onward, wagashi continued to develop in their own way while absorbing Western influences, and they remain a cherished part of Japanese traditional culture today.
Ingredients
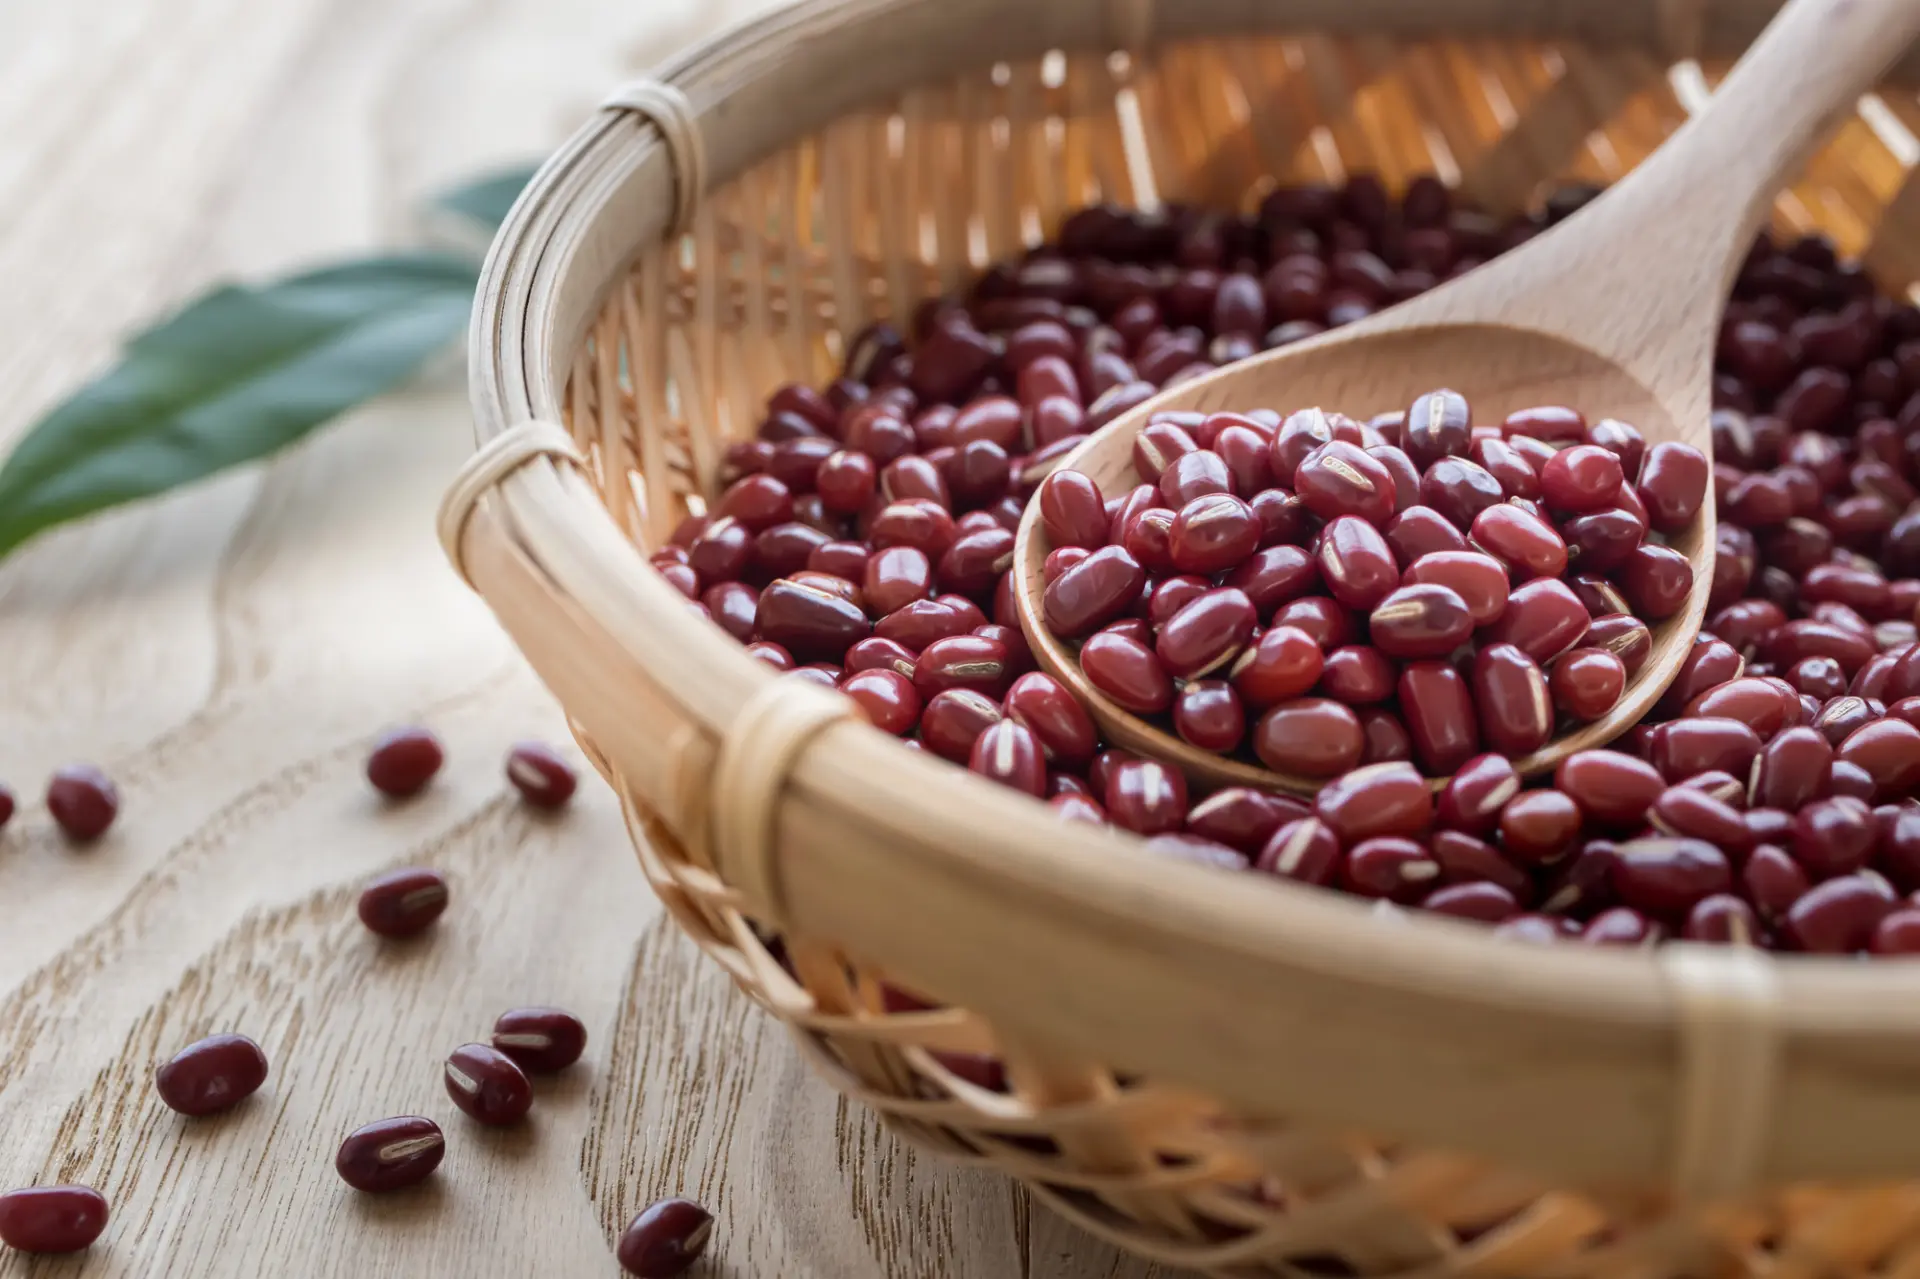
Azuki Beans
Sweet bean paste is the foundation and very heart of wagashi—so much so that it is no exaggeration to say it determines how good a sweet will taste. This paste is made from azuki beans, which have been cultivated in Japan since ancient times. A member of the legume family, azuki beans are harvested from September to October. They are used in smooth bean paste, mashed bean paste, and azuki bean jelly, as well as in dishes such as sekihan, rice cooked with red beans. Their versatility is one of their defining features.
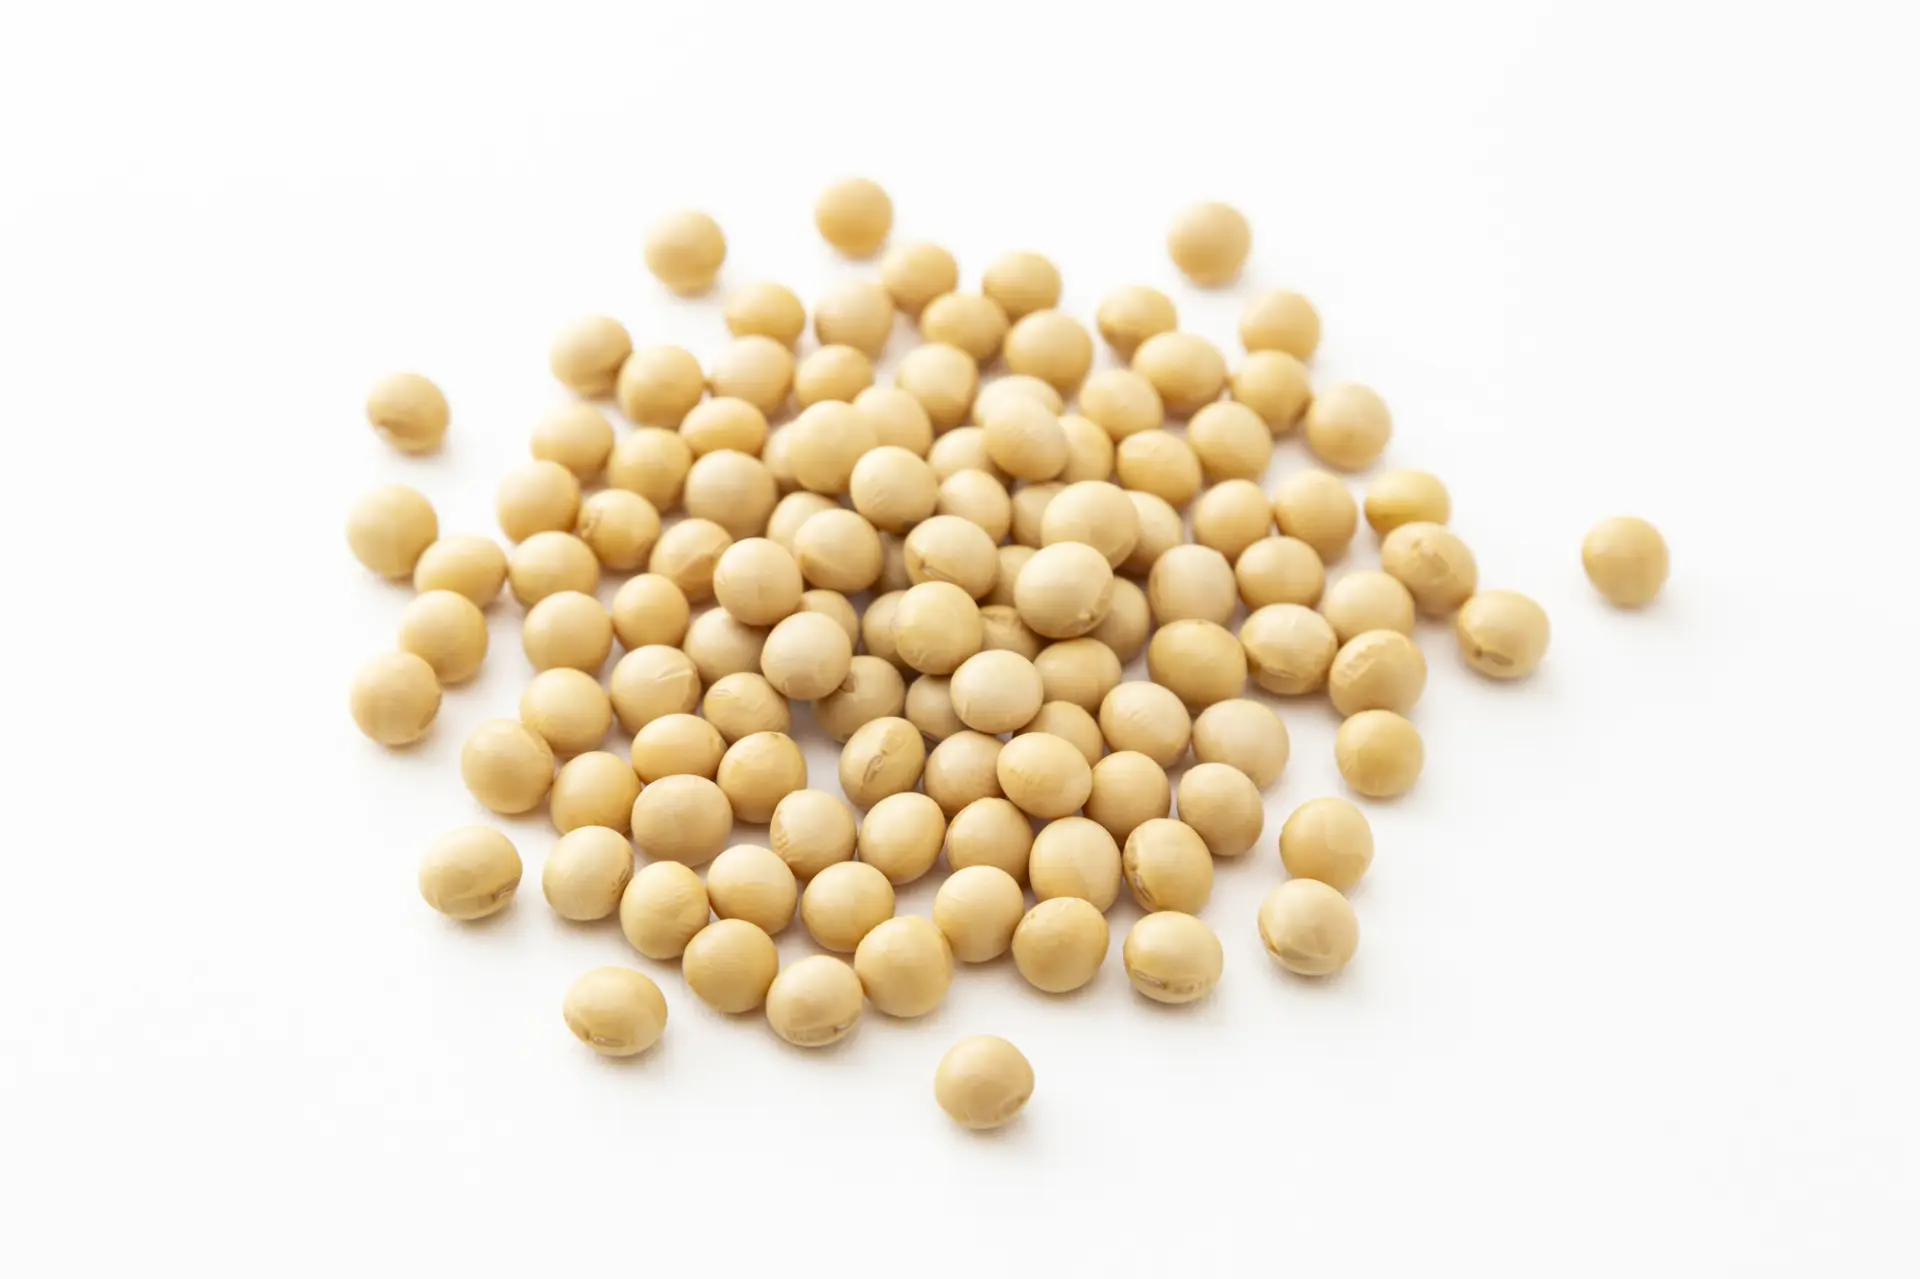
Soybeans
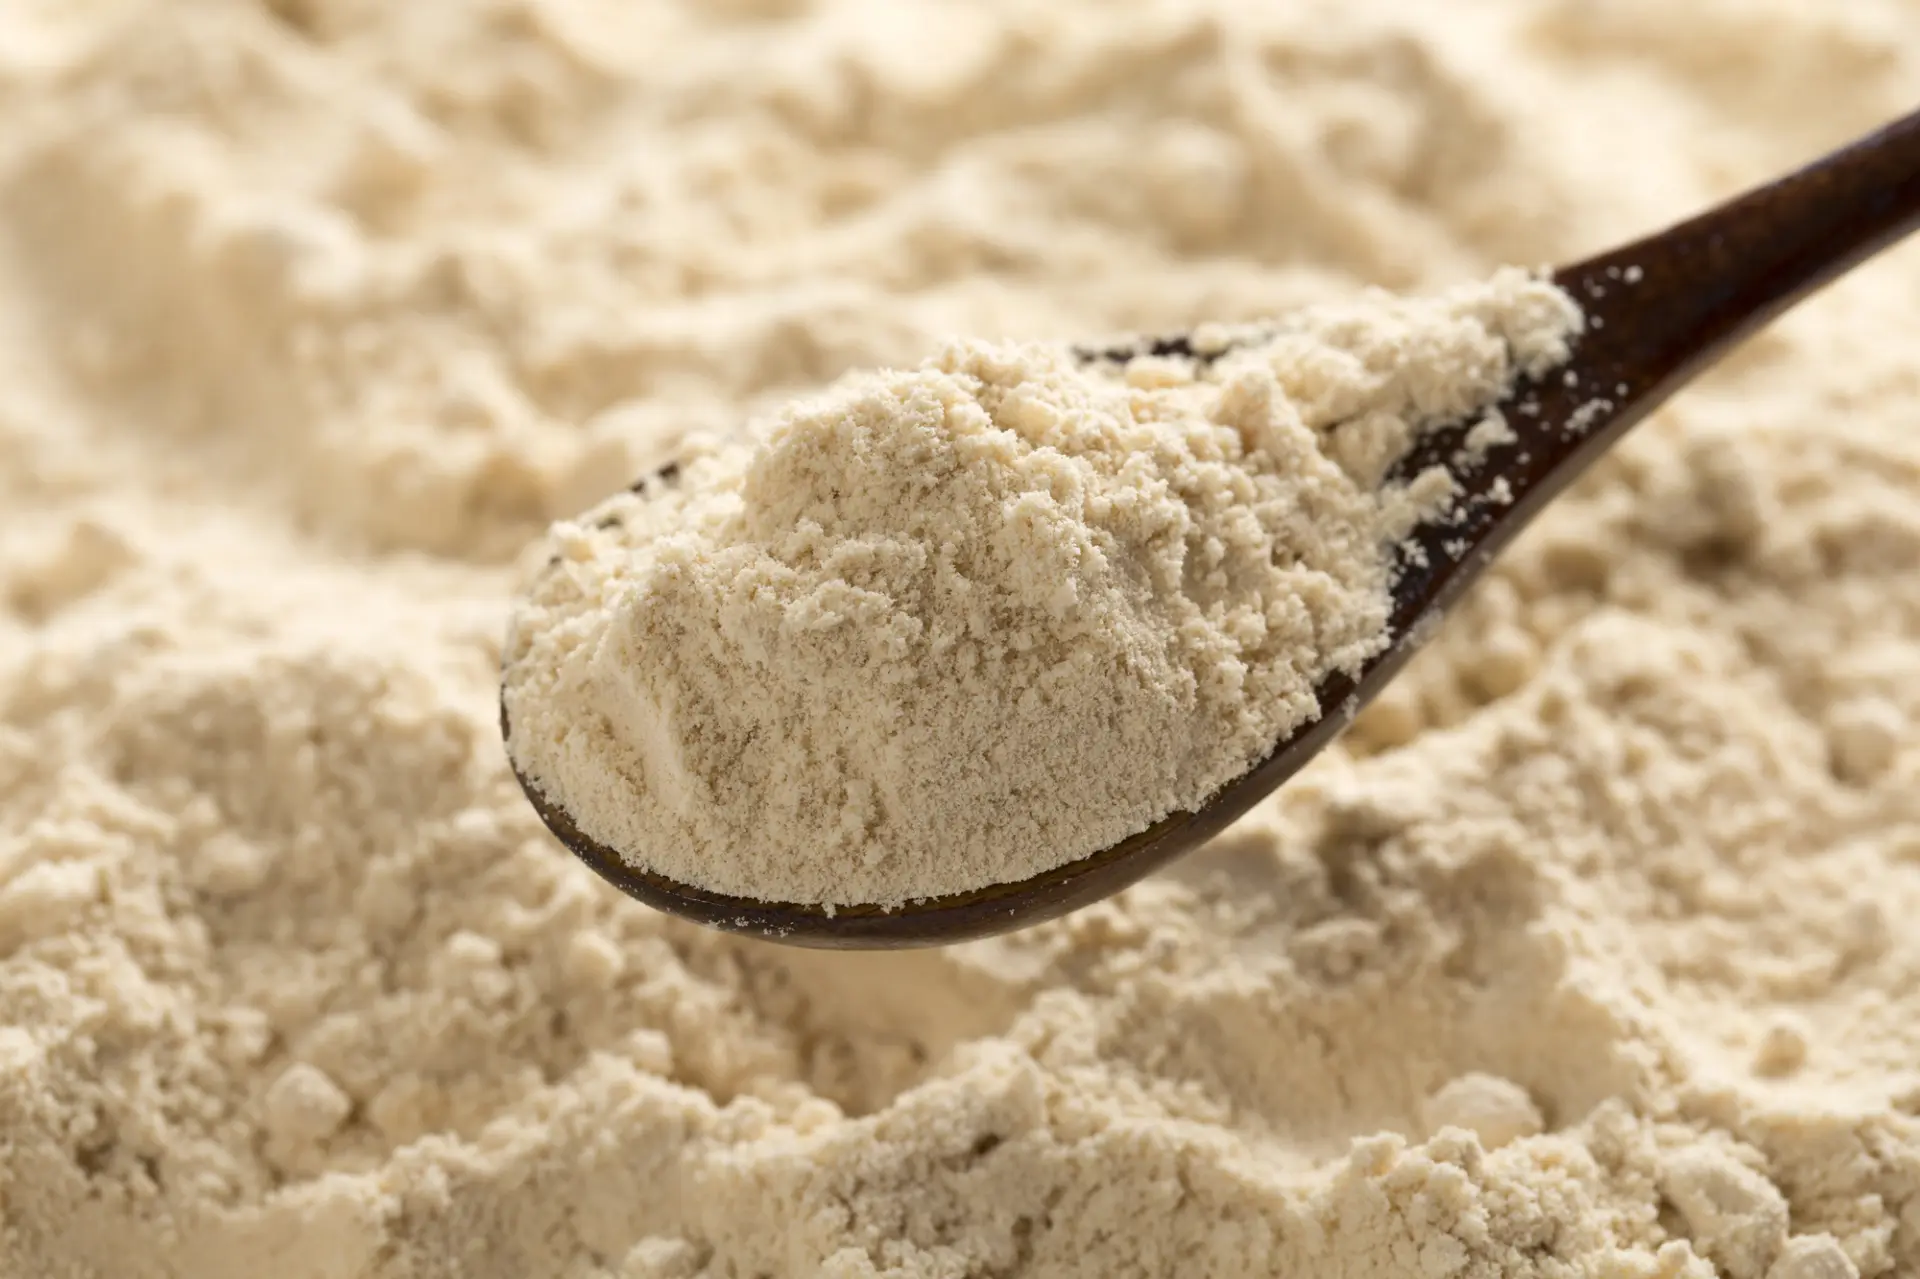
Soybeans are thought to have reached Japan in the early Yayoi period. At the time, people appear to have eaten them boiled or roasted. During the Nara period, they began to be used as ingredients in what we now know as miso and soy sauce. In sweets, they are used as kinako, a soybean flour, and suhamako, a powder made by roasting soybeans, removing their skins, and grinding them.
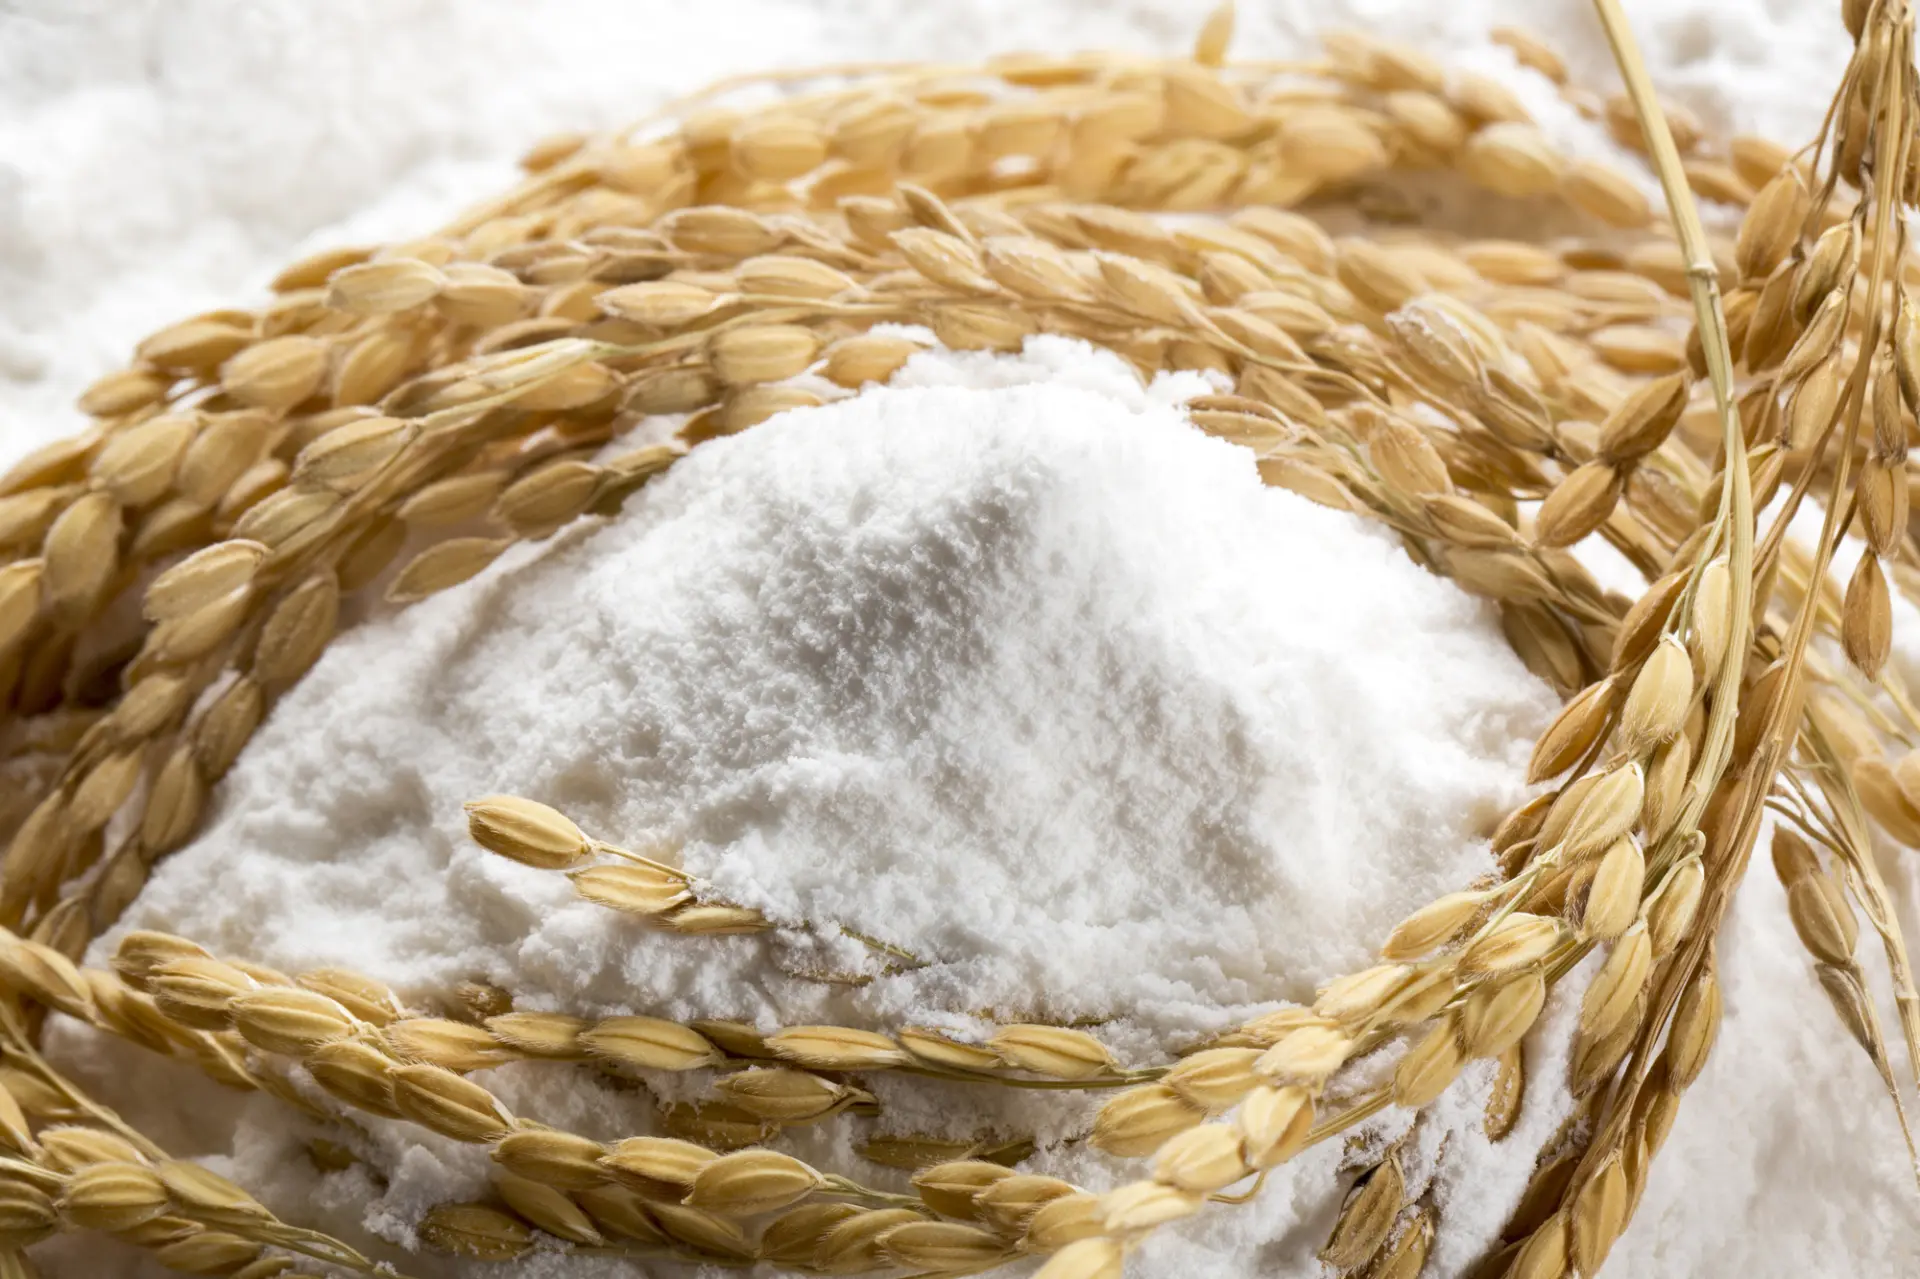
Flours and Starches
Many different flours and starches are used in wagashi.
Among wheat flours, low-protein cake flour is commonly used, since excessive stickiness and elasticity can prevent sweets from cooking through properly or spoil their texture.
Katakuriko originally referred to starch extracted from the roots of the Japanese dogtooth violet, a member of the lily family. Today, this starch is rarely harvested, and the term generally refers to potato starch.
Flours made from non-glutinous rice include joshinko, joyoko, shinbikiko, shinko, and karukanko, while those made from glutinous rice include domyojiko, mochiko, and kanbaiko.
Other flours and starches are made from barley, brown rice, bracken, kudzu, and soybeans. All are essential ingredients in wagashi-making.
Sugar
The types of sugar used in wagashi differ from those used in Western-style sweets. They include johakuto, a fine white sugar used in everything from doughs to baked and pressed sweets; chuhakuto, which is slightly less refined than johakuto; sanonto, known for its distinctive flavor and aroma; kurozato, an unrefined brown sugar made by boiling down sugarcane juice; and wasanbon, a premium white sugar produced only in a few small areas of Kagawa and Tokushima.
Types of Wagashi
Omogashi: Formal Tea Sweets
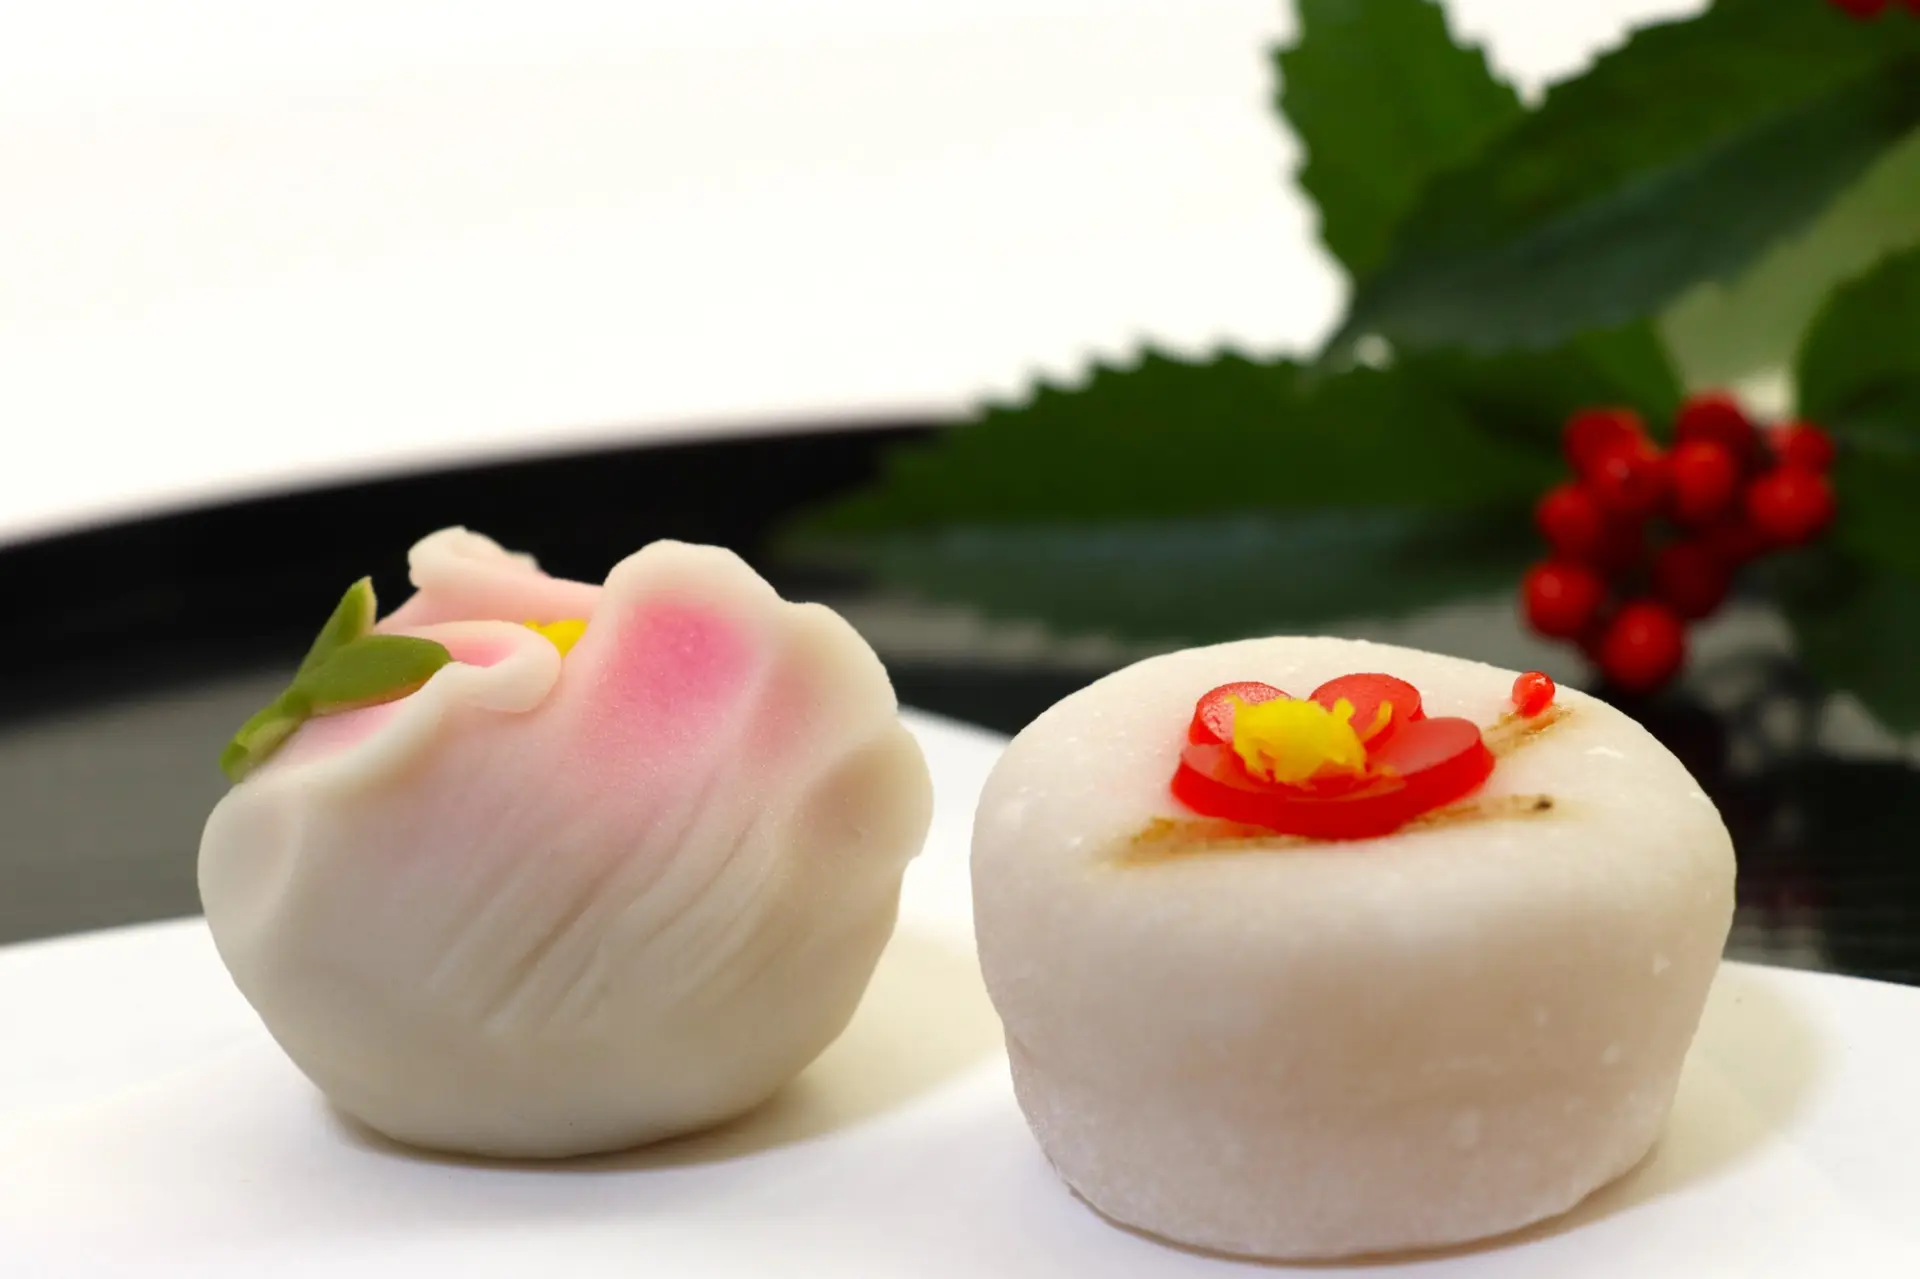
Omogashi are refined fresh sweets mainly served on formal occasions, such as tea gatherings. They belong to the category of fine fresh sweets known as jonama, which includes kinton and nerikiri.
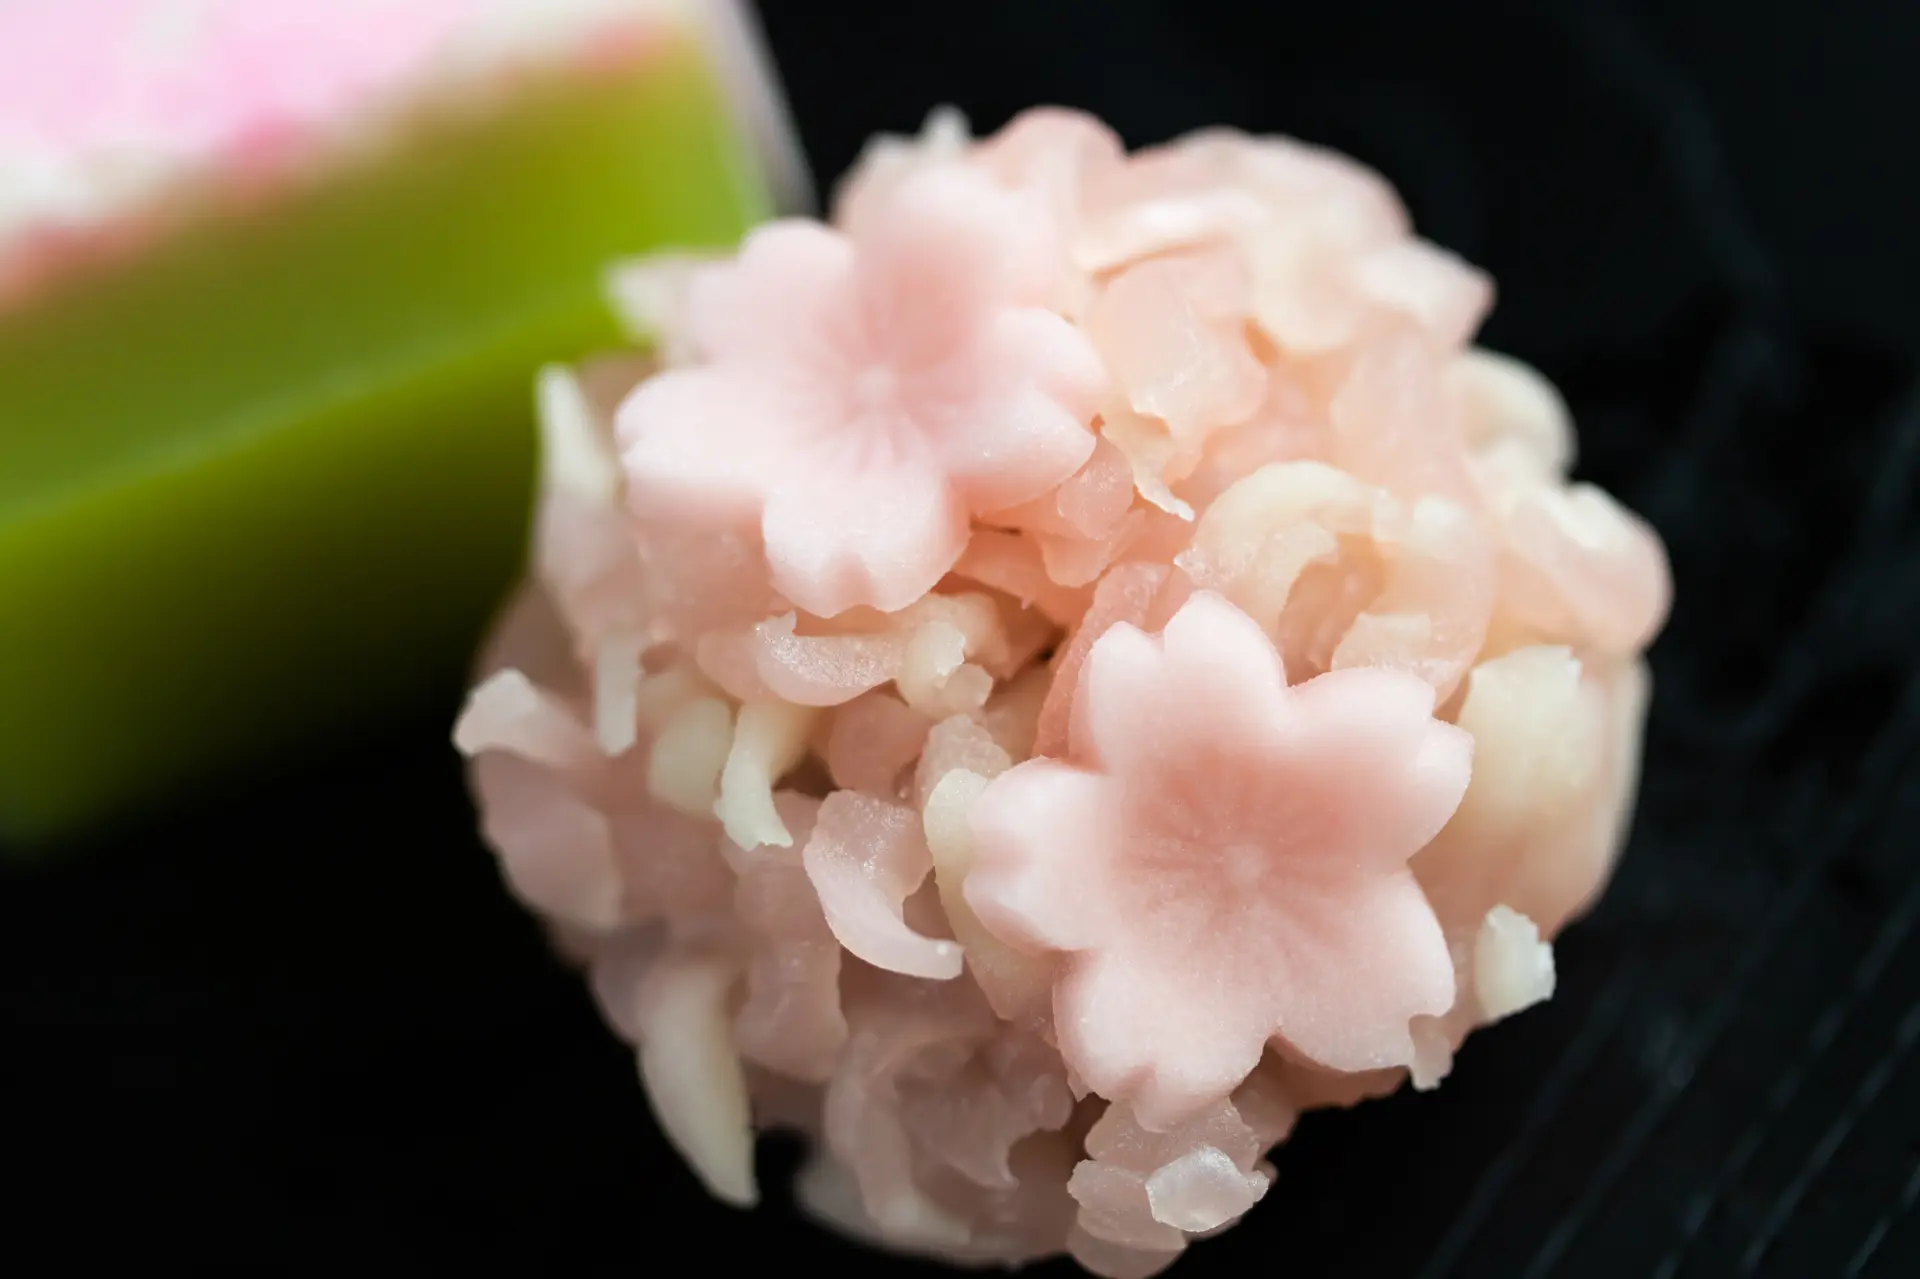
Kinton
Kinton is made by shaping sweet bean paste or gyuhi, a soft mochi dough, into a small ball, then coating it with crumb-like pieces of bean paste that have been kneaded and pressed through a sieve.
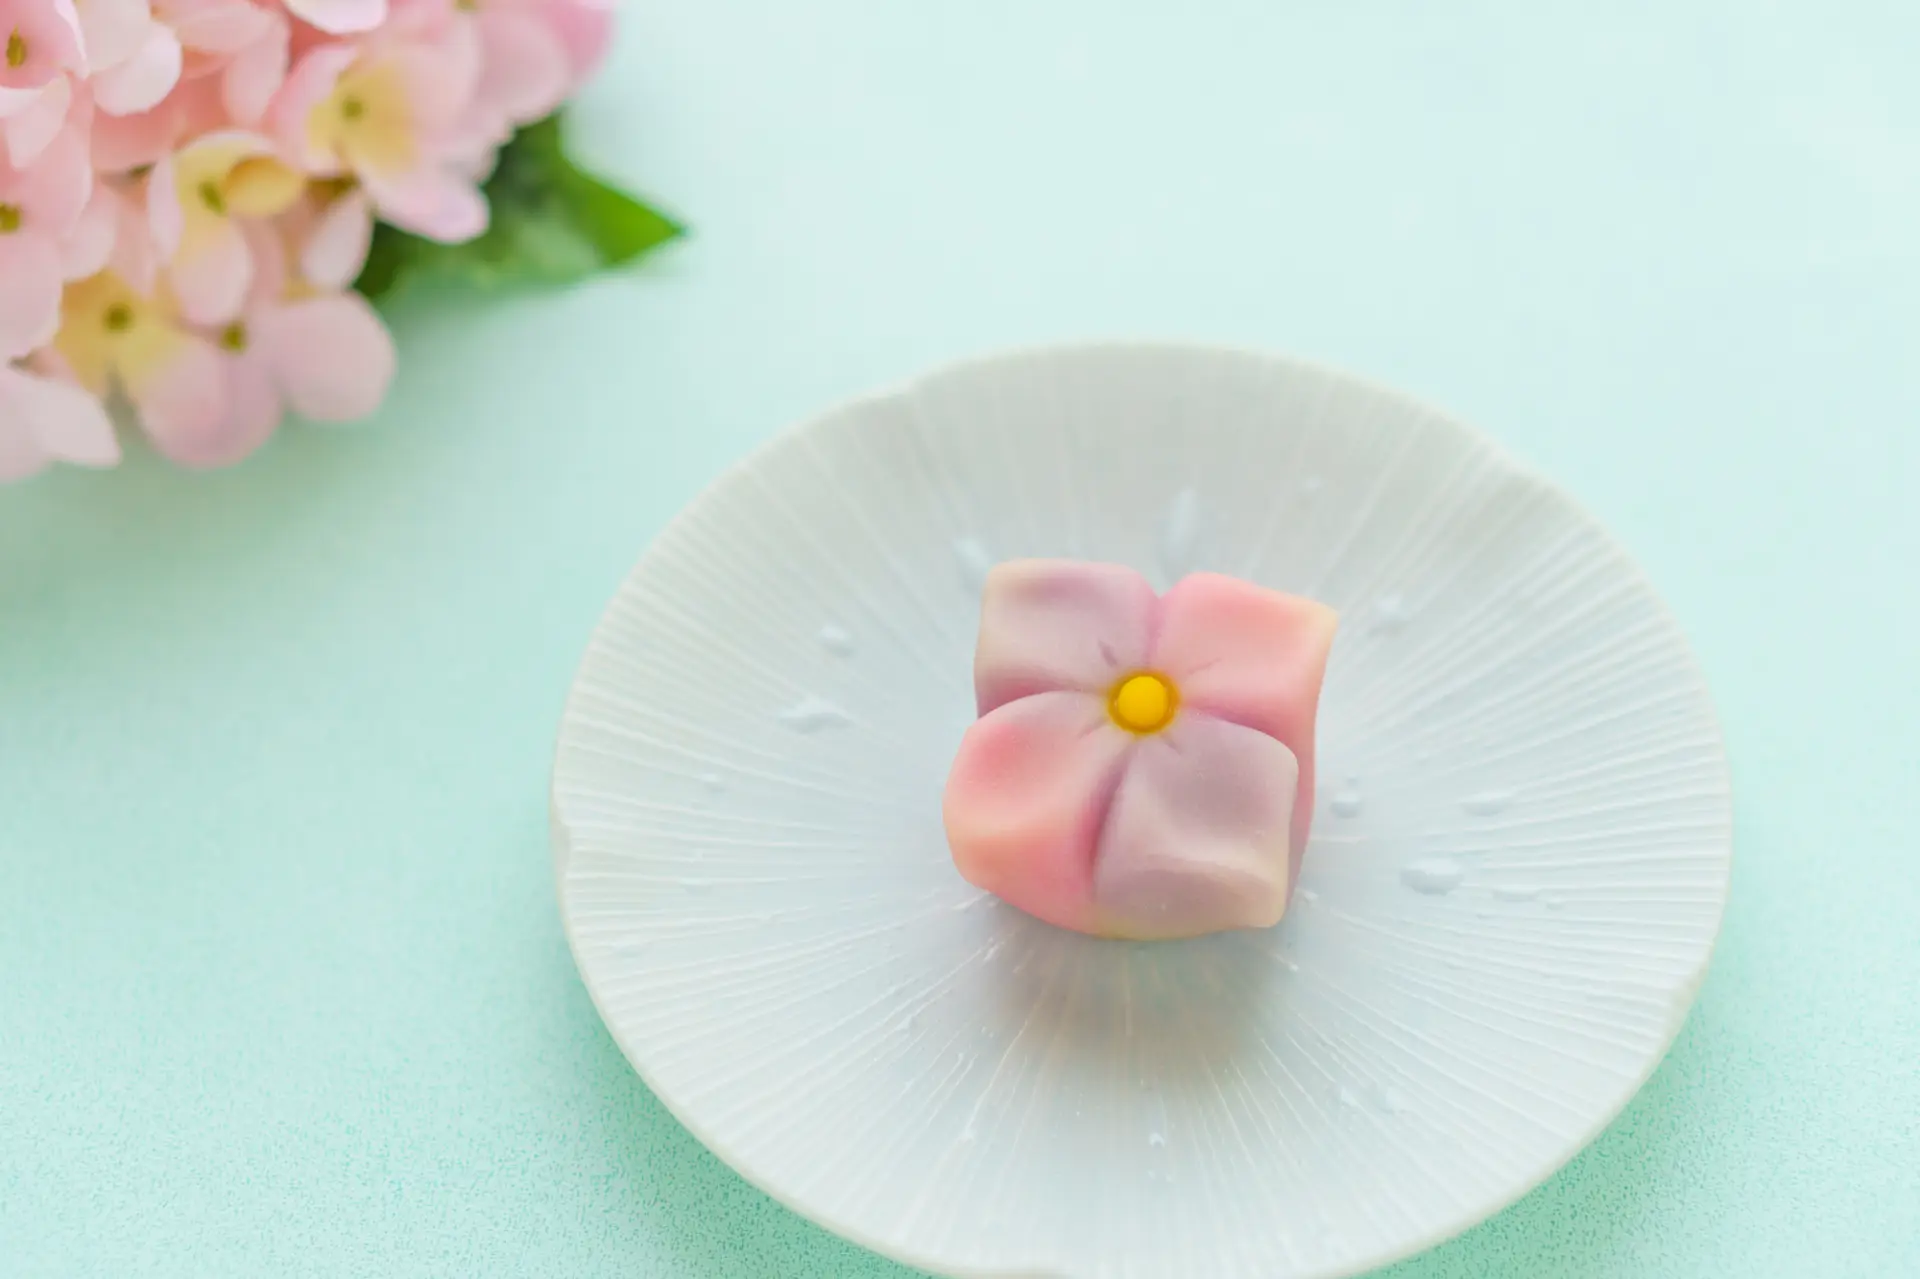
Nerikiri
There are 2 types of nerikiri. One is made by kneading white bean paste with gyuhi as a binder. The other, joyo nerikiri, is made by steaming and straining Japanese yam, then kneading it with sugar.
Higashi: Dry Sweets
Higashi are dry sweets. Examples include wasanbonto, made mainly from the wasanbon sugar traditionally produced in Tokushima and Kagawa; rakugan, made by mixing sugar with rice flour, kanbaiko, or roasted barley flour, shaping it in wooden molds, and drying it; kizato, made by pressing less-refined sugar into shapes; aruheito, made by boiling sugar and starch syrup; oshimono, made by packing flour and sugar into molds and pressing them firmly; and tamamono, round sweets made from sugar or beans. Their low moisture content gives them a relatively long shelf life. They are served as an accompaniment to omogashi.
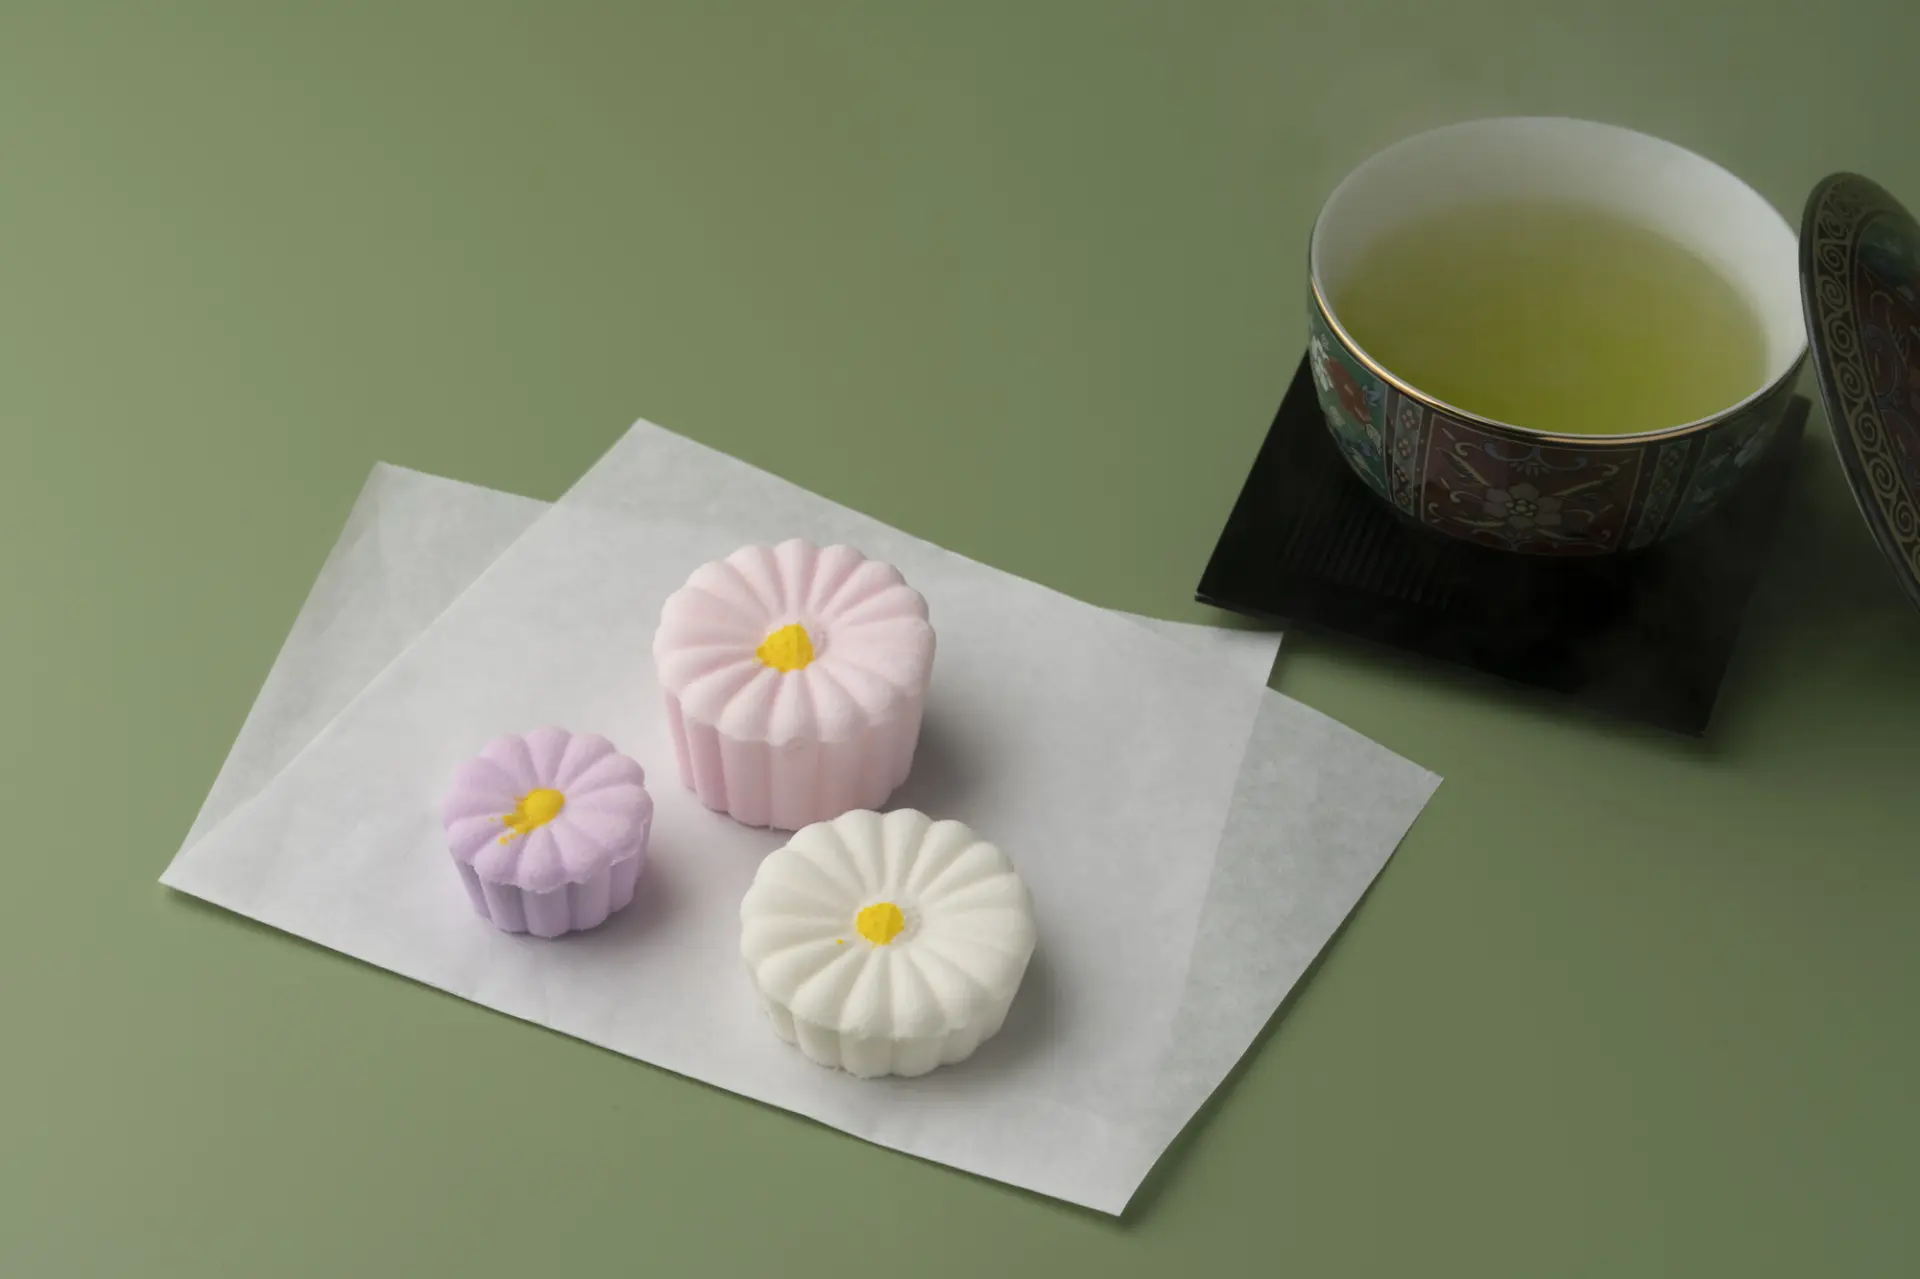
Yokan
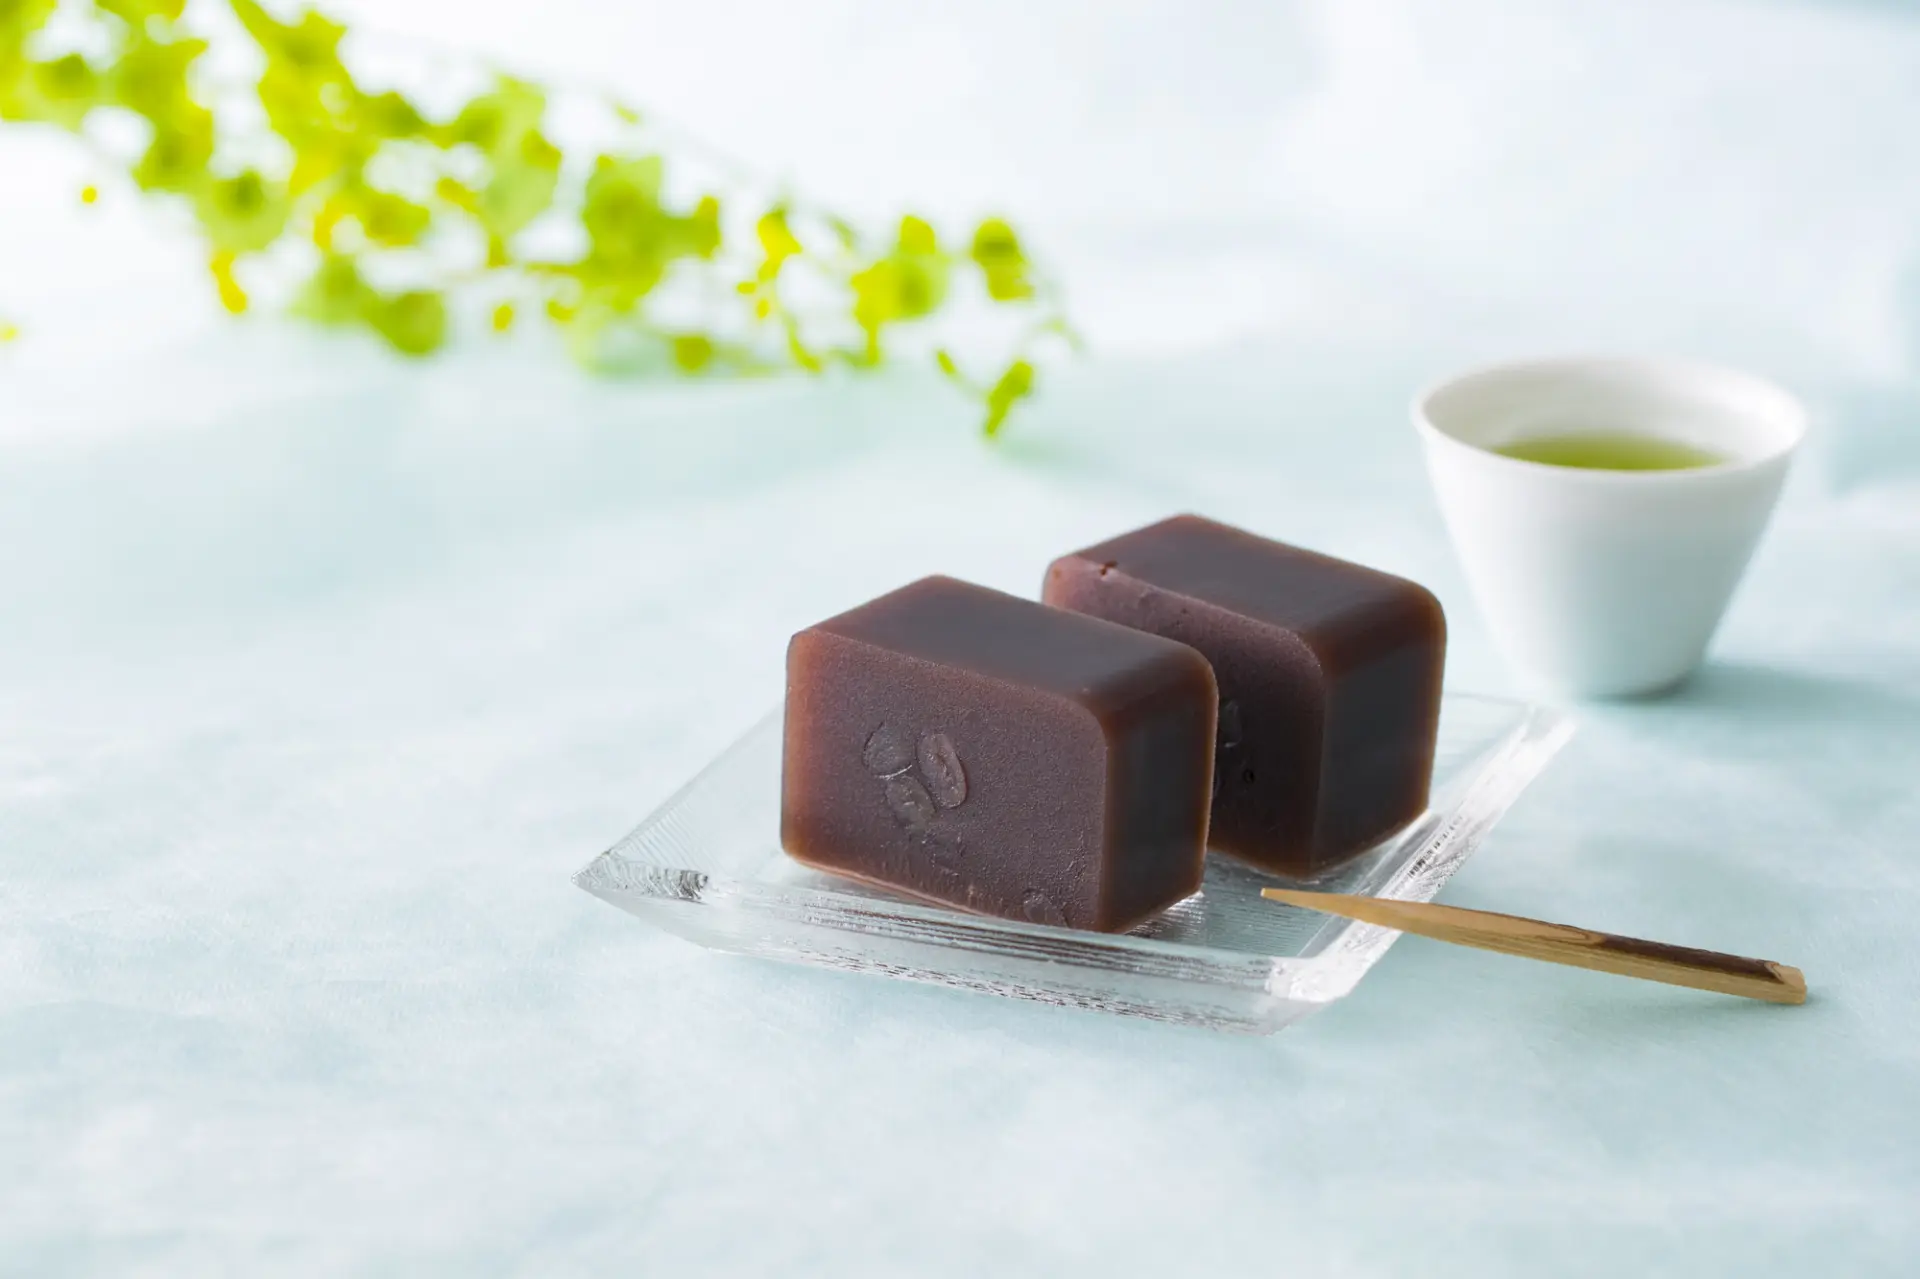
Yokan was originally an offering to Shinto deities and Buddhist figures, made by kneading mutton with unrefined brown sugar. During the Kamakura period, azuki beans and kudzu starch came to be used in place of mutton. It is said to have developed into mushi yokan in the Muromachi period, made by kneading azuki bean paste with wheat flour and steaming it. In the Edo period, neri yokan emerged, made by boiling down bean paste, sugar, and agar and allowing the mixture to set.
Manju
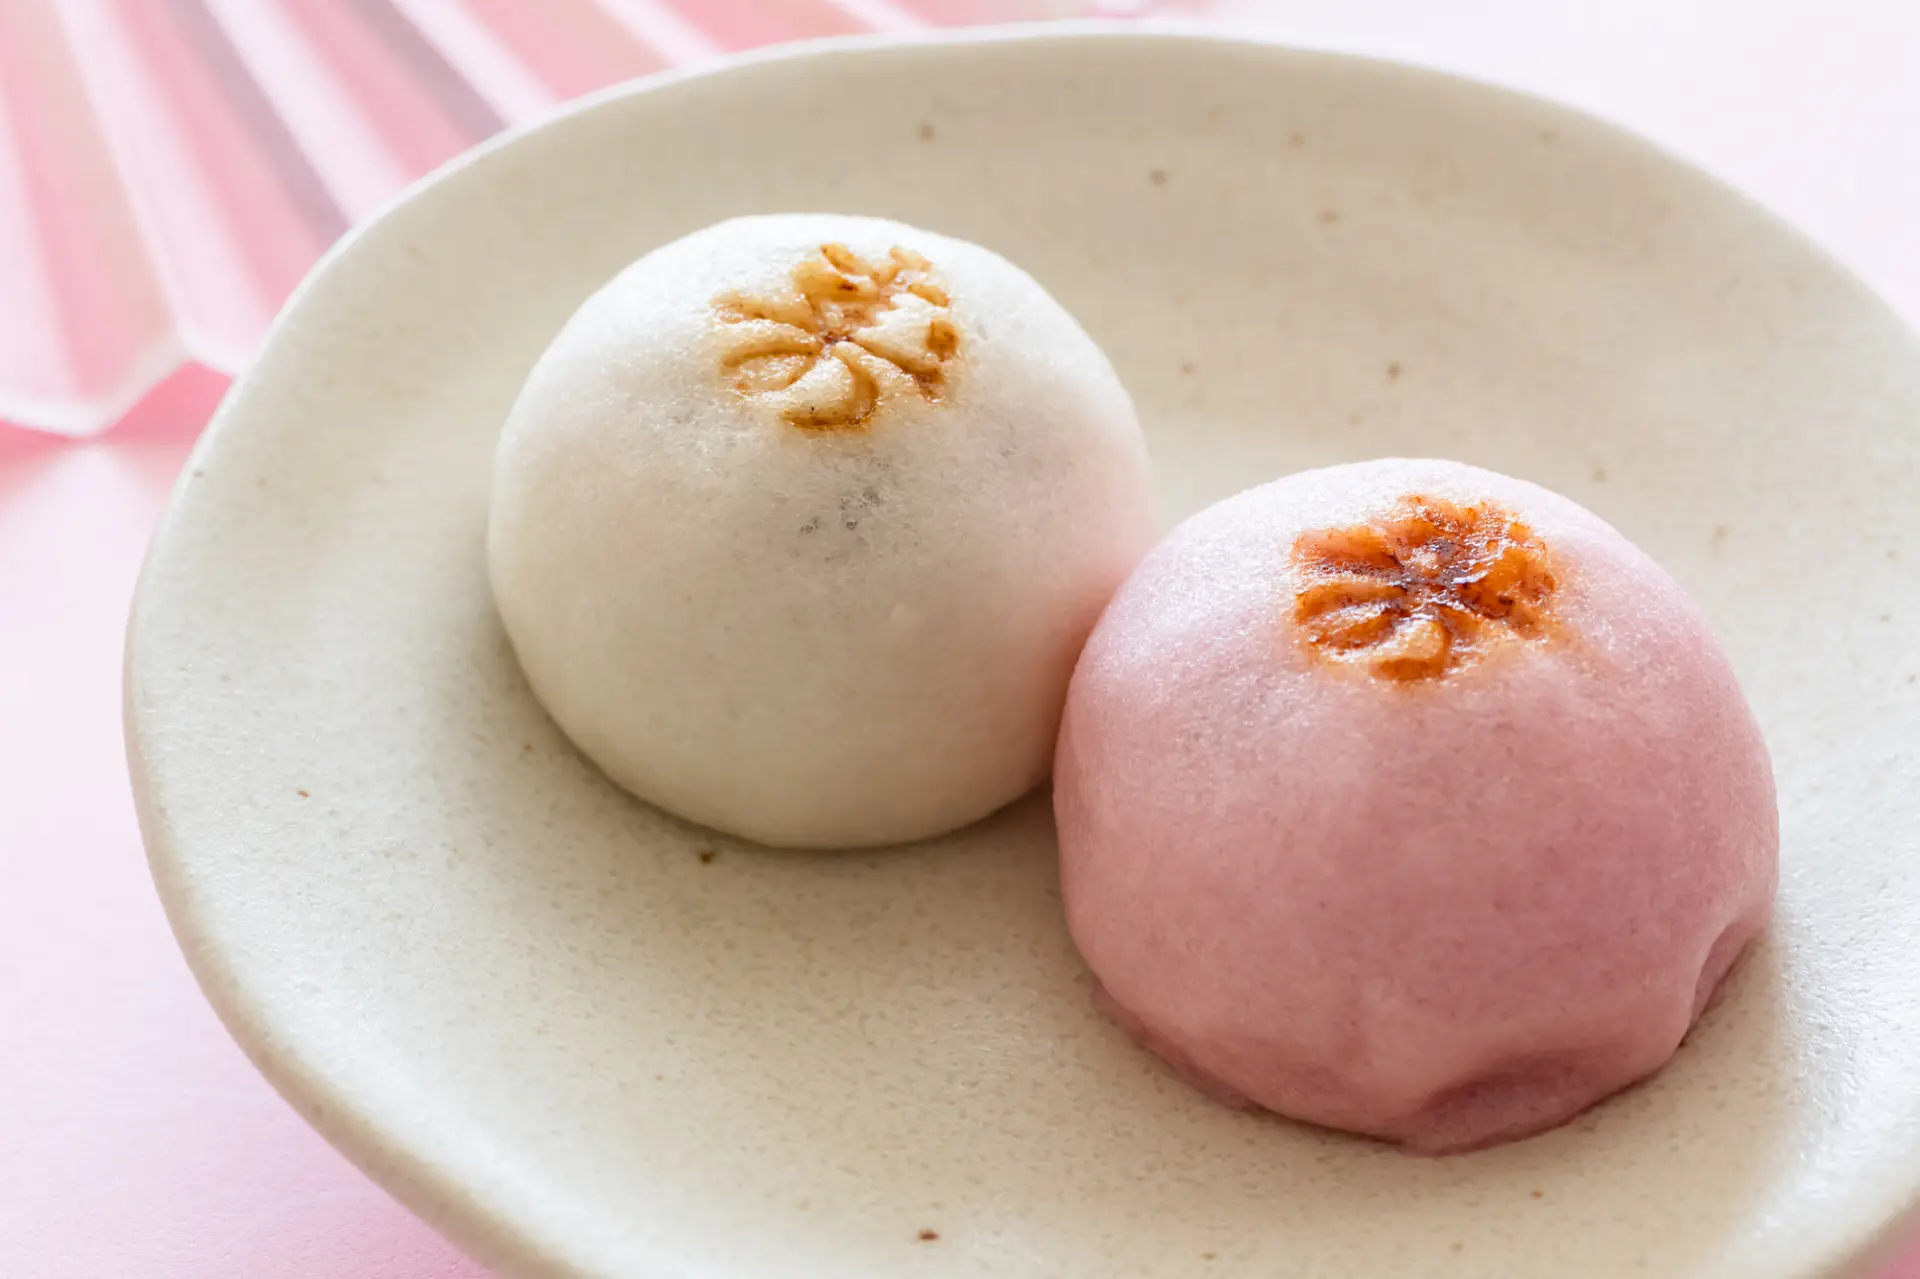
Manju are generally round, steamed buns. Red-and-white kohaku manju, in particular, are given as celebratory gifts at school entrance and graduation ceremonies, local celebrations, weddings, and other festive occasions. Red and white have long been considered auspicious colors in Japan: red represents protection from evil and vitality, while white symbolizes purity and sacredness.
Kohakuto
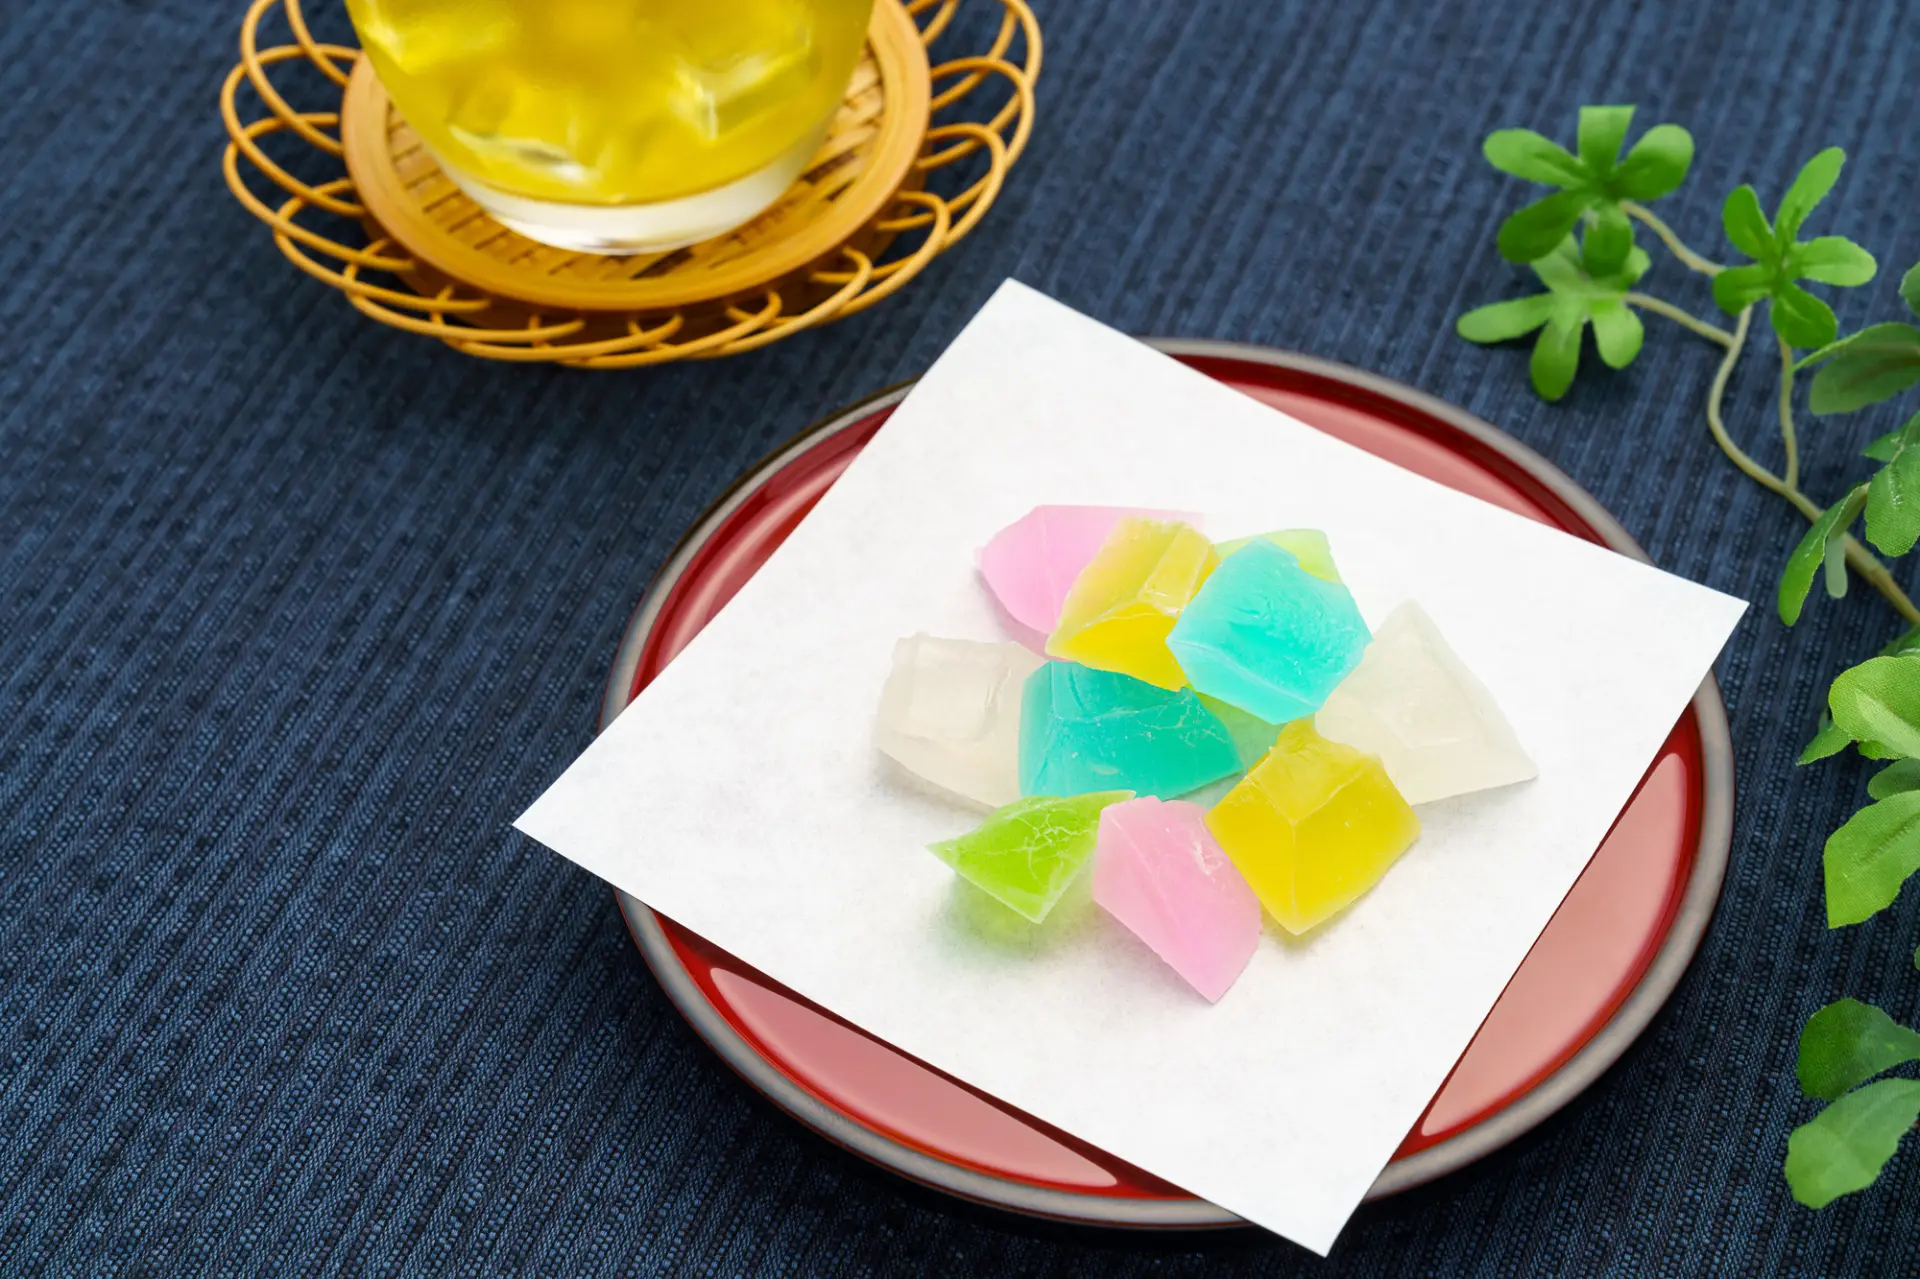
Kohakuto is made by boiling down agar and sugar, then cooling the mixture until it sets. It has a distinctive crystalline crunch. Its name comes from the gemstone amber.
Monaka
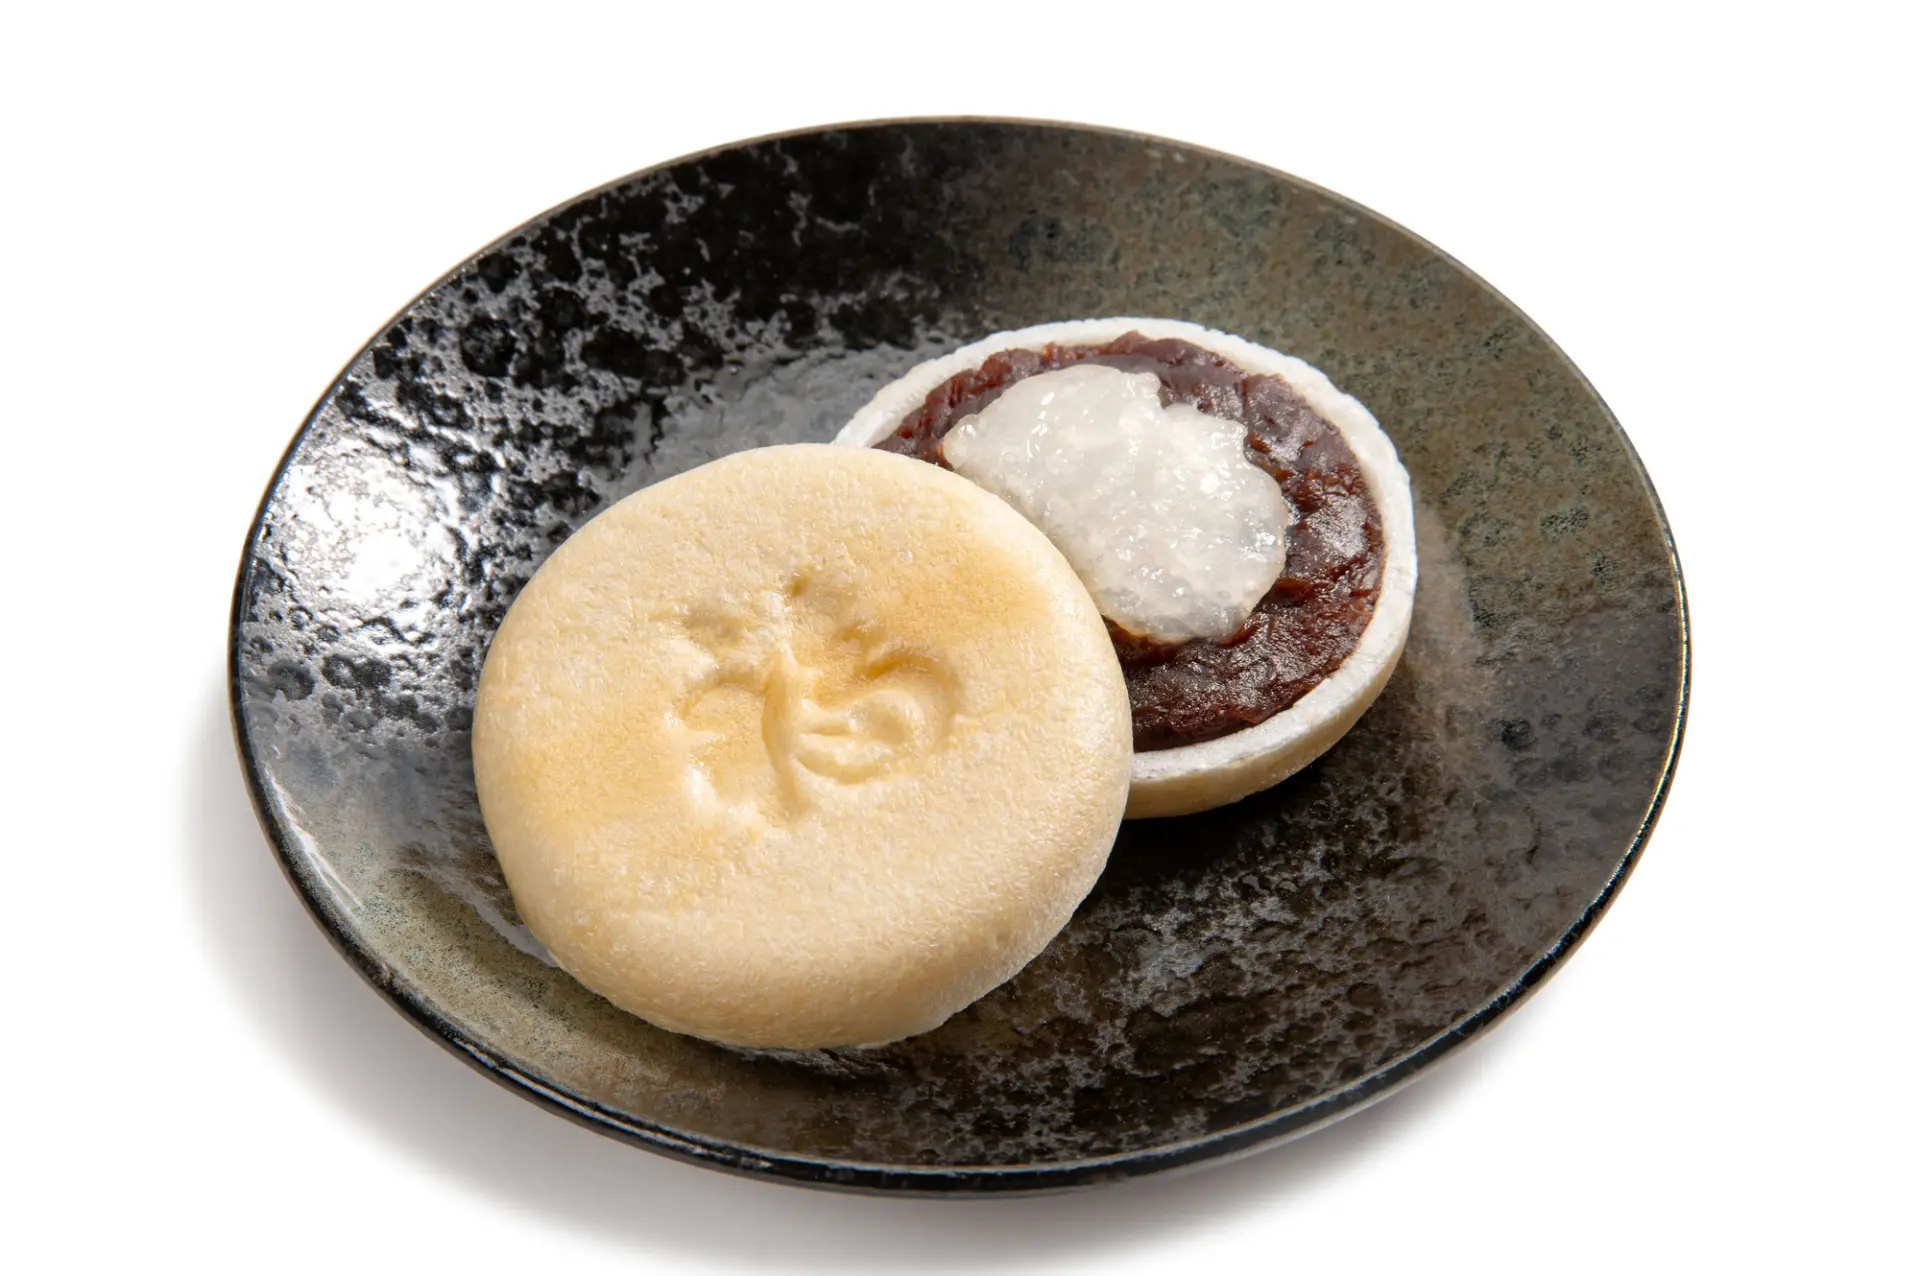
Monaka shells are made by kneading and steaming glutinous rice flour, rolling it out thinly, and baking it in molds. Sweet bean paste is sandwiched between the shells. This sweet originated in the mid-Edo period.
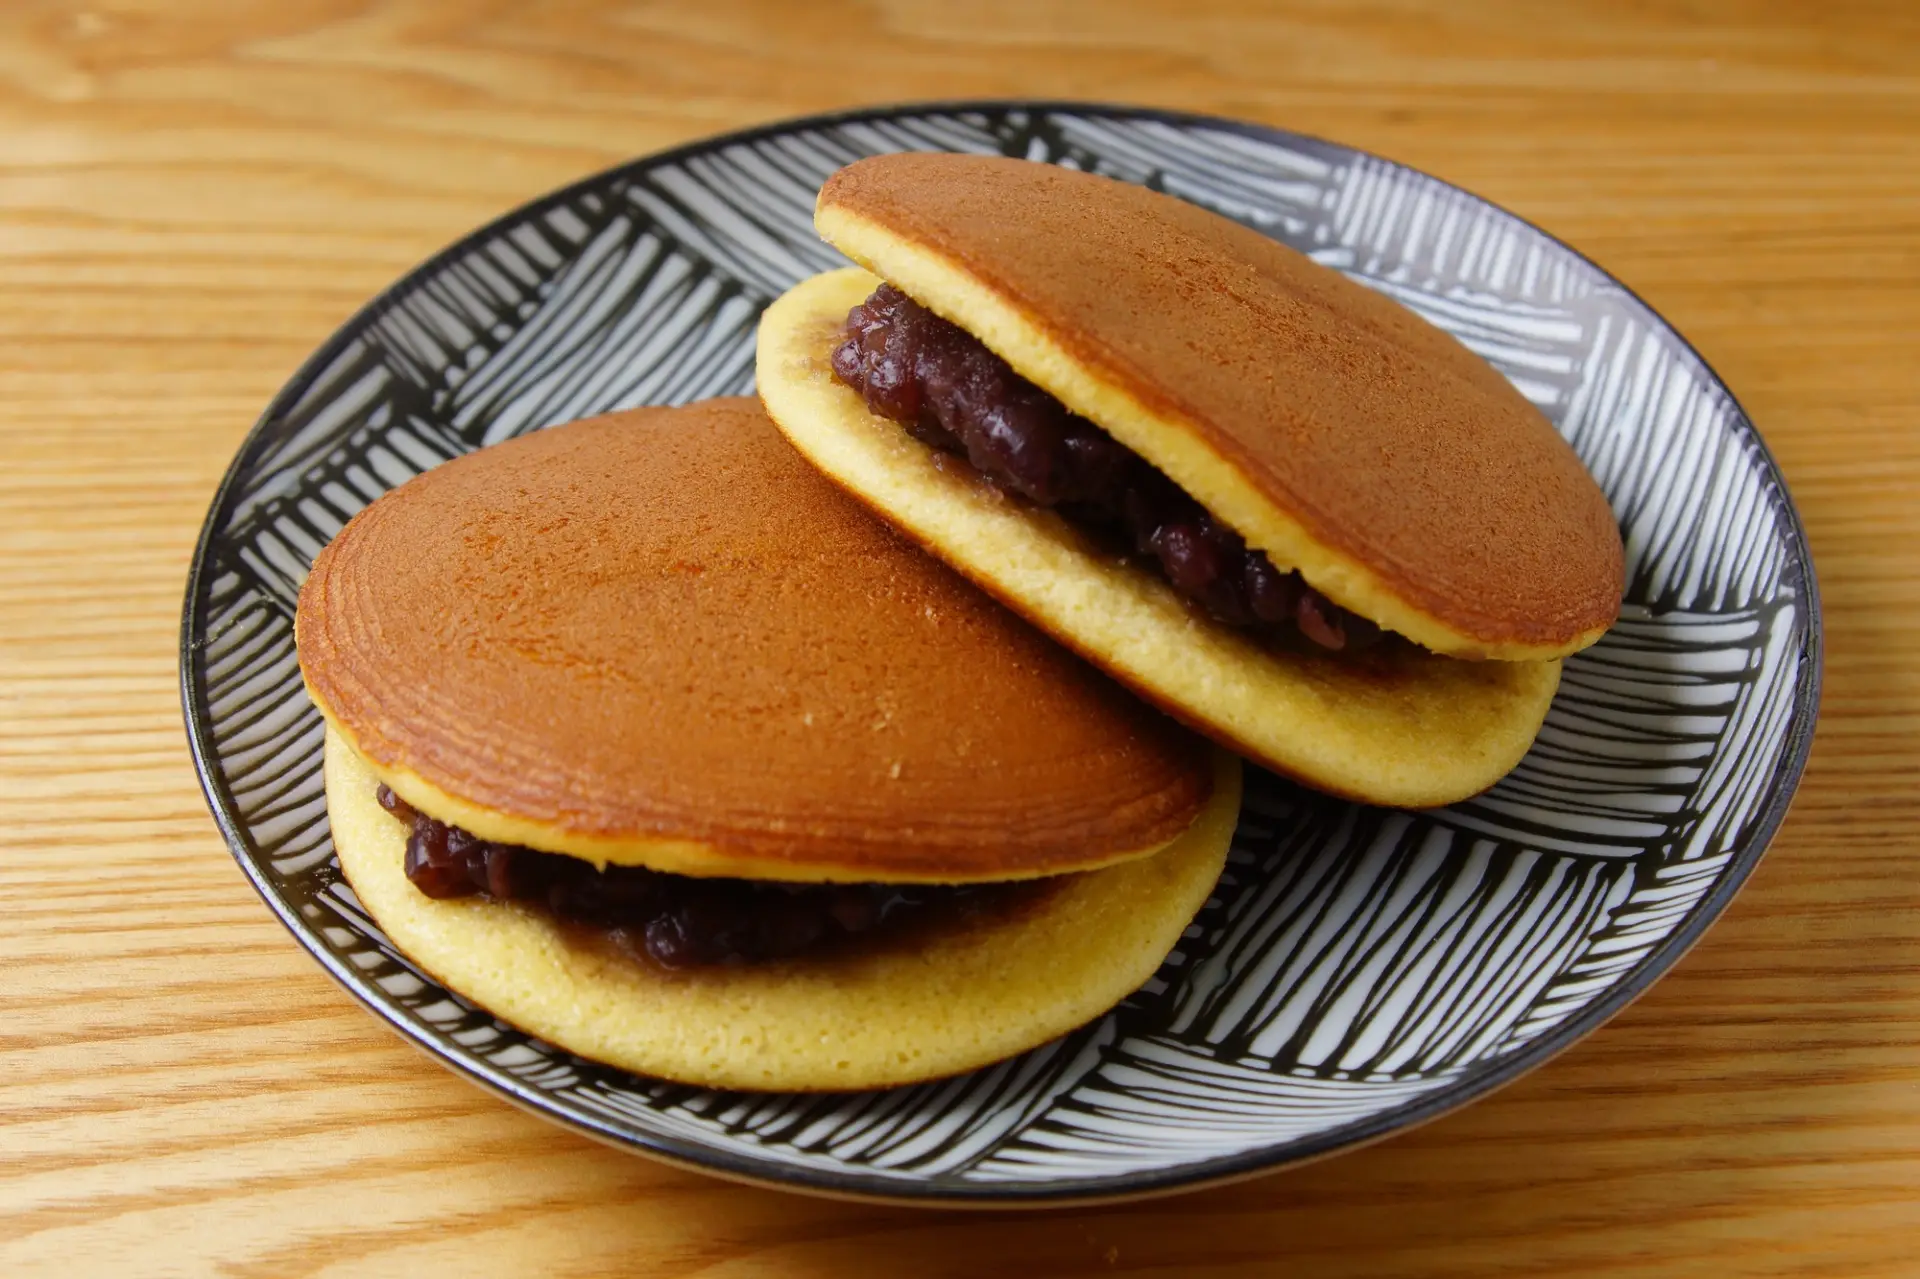
Dorayaki / Mikasa
There are several theories about the origin of the name dorayaki. One suggests that the sweets resemble a ship's gong, or dora; another says the batter was cooked on a gong rather than an iron griddle. They are also called mikasa because of their shape. An early form of dorayaki is thought to have appeared in the early Edo period, but the version familiar today is said to date from the Taisho period.
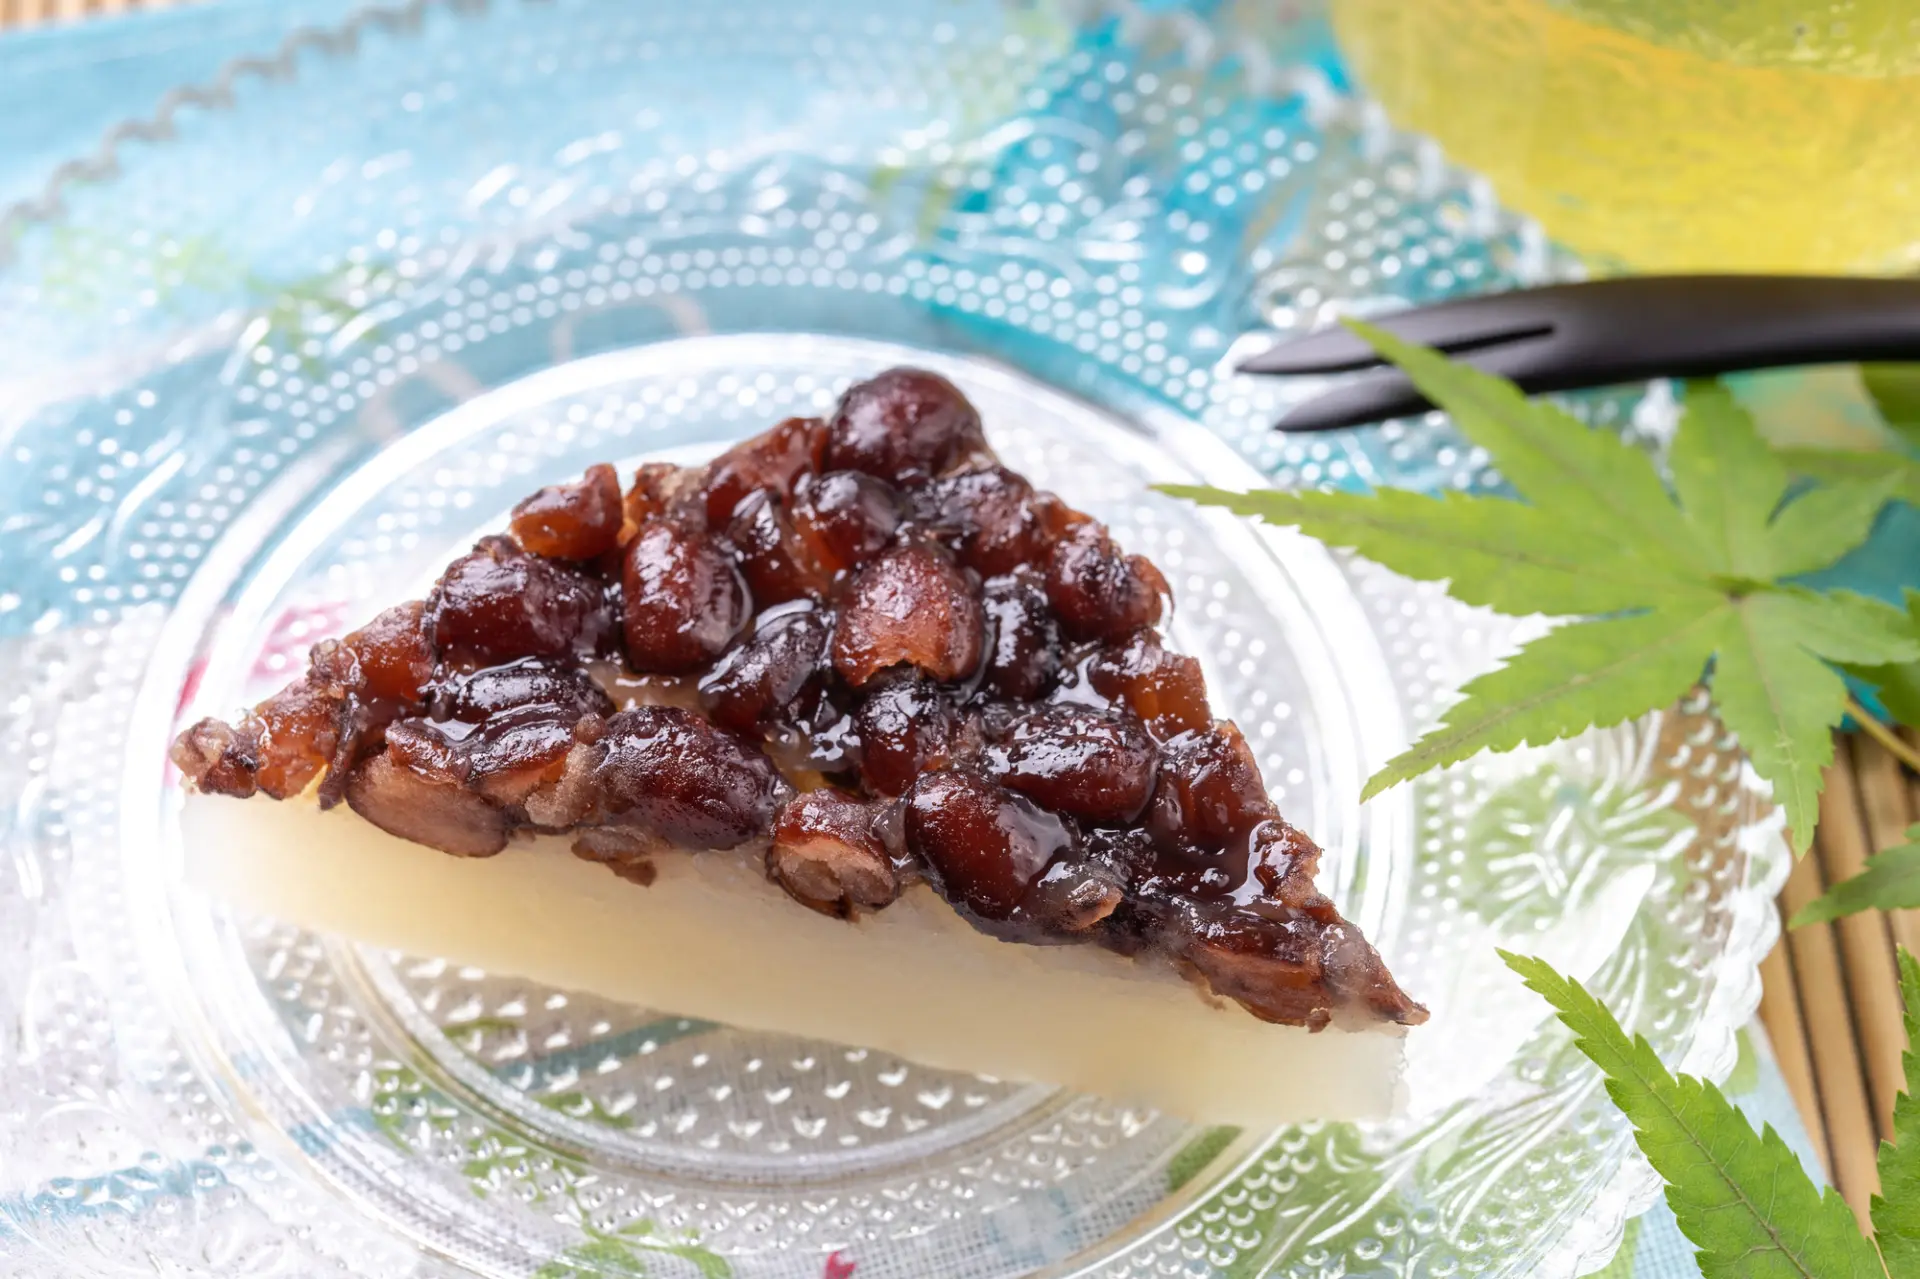
Minazuki
Minazuki is the traditional Japanese name for the sixth month of the old lunar calendar. In Kyoto, shrines hold a ritual called Nagoshi no Harae on June 30, the midpoint of the year. It purifies the sins and impurities of the previous 6 months and offers prayers for good health during the remaining 6 months.
The wagashi eaten for this ritual is also called minazuki. It is a triangular sweet made from white uiro rice-flour dough topped with azuki beans. The beans are said to ward off evil, while the triangle represents a piece of ice that dispels the summer heat.
A Wagashi-Making Workshop
Kyoto confectioner Kanshundo offers workshops where you can make wagashi that express the changing seasons through color, design, and flavor. Using the same tools the artisans use in their work, you will learn directly from them. Discover the challenges of making wagashi and the meaning behind each sweet.
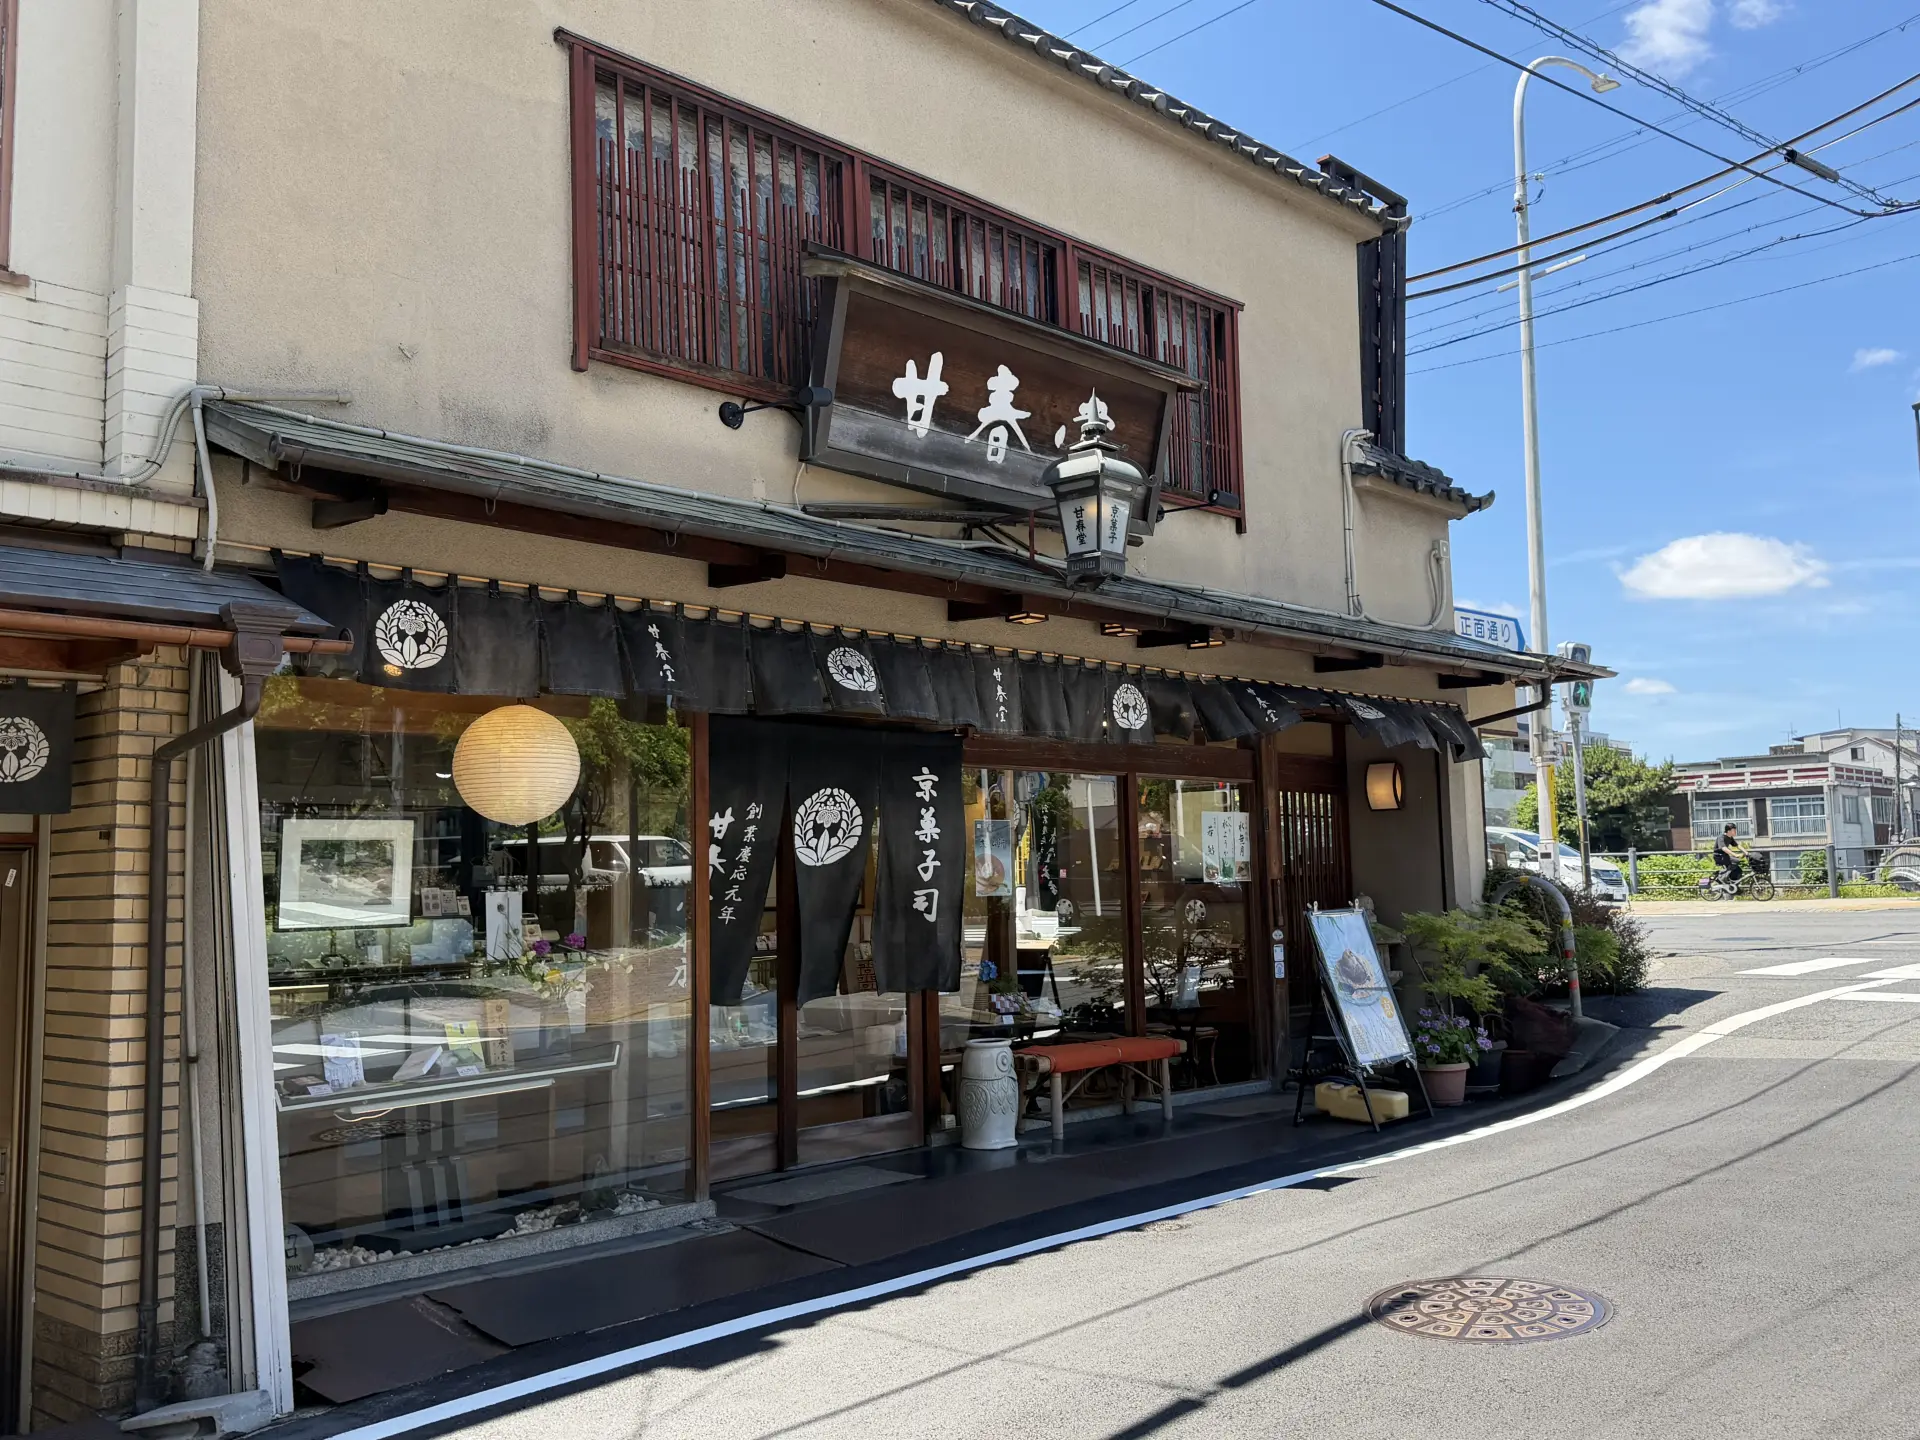
Kyoto Confectioner Kanshundo
Kanshundo is a long-established confectioner that has been making wagashi in Kyoto since the late Edo period. With high-quality ingredients, good water, and a rich calendar of seasonal changes, Kyoto provides everything needed to nurture wagashi-making. Successive generations of owners have created unusual sweets and passed them down to those who followed. Today, Kanshundo has 3 stores in Kyoto.
Kanshundo Main Store
To reach the main store, get off at Keihan Shichijo Station, take Exit 5 or 6, and walk north along Kawabata Street for 3 minutes.
The store is right on Kawabata Street, making it easy to find.
- Postal Code
- 605-0991
- Address
- 292-2 Kamihorizume-cho, Higashiyama-ku, Kyoto, Kyoto Prefecture Google Maps
- Phone
- 075-561-4019
Kanshundo East Store
The East Store is about a 4-minute walk from the main store along Shomen Street. It stands in front of Toyokuni Shrine.
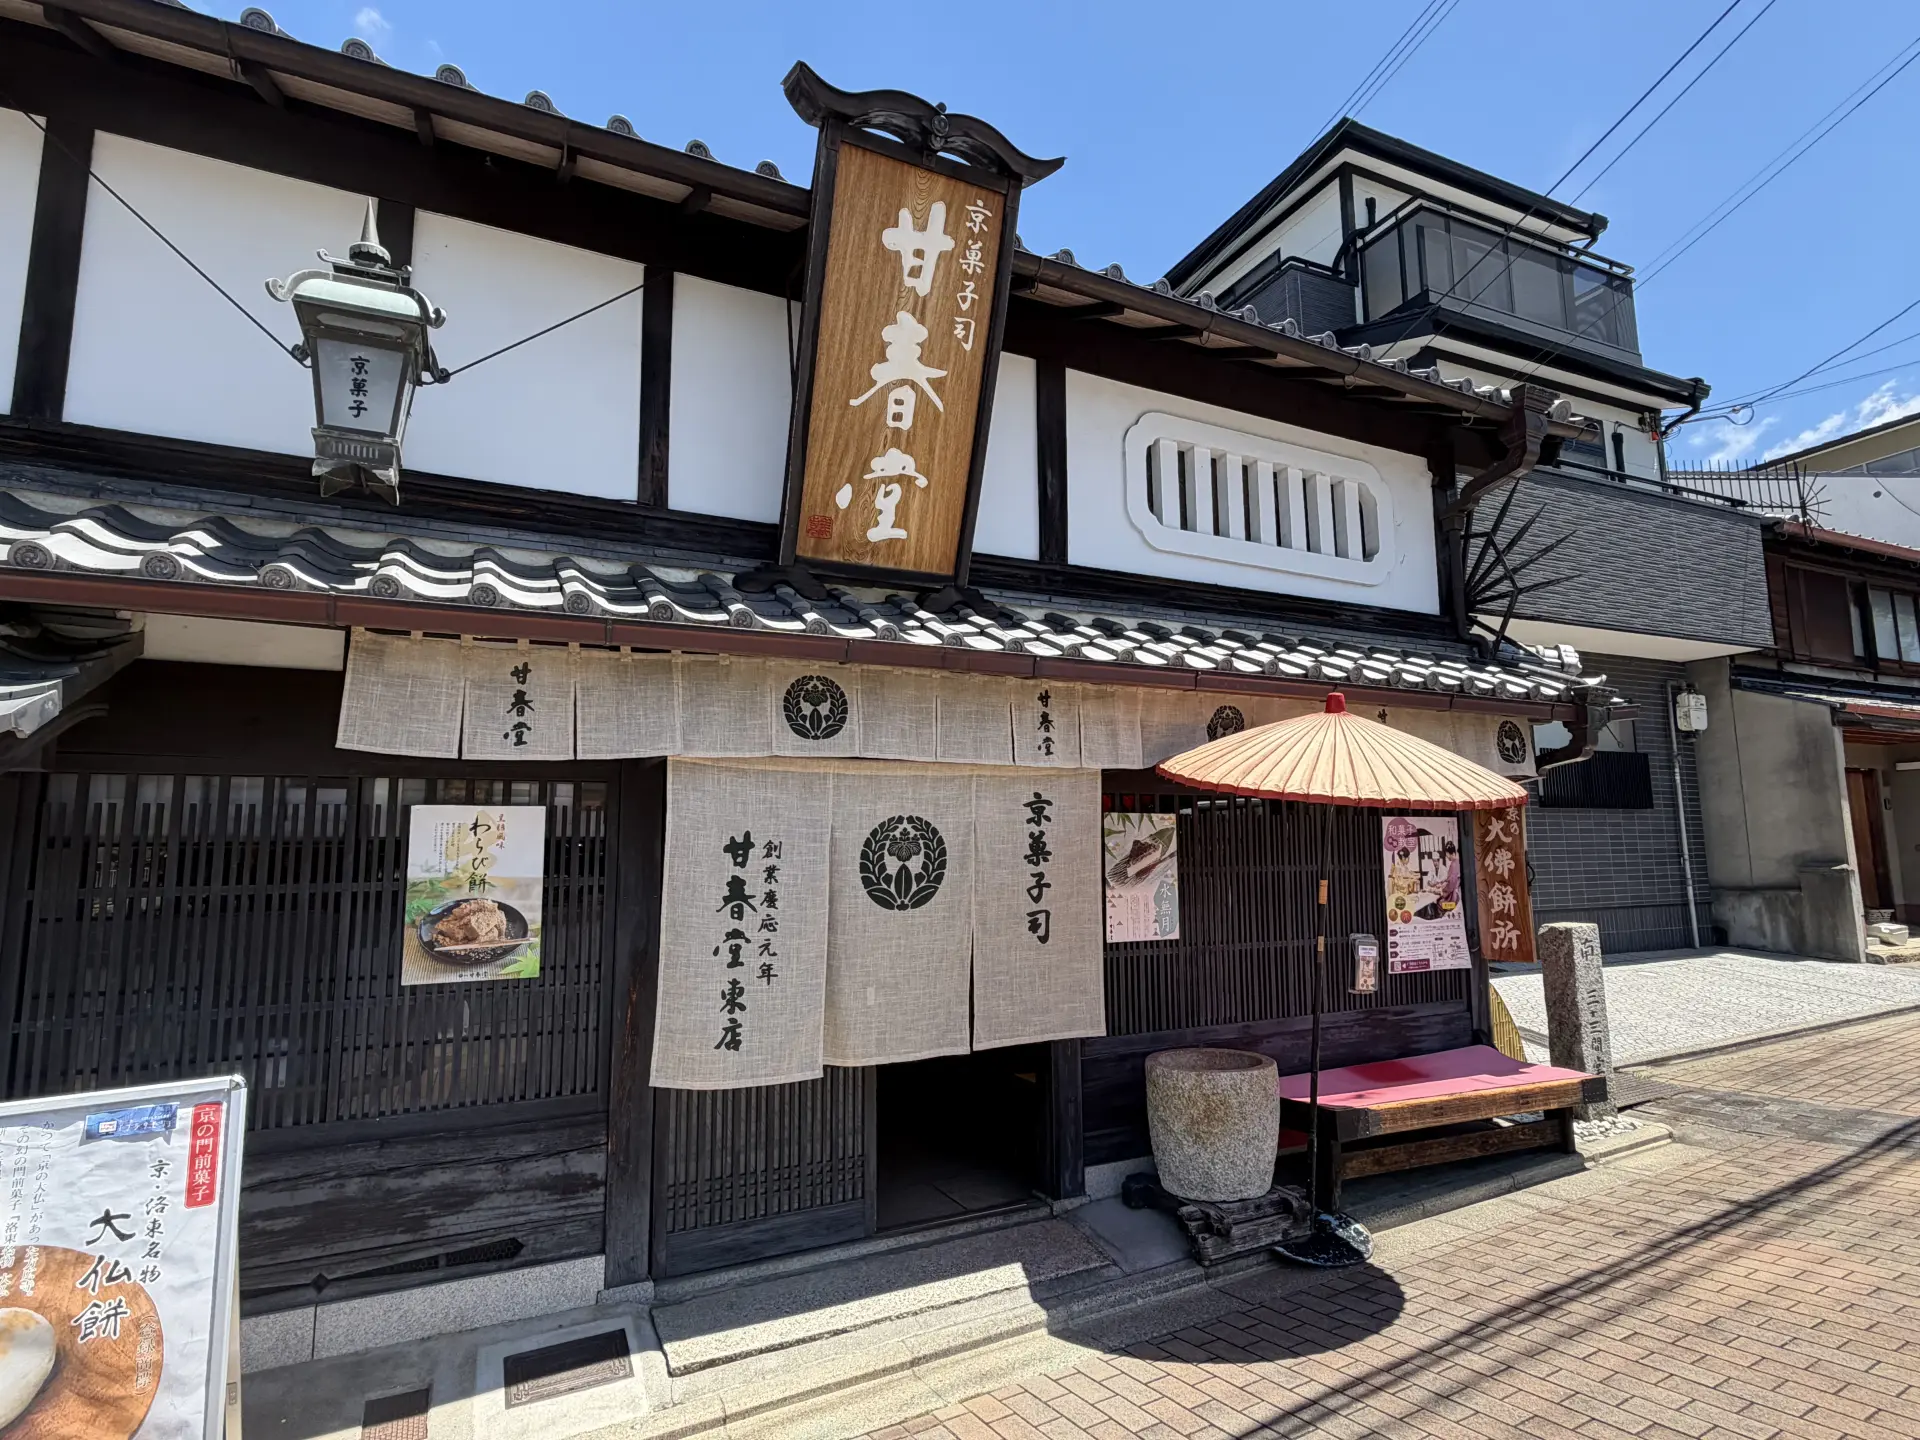
- Postal Code
- 605-0931
- Address
- 511-1 Chaya-cho, Yamato-oji Street south of Shomen Street, Higashiyama-ku, Kyoto, Kyoto Prefecture (in front of Toyokuni Shrine) Google Maps
- Phone
- 075-561-1318
Kanshundo Sagano Store
The Sagano Store is within a 10-minute walk of Daikakuji Temple and Arashiyama. It is a convenient stop while exploring Arashiyama and Sagano.
- Postal Code
- 616-8422
- Address
- 1-1 Saga Shakado Daimon-cho, Ukyo-ku, Kyoto, Kyoto Prefecture (in front of Seiryoji Temple, also known as Saga Shakado) Google Maps
- Phone
- 075-861-5488
The East and Sagano stores have tea rooms serving matcha sets and seasonal sweets, and they also host workshops. In the workshops, you can learn to make wagashi directly from the artisans.
Learn Directly from an Artisan
For this visit, we tried the wagashi-making workshop at the East Store. Participants make 1 type of higashi and 3 types of fine fresh sweets. Afterward, you can have matcha with one of your freshly made sweets, making this a very popular experience.
As with wagashi themselves, the designs change with the seasons, with a different selection each month.
Spring: canola blossoms, cherry blossoms, Japanese bush warblers, and more
Summer: irises, China pinks, morning glories, and more
Fall: chrysanthemums, autumn maple leaves, ginkgo leaves, and more
Winter: plum blossoms, sasanqua camellias, pine needles, camellias, and more
The techniques vary slightly, making you want to return every month.
We attended in June.
Kyoto Wagashi-Making Workshop: Standard Course (East Store)
- Days Offered
- Daily (no classes on January 1)
- Hours
-
4 sessions daily: 9:15–10:30 AM, 11:00 AM–12:15 PM, 1:15–2:30 PM, and 3:00–4:15 PM
Please arrive 10 minutes before the start time to wash your hands and get ready. - Duration
- About 1 hour and 15 minutes. The duration may vary depending on the number of participants.
- Admission
- 3,700 yen (tax included)
- Reservations
-
https://www.kanshundo.co.jp/wagashiform/
Please book about 2–3 days in advance.
For same-day reservations, contact the store directly.
You will be joining other participants, and everyone starts together, so please be on time. - What to Bring
- Nothing required
- Language Support
- Written instructions are available in English, Chinese, and Korean. Please request them when booking.
What to Expect at the Wagashi-Making Workshop
(1) Check In
When you arrive, speak to a staff member to check in, then wait for the other participants to gather.
Depending on the time of day, you may be able to watch artisans making wagashi inside the store.
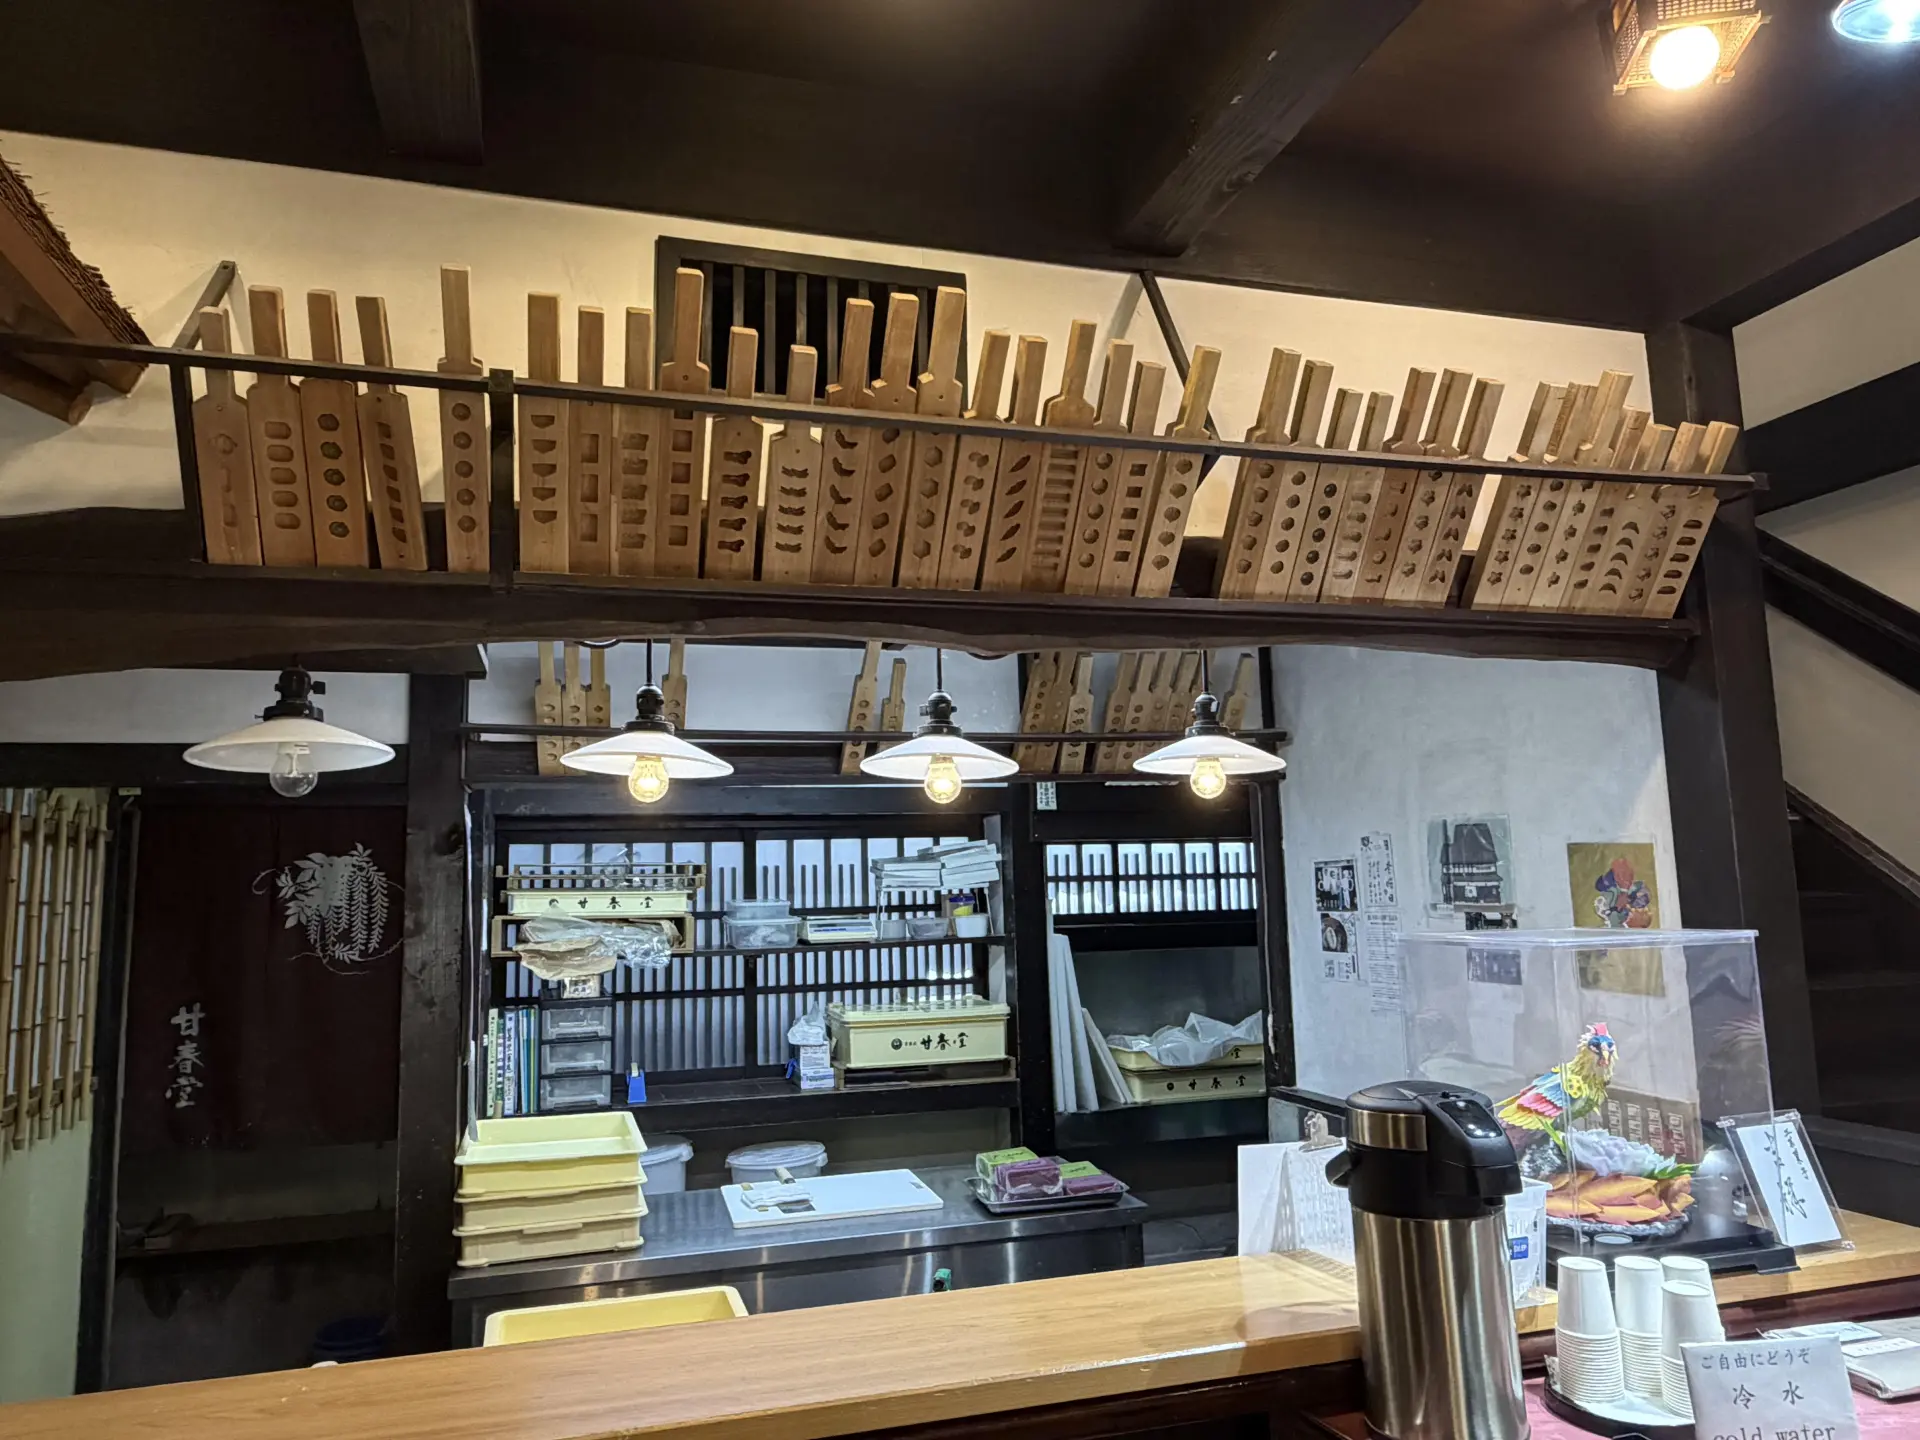
A variety of wooden molds used to make higashi are also on display.
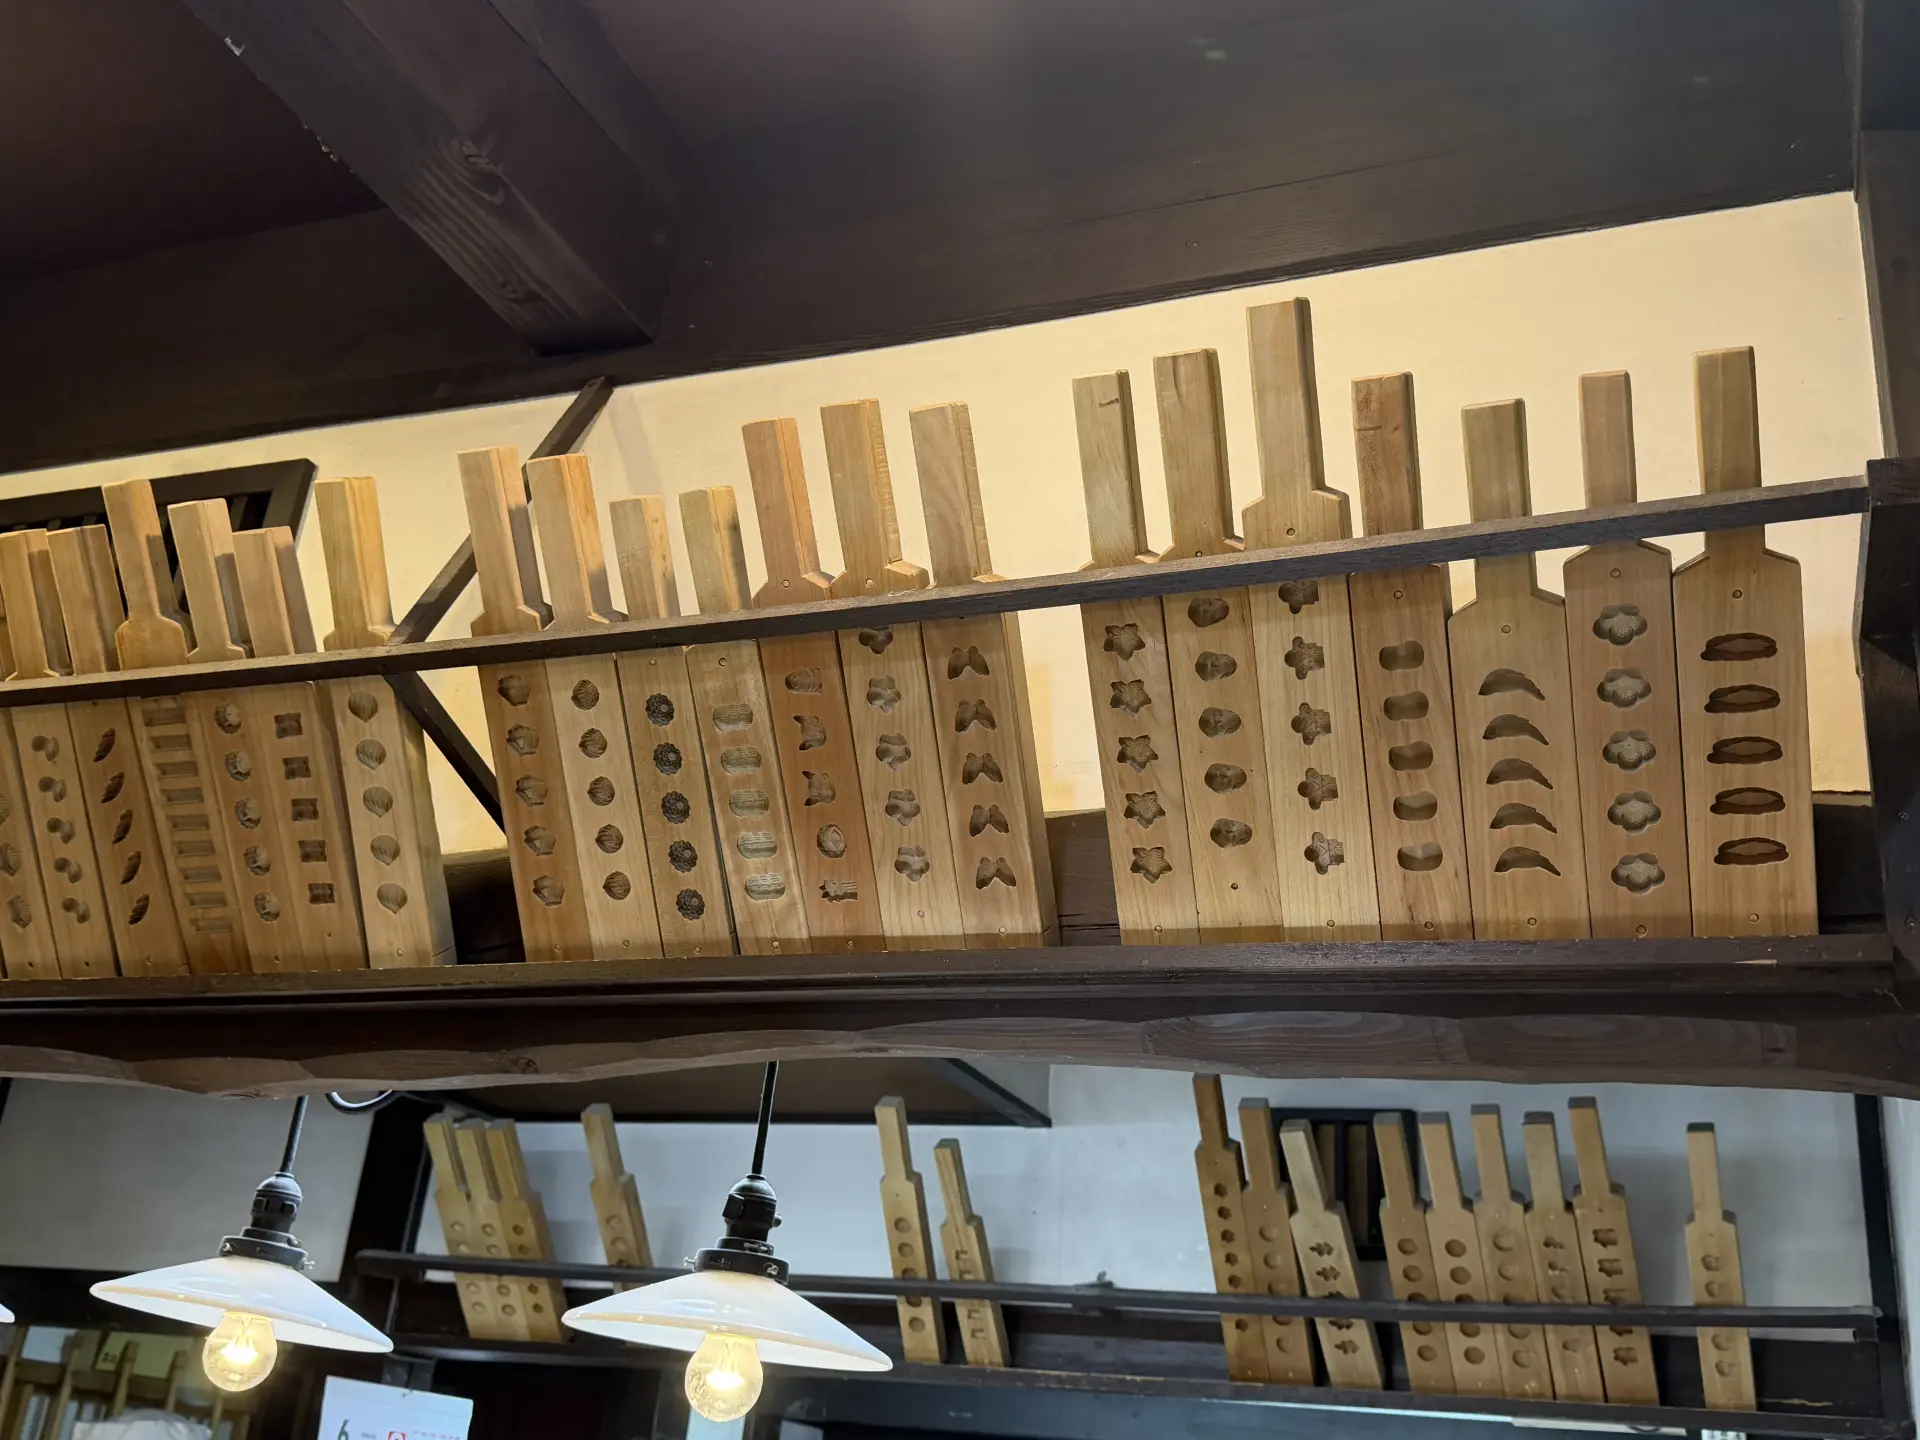
The designs include flowers, other plants, and butterflies. The East Store alone is said to have about 60 different molds.
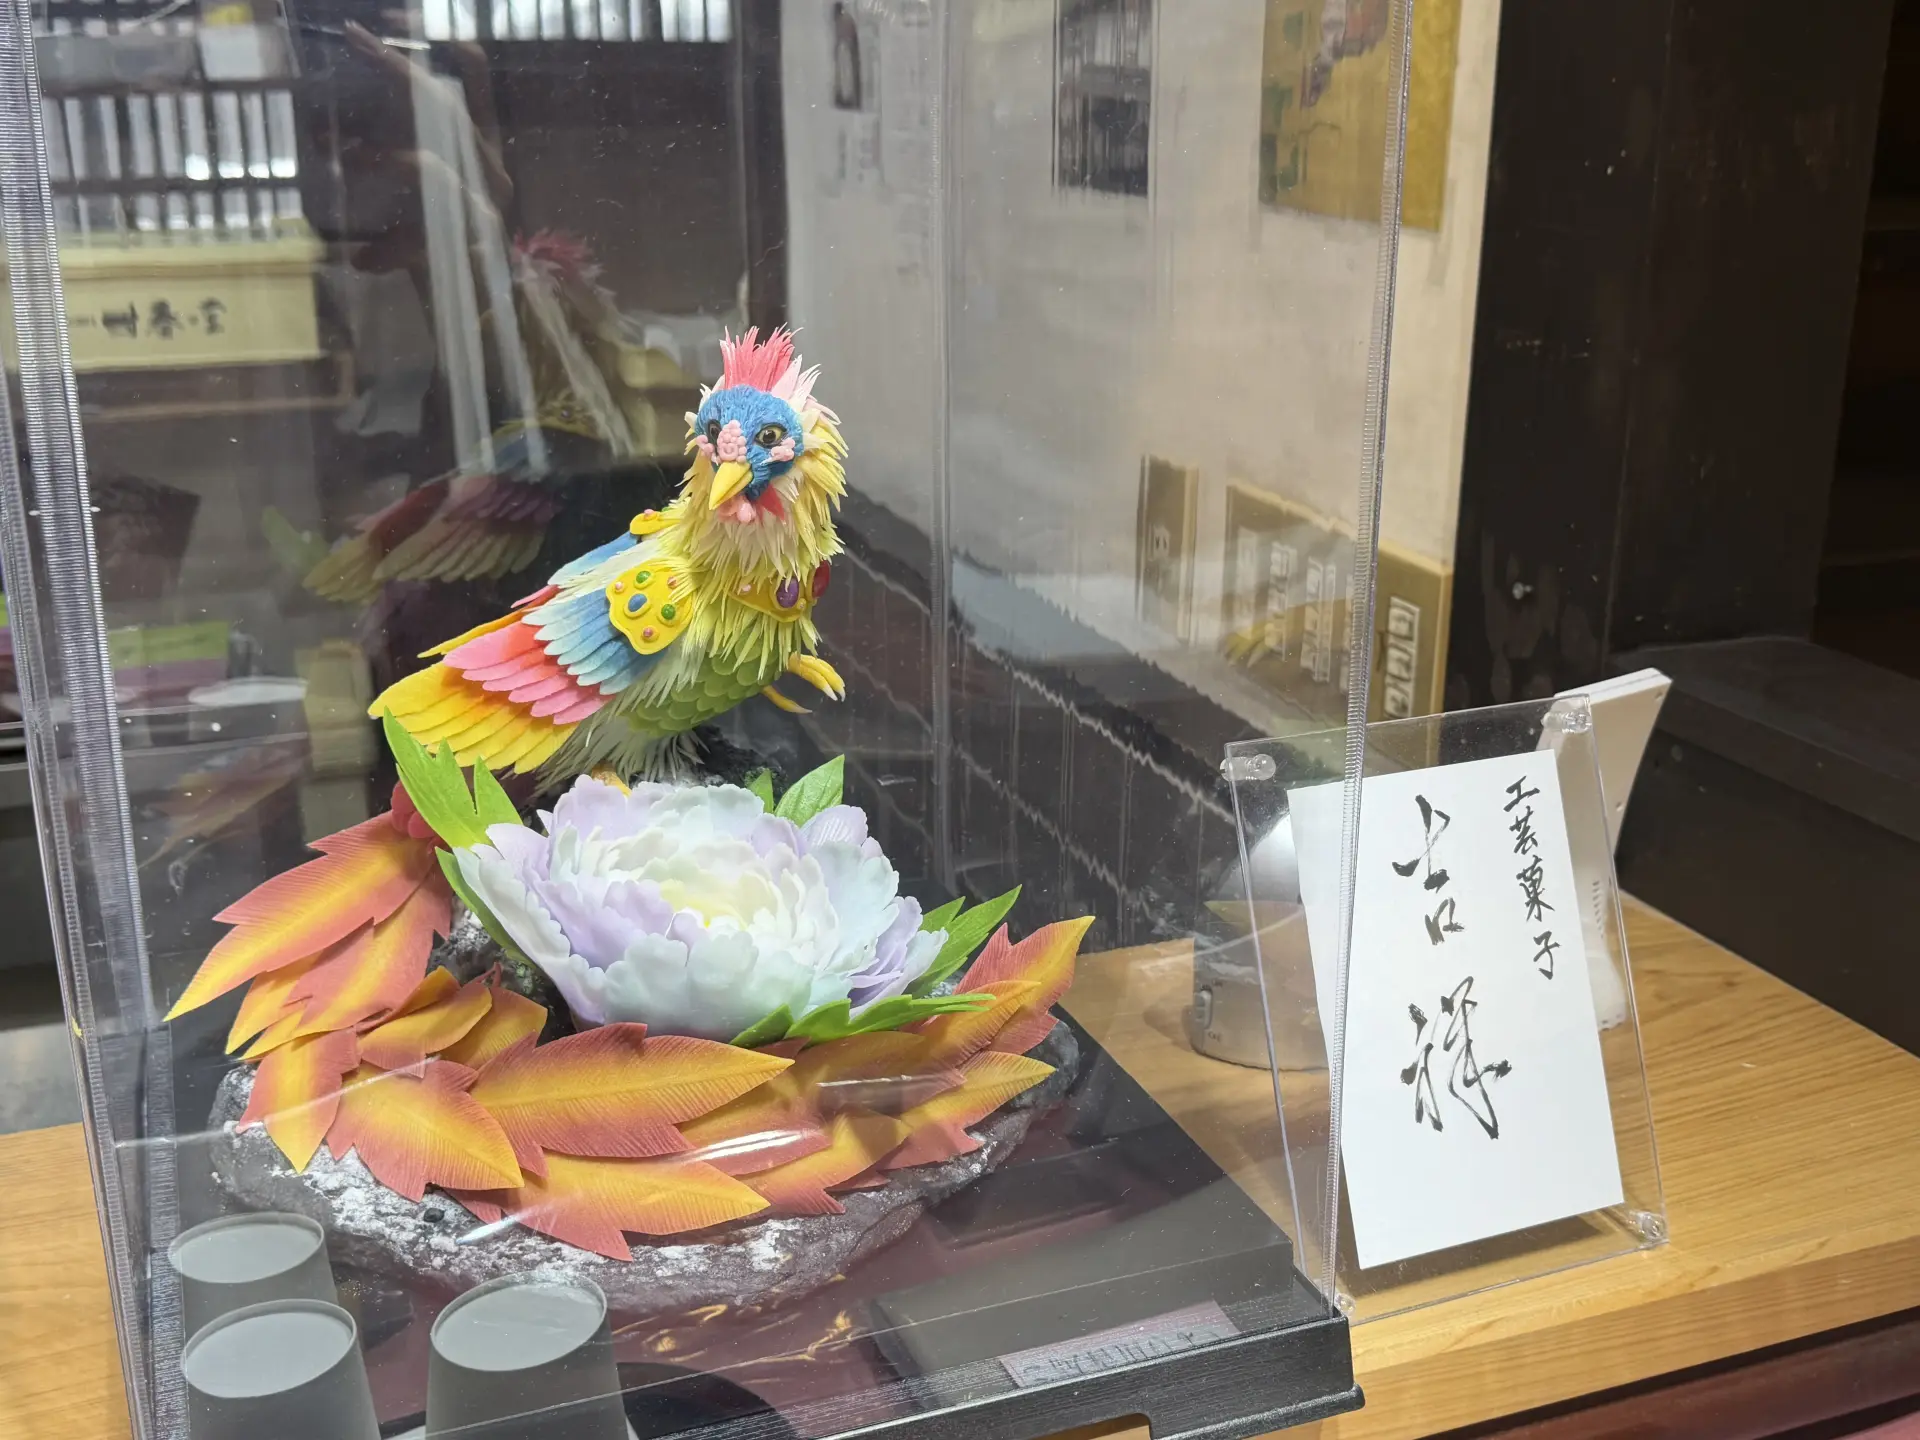
Be sure to take a look at the confectionery art, too. These pieces are made from sweets and, surprisingly, are actually edible!
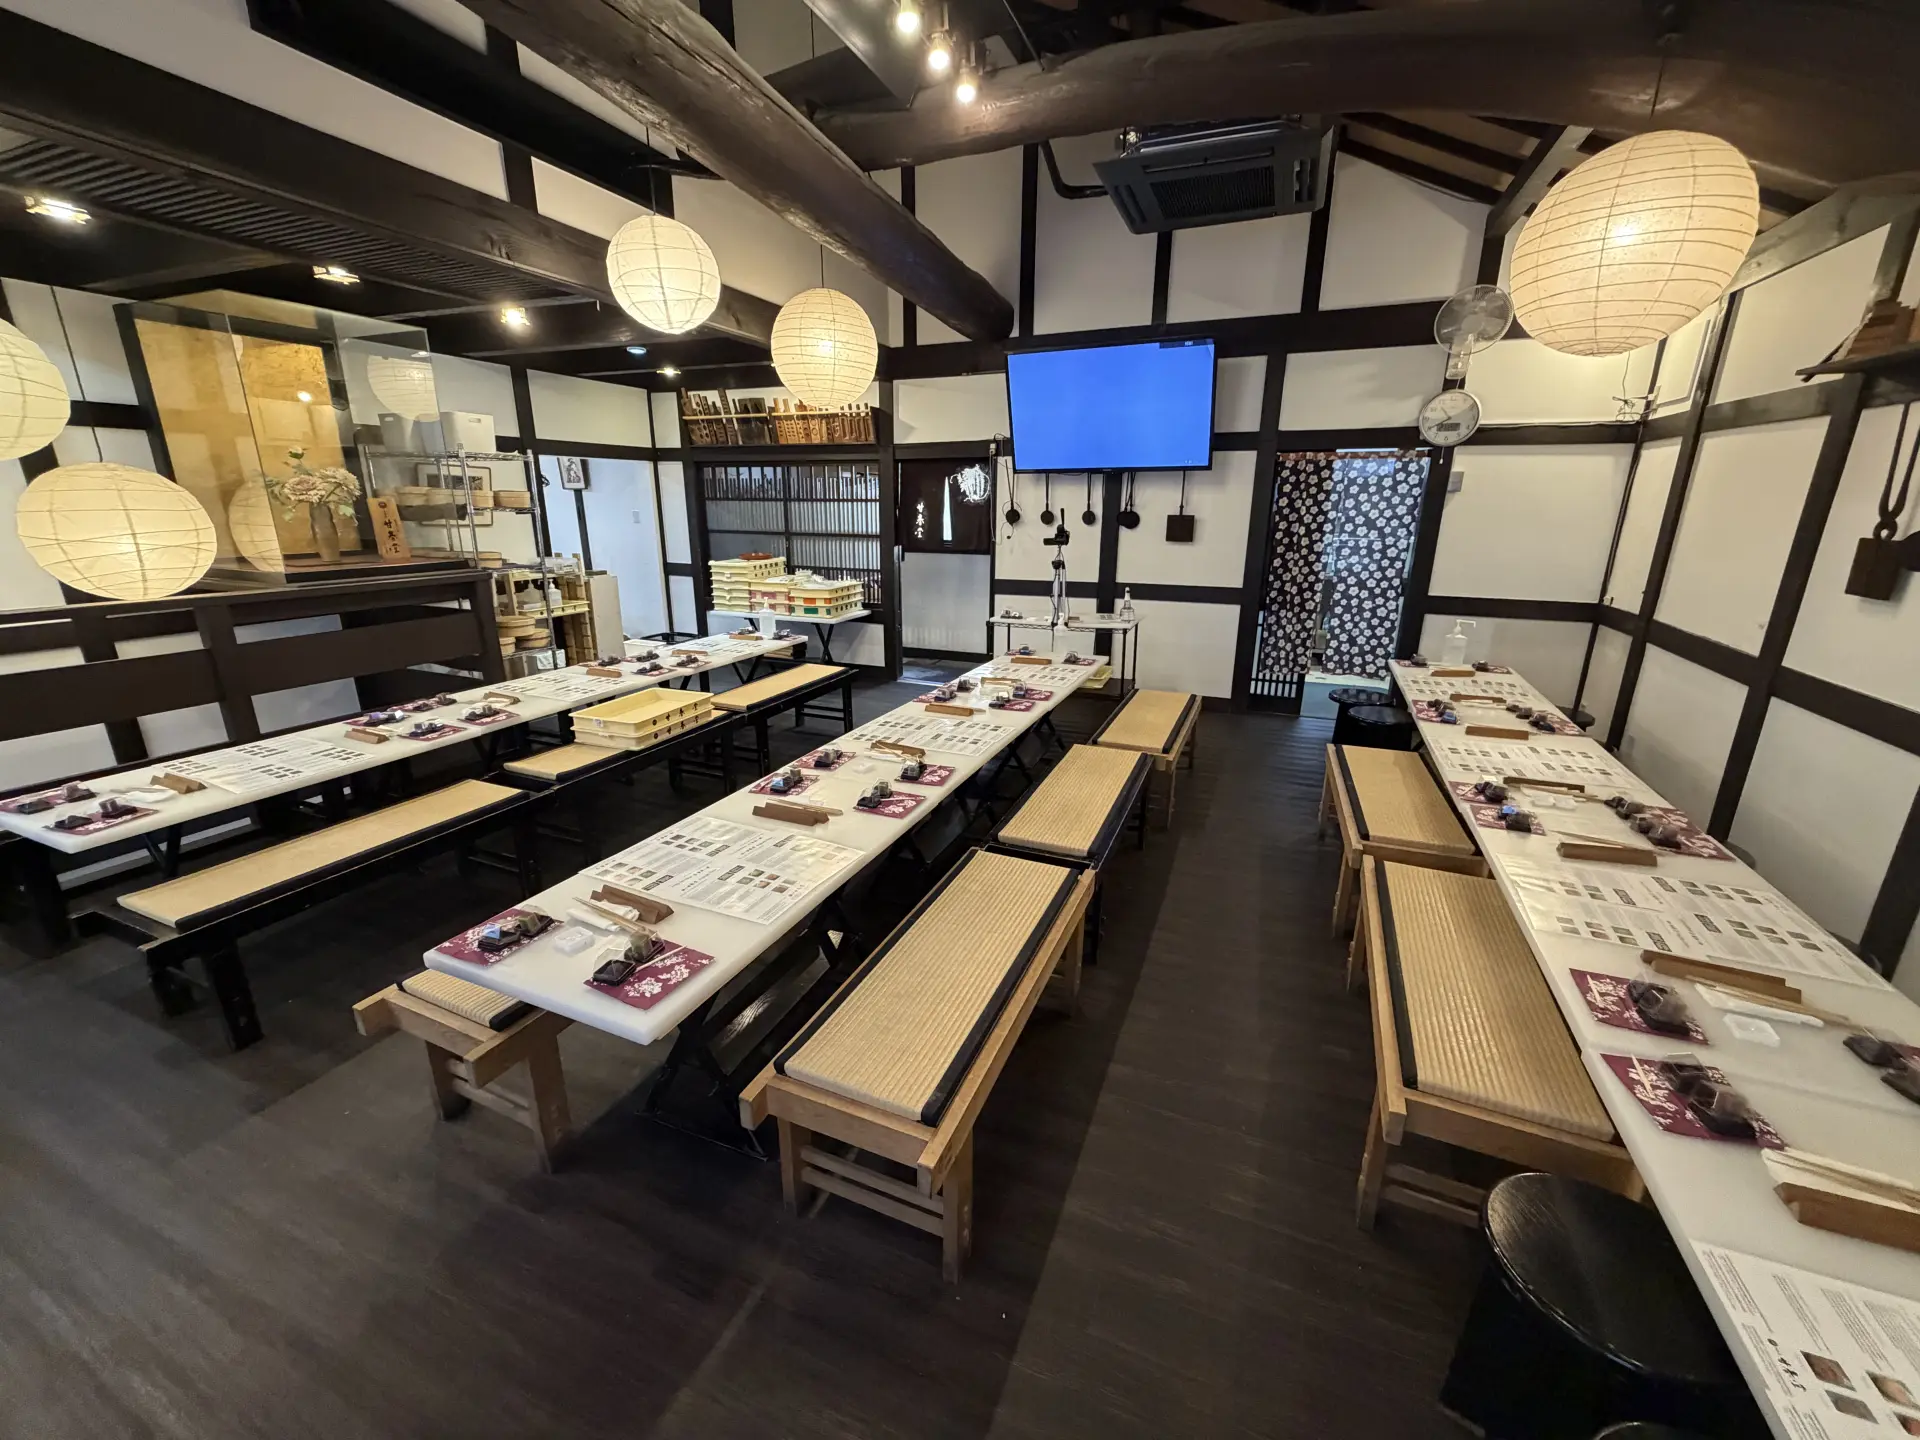
(2) Head to the Second Floor and Get Ready
The workshop takes place on the second floor. Once upstairs, keep your valuables with you and leave your other belongings on the shelves. Then wash your hands thoroughly with soap.
(3) Start with Kizato Dry Sweets
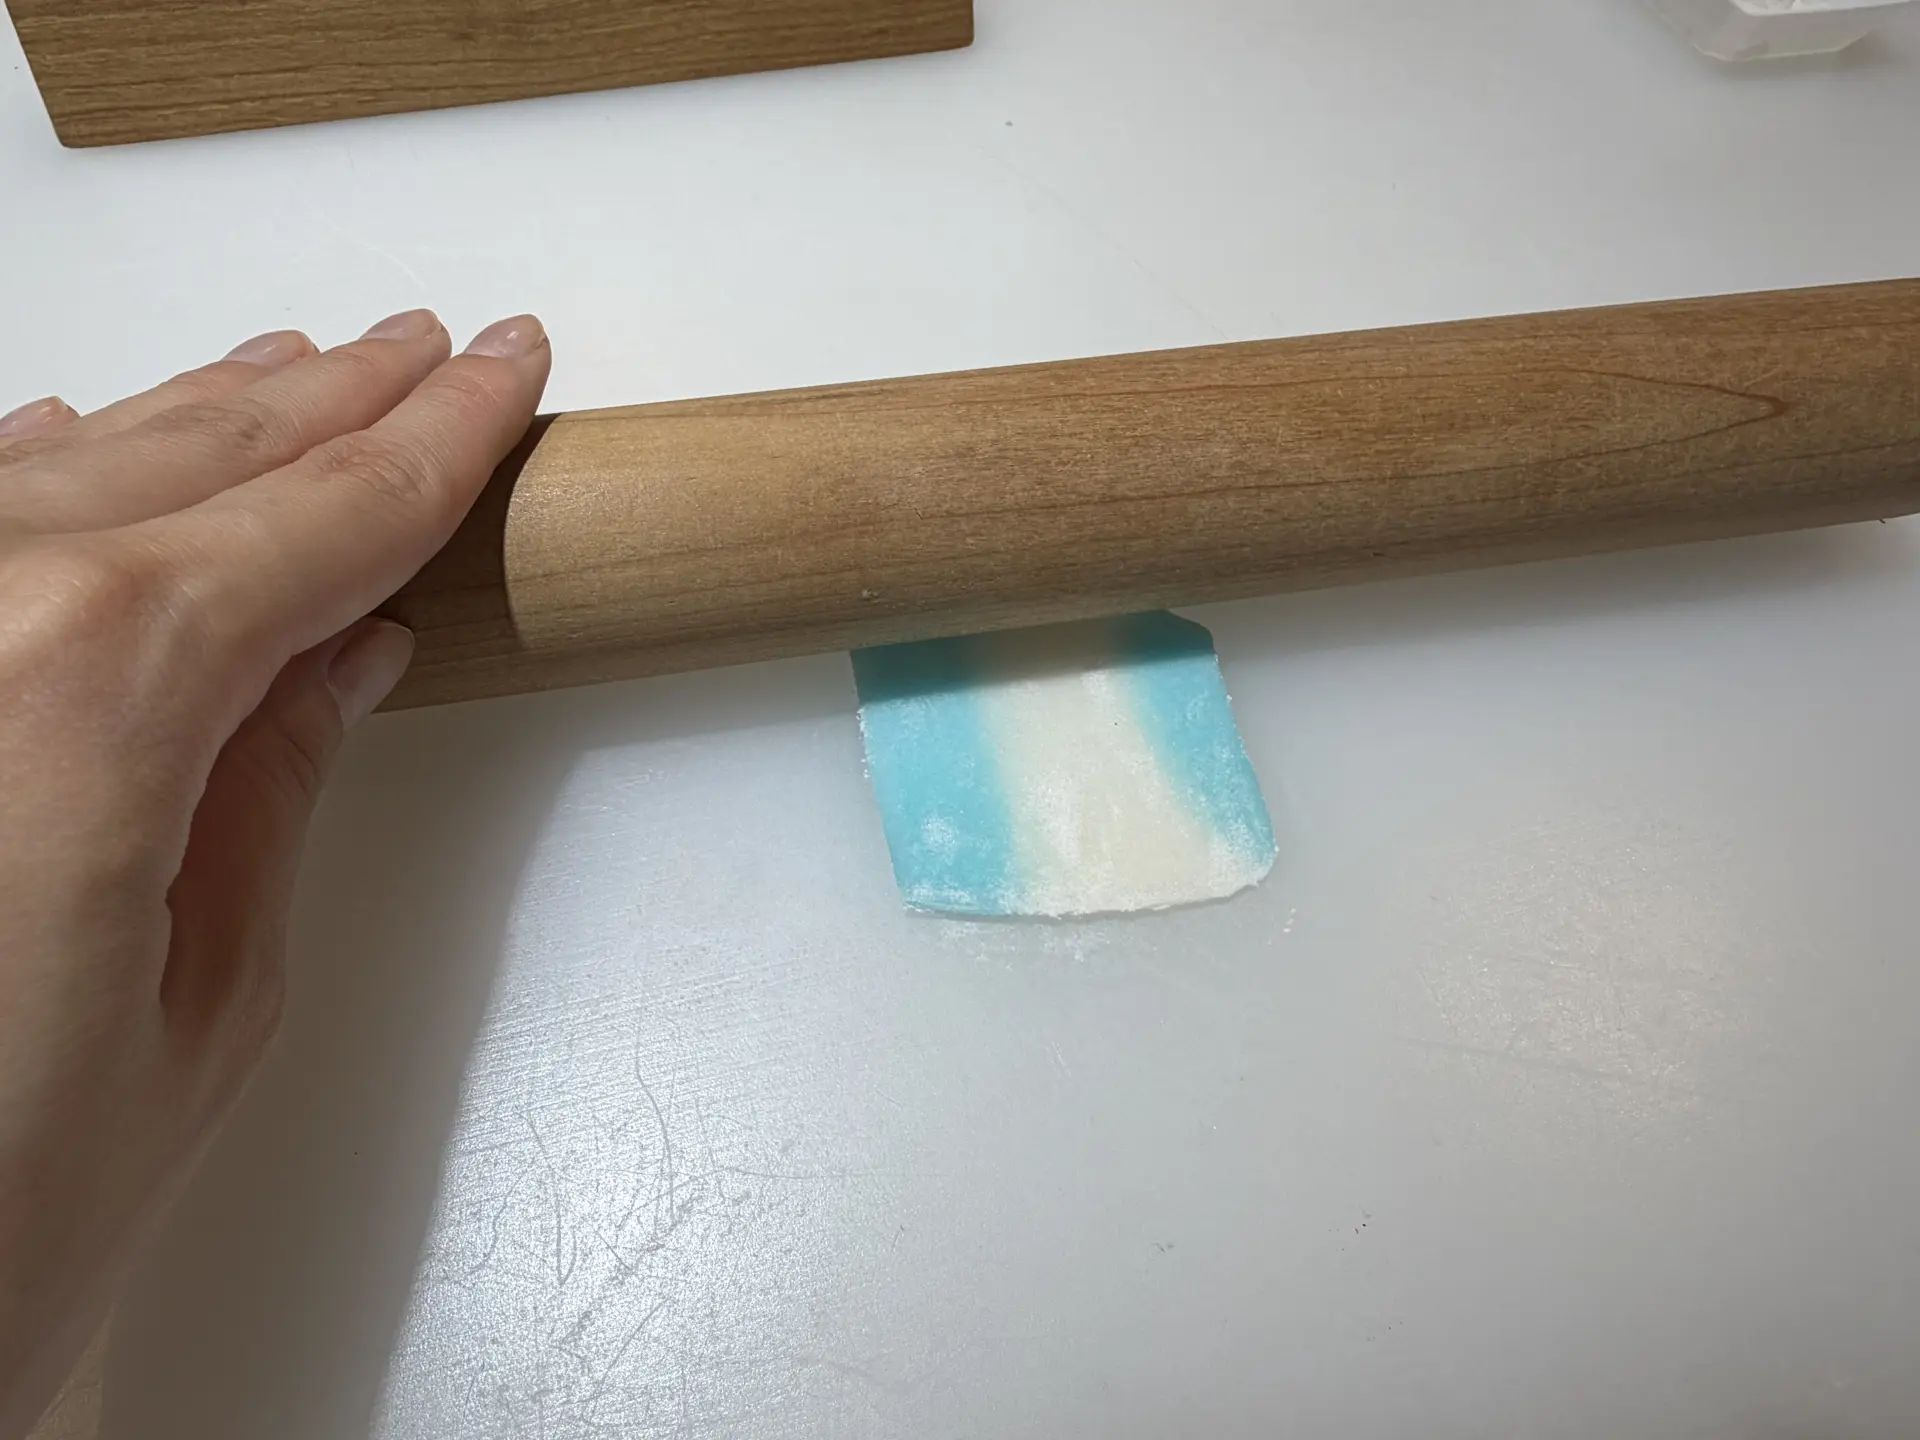
First, you will make an ayu sweetfish from kizato, a type of higashi. Kizato originated during the Genroku and Kyoho eras as sweets presented to high-ranking figures and developed in Kyoto. Its name means "raw sugar," and its dough is made almost entirely of sugar, kneaded with glutinous rice flour and a little water, then colored. The dough is already prepared, so participants begin by using a rolling pin to roll it into a square of even thickness.
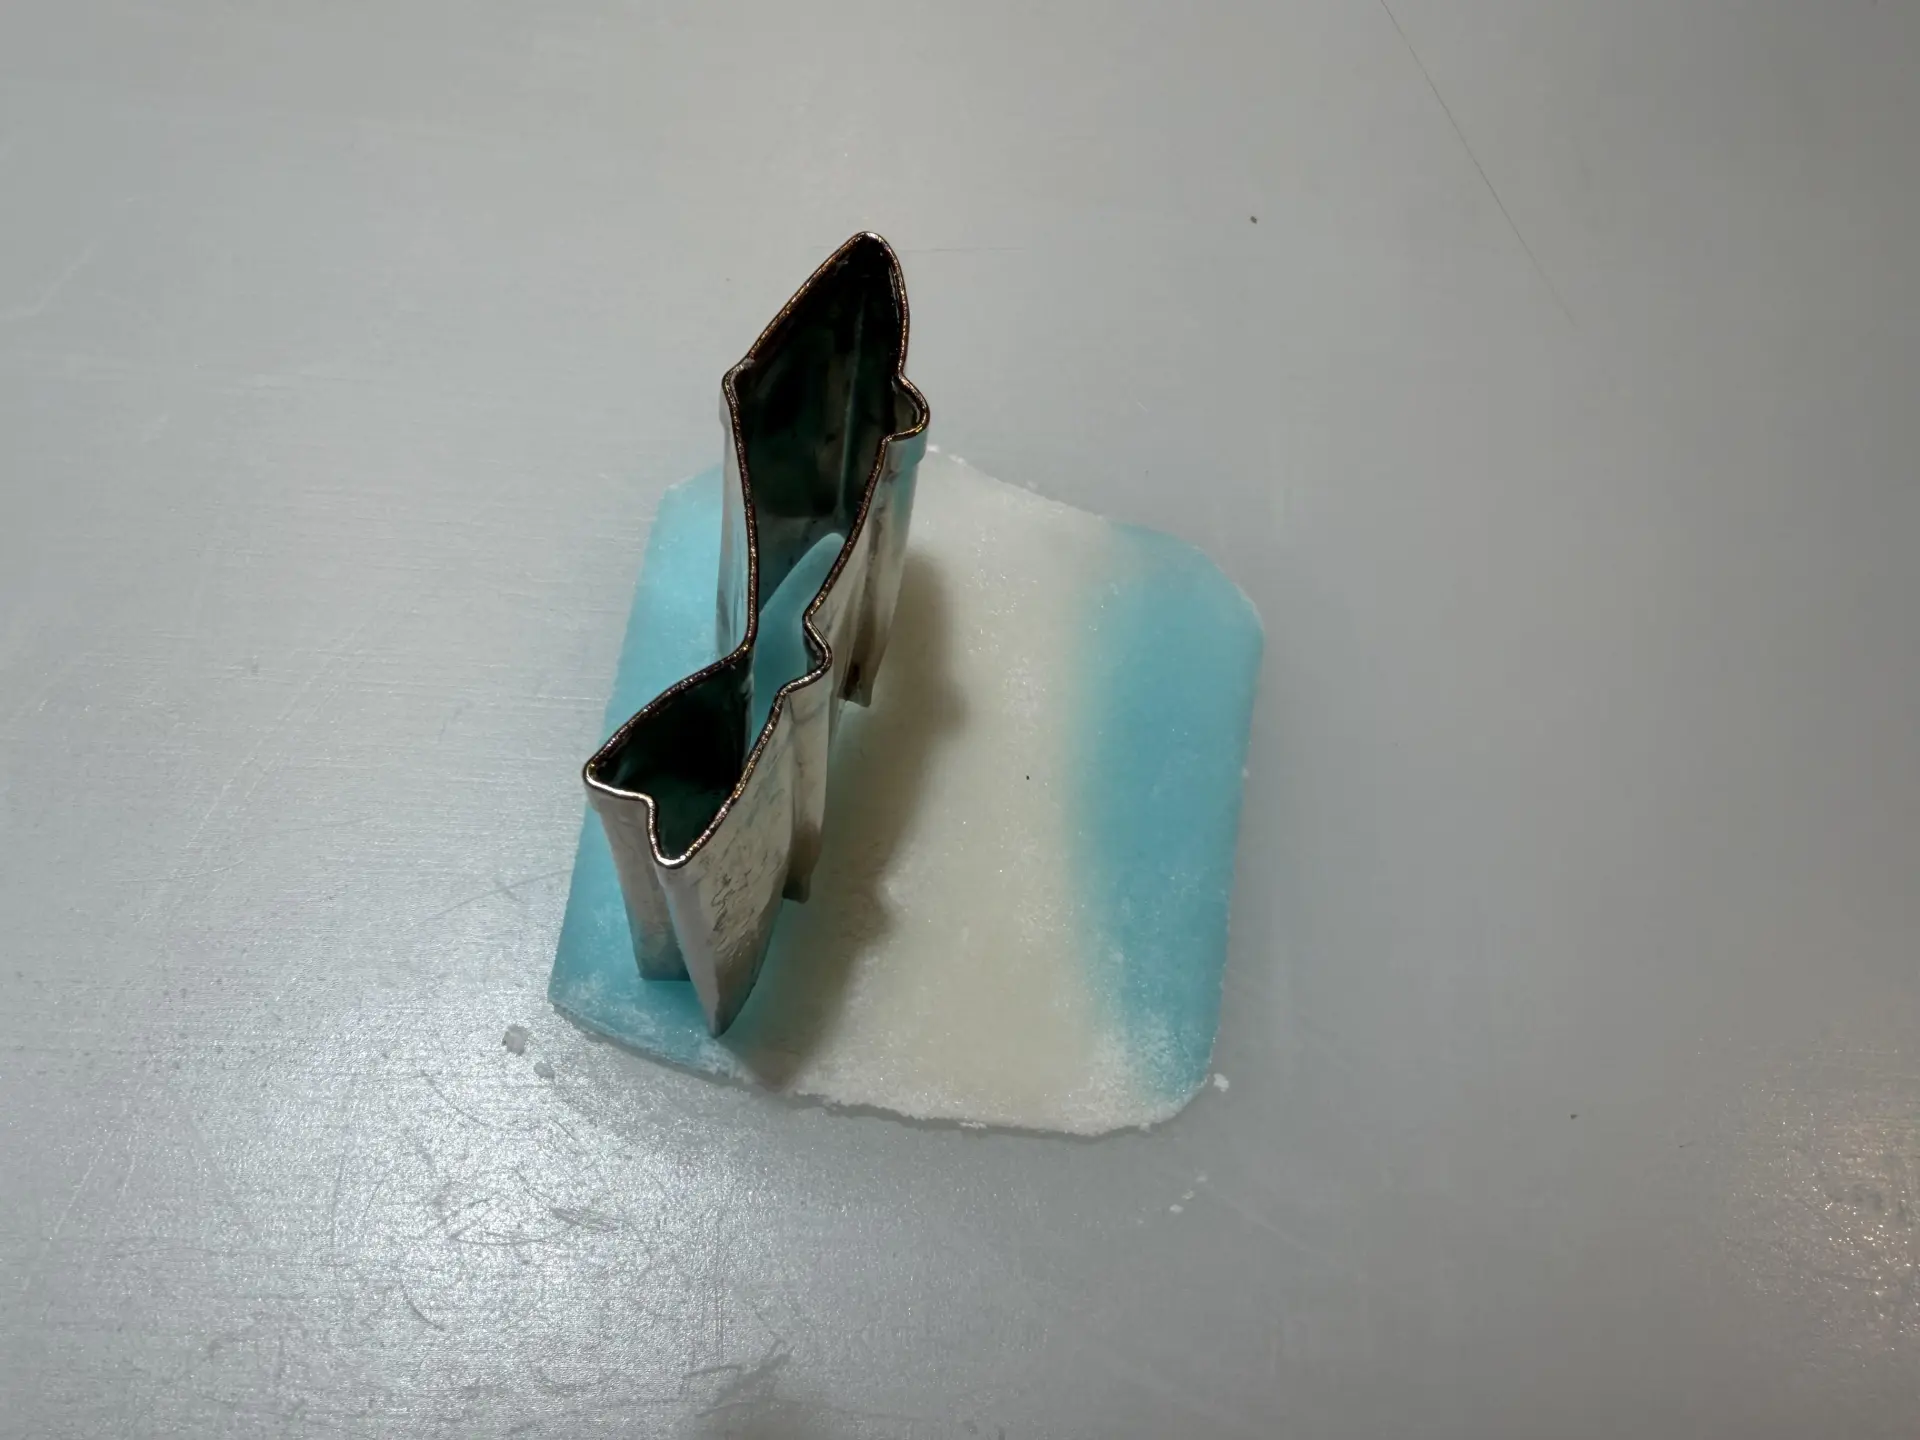
Next, cut out the dough with an ayu-shaped cutter, positioning it so the light blue part forms the back and the white part forms the belly.
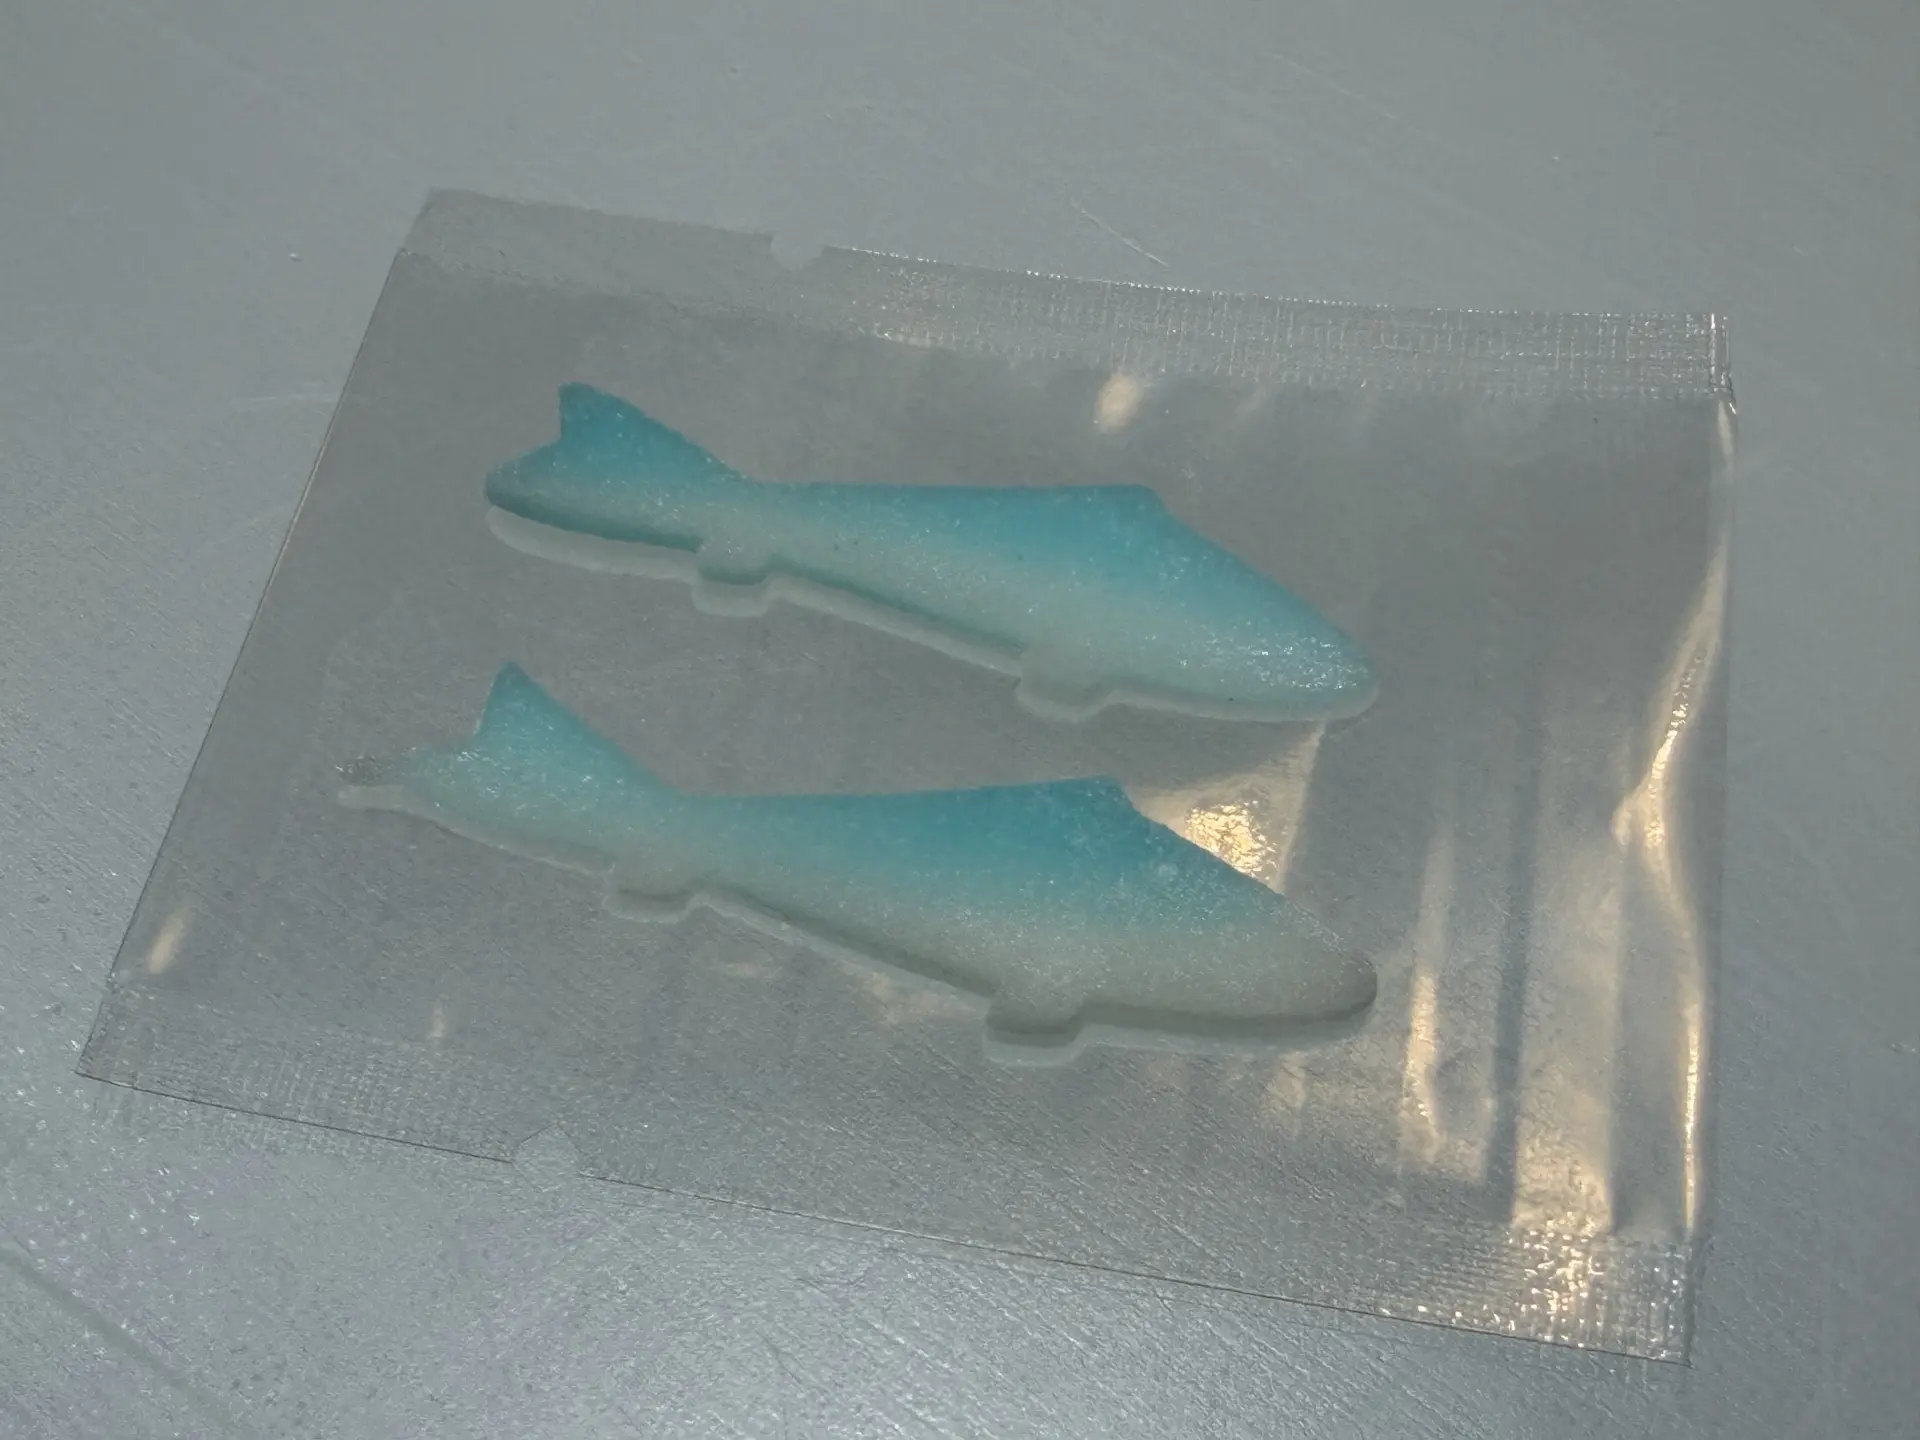
The shape came out neatly. Once you take it home, let it dry for about 3 days so the moisture evaporates and the sweet is ready to eat.
You can eat the leftover dough from around the cutout on the spot. Take note of its soft texture. After 3 days of drying, the ayu-shaped sweet will lose its moisture and become very firm. Compare the textures once you are home.
In other seasons, kizato designs include irises, ivy, balloon flowers, daffodils, ginkgo leaves, and autumn maple leaves.
(4) Make a Fine Fresh Sweet: Uiro
Next is uiro, shaped into a loquat fruit. Uiro is another name for uiro u. Its dough is made by kneading sugar, glutinous rice flour, rice flour, and other ingredients with water, adding color, and steaming the mixture in a steamer for about 50 minutes. Since the dough is already prepared, you start by flattening it. For this sweet, you will try a technique called nakabokashi, which creates a subtle color effect from within.
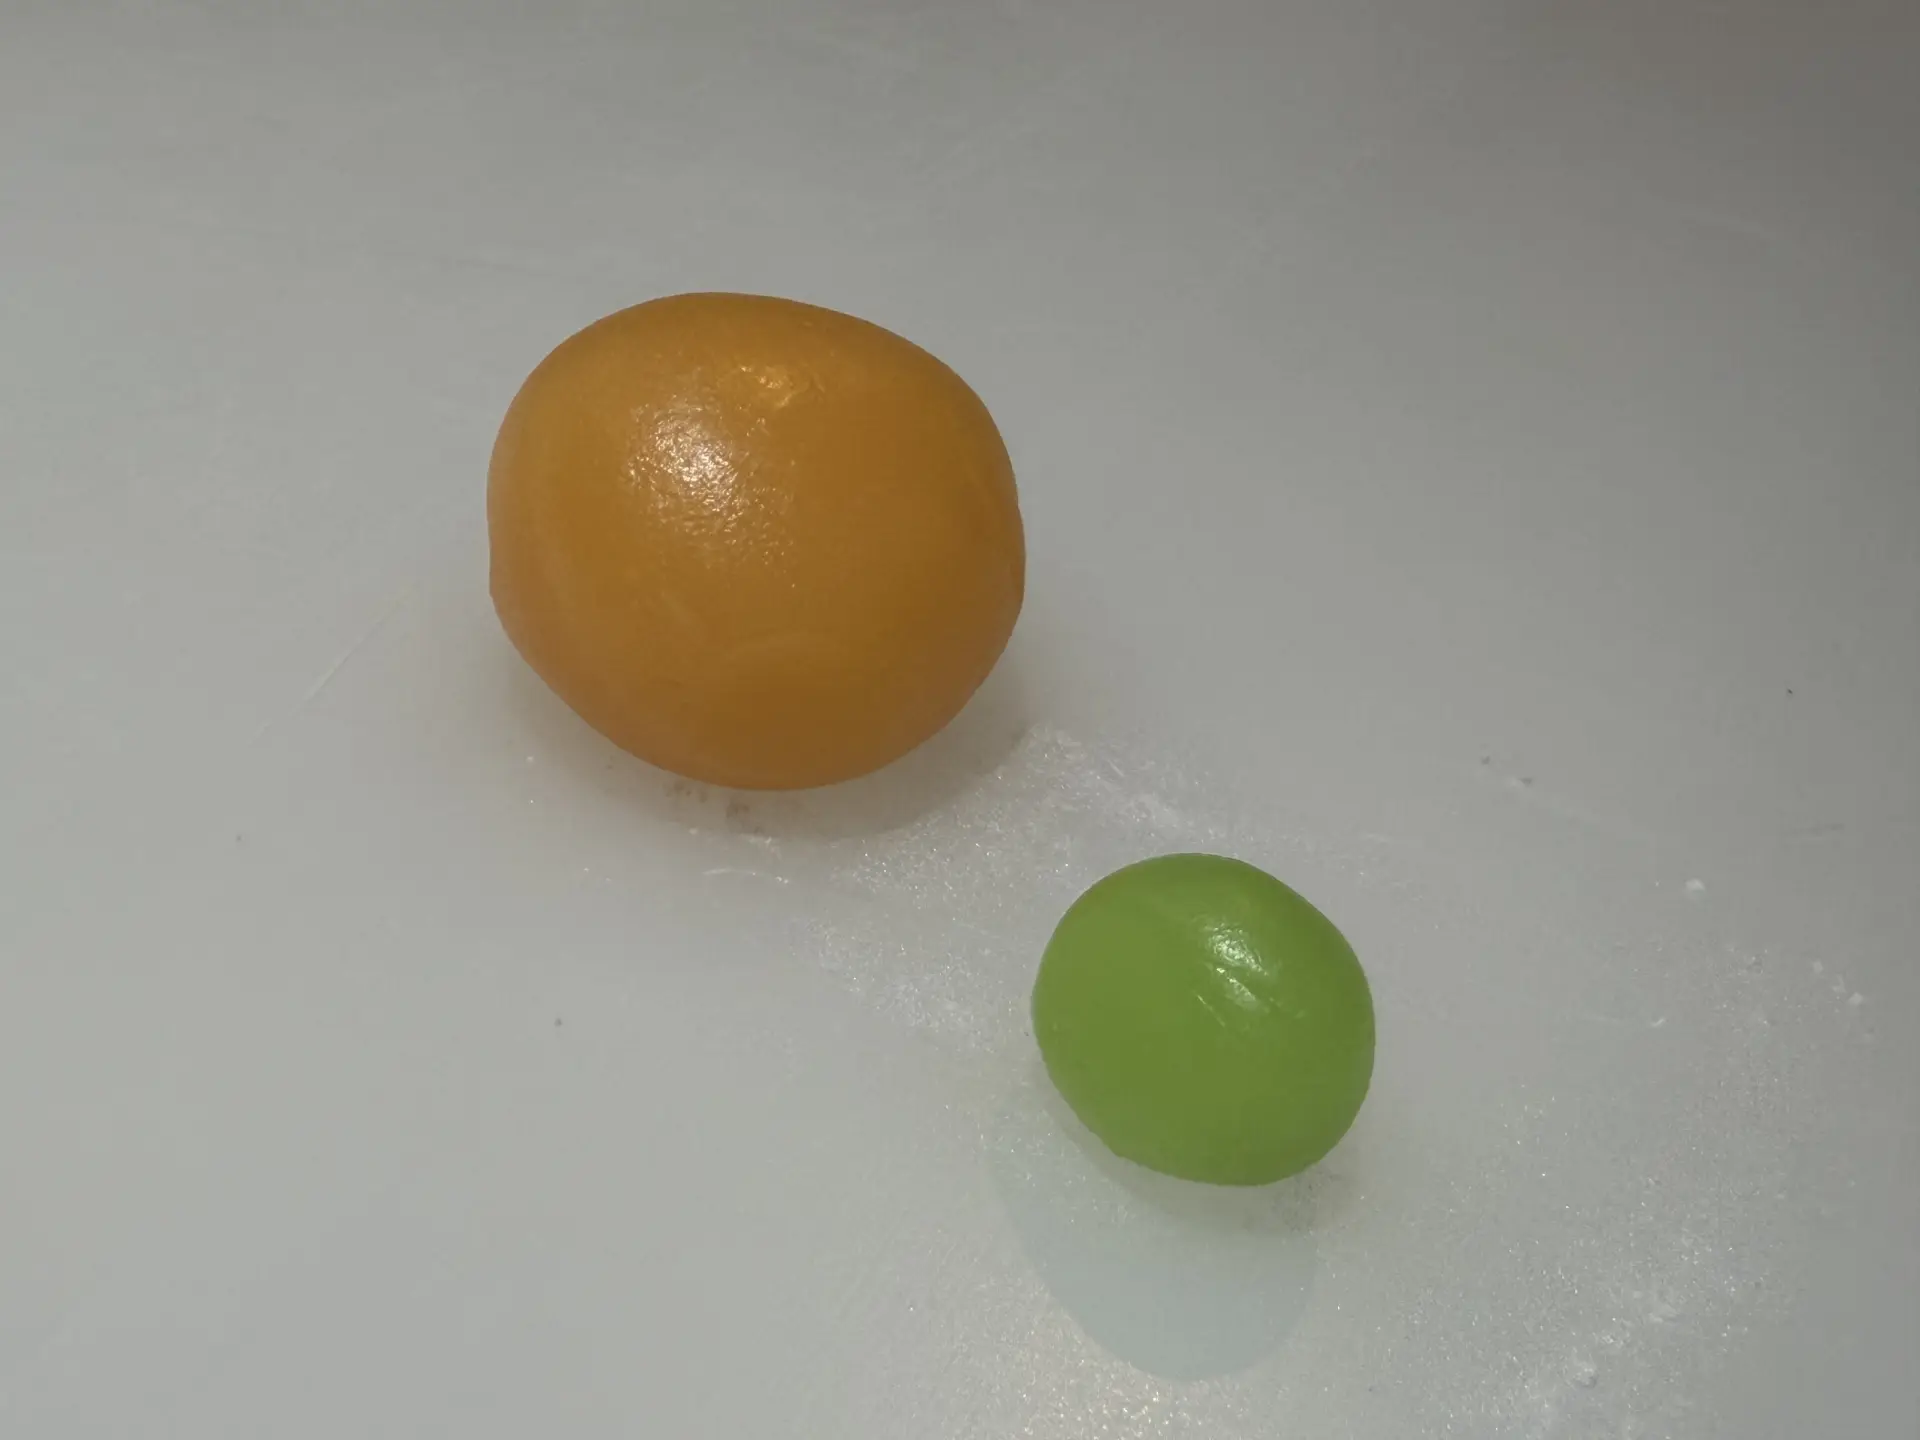
Uiro sticks to your hands very easily, so put a tiny amount of soybean oil on your fingertips and spread it over your palms. Then flatten the orange dough slightly and use a finger to make an indentation off-center. Place the green dough in the indentation and blend it in, then use the heel of your hand to flatten the dough to about the size of your palm.
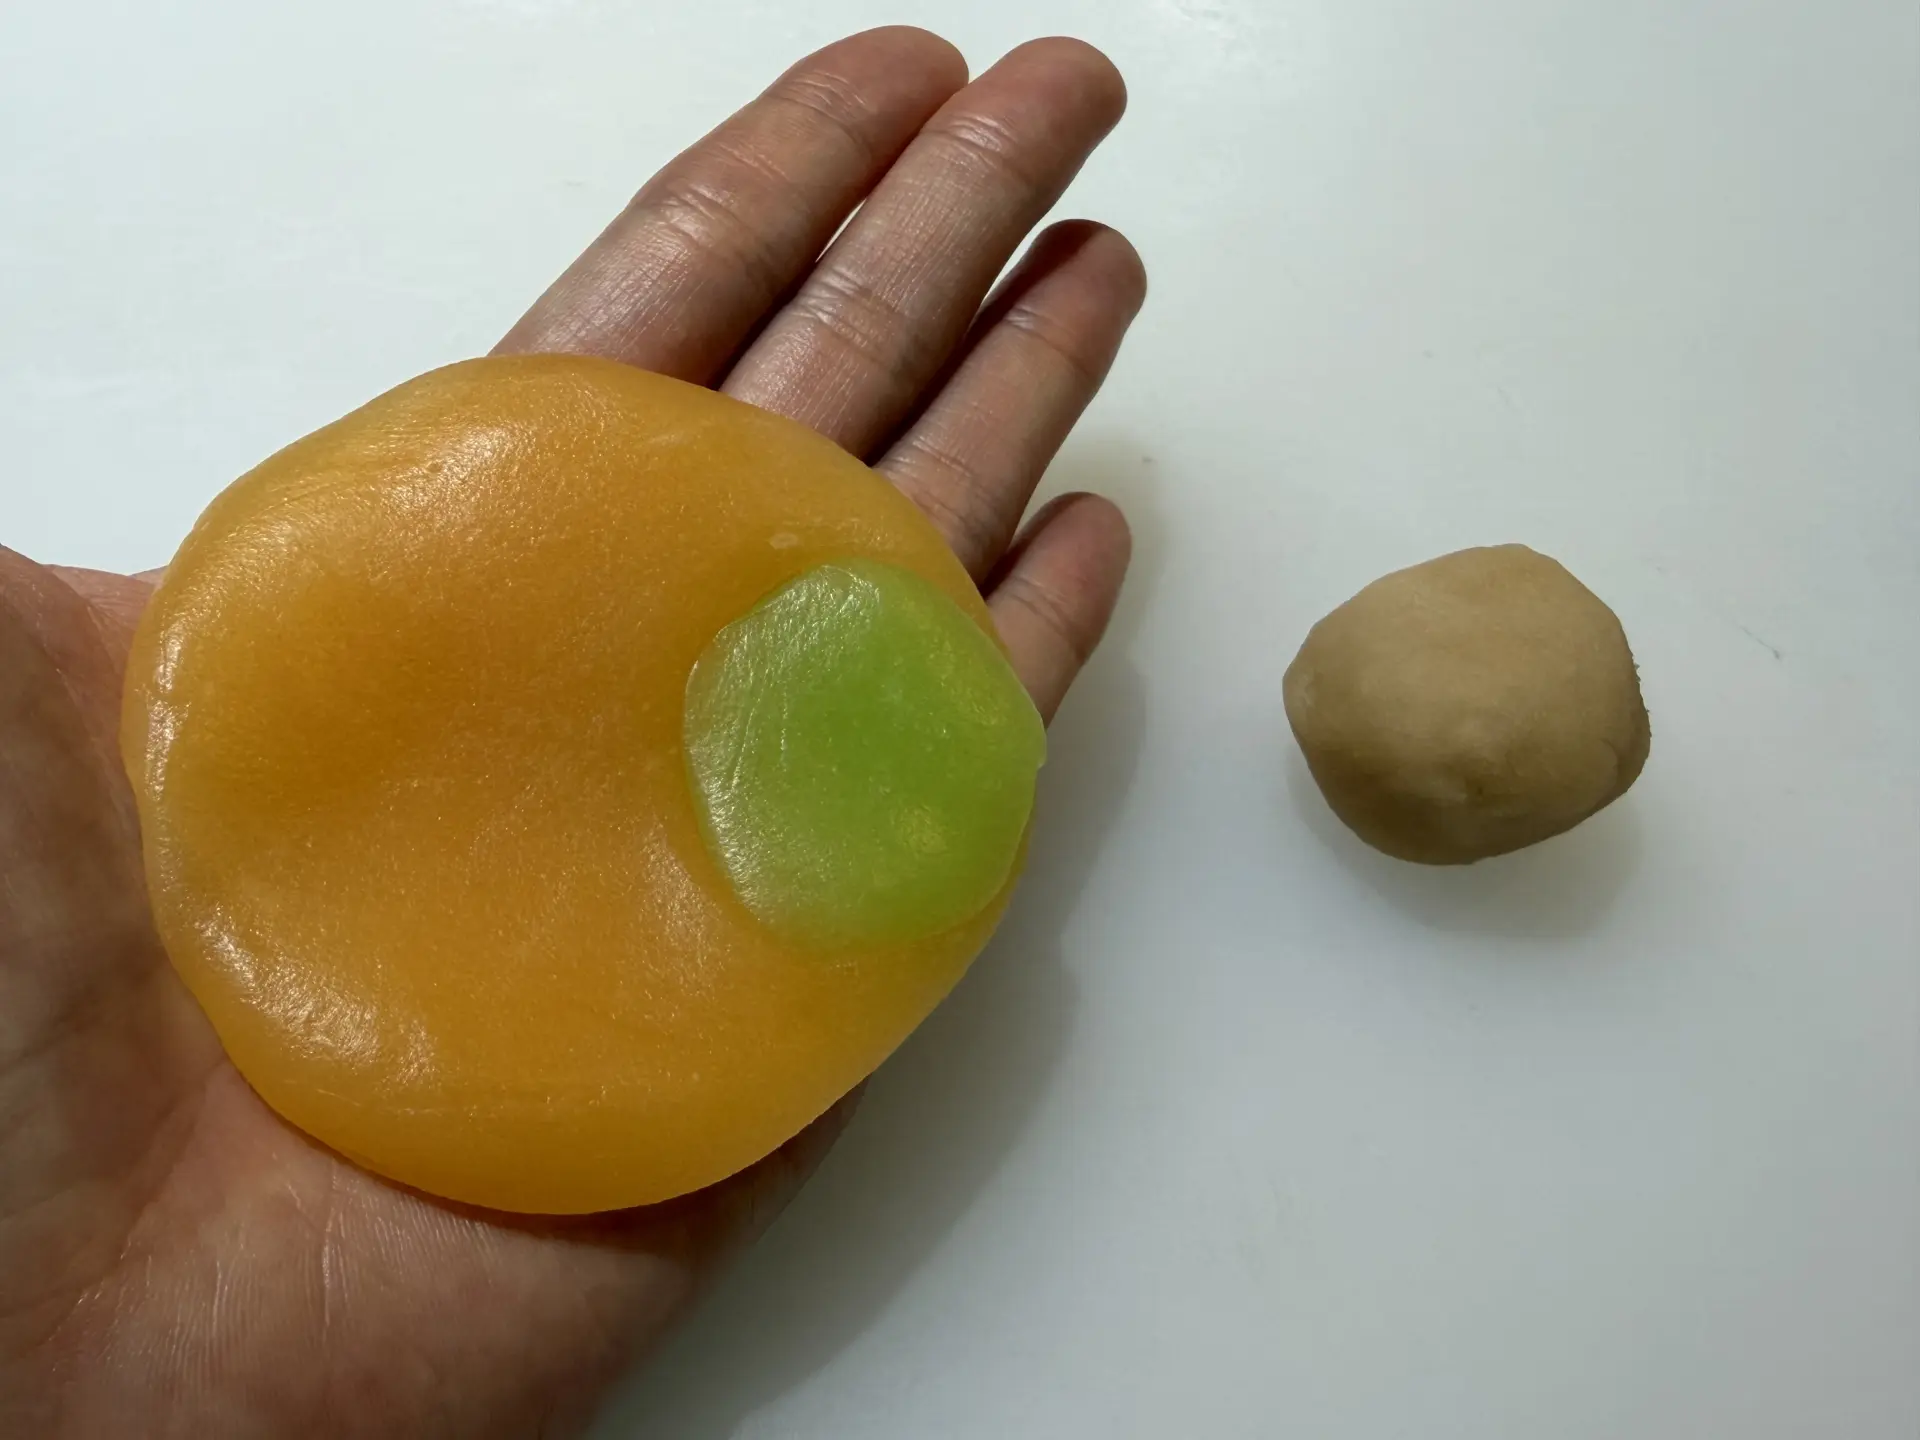
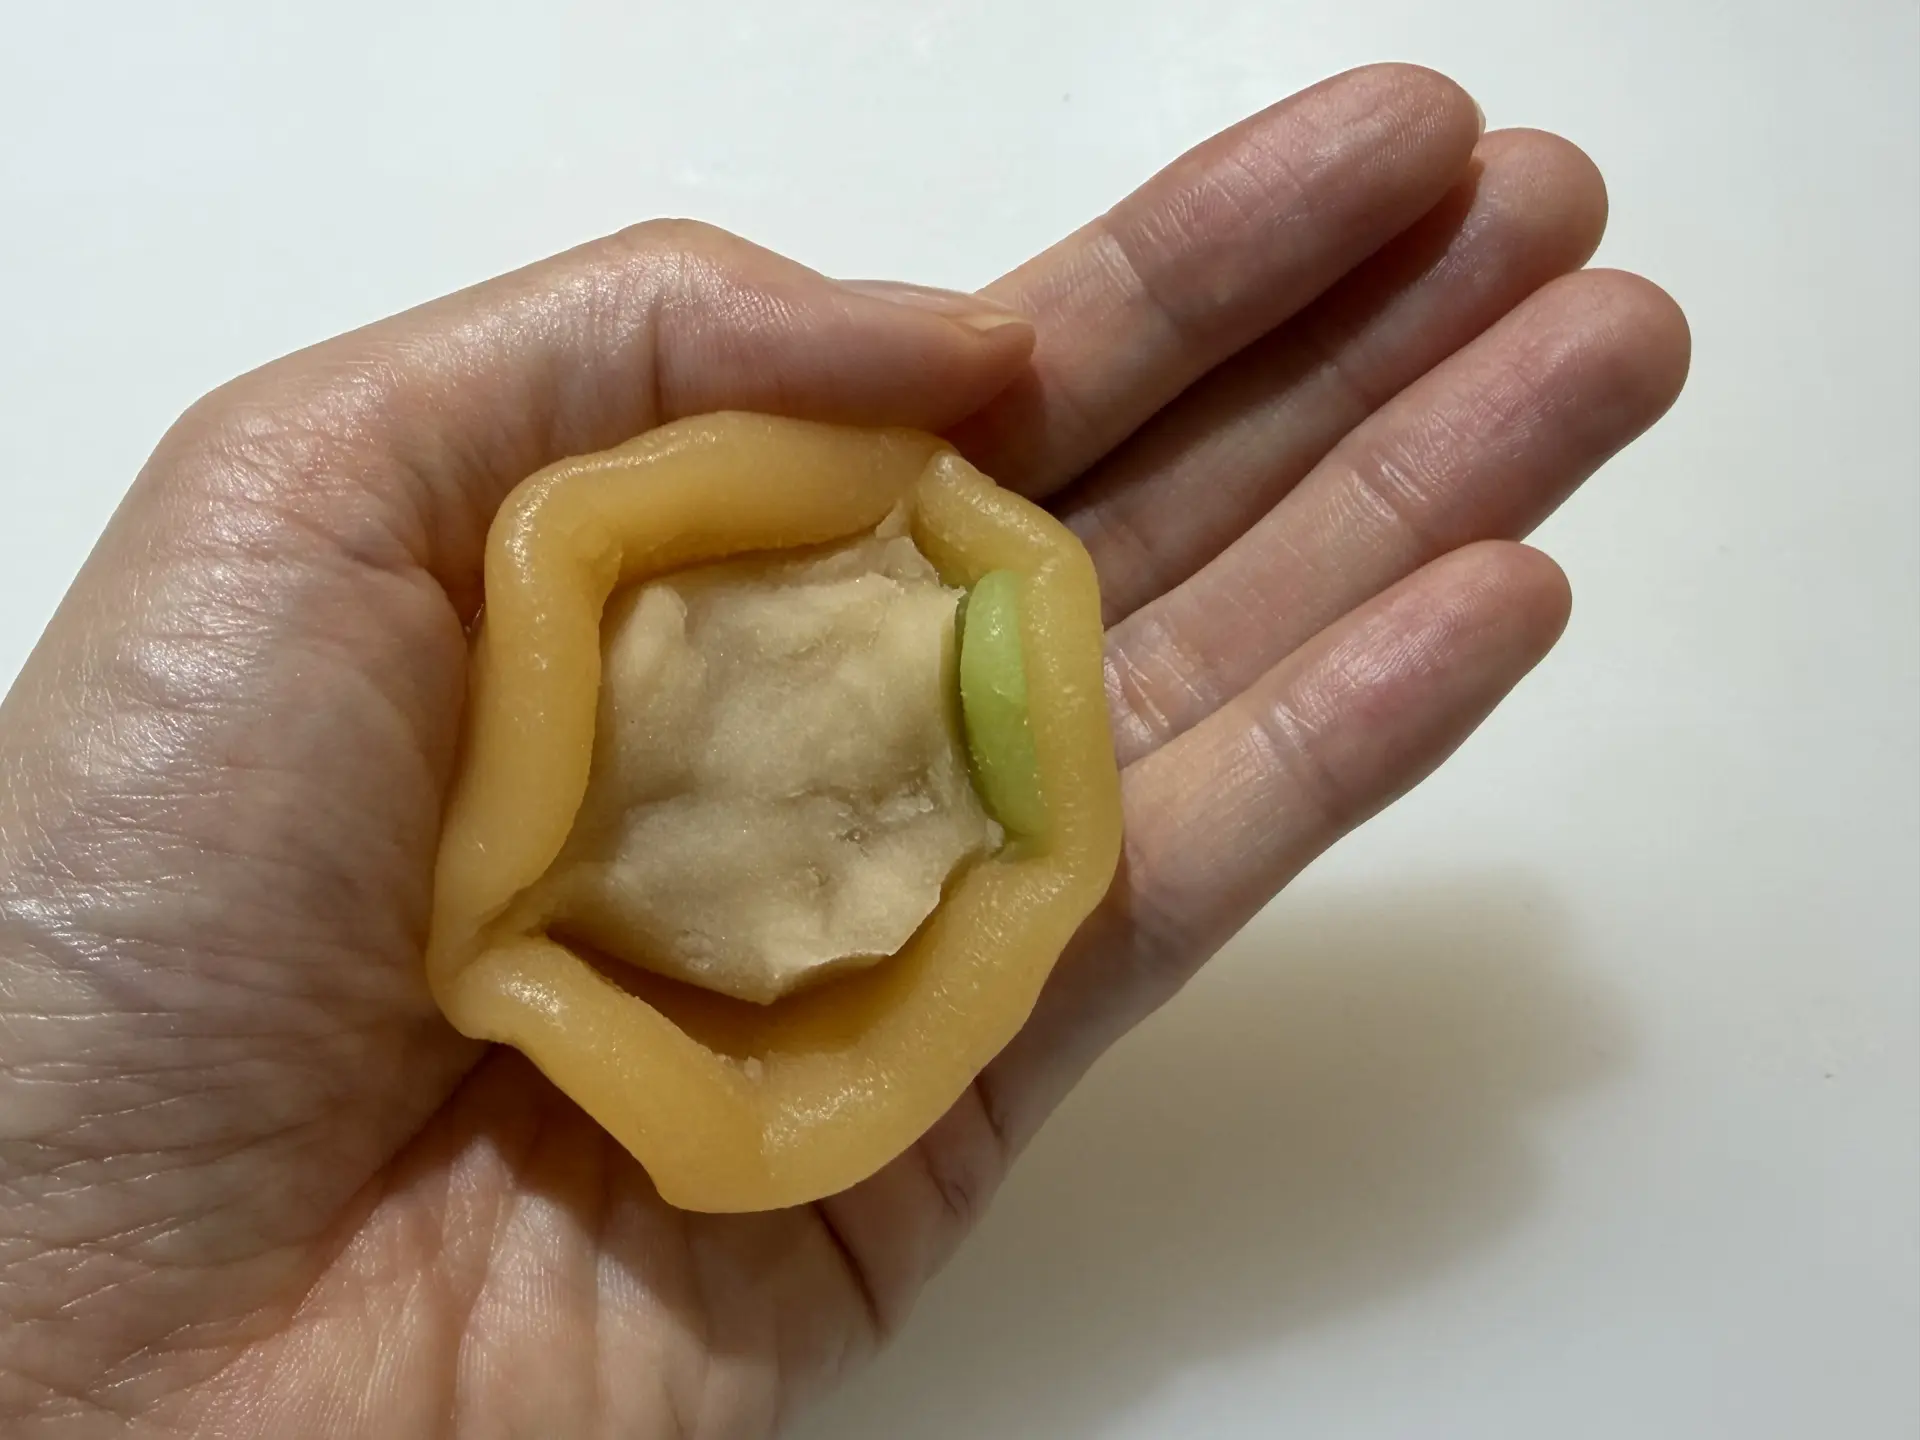
Place white bean paste in the center, then wrap the dough around it to form an egg shape.
Turn it over, and…you can see a hint of green showing through.
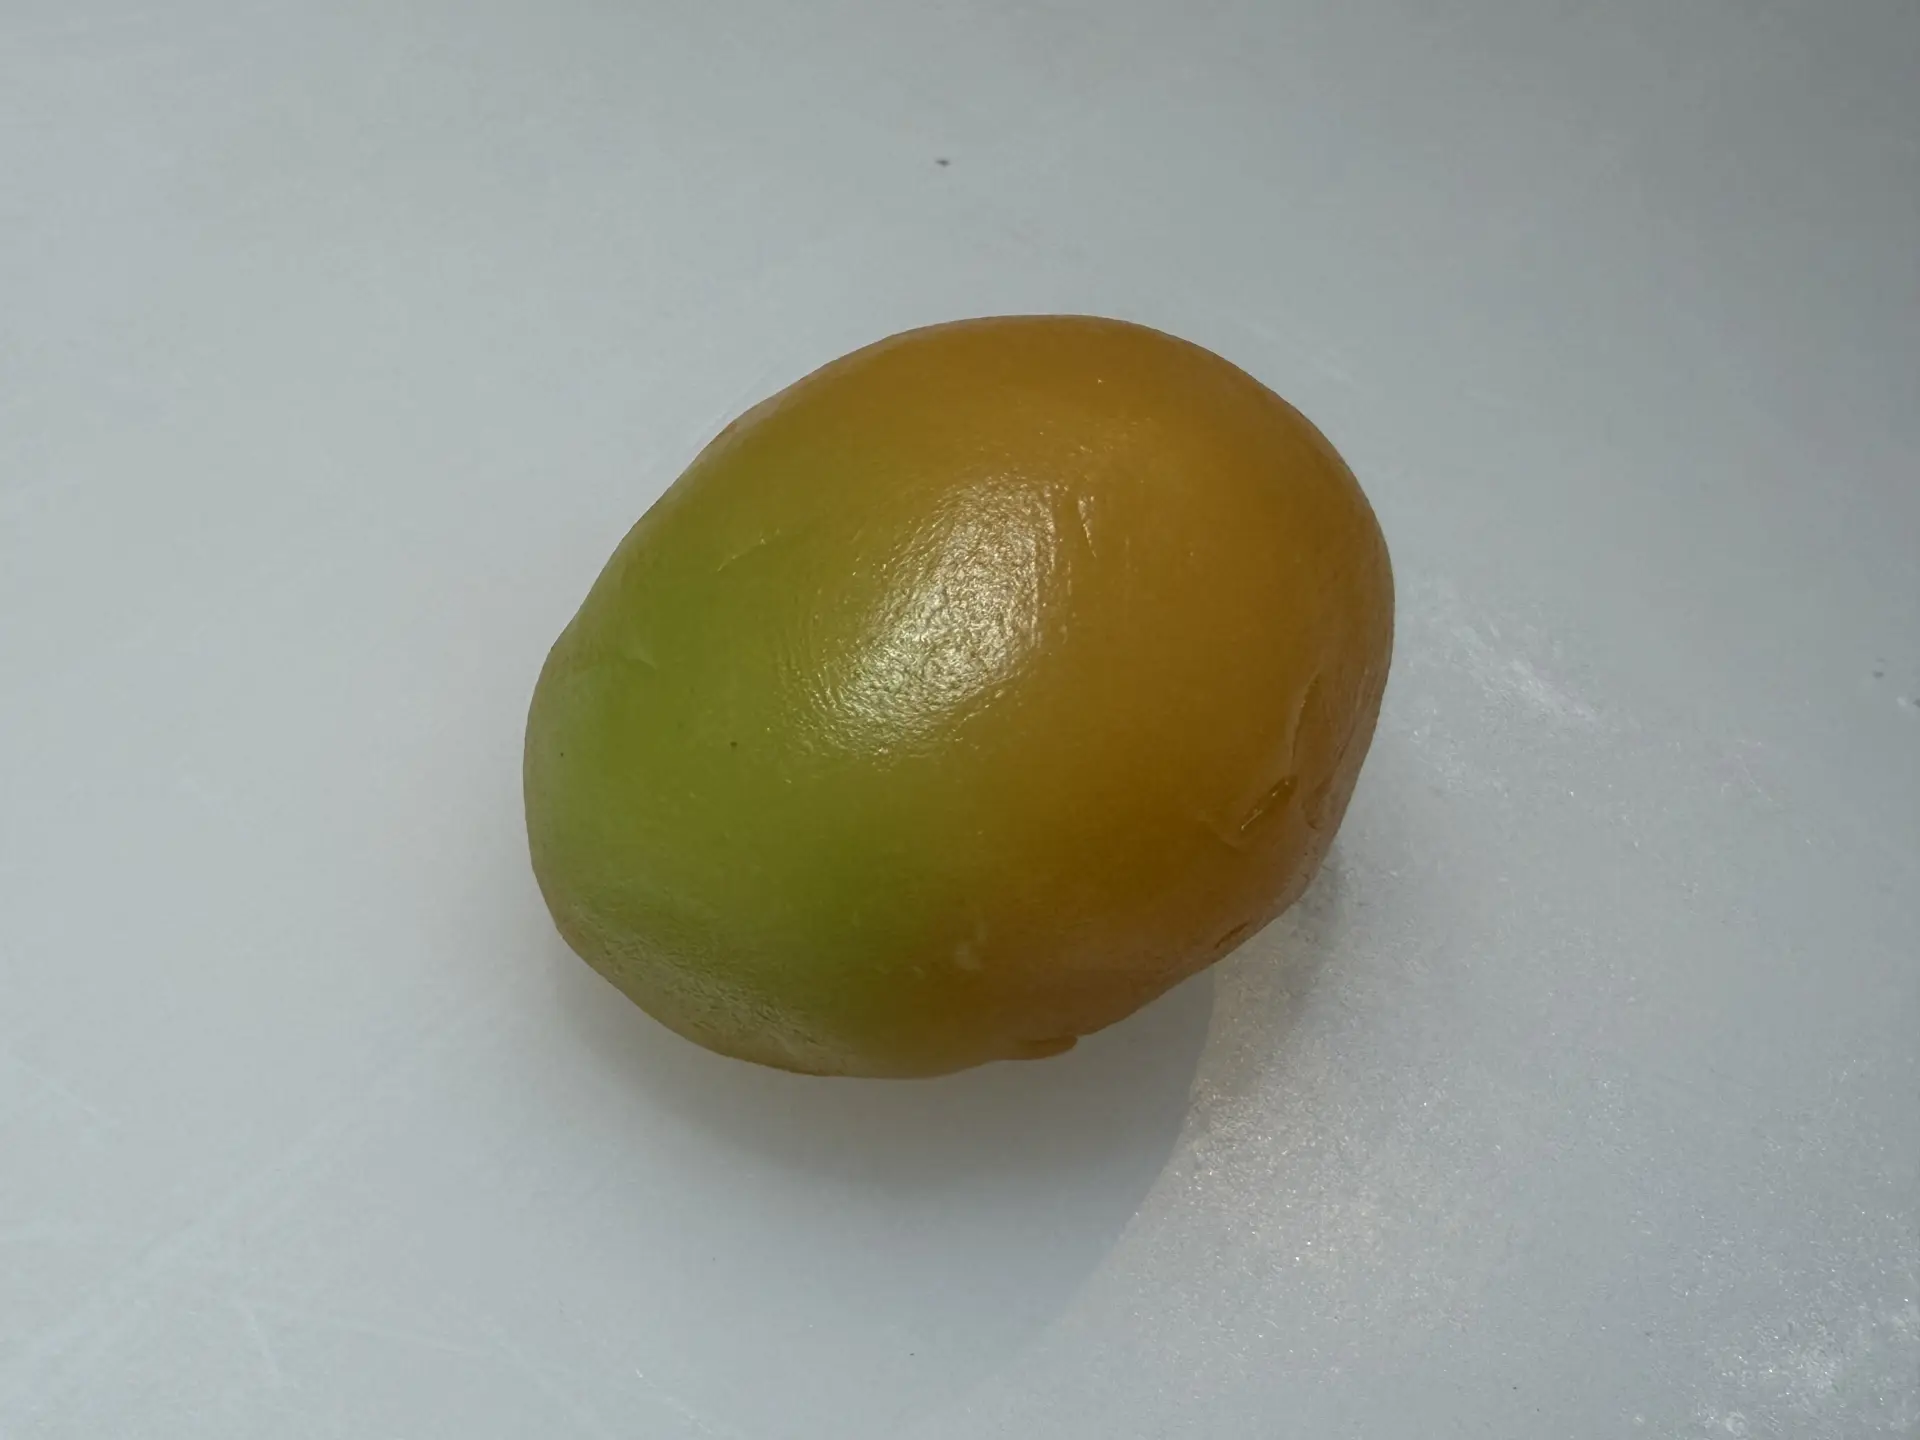
This is the wagashi-making technique called nakabokashi. It looks just like a real loquat. Roll it gently in your palms to refine the shape, then make a small indentation with your finger in the shaded area to finish.
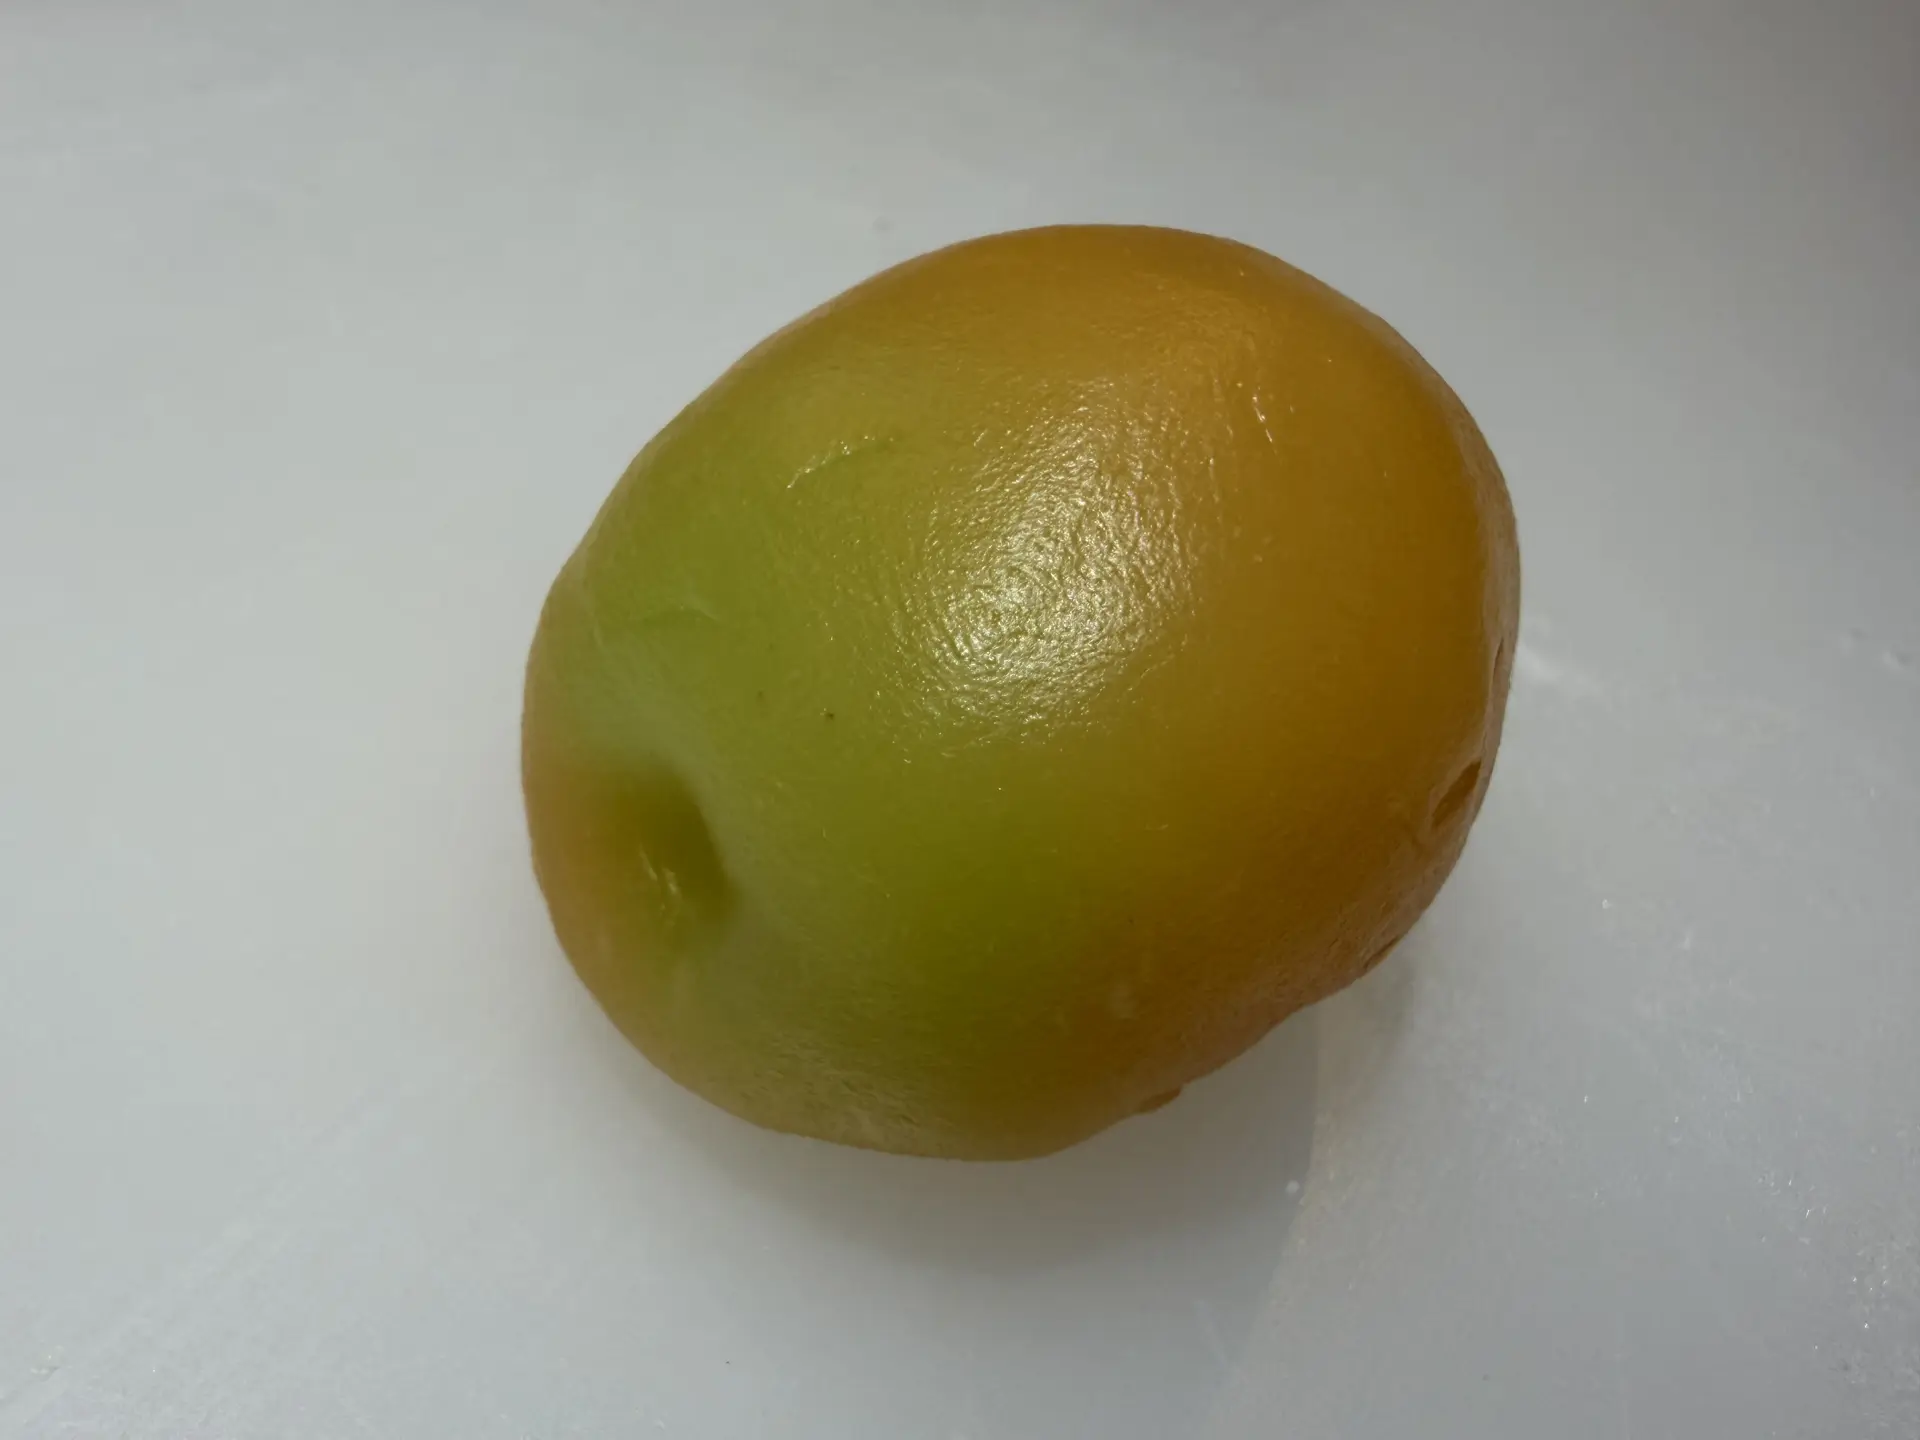
In other seasons, uiro designs include a persimmon left on the tree, adonis flowers, plum blossoms, and Chinese lantern plants.
(5) Make a Fine Fresh Sweet: Nerikiri
Next is nerikiri, shaped into a dianthus flower. Nerikiri is made from a sticky bean paste cooked with a glutinous rice flour binder. It is said to be the dough most often used for fine fresh sweets. While nerikiri is sometimes shaped in wooden molds, Kanshundo uses traditional methods, such as gathering it in a cloth or shaping it with a spatula. We will use the nakabokashi technique again for this sweet.
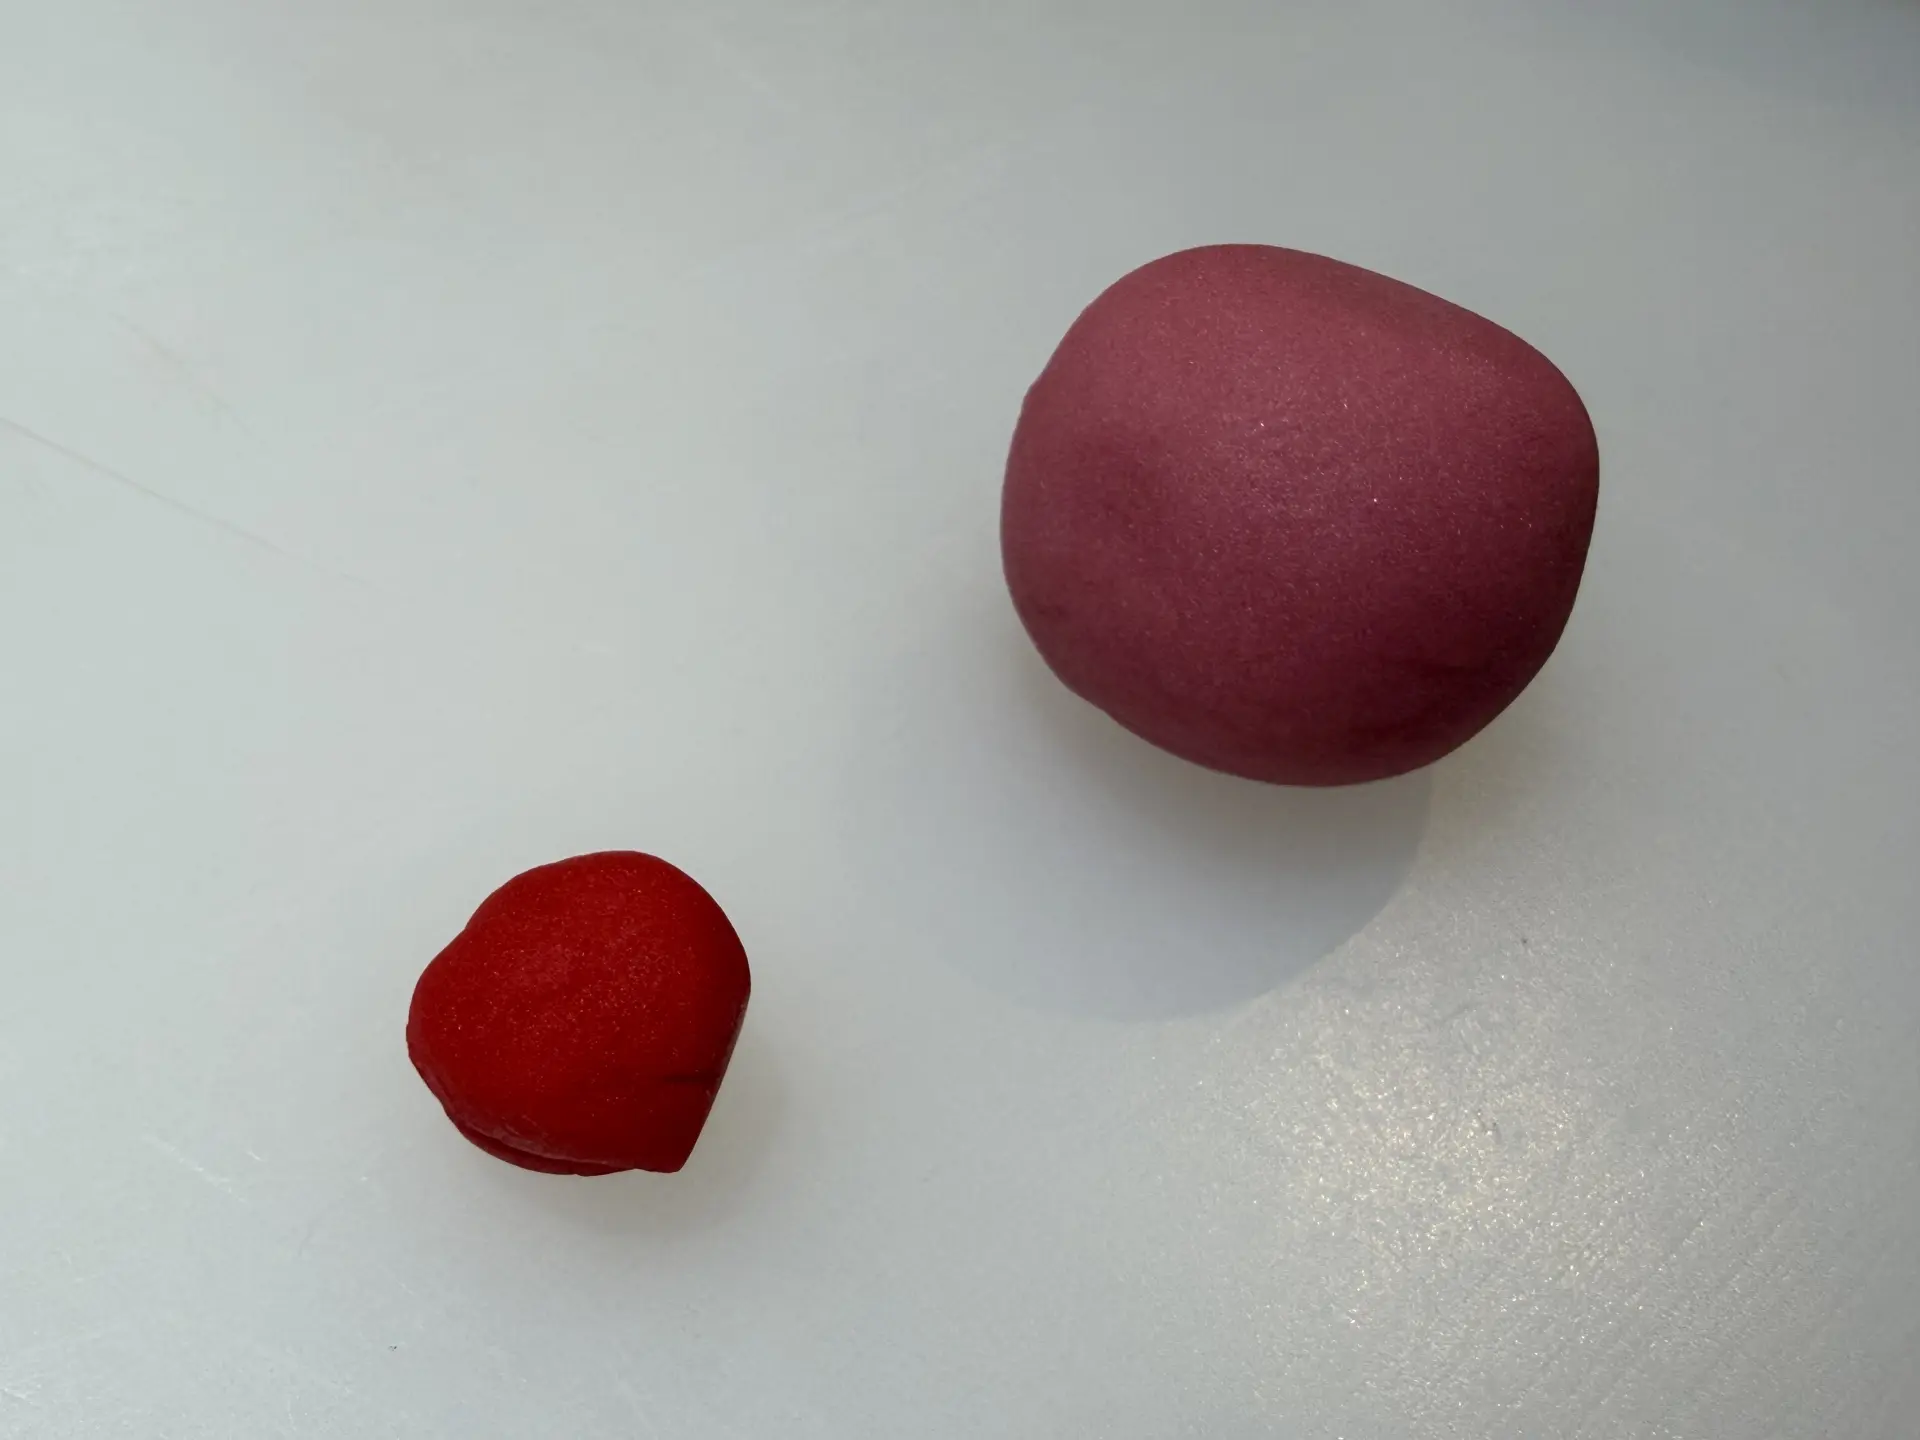
First, knead the pink bean paste with your fingertips to soften it.
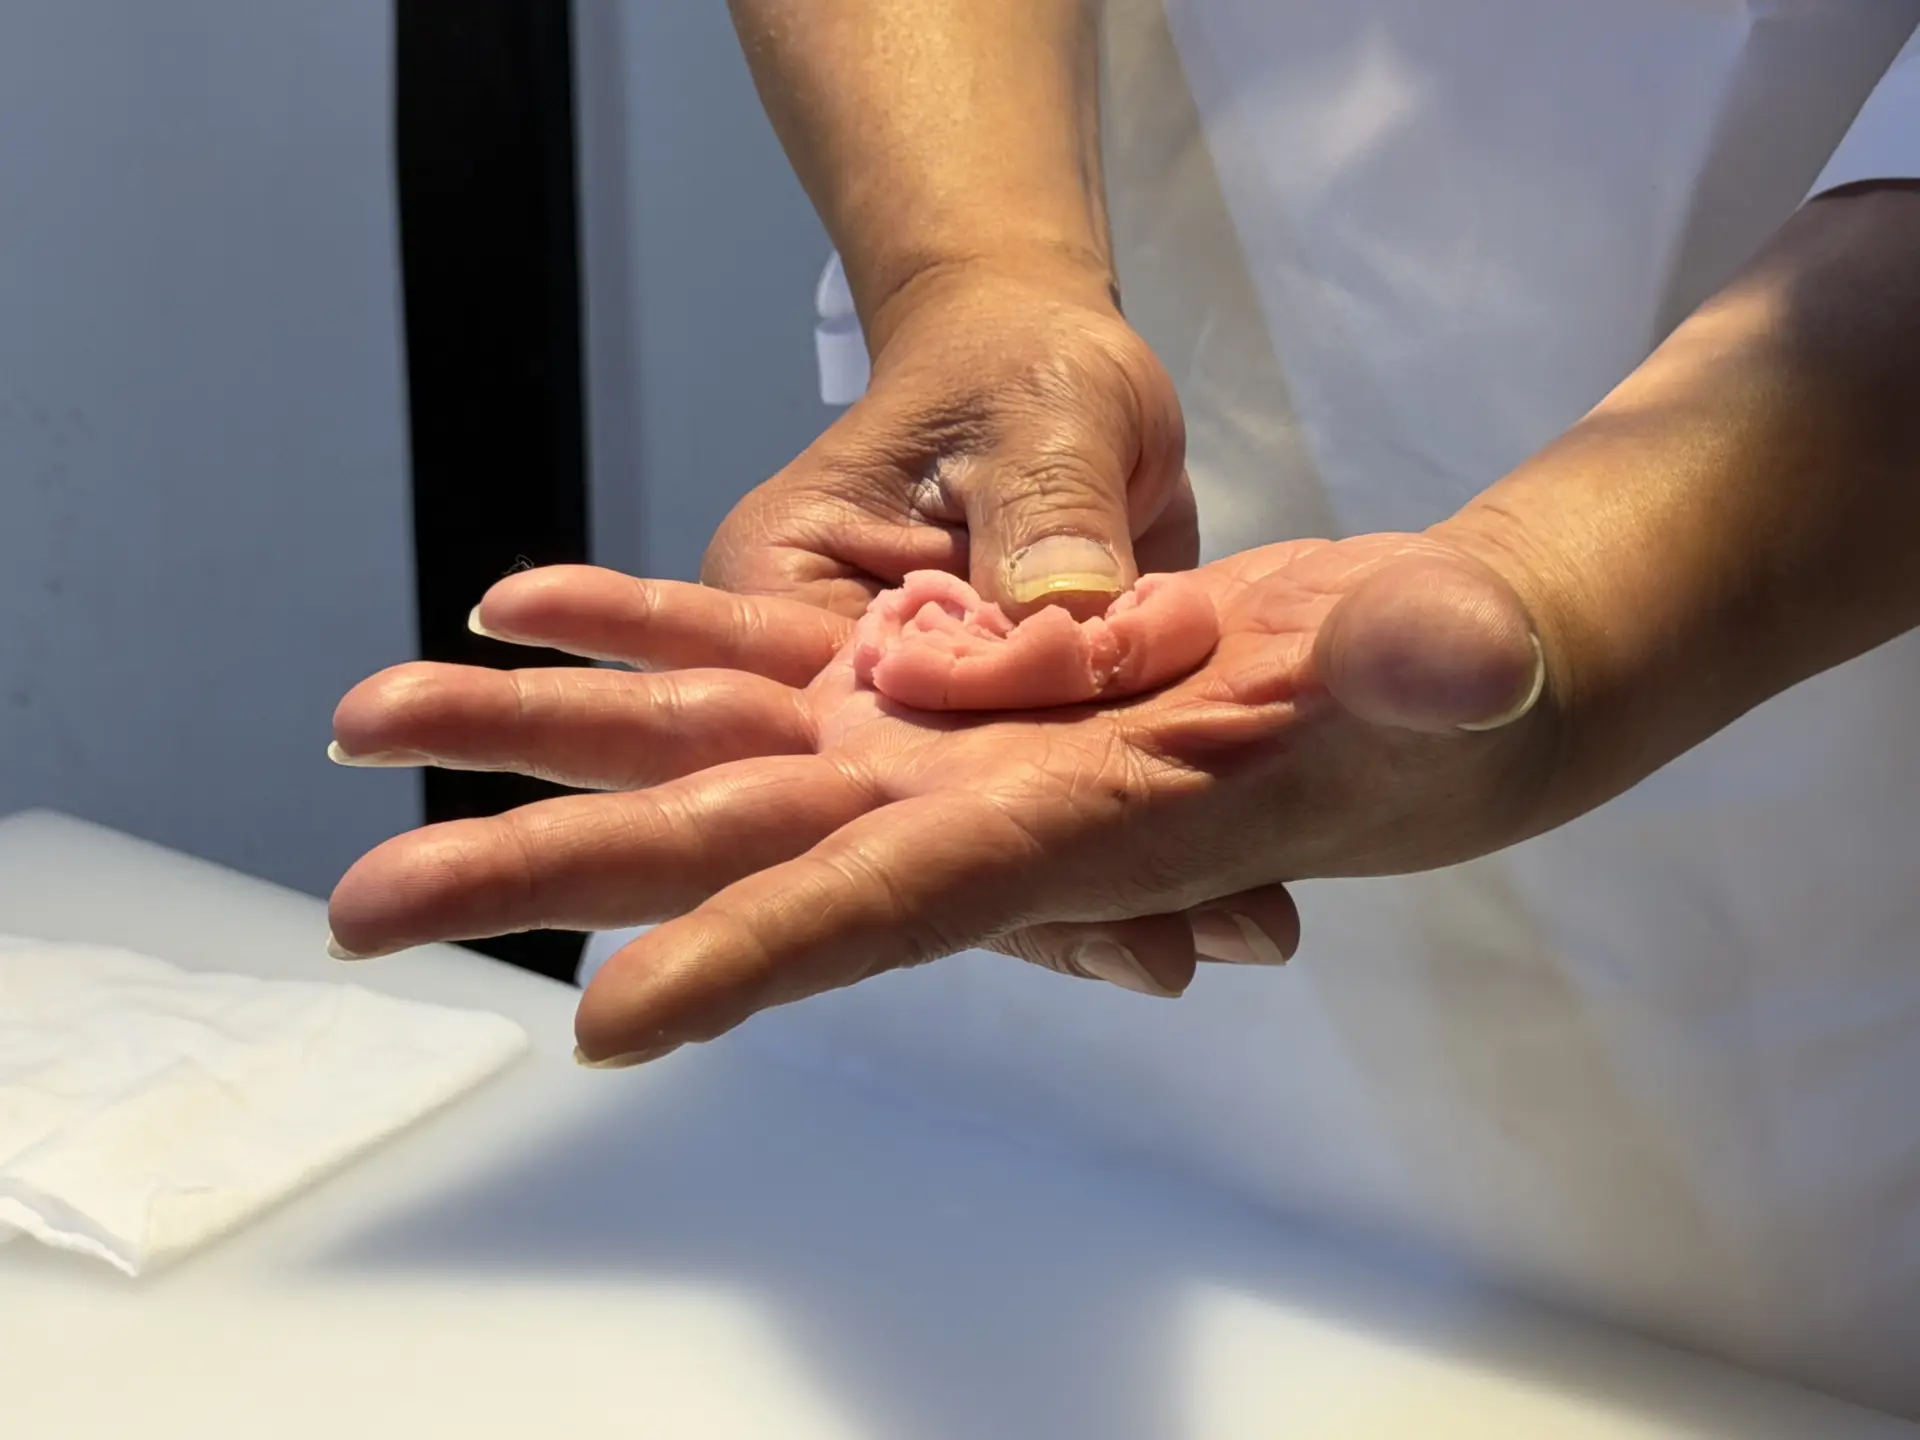
Divide it into a larger piece and a smaller piece—there is no need to be exact. Knead the red paste with your fingertips to soften it, too.
Then flatten the larger piece of pink paste to about the size of your palm.
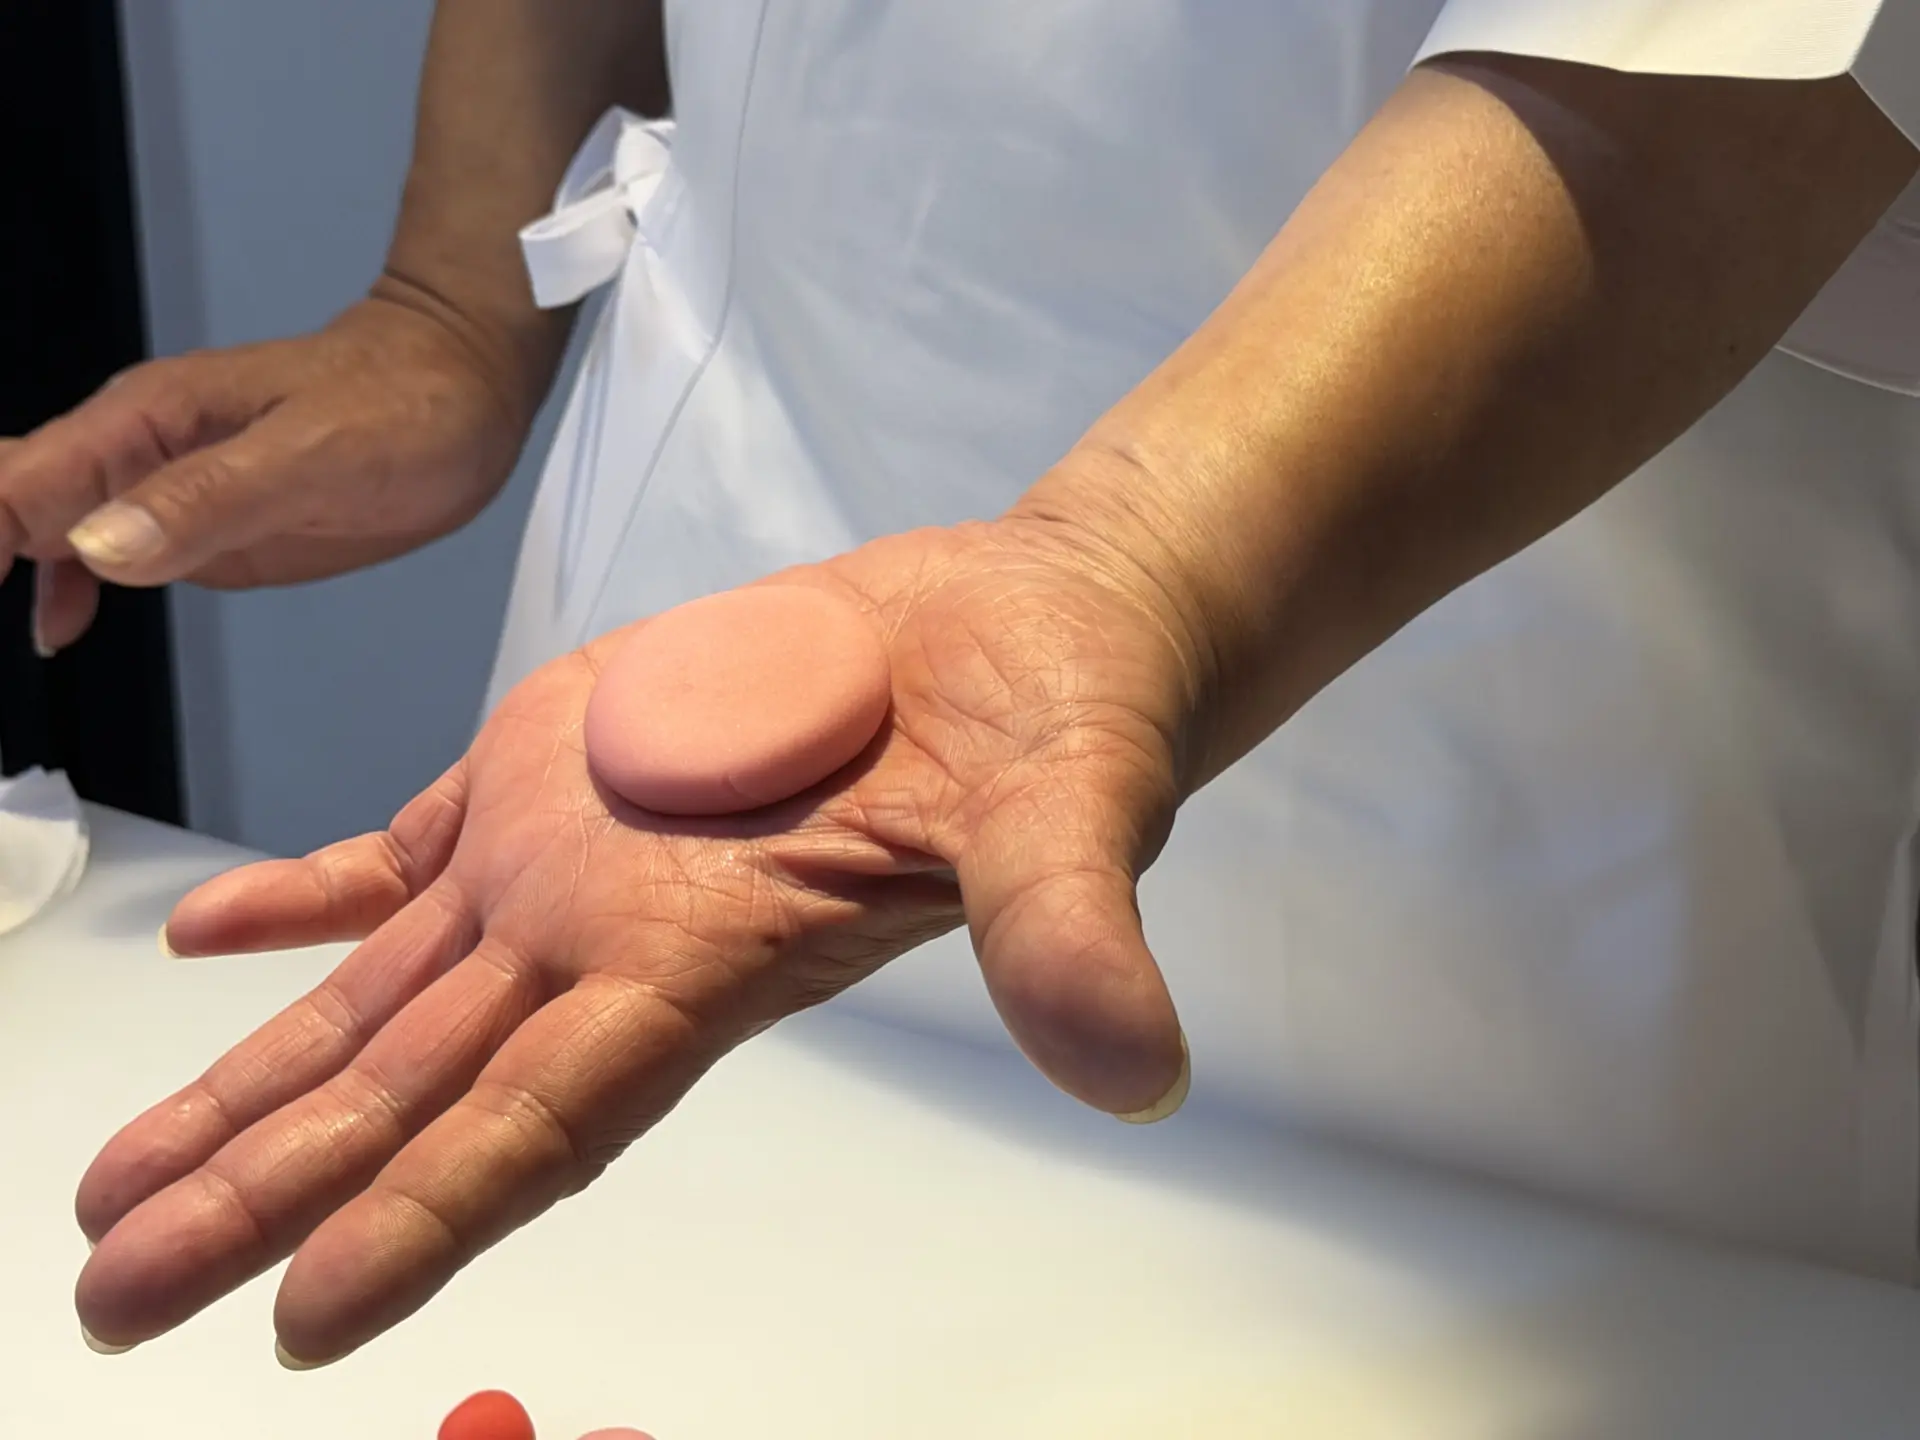
Use the pad of your finger to make an indentation in the center, then place the red paste inside.
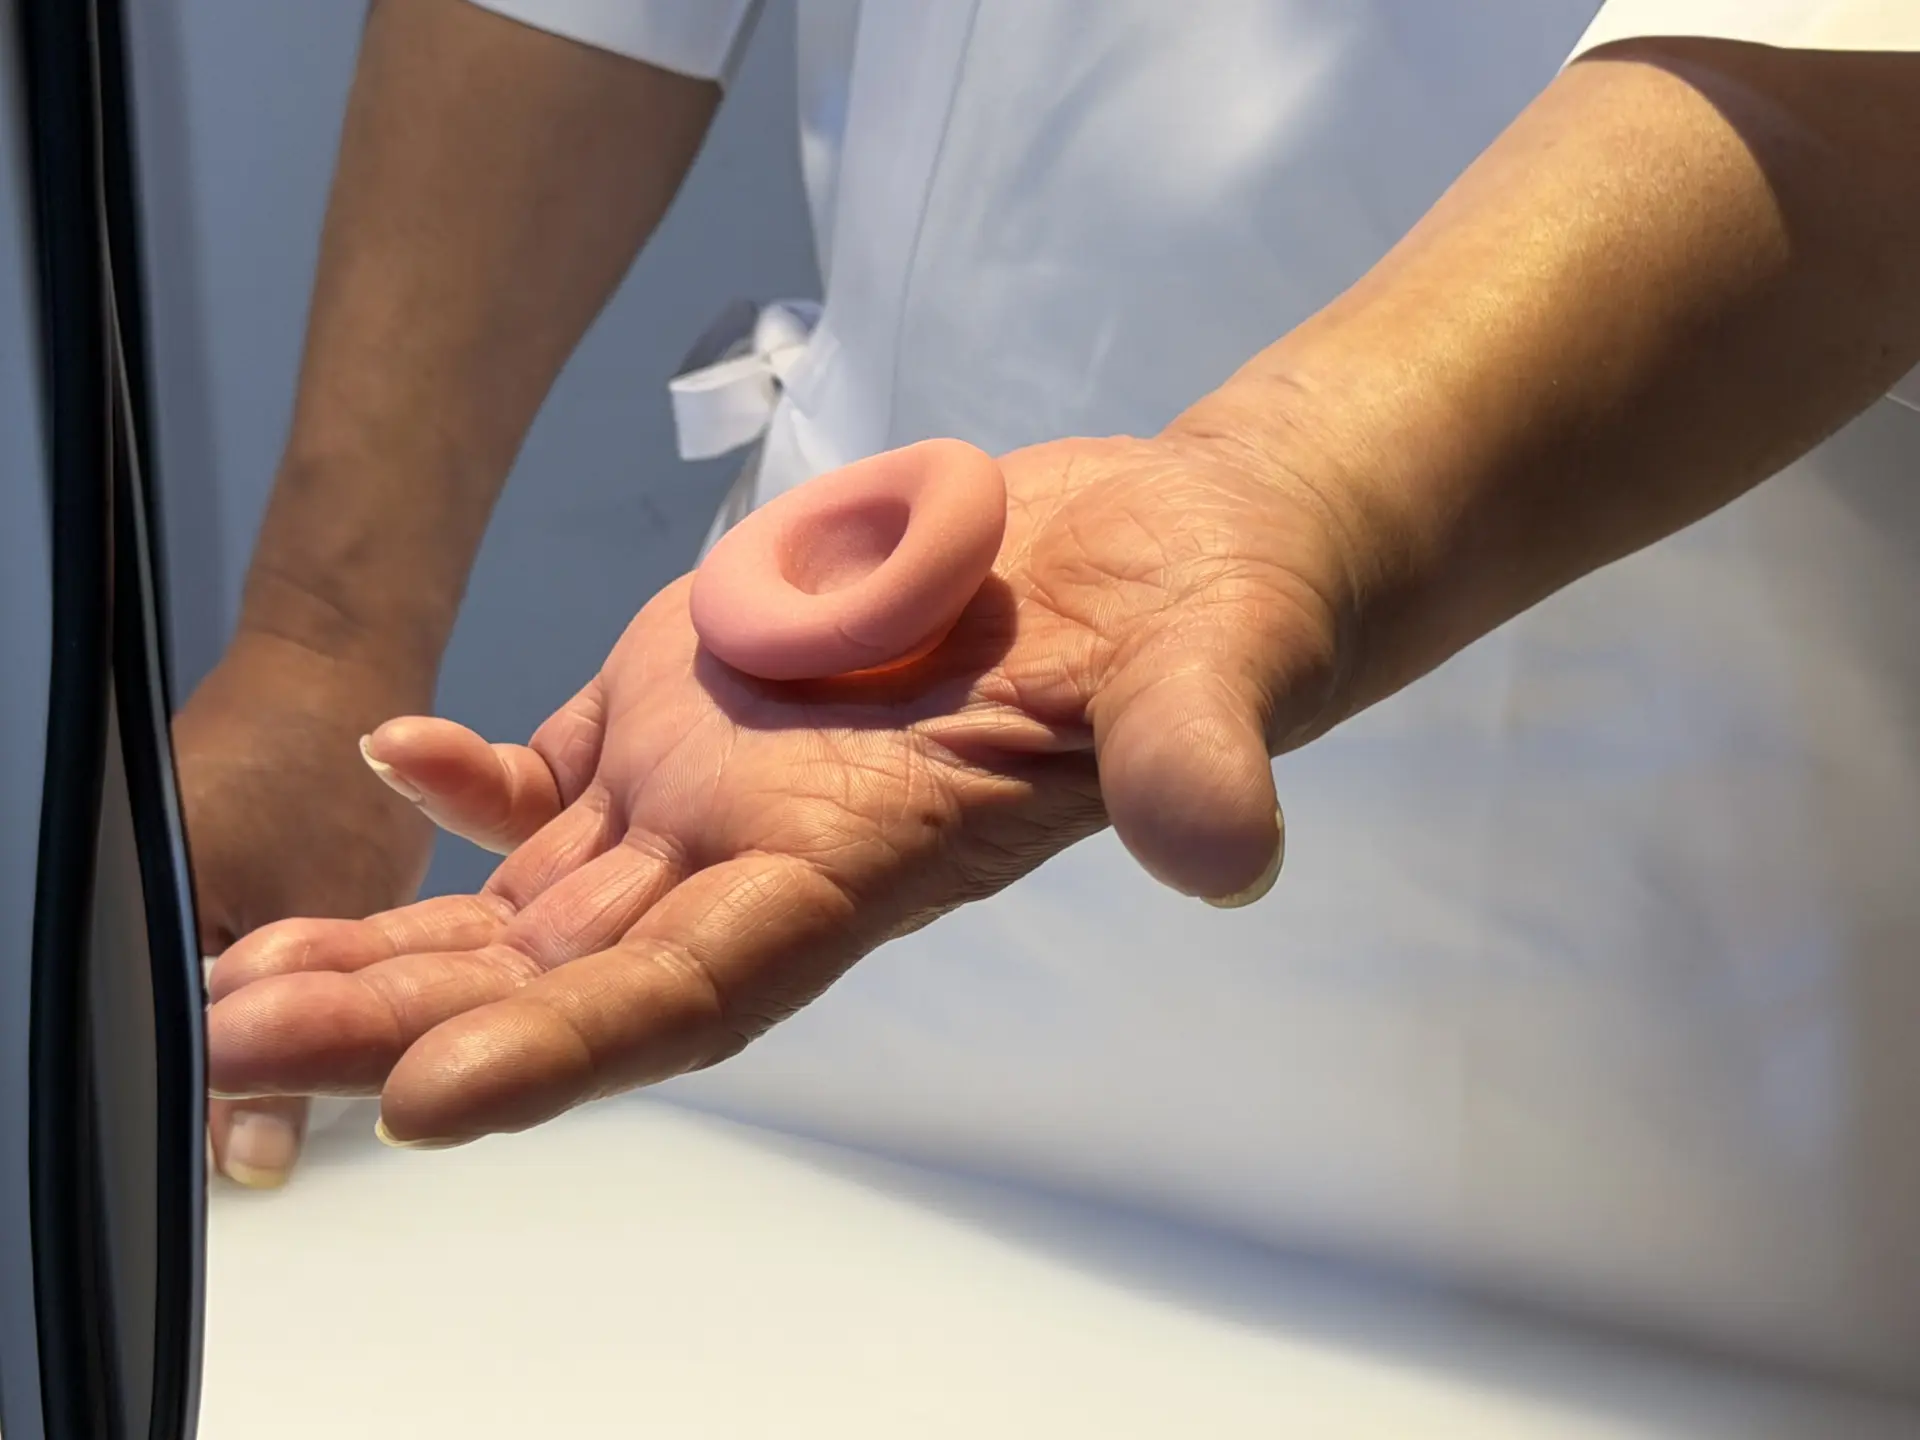
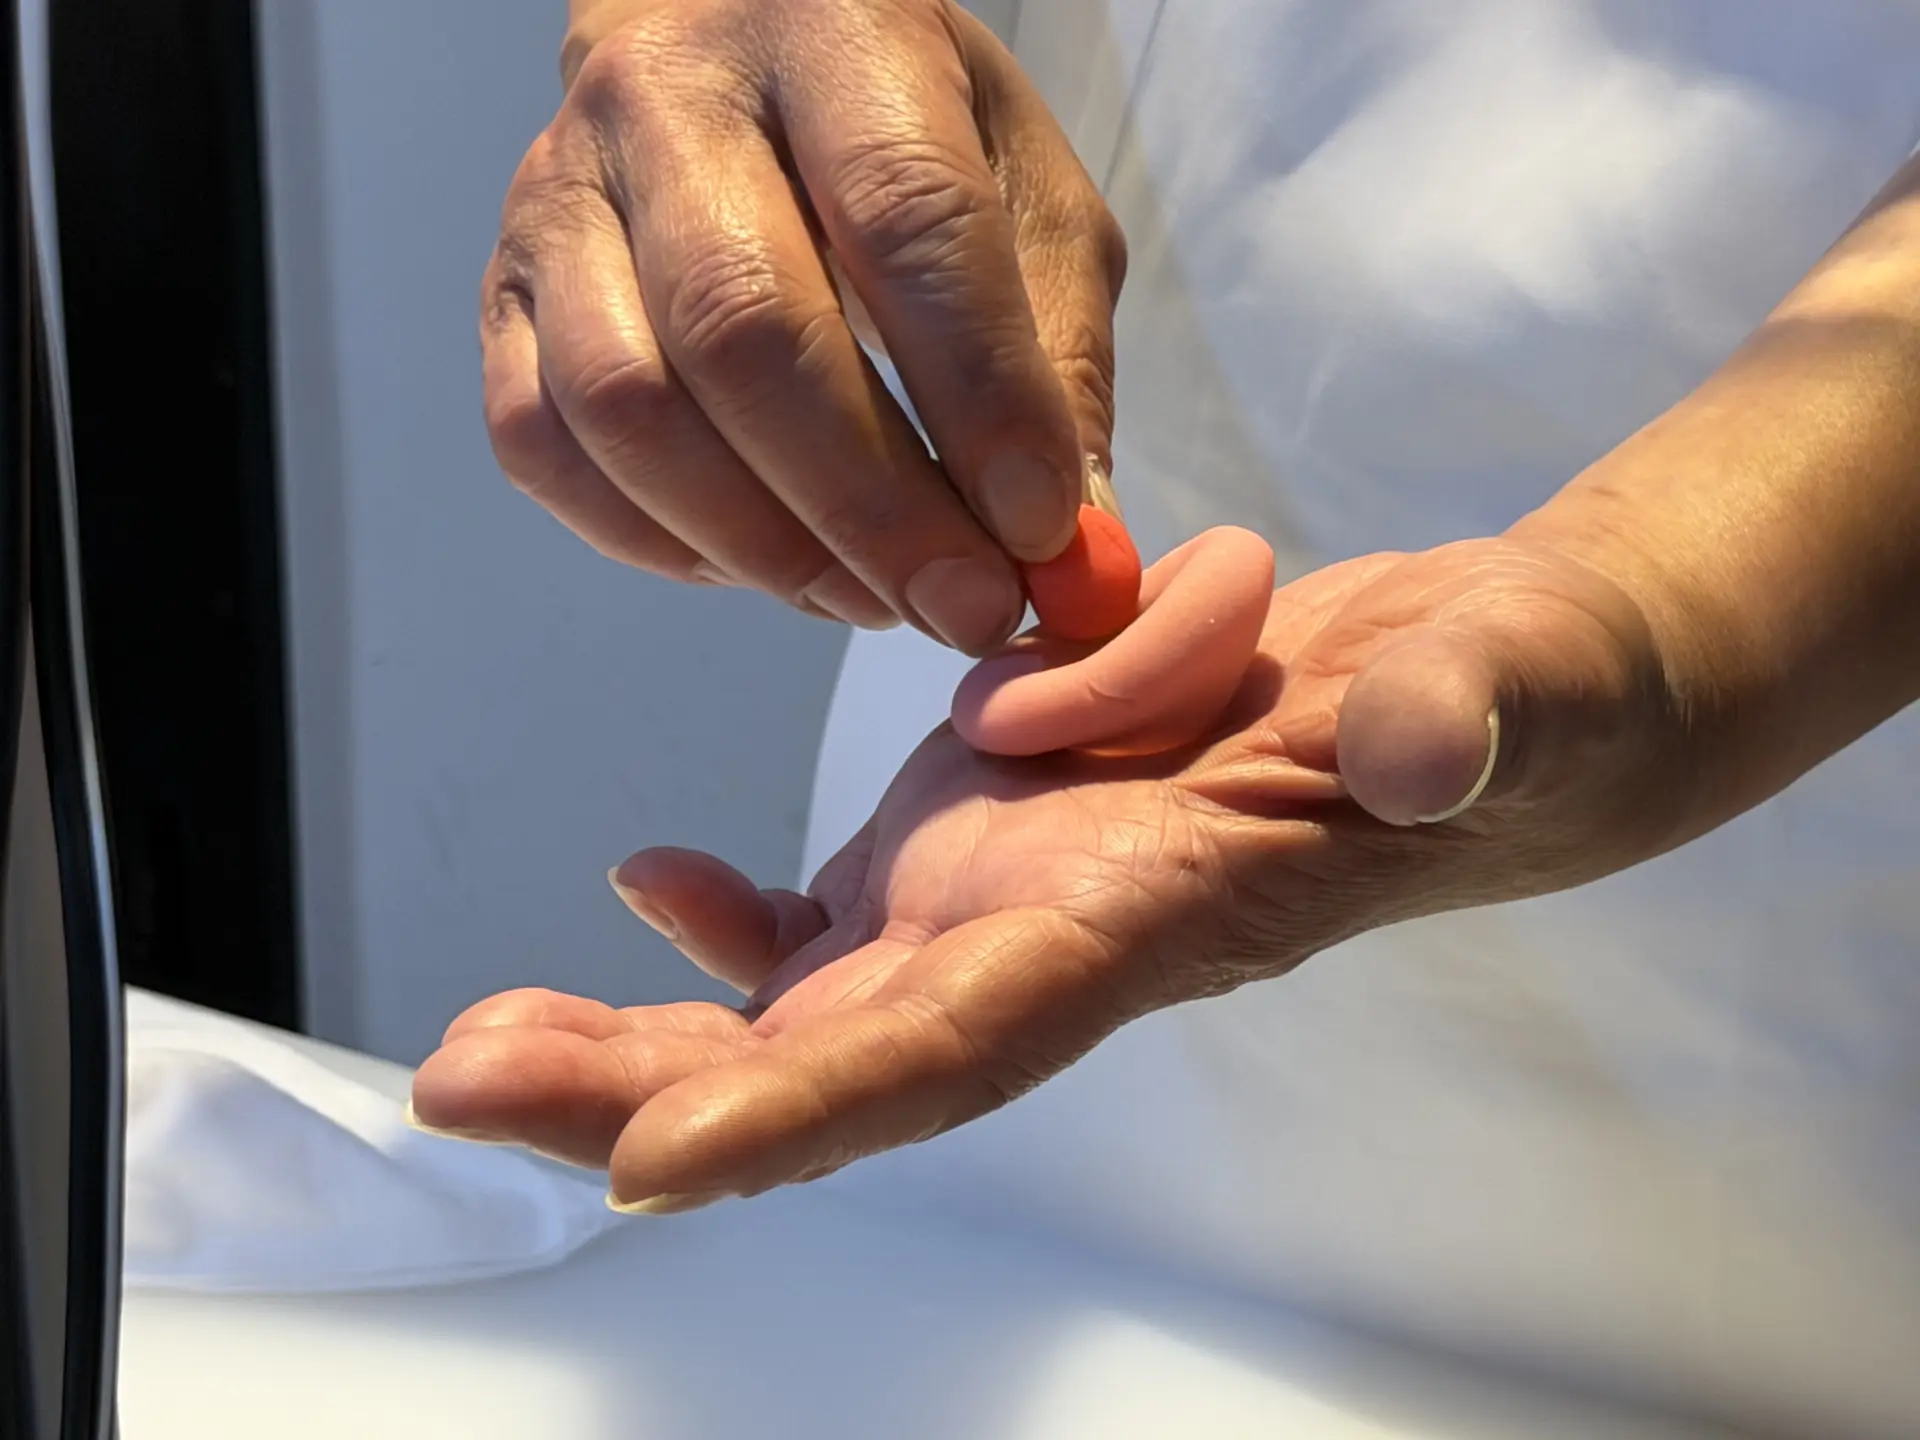
Cover it with the smaller piece of pink paste.
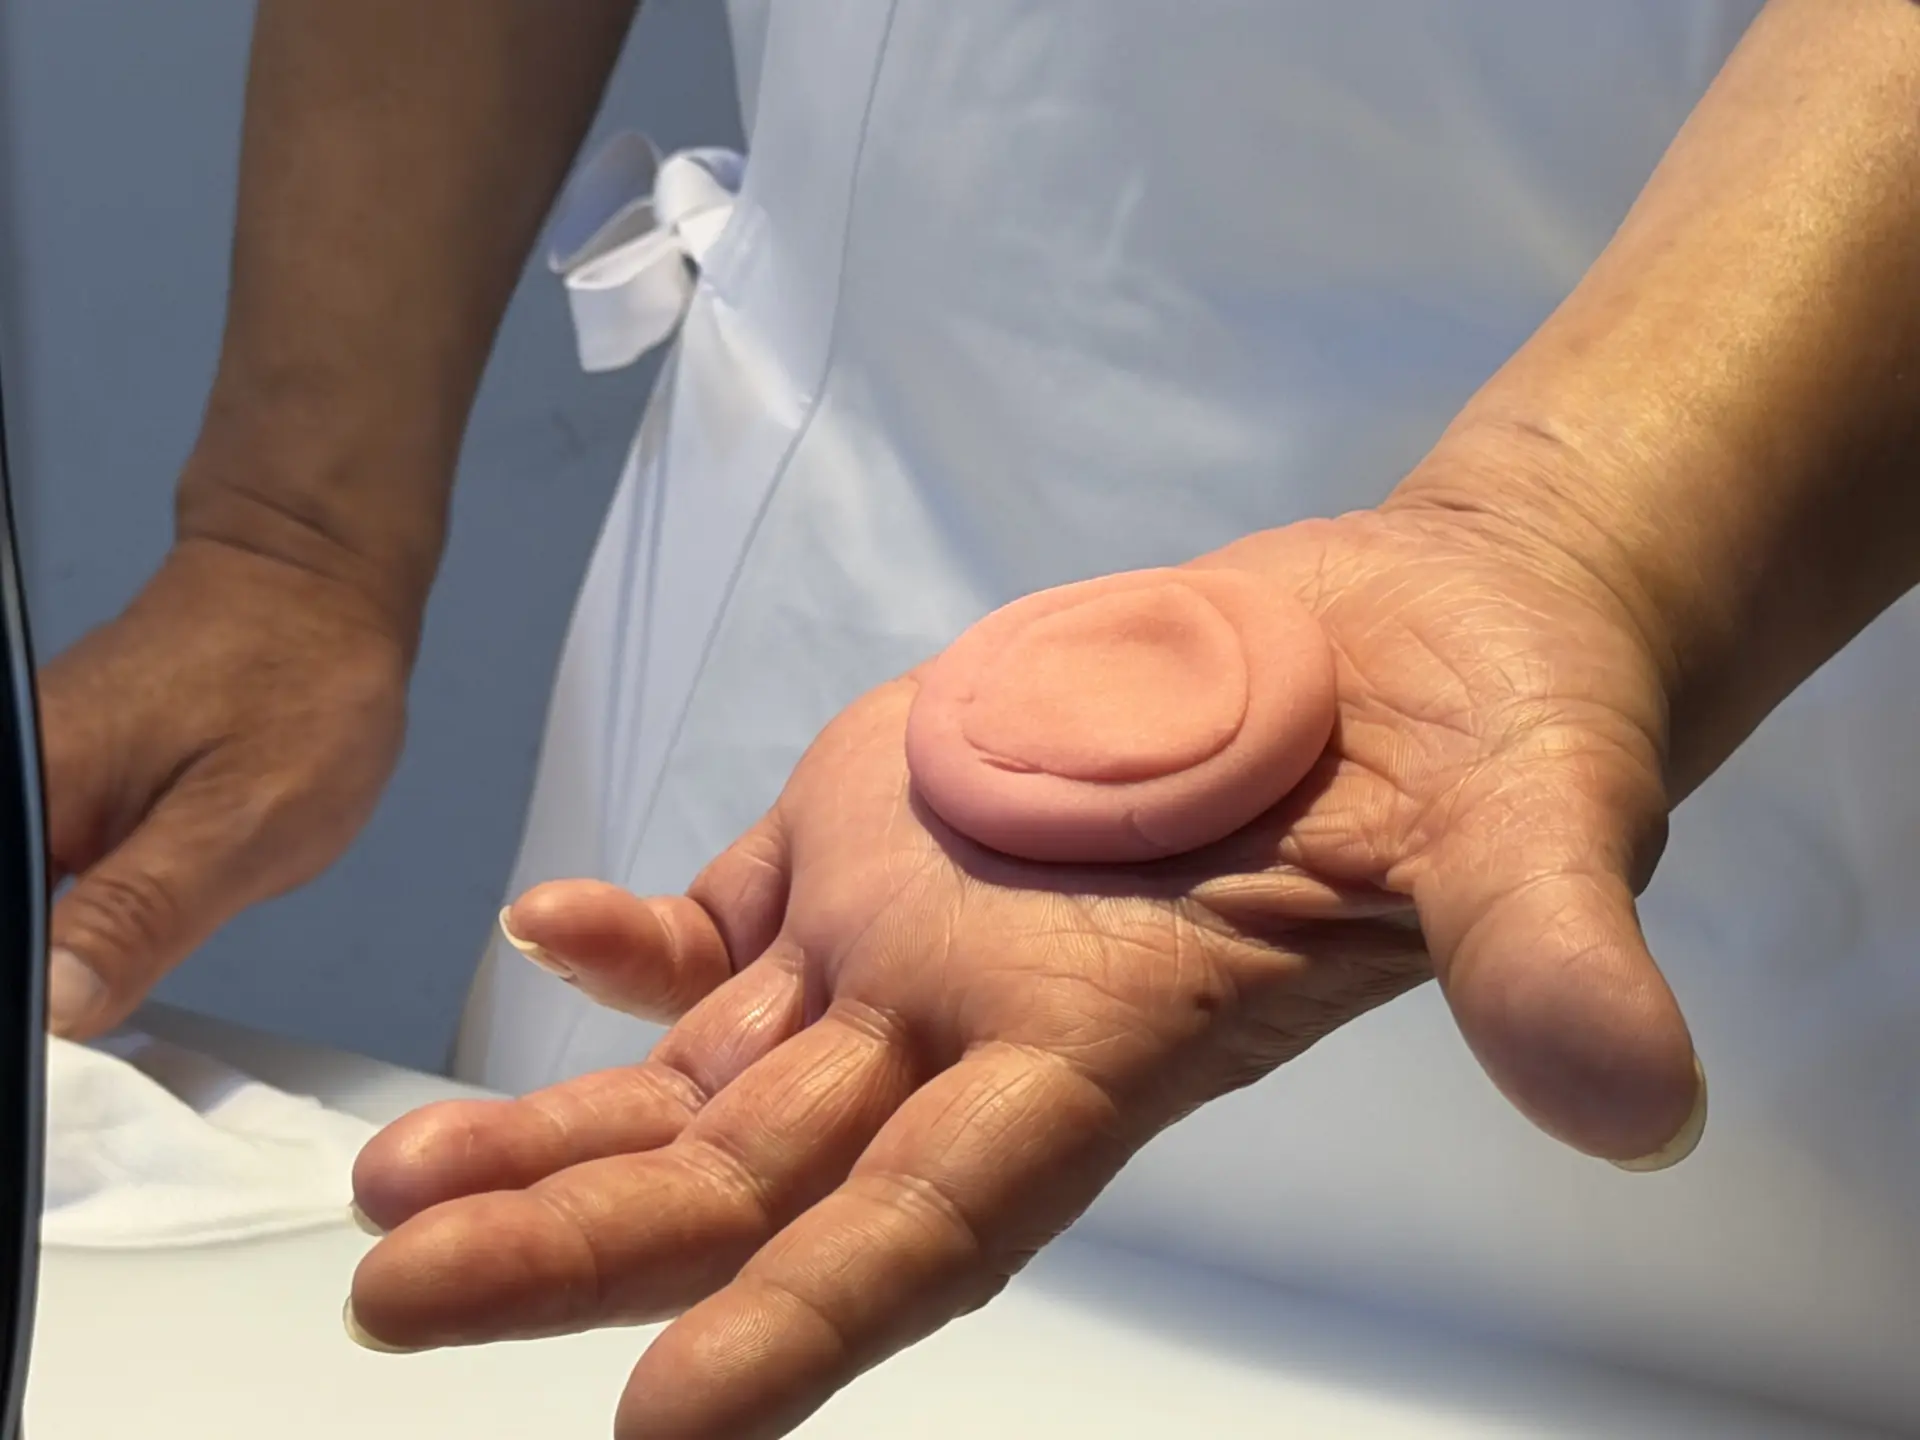
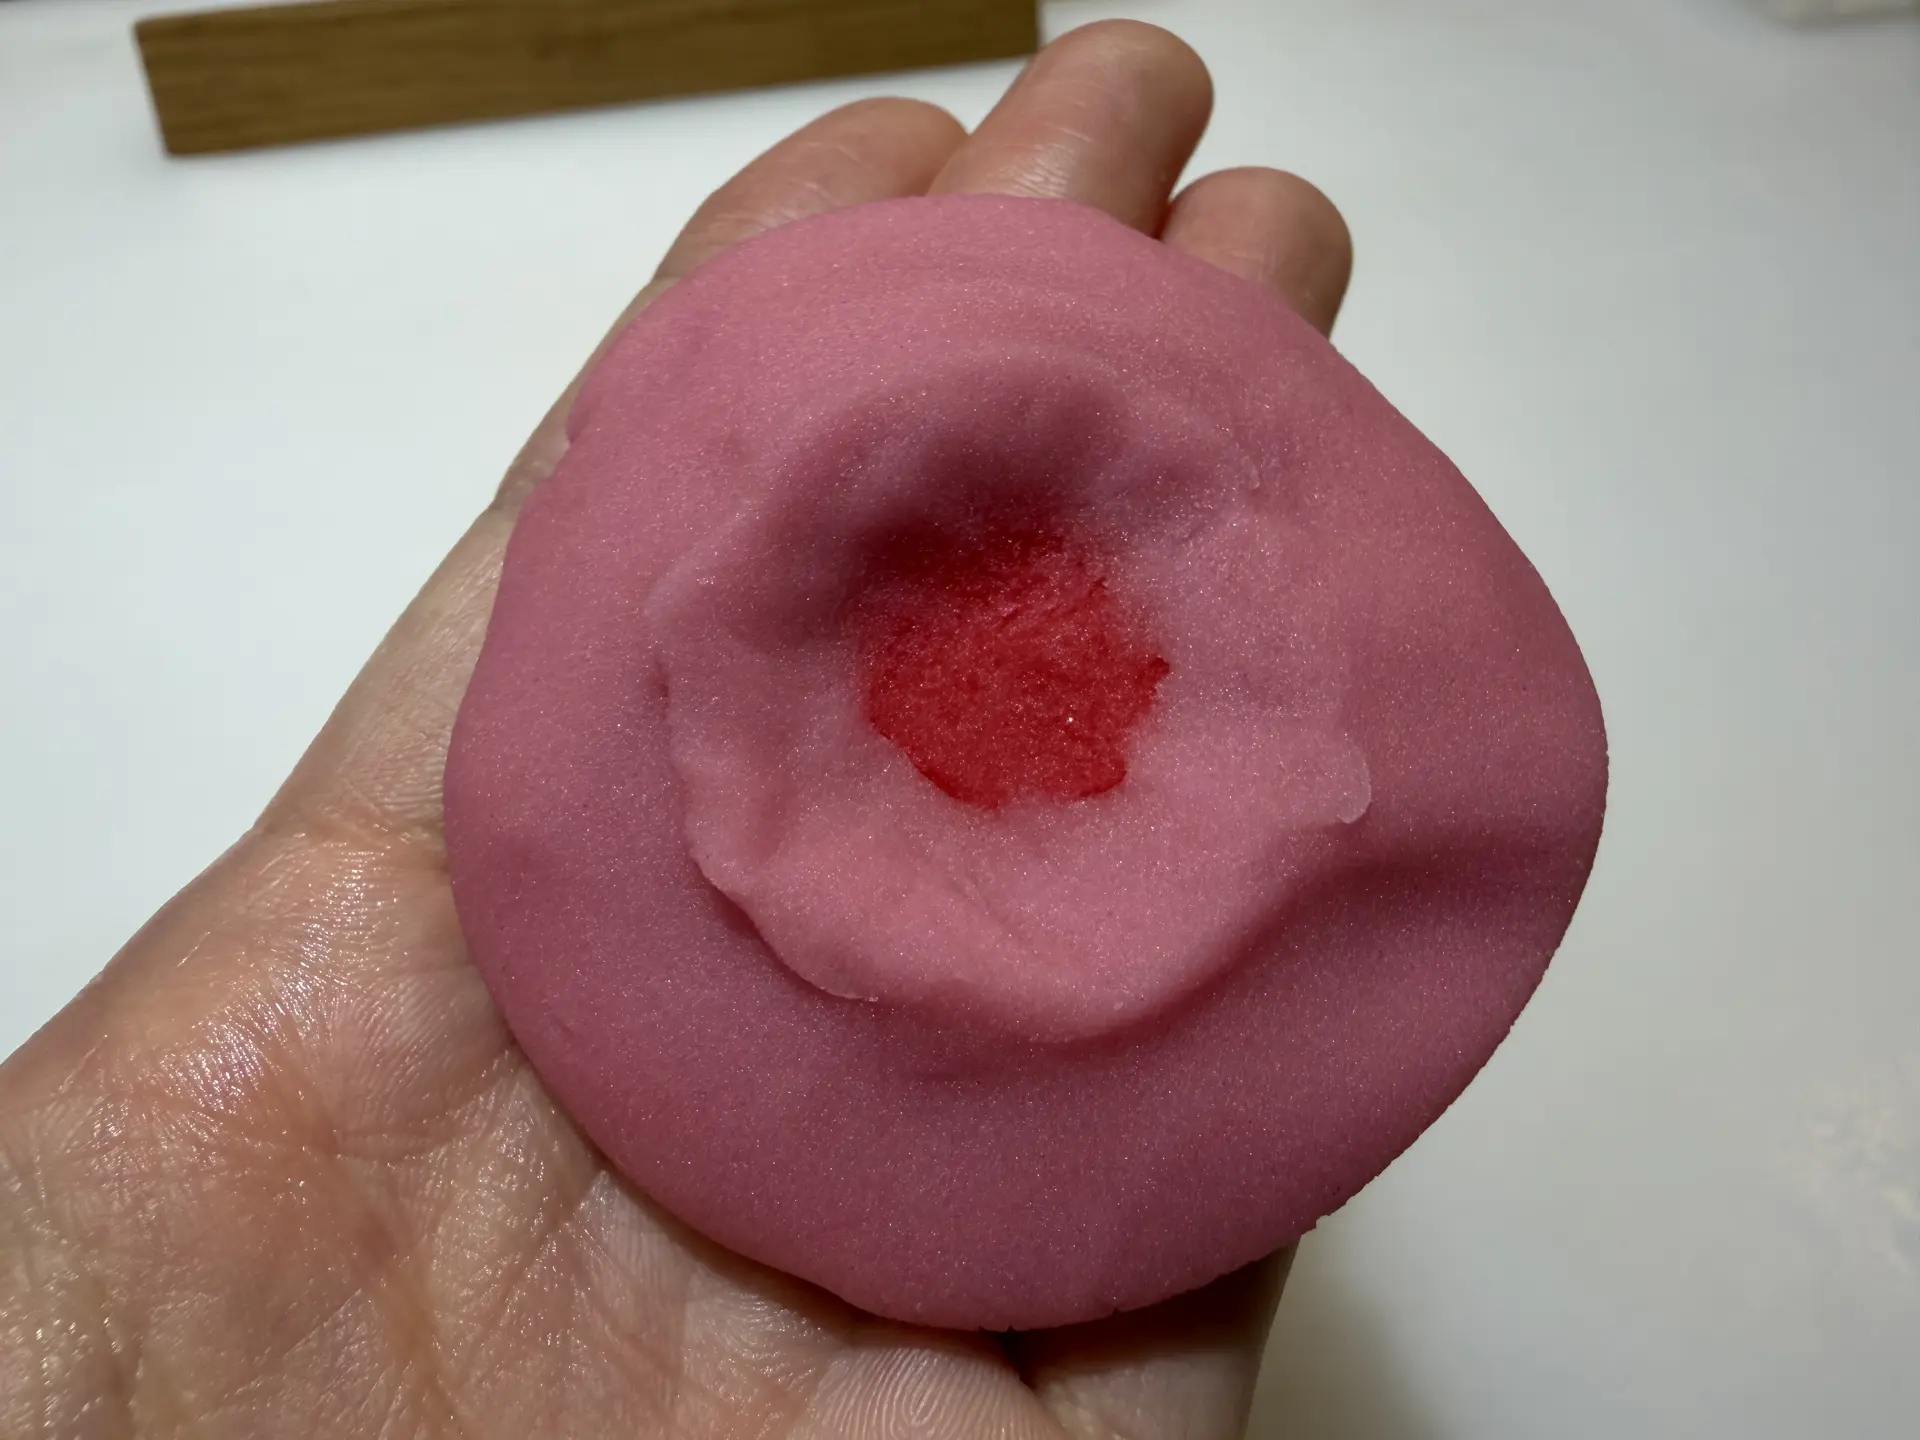
Turn it over and gently press into the center with your finger, where the red paste sits underneath. The red paste will begin to show through. This is nakabokashi in nerikiri.
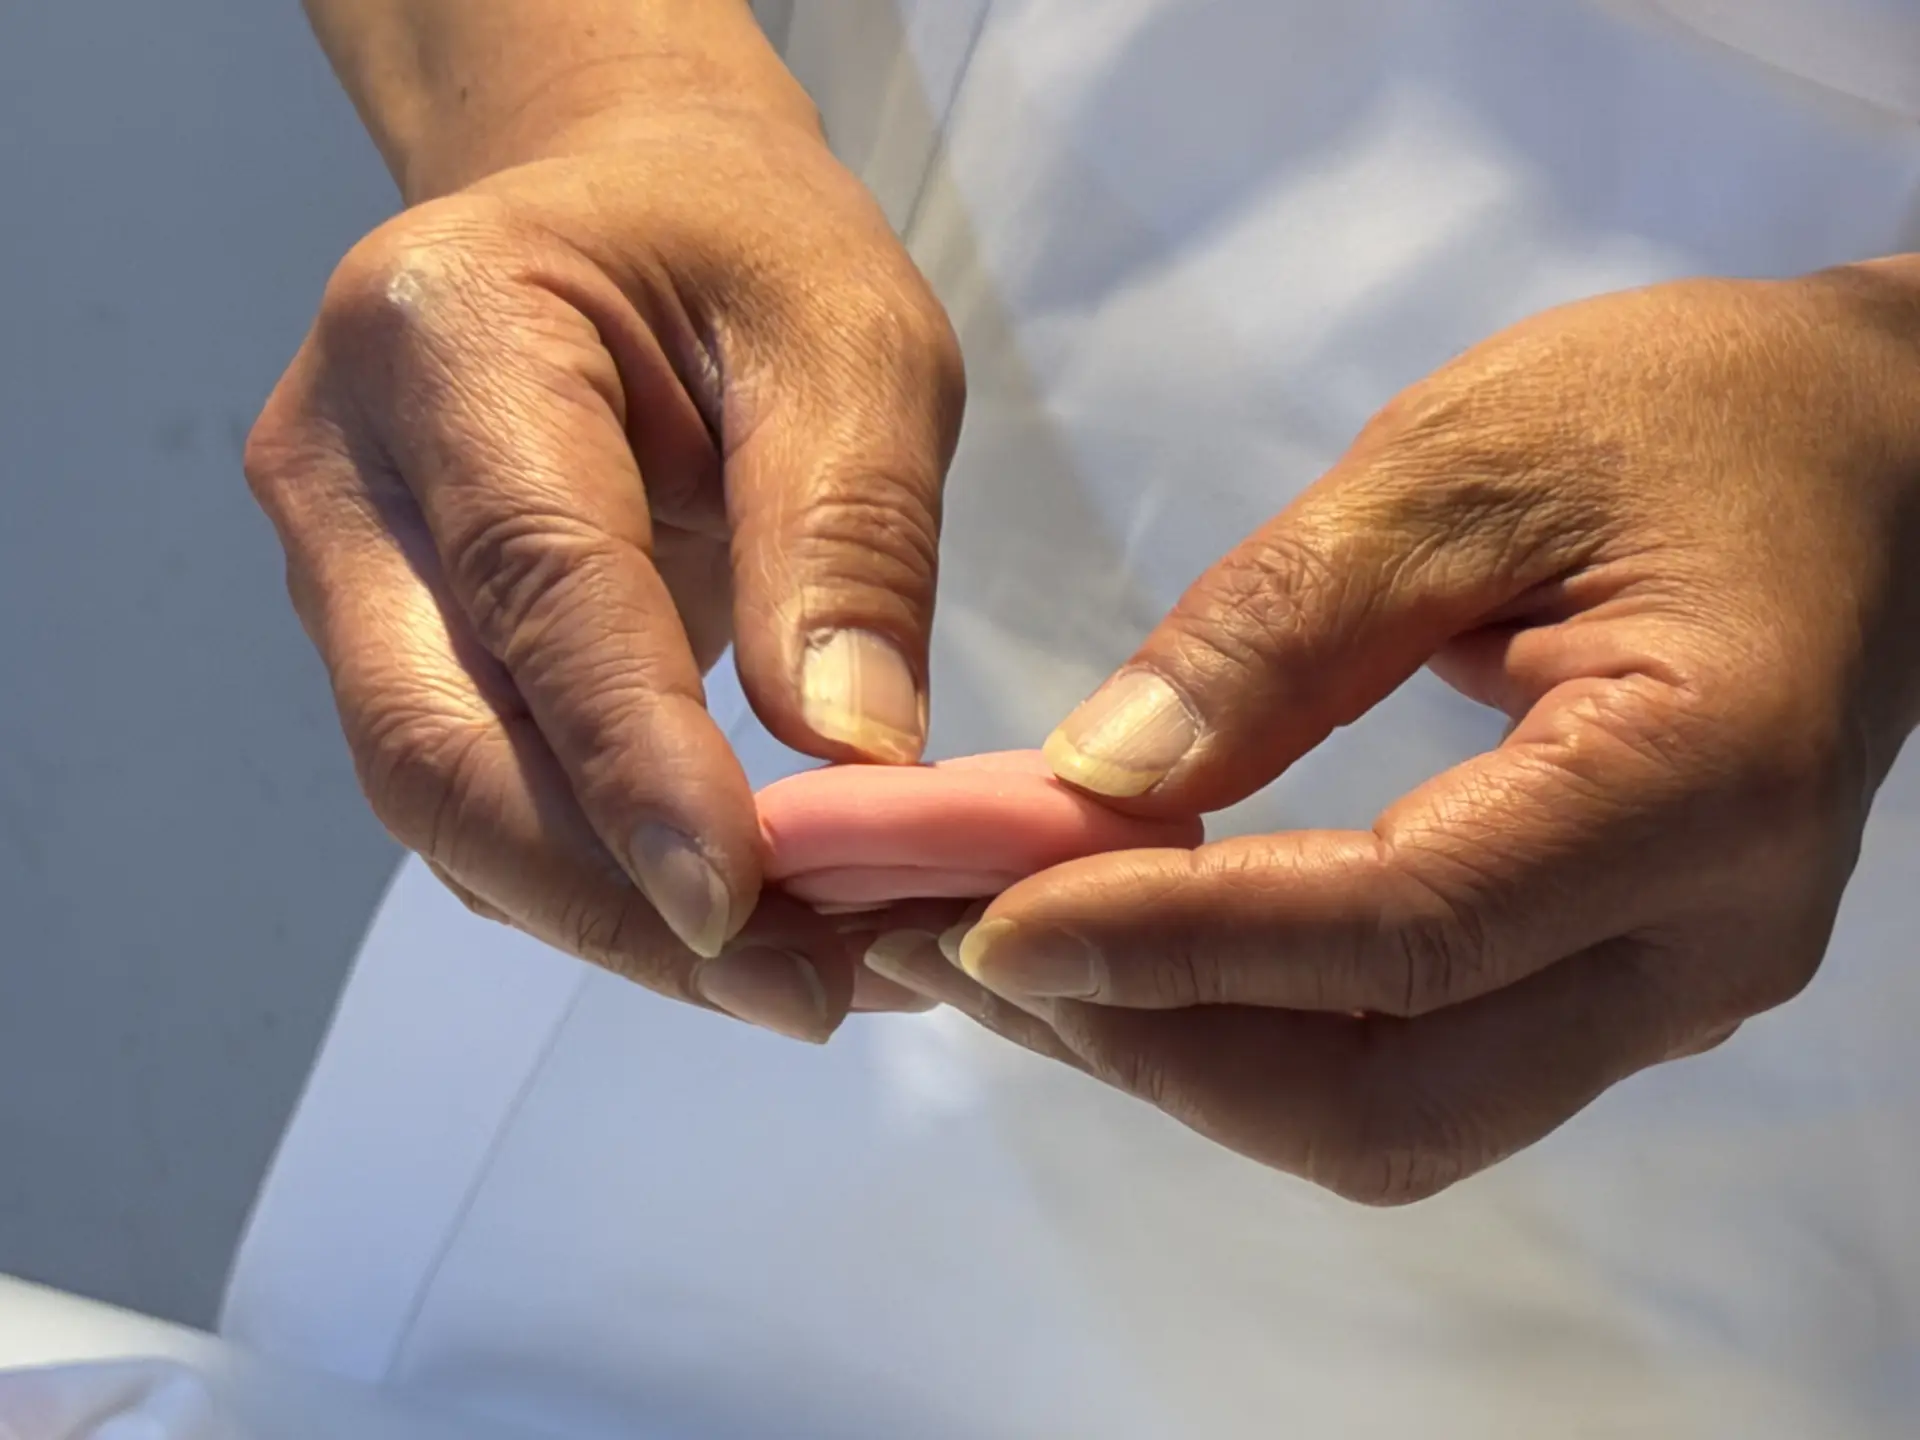
Flatten it to palm size again, then wrap it around smooth azuki bean paste. We were told that wrapping the filling is the very first skill apprentice artisans practice.
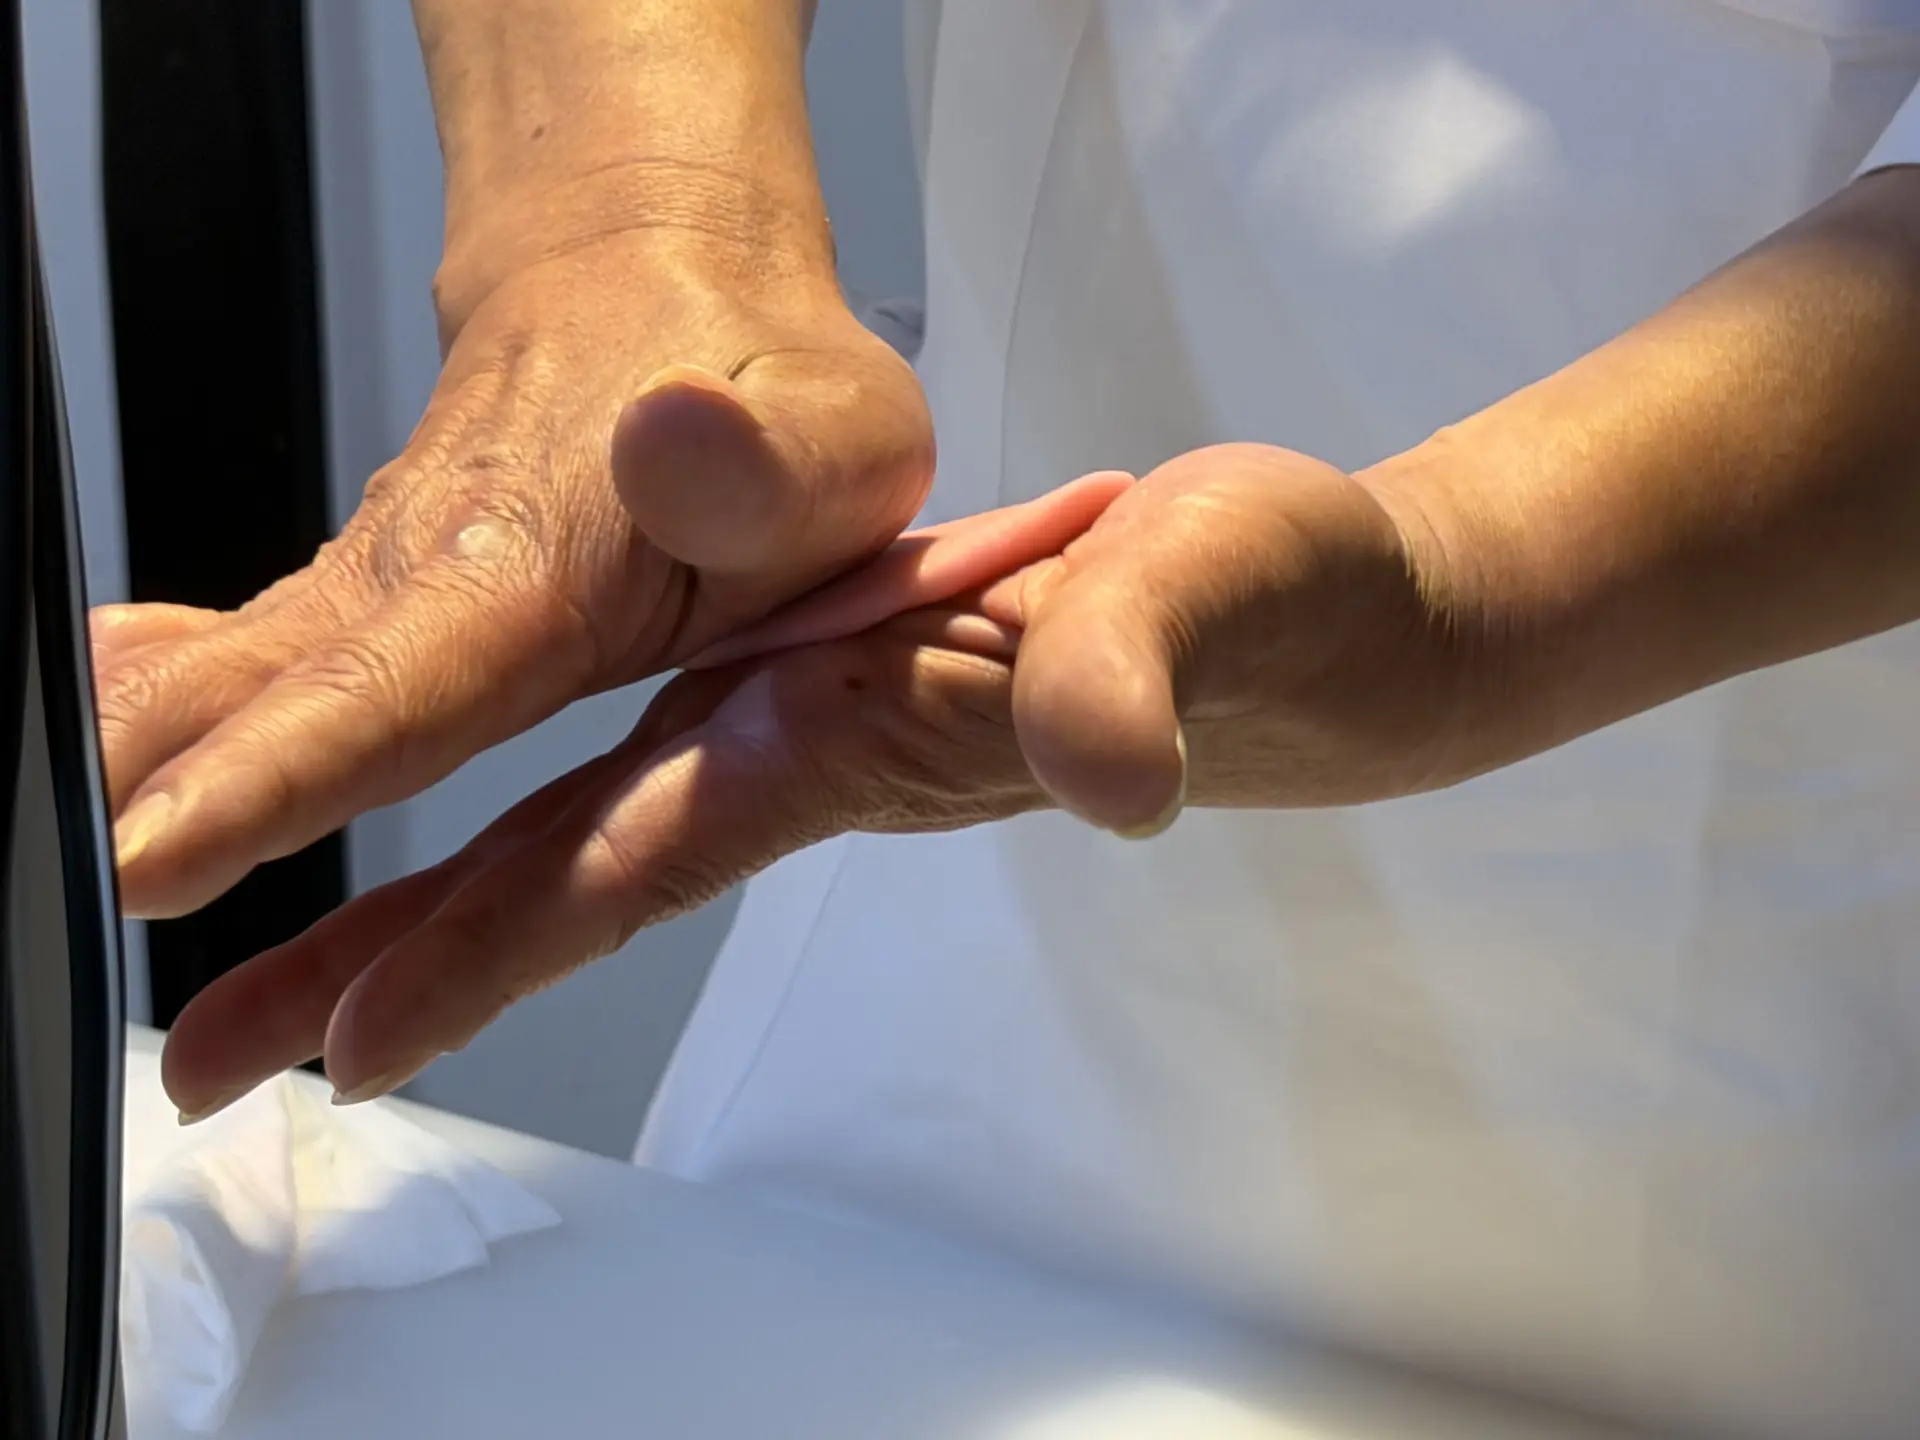
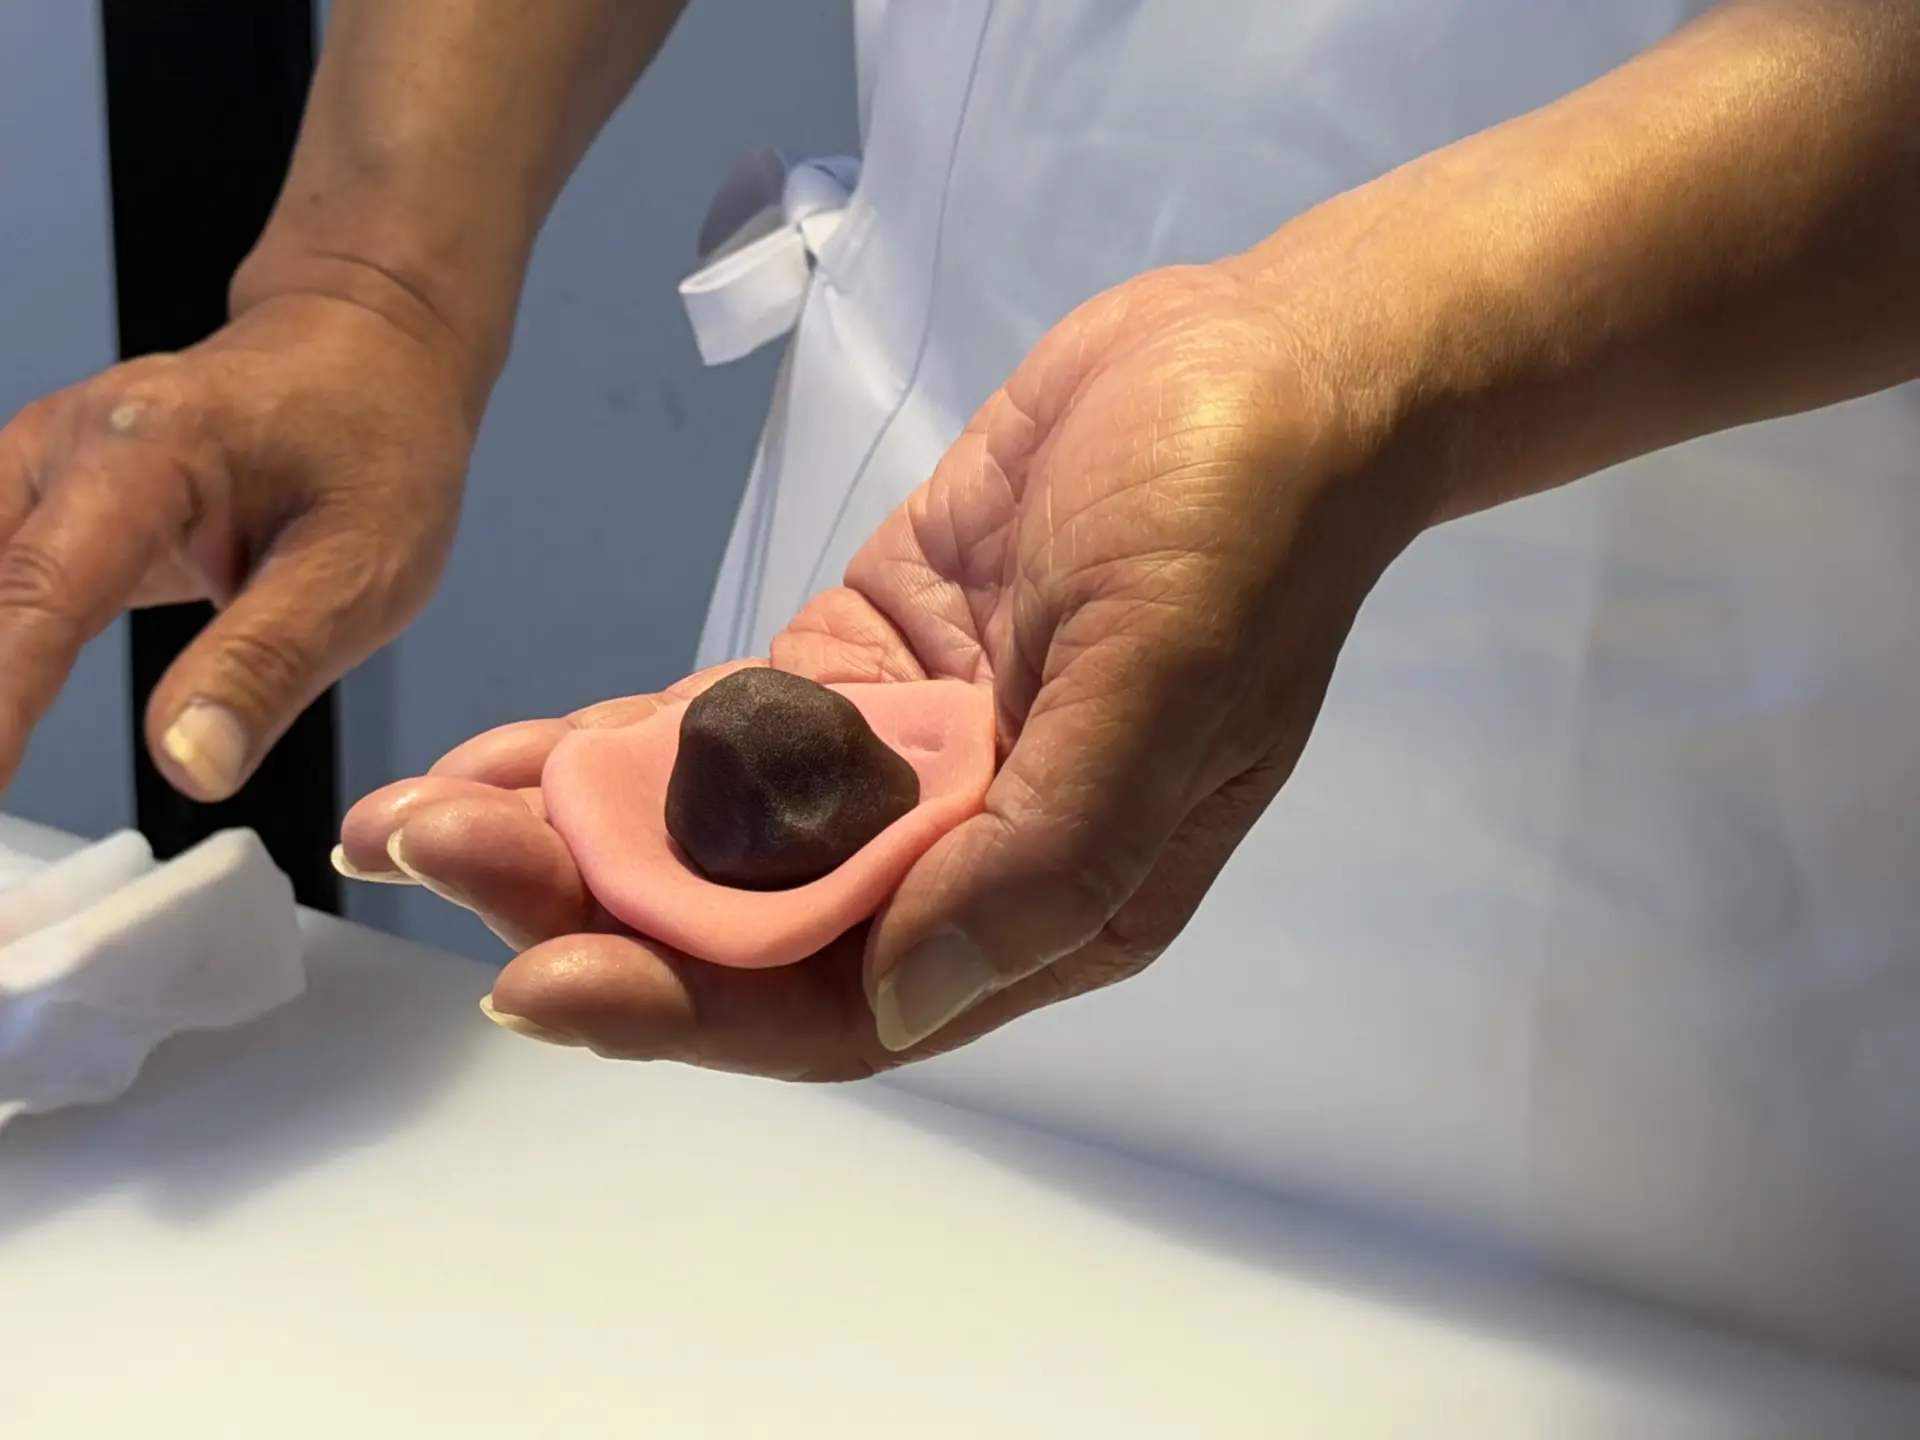
Once the filling is enclosed, roll the sweet in your palms to make it round.
Now it is time to shape it. Press a finger against the sides to make indentations that form the basis of the petals. The key is to hold your finger perpendicular to the paste.
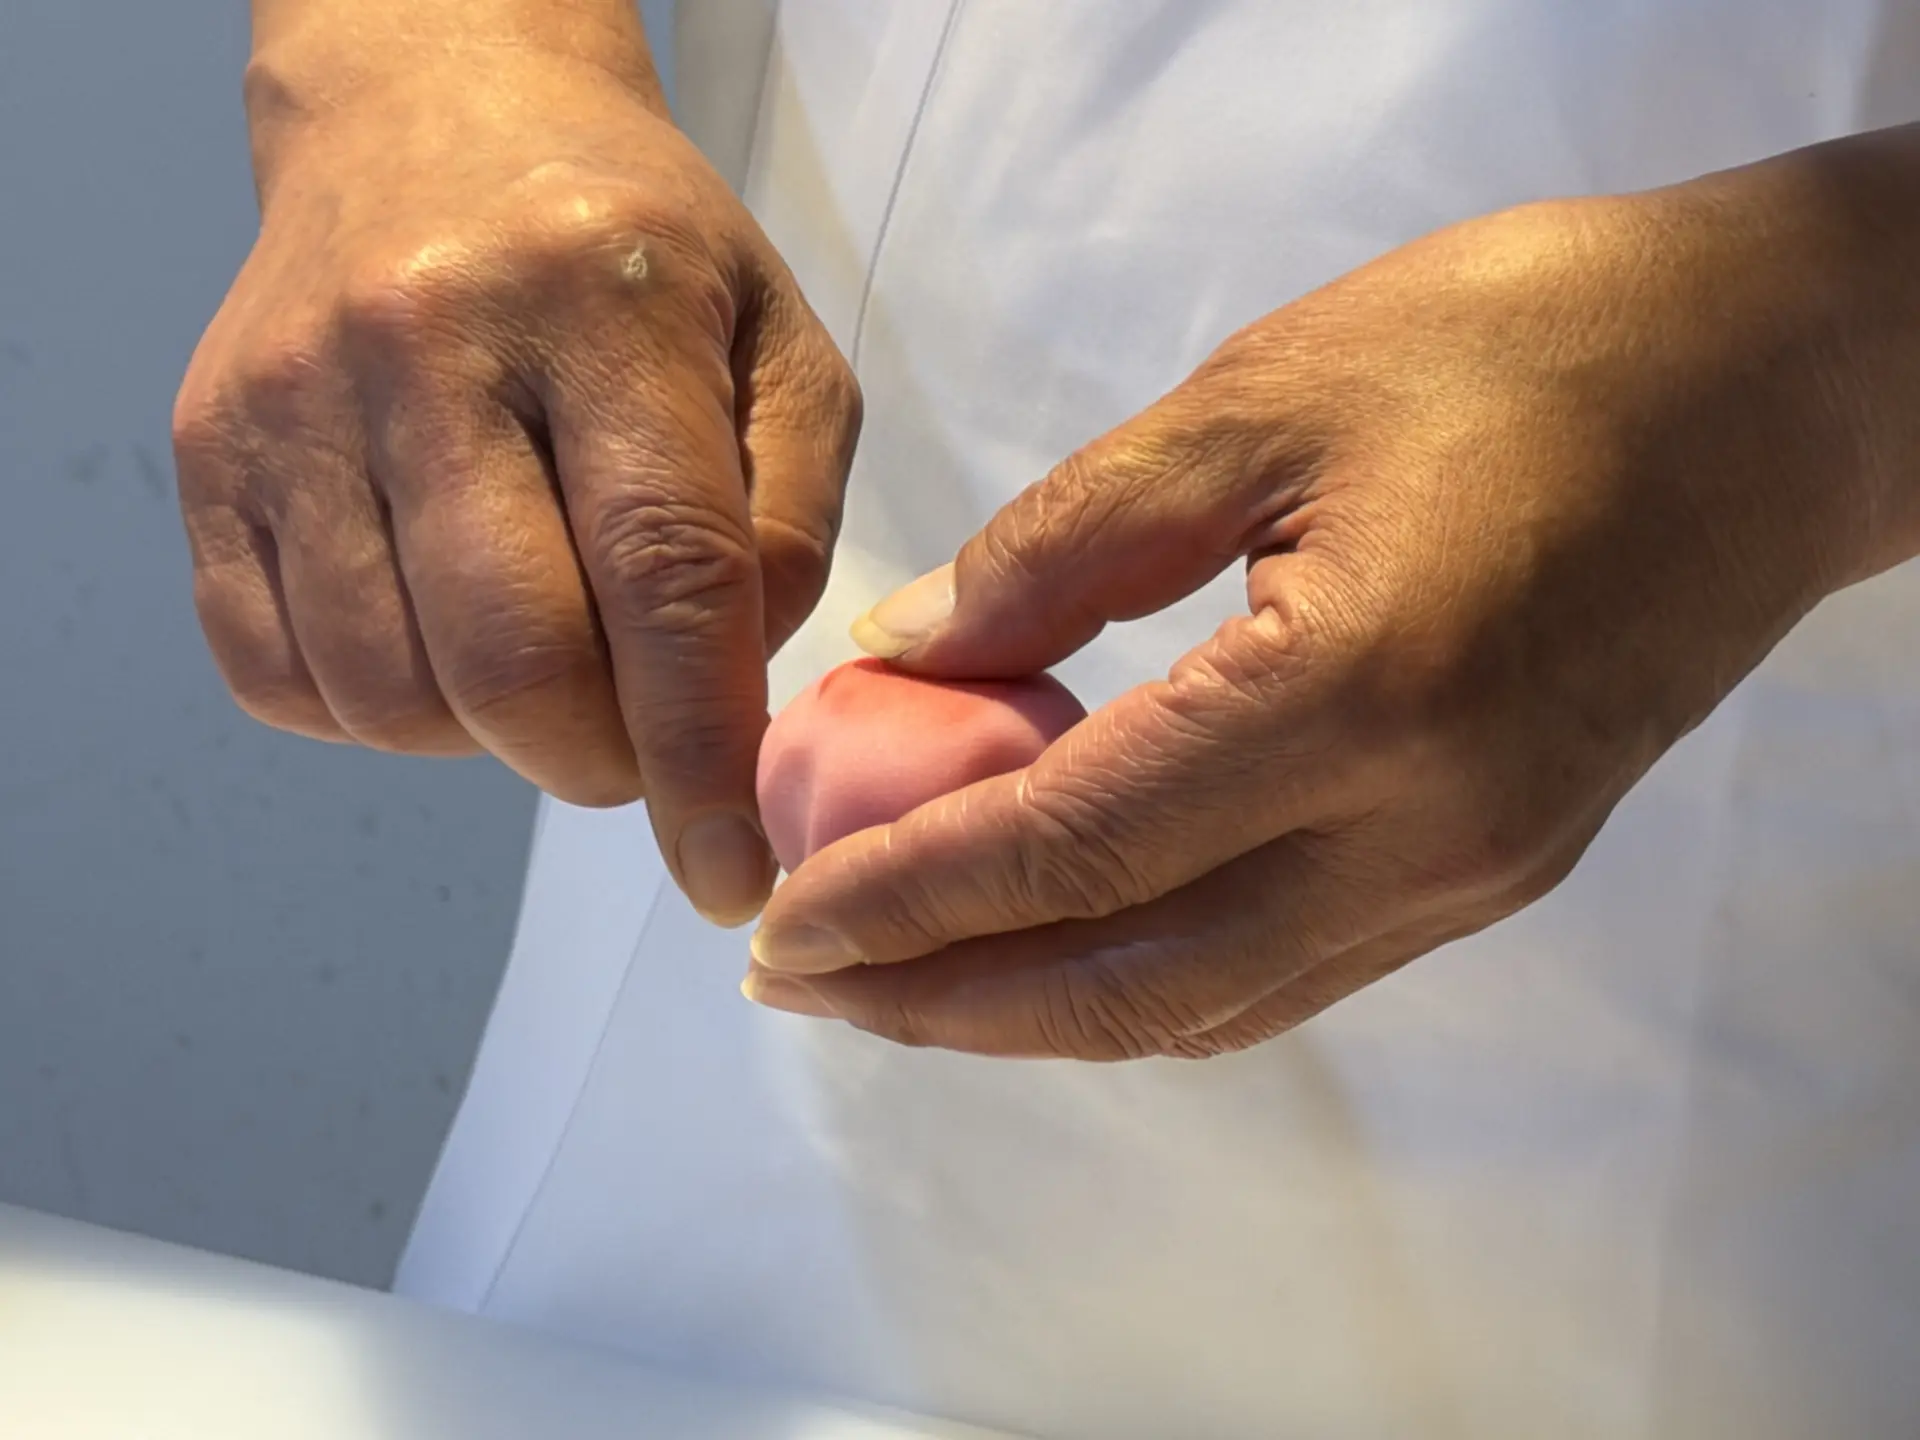
Nakabokashi was harder than expected, and spacing the petals evenly was tricky, too. It did not look quite as we had imagined…but it did take on a petal-like shape.
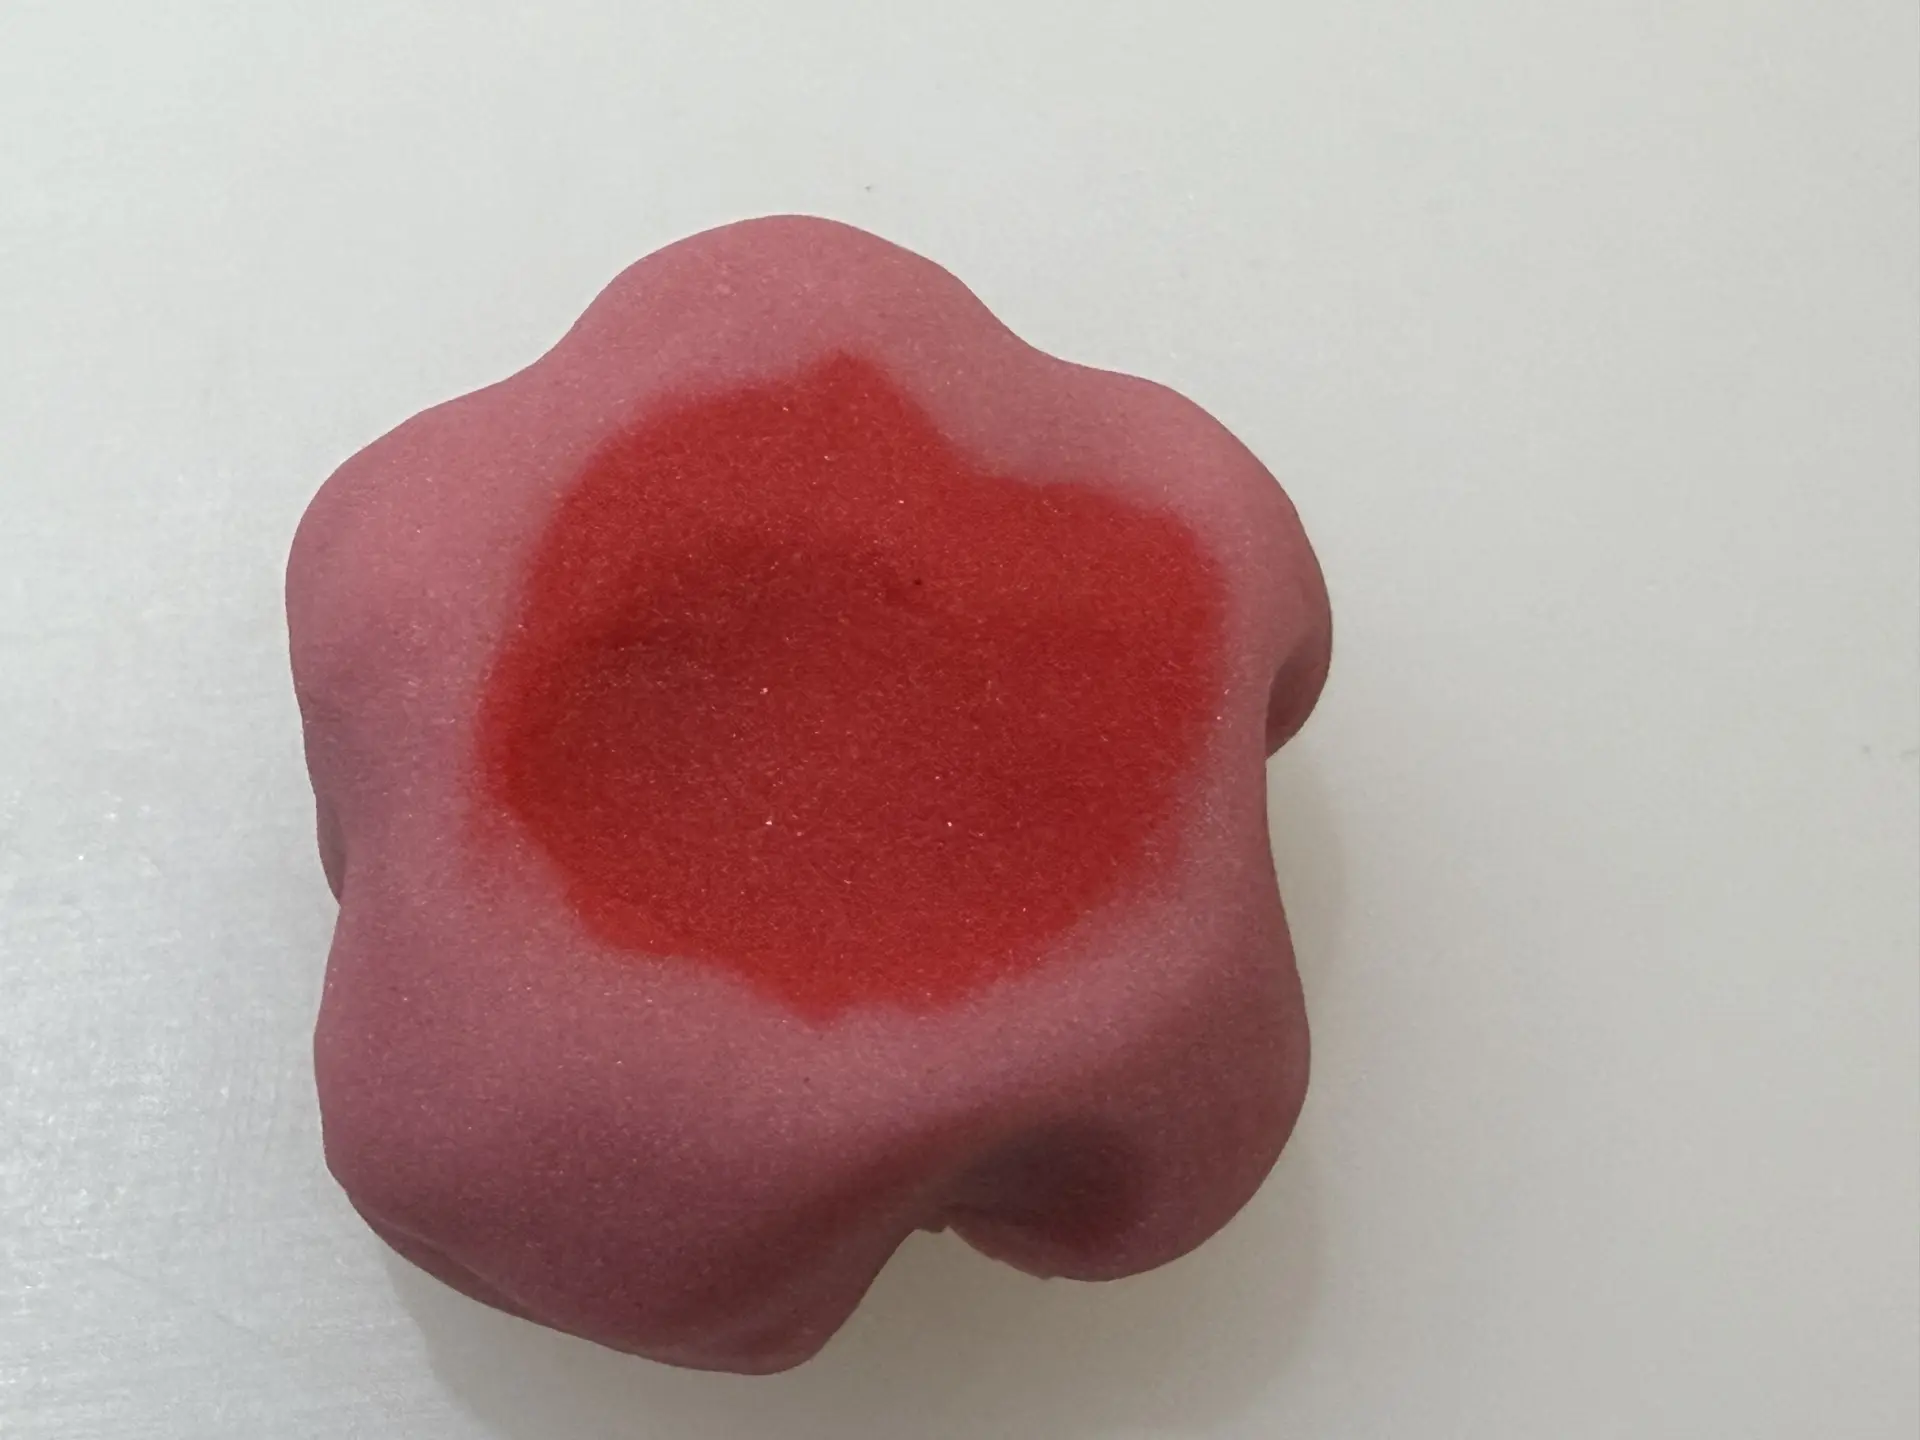
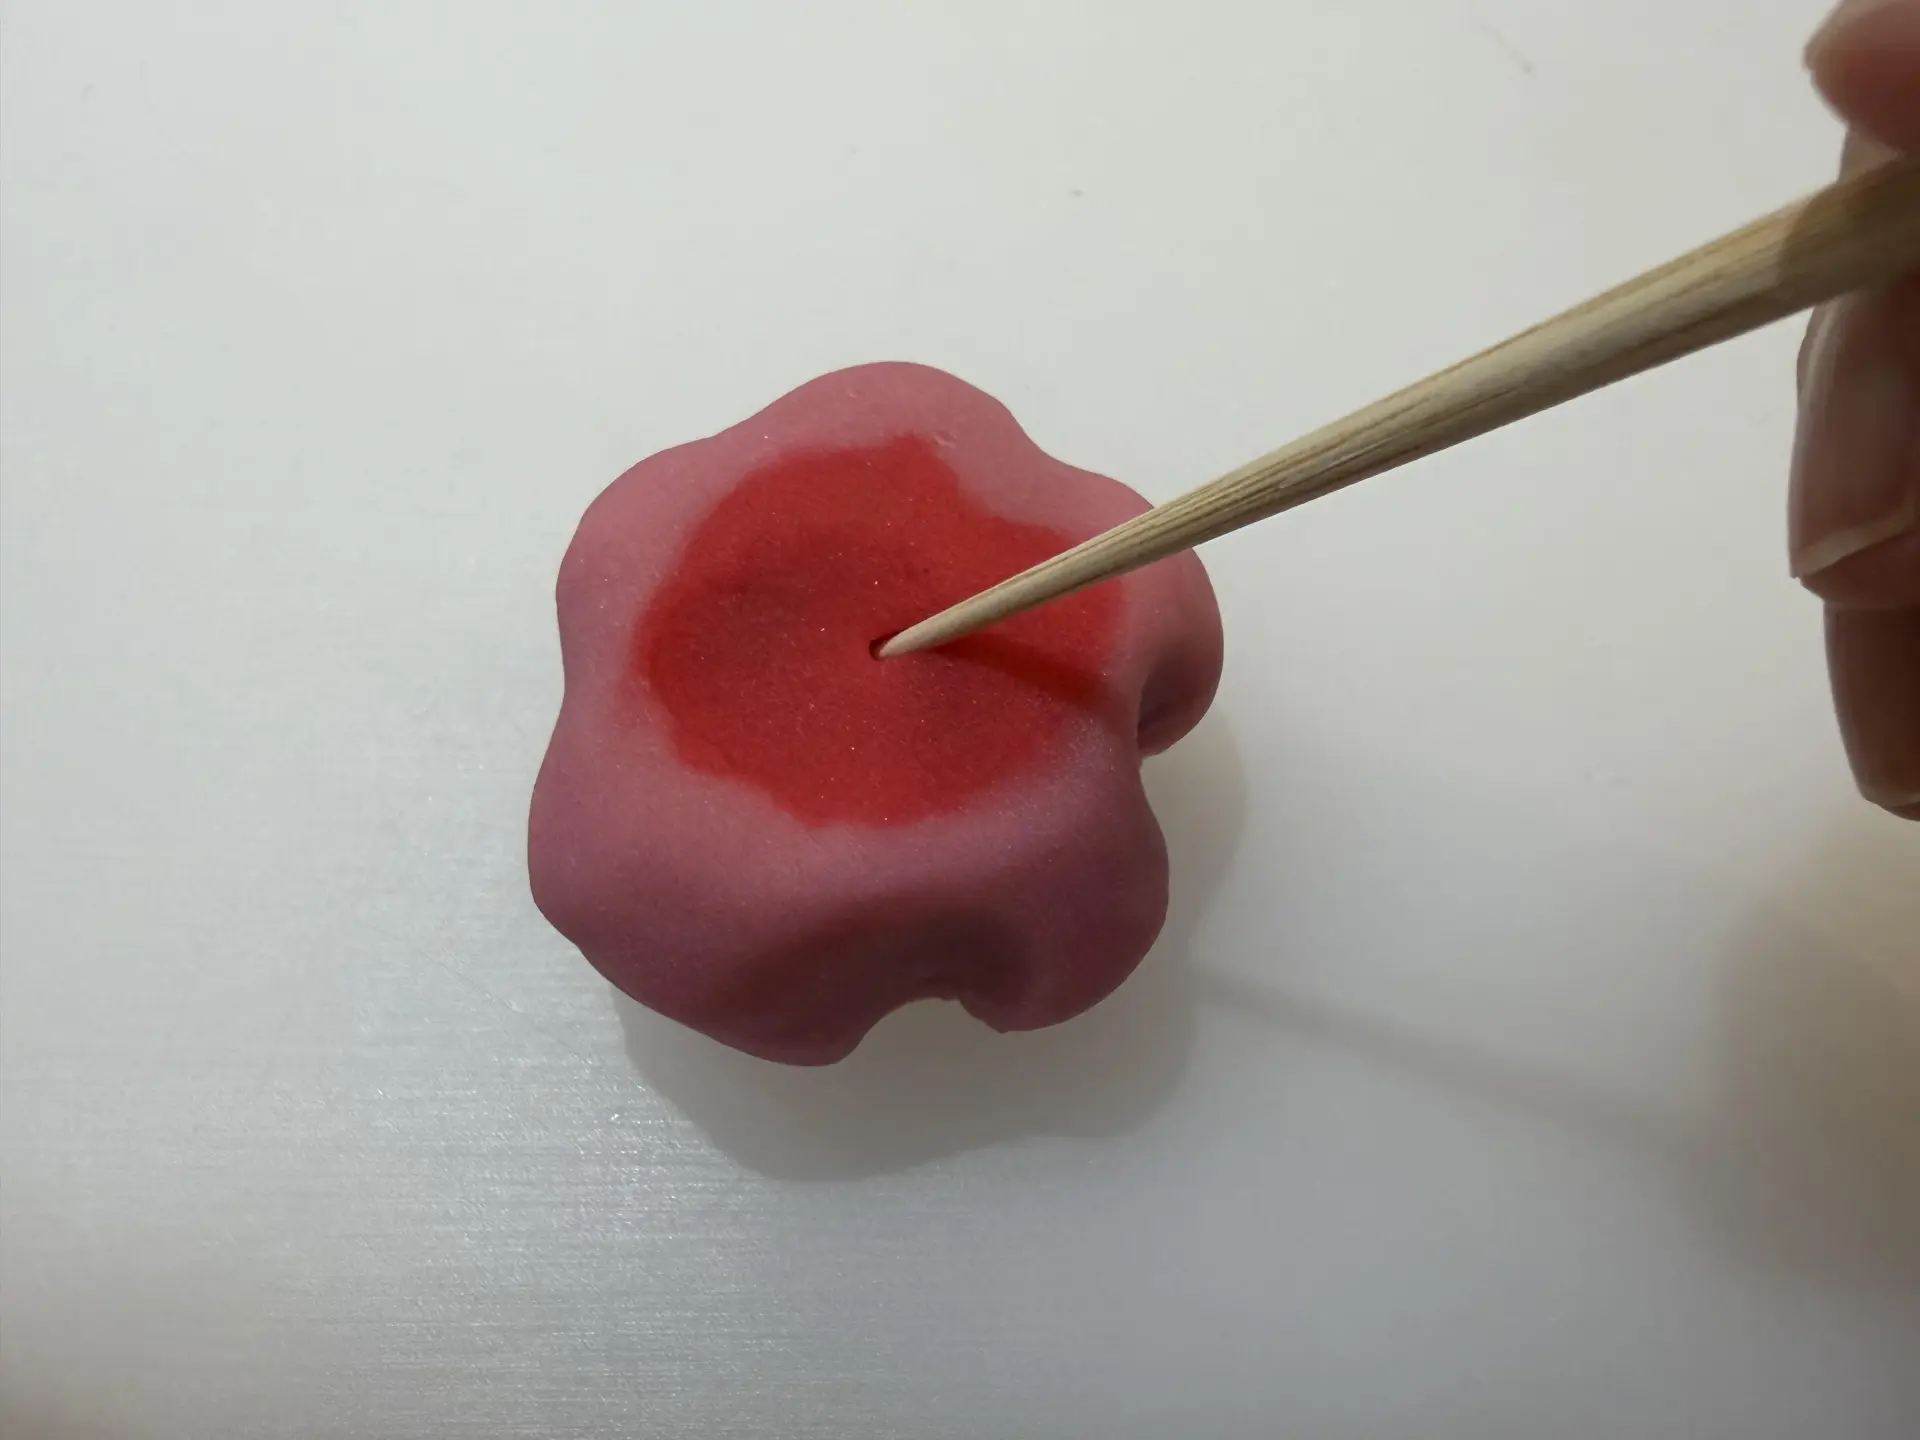
Next, use a bamboo skewer to mark the center.
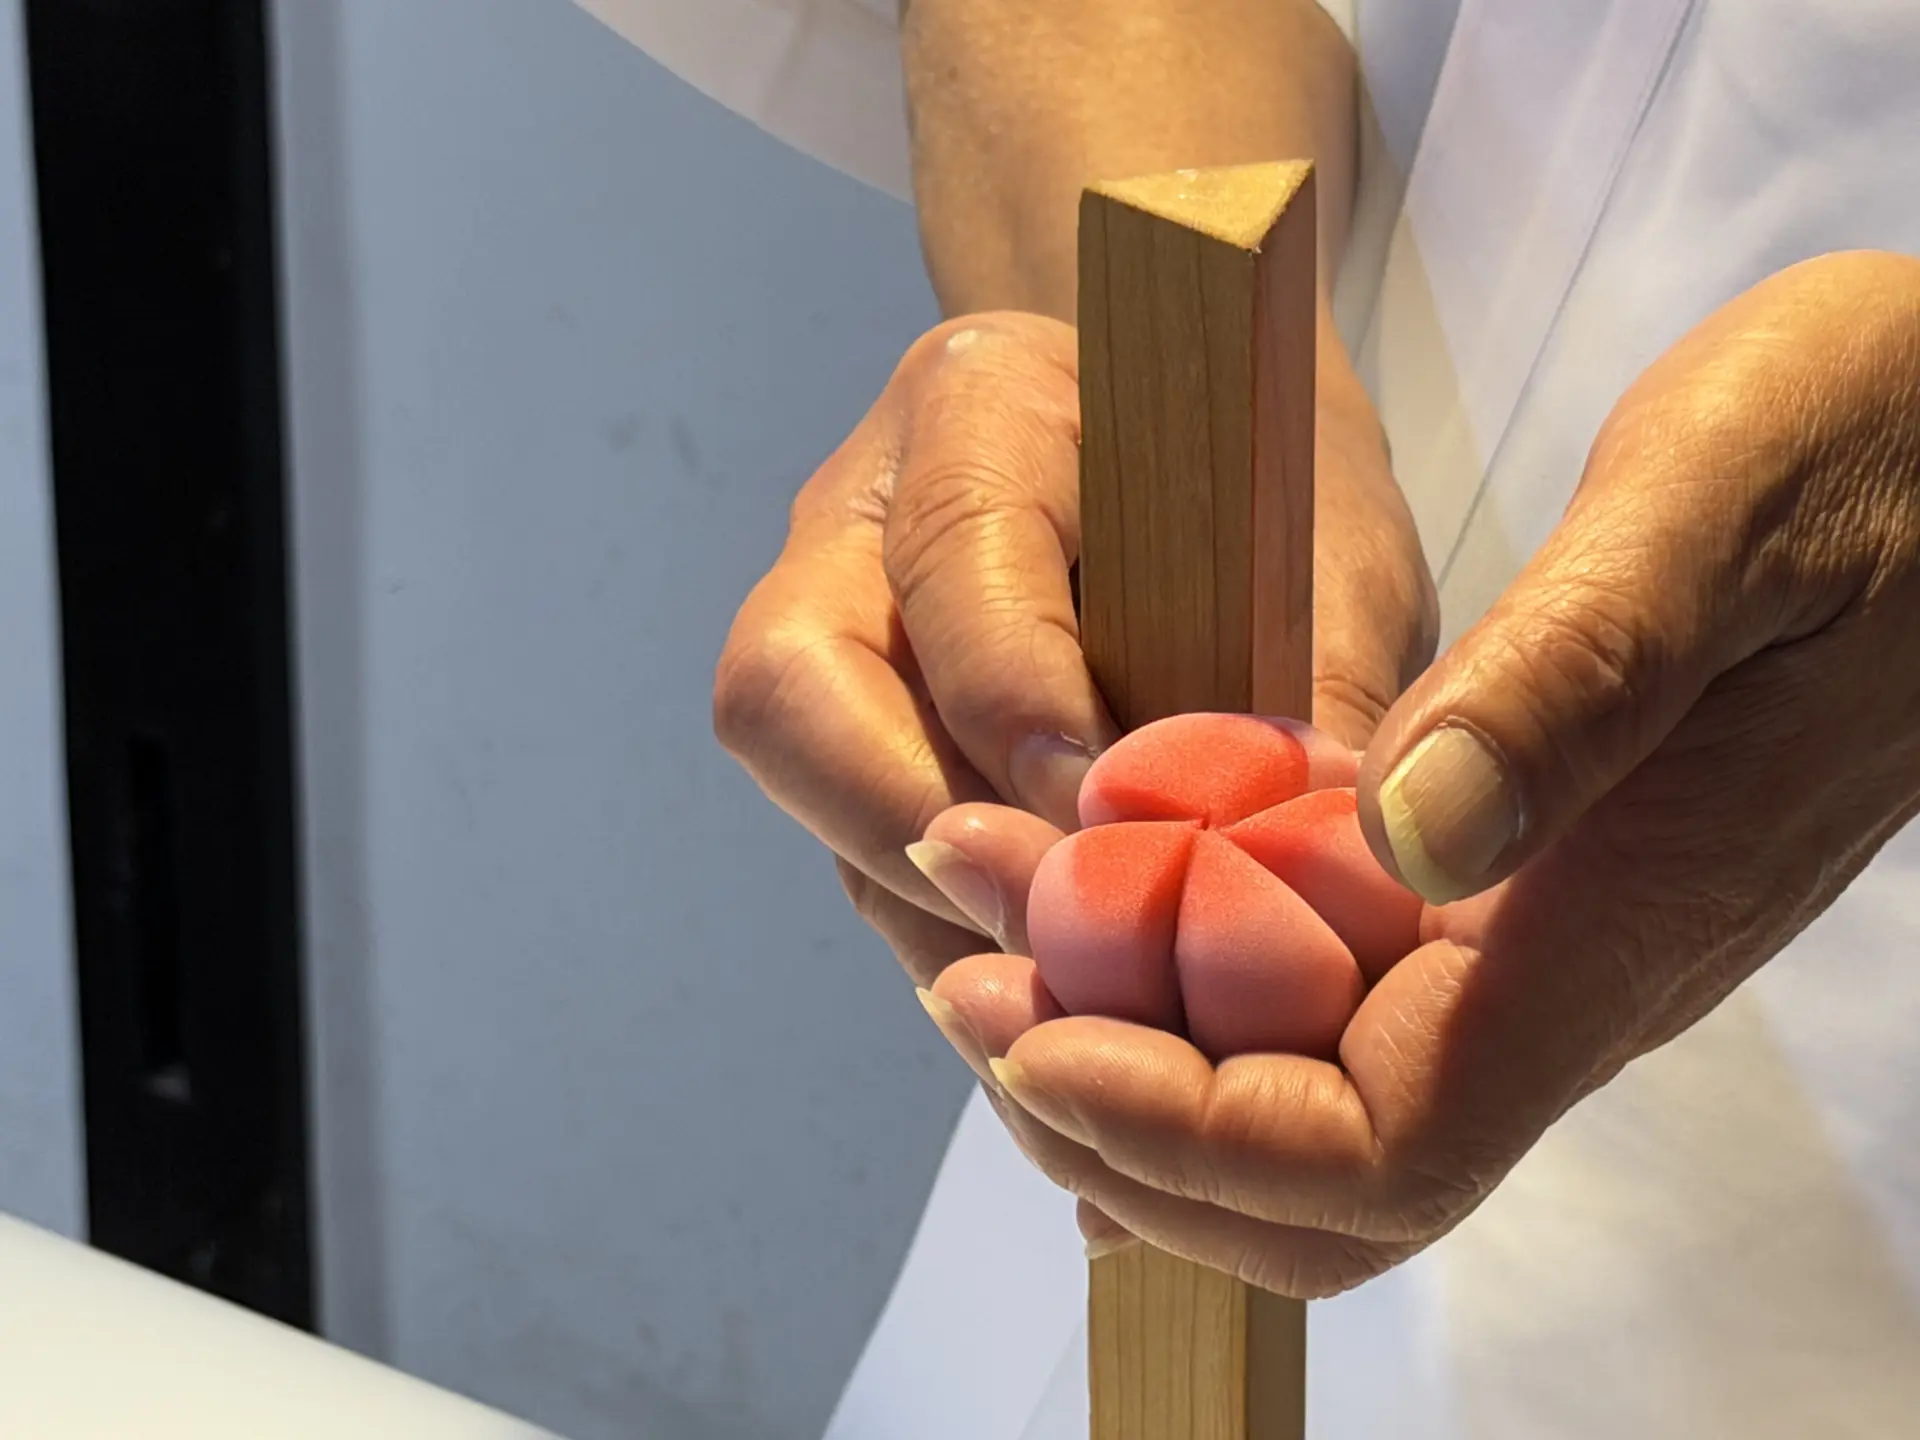
Place a wagashi-making tool called a triangular spatula against each indentation, then press a groove toward the center mark.
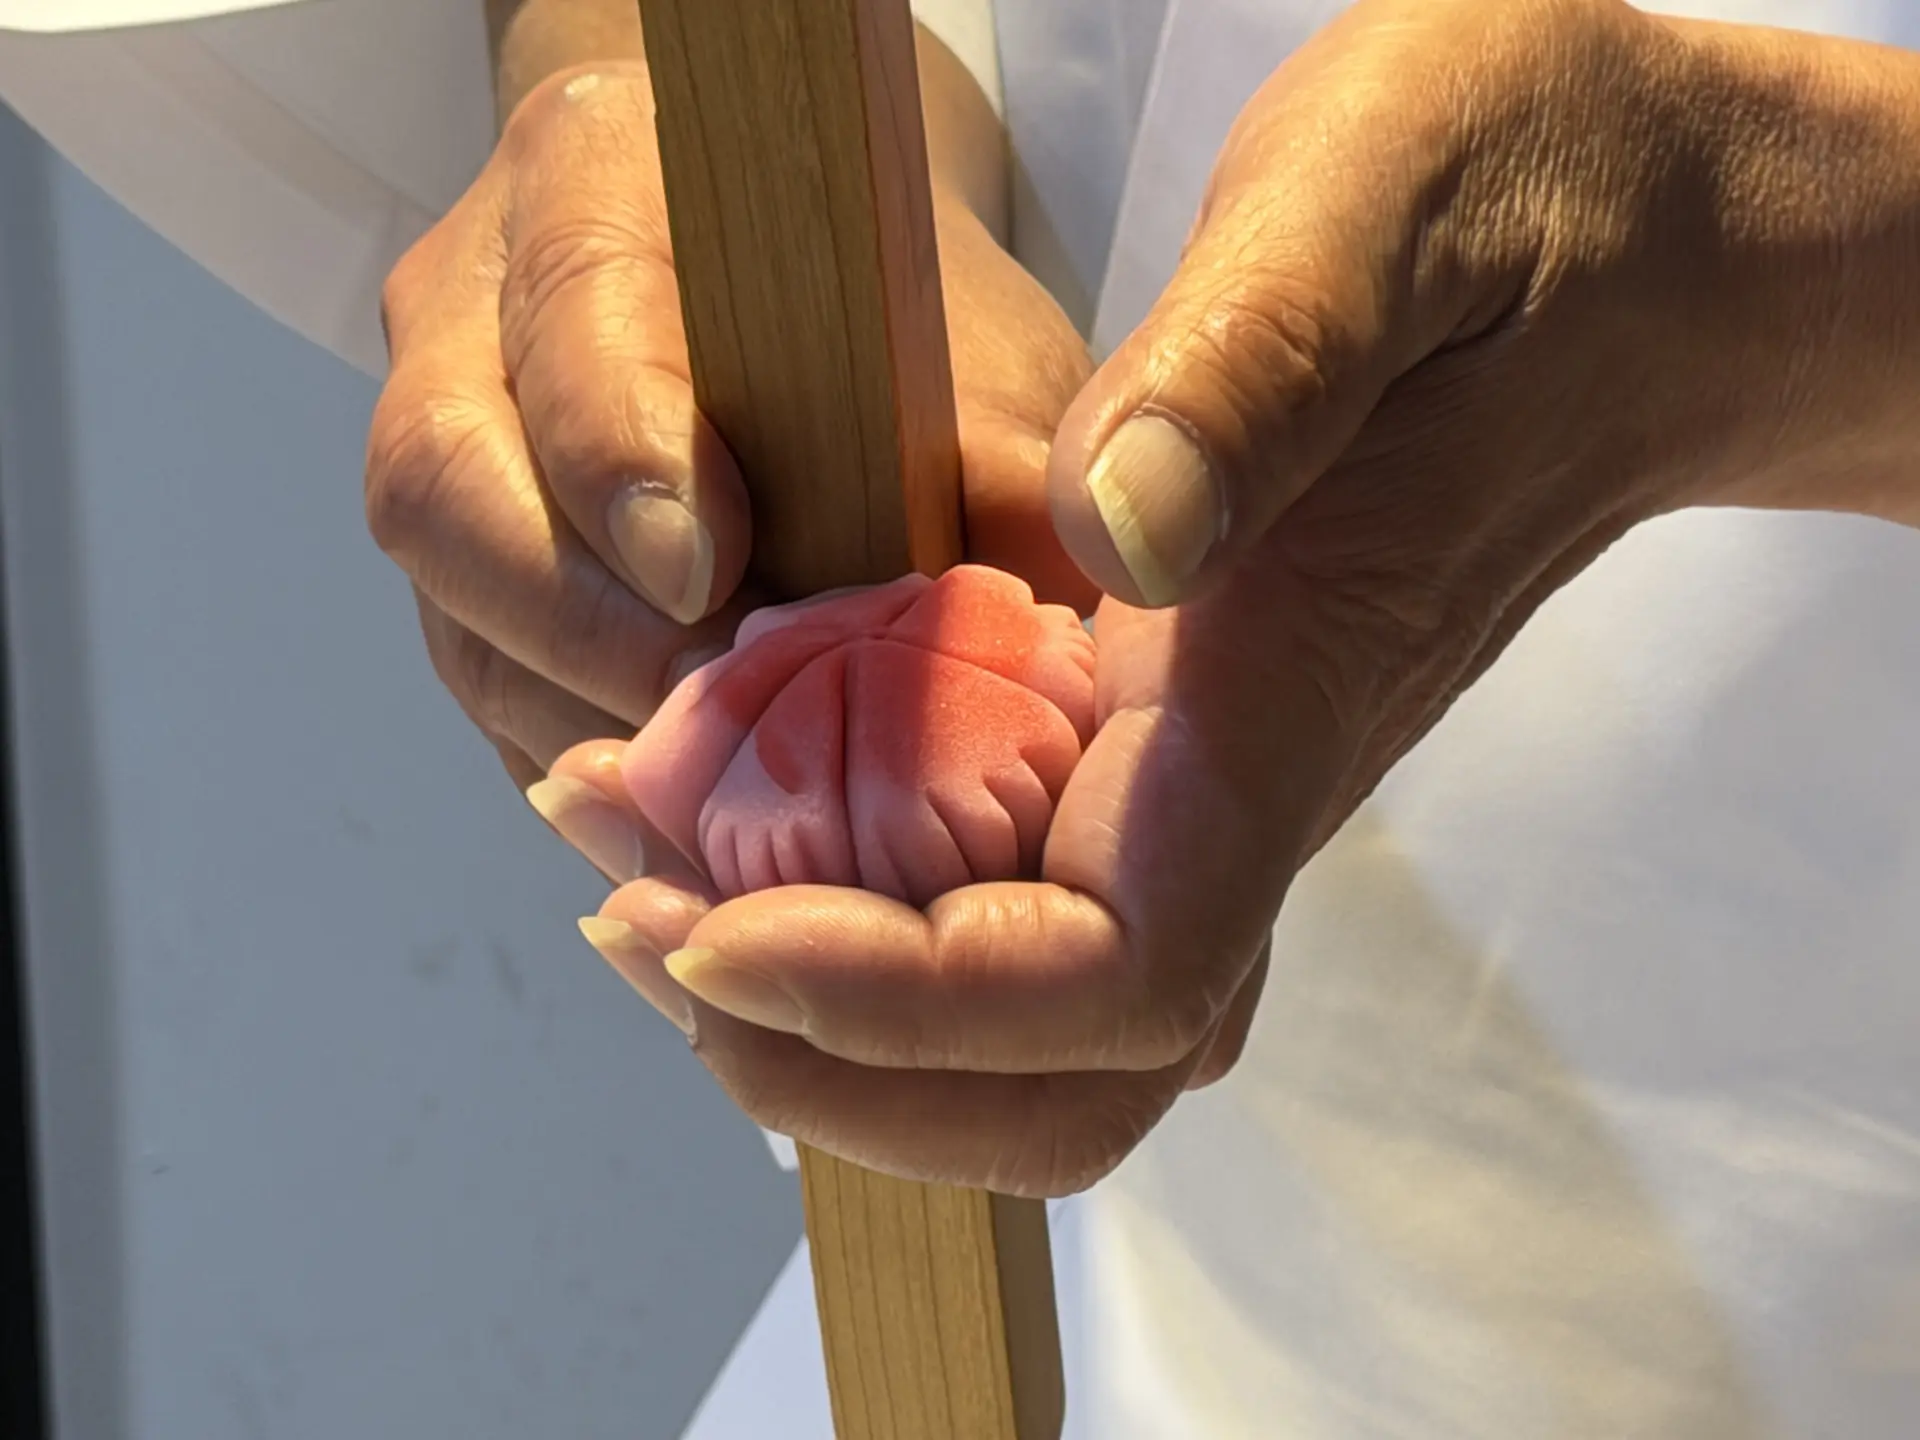
The key is to tilt the triangular spatula down as you press. The artisan also showed us how to hold the tool.
Next, use the spatula to add the characteristic jagged edges of a dianthus flower to each petal.
Finally, make the pistil using a sieve made with horsehair. Place the yellow paste on top and press firmly with your fingertips. The paste emerges through the sieve looking remarkably like the center of a flower.
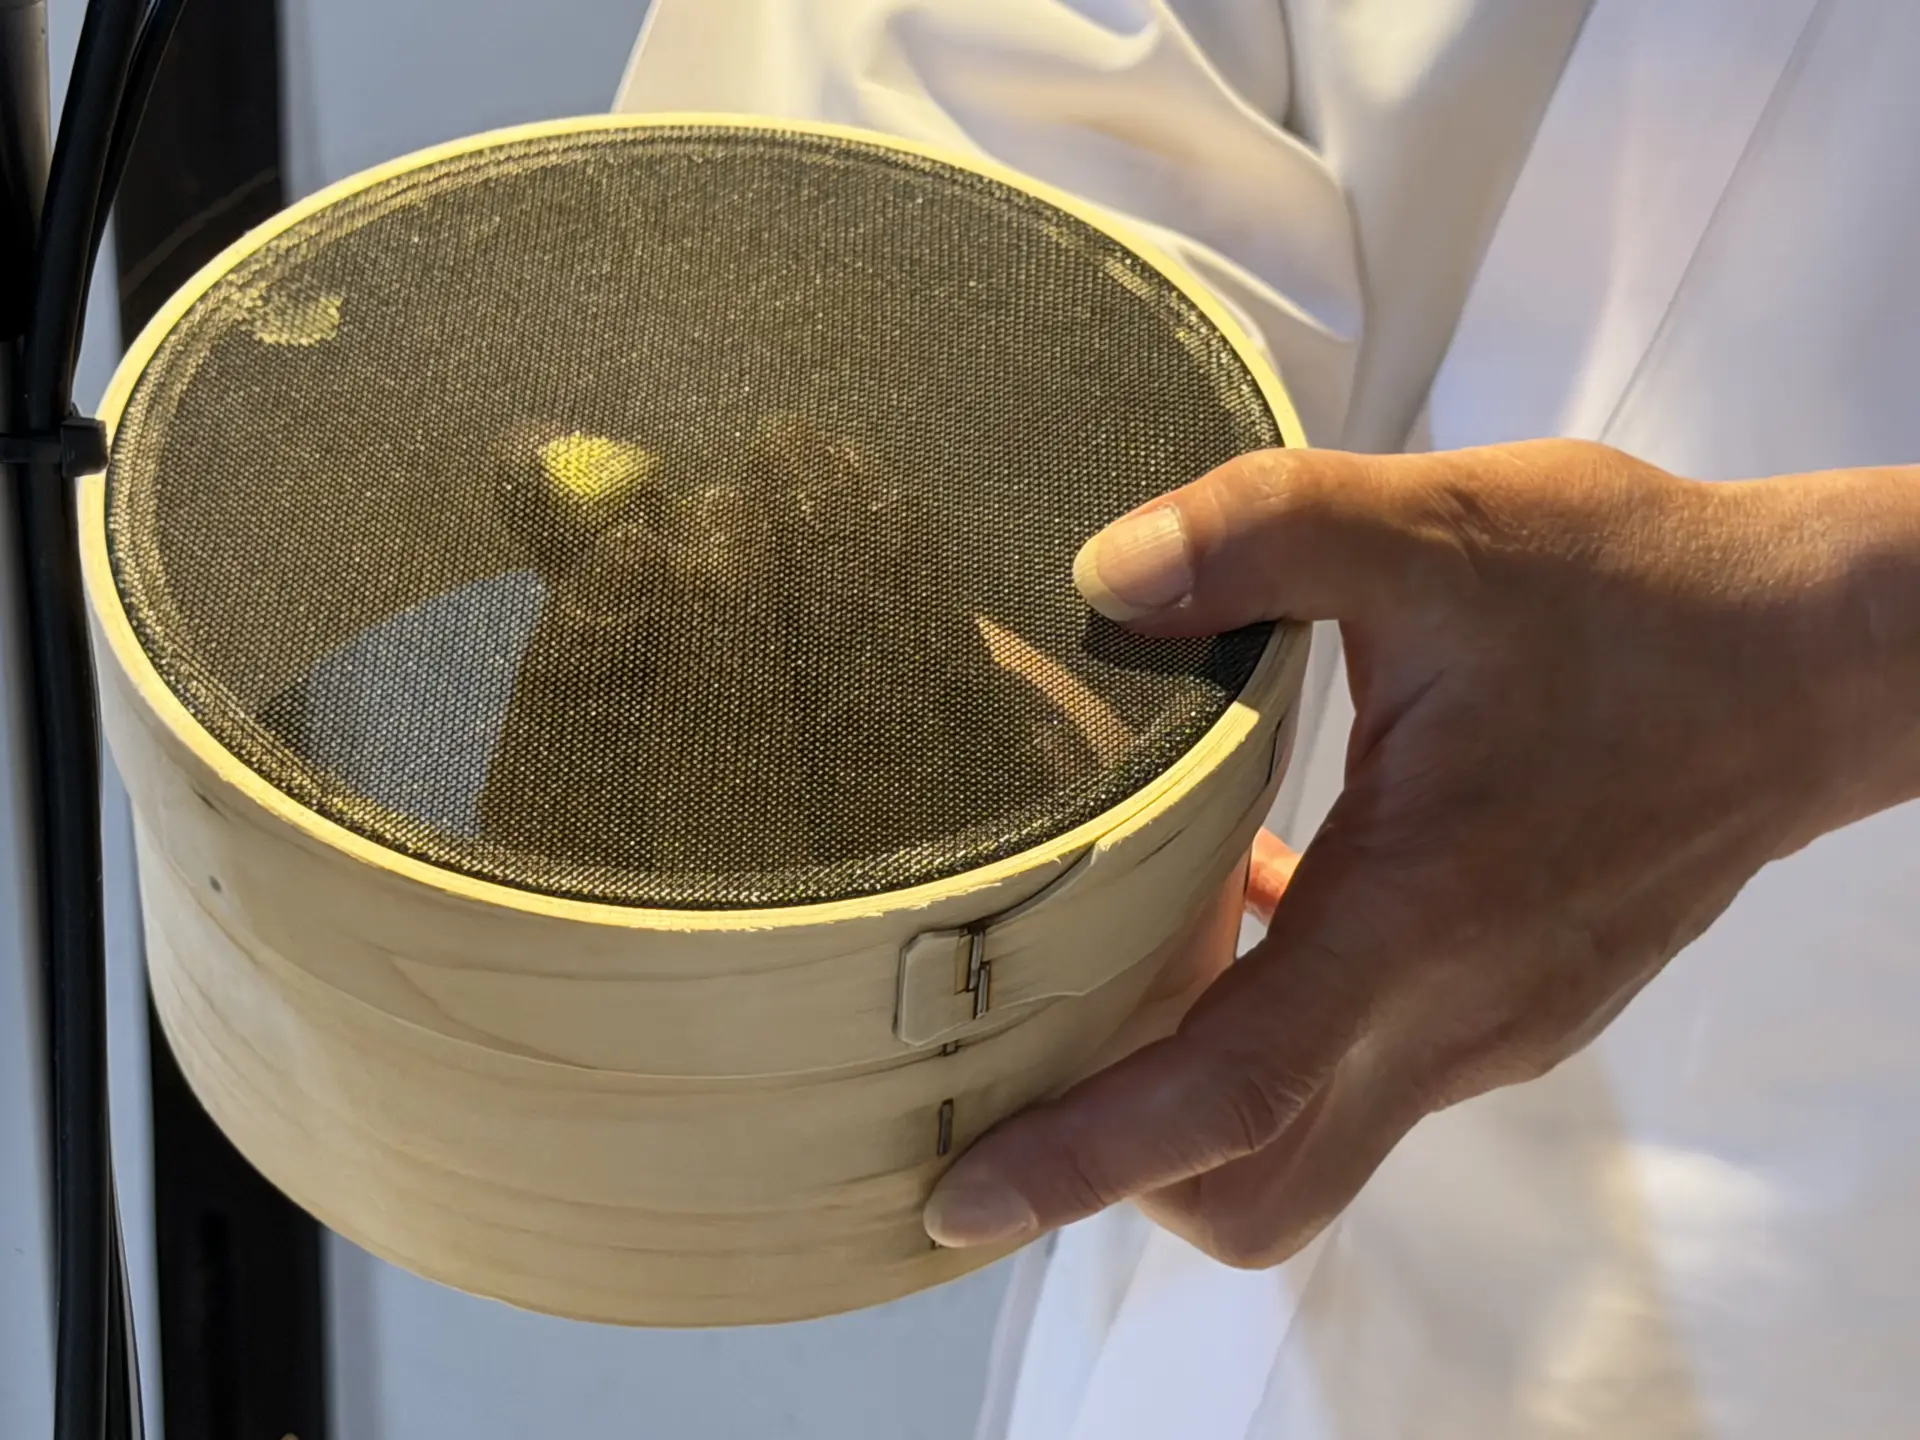
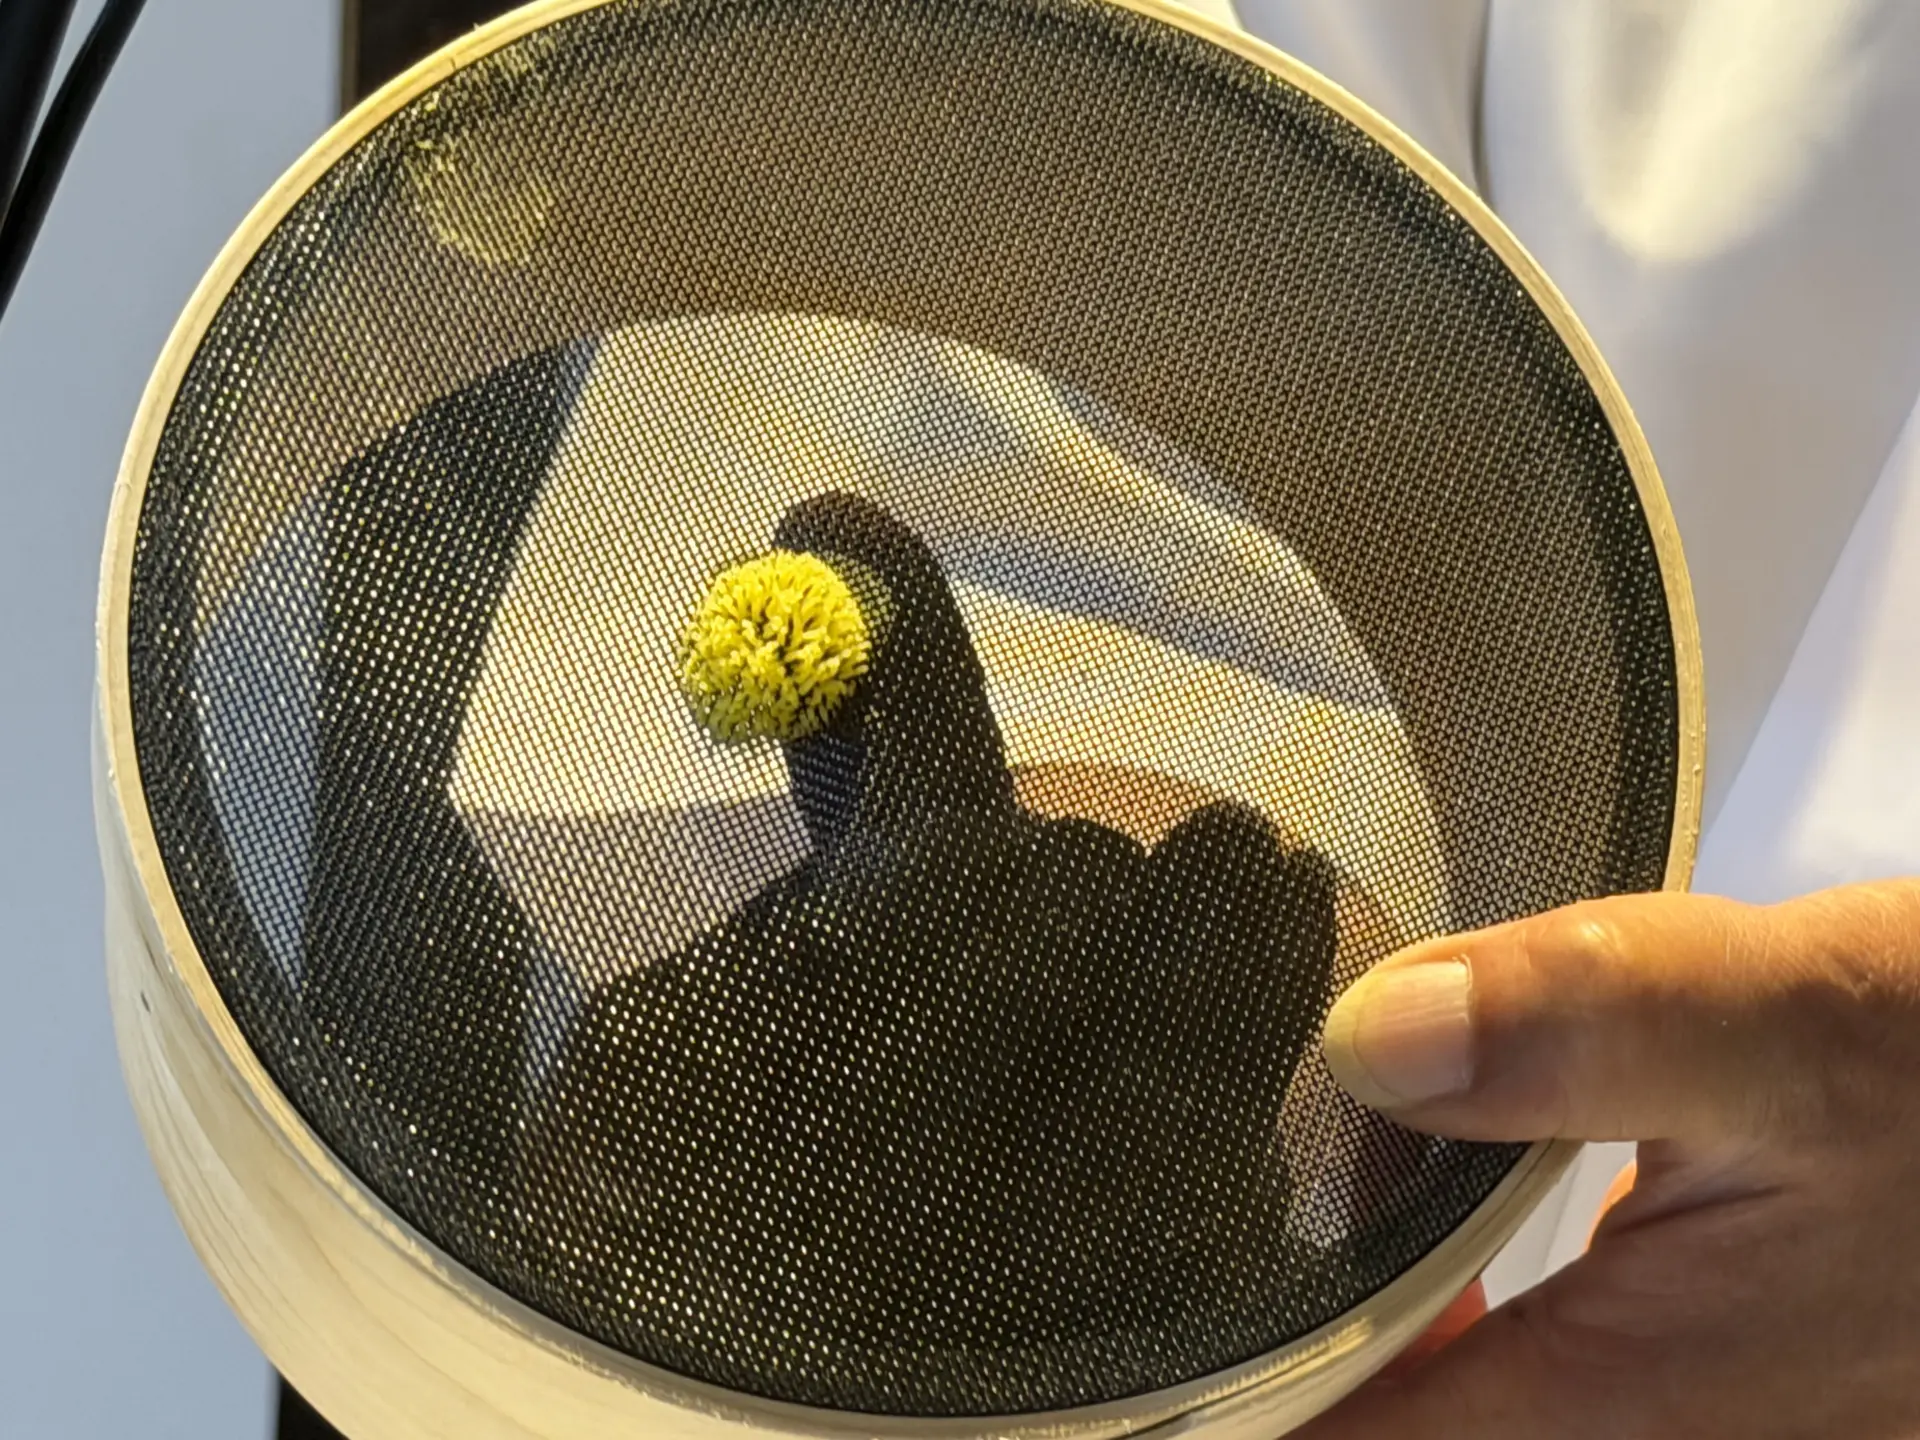
Gently place the pistil on top of the flower with chopsticks, and it is finished.
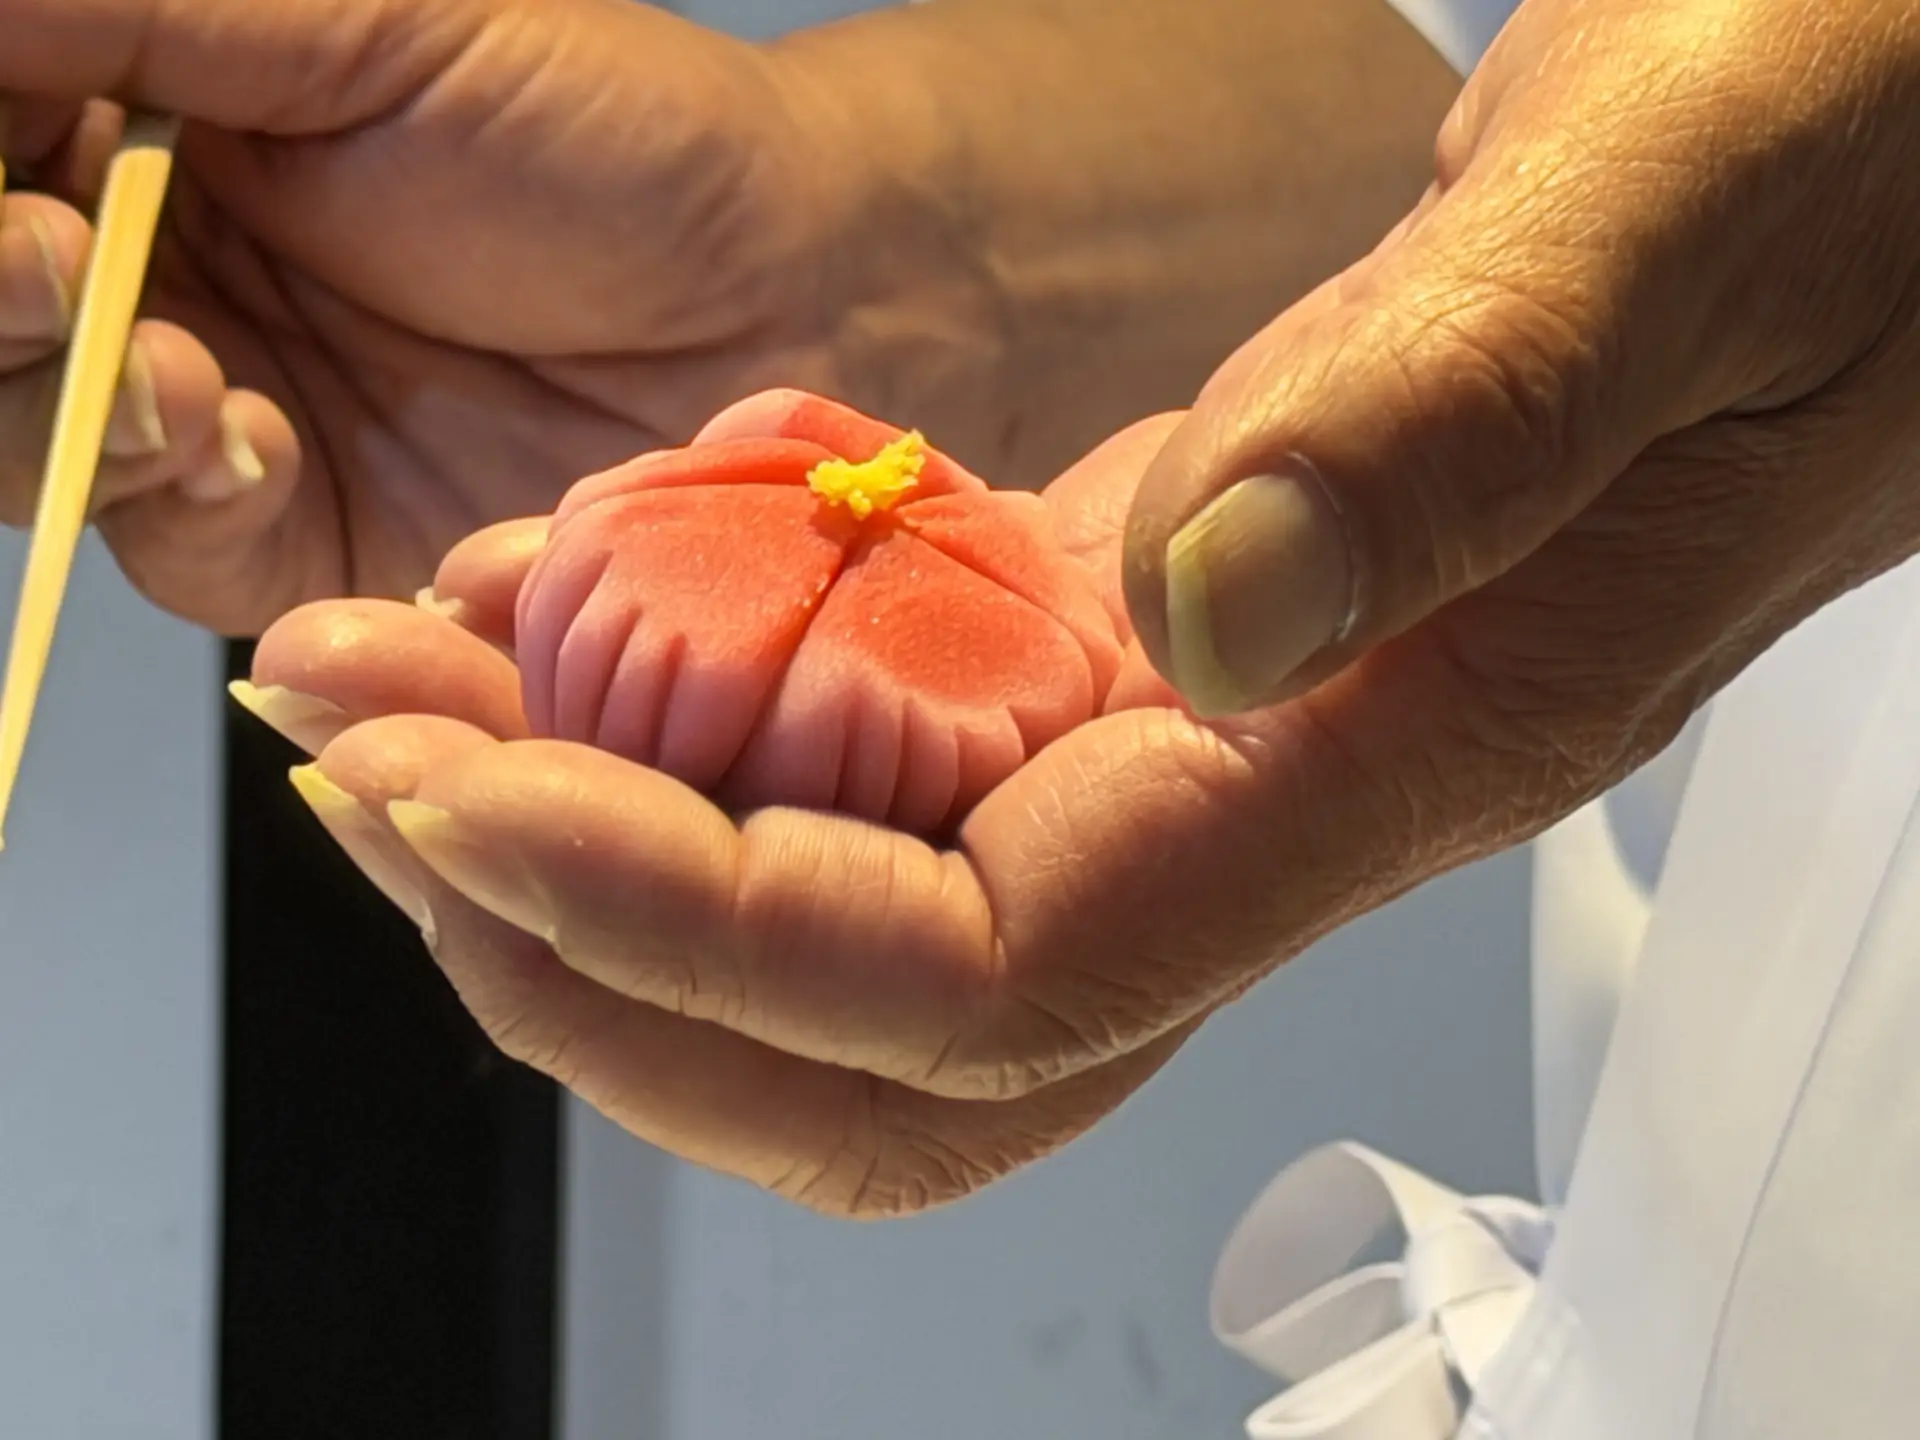
In other seasons, nerikiri designs include peonies, balloon flowers, plum blossoms, sasanqua camellias, wild chrysanthemums, and autumn maple leaves.
(6) Make a Fine Fresh Sweet: Kinton
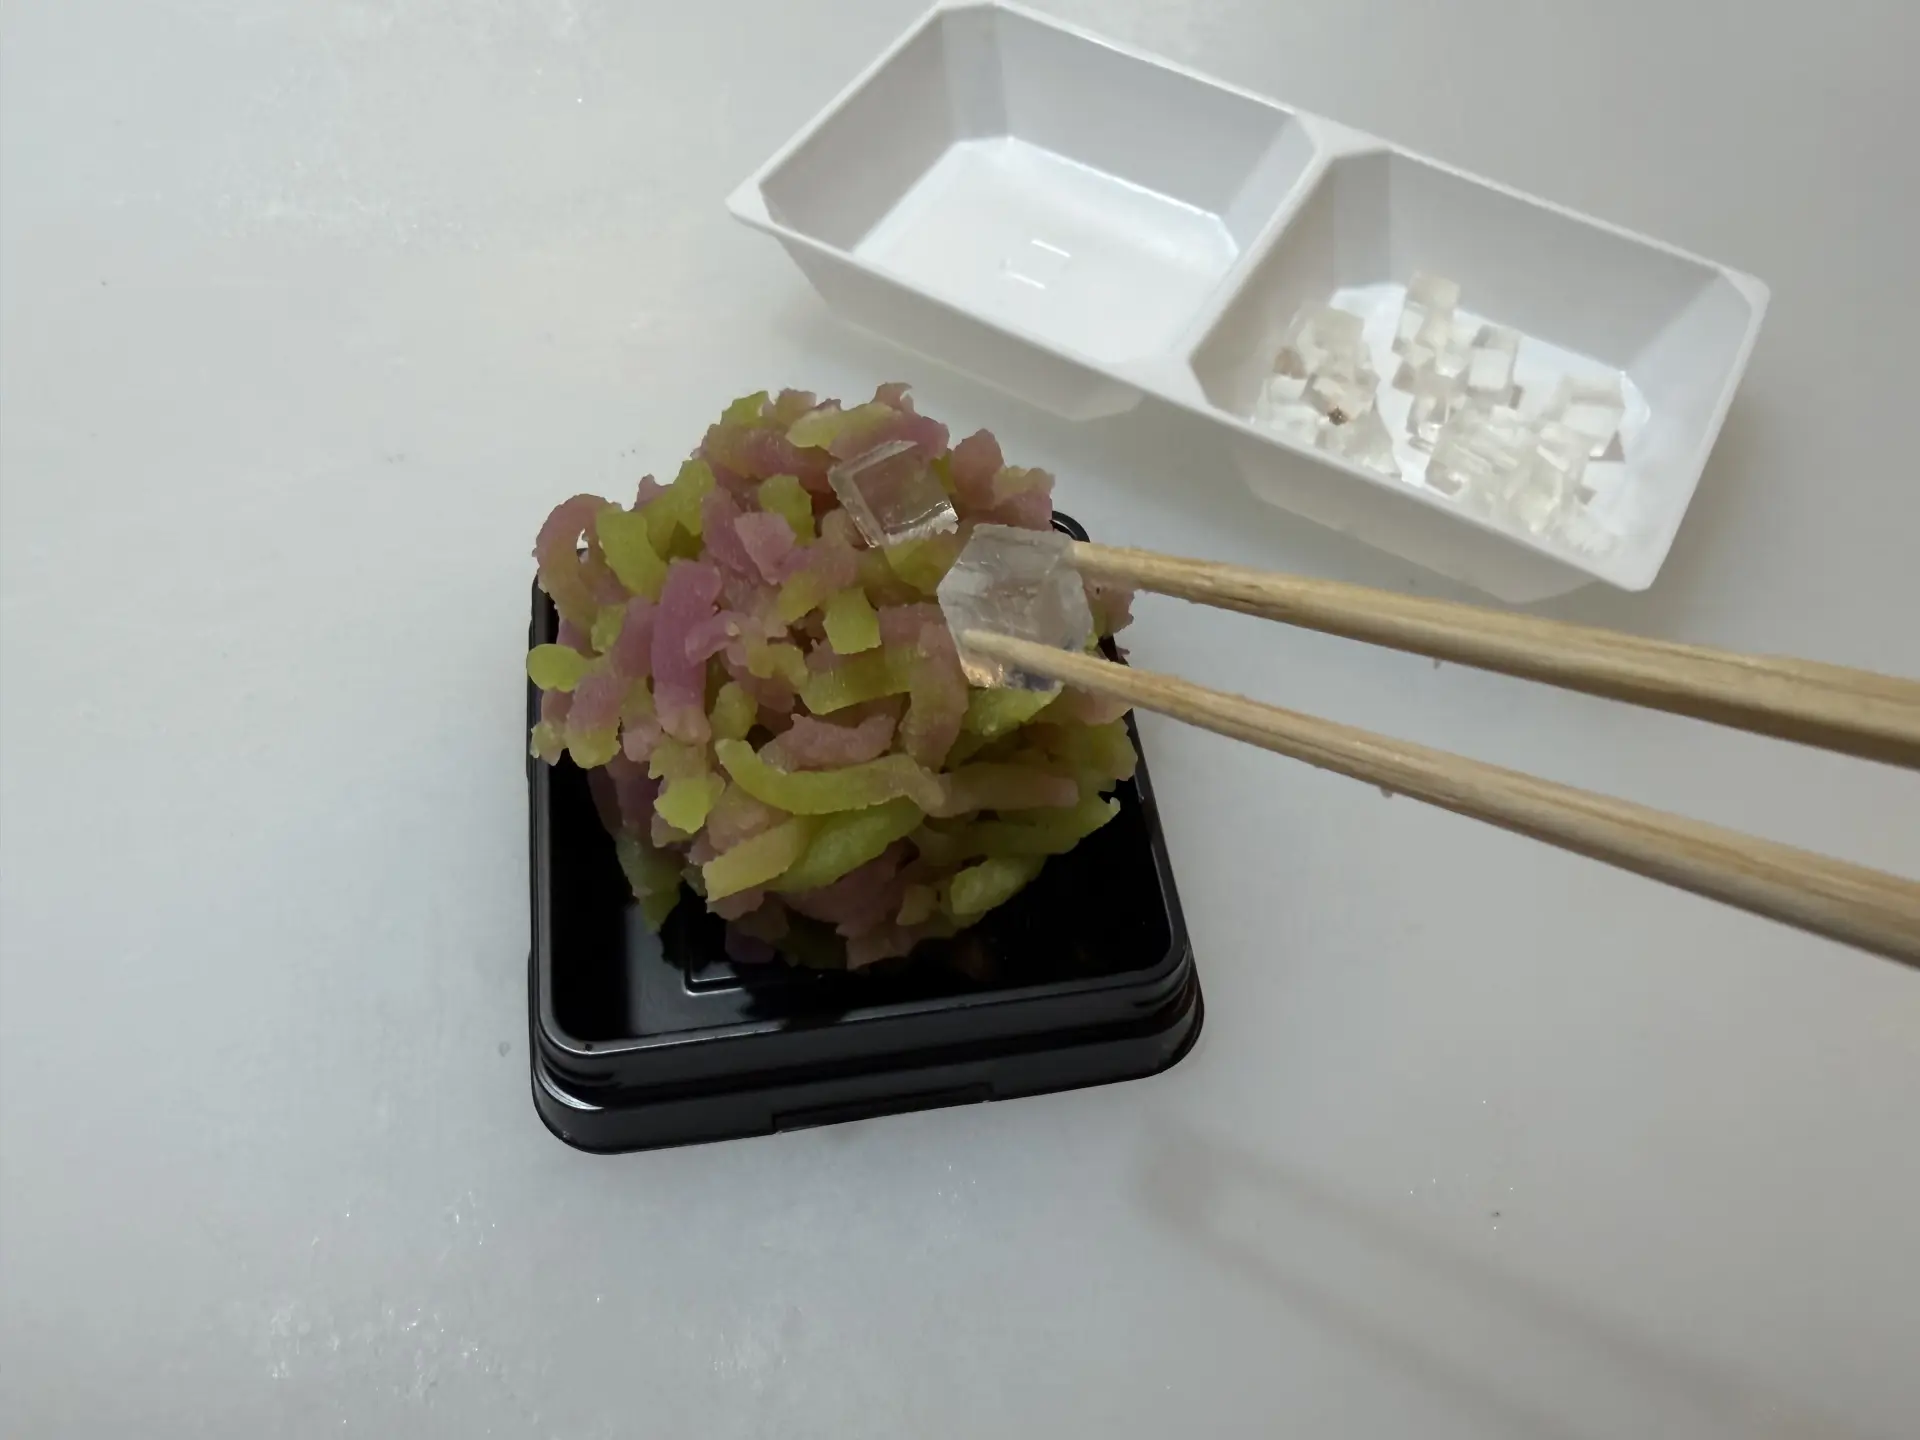
The last sweet is kinton, whose name can also be written with characters meaning "golden dumpling." It is an essential variety of fine fresh wagashi. This time, we will make a hydrangea using green and purple yokan.
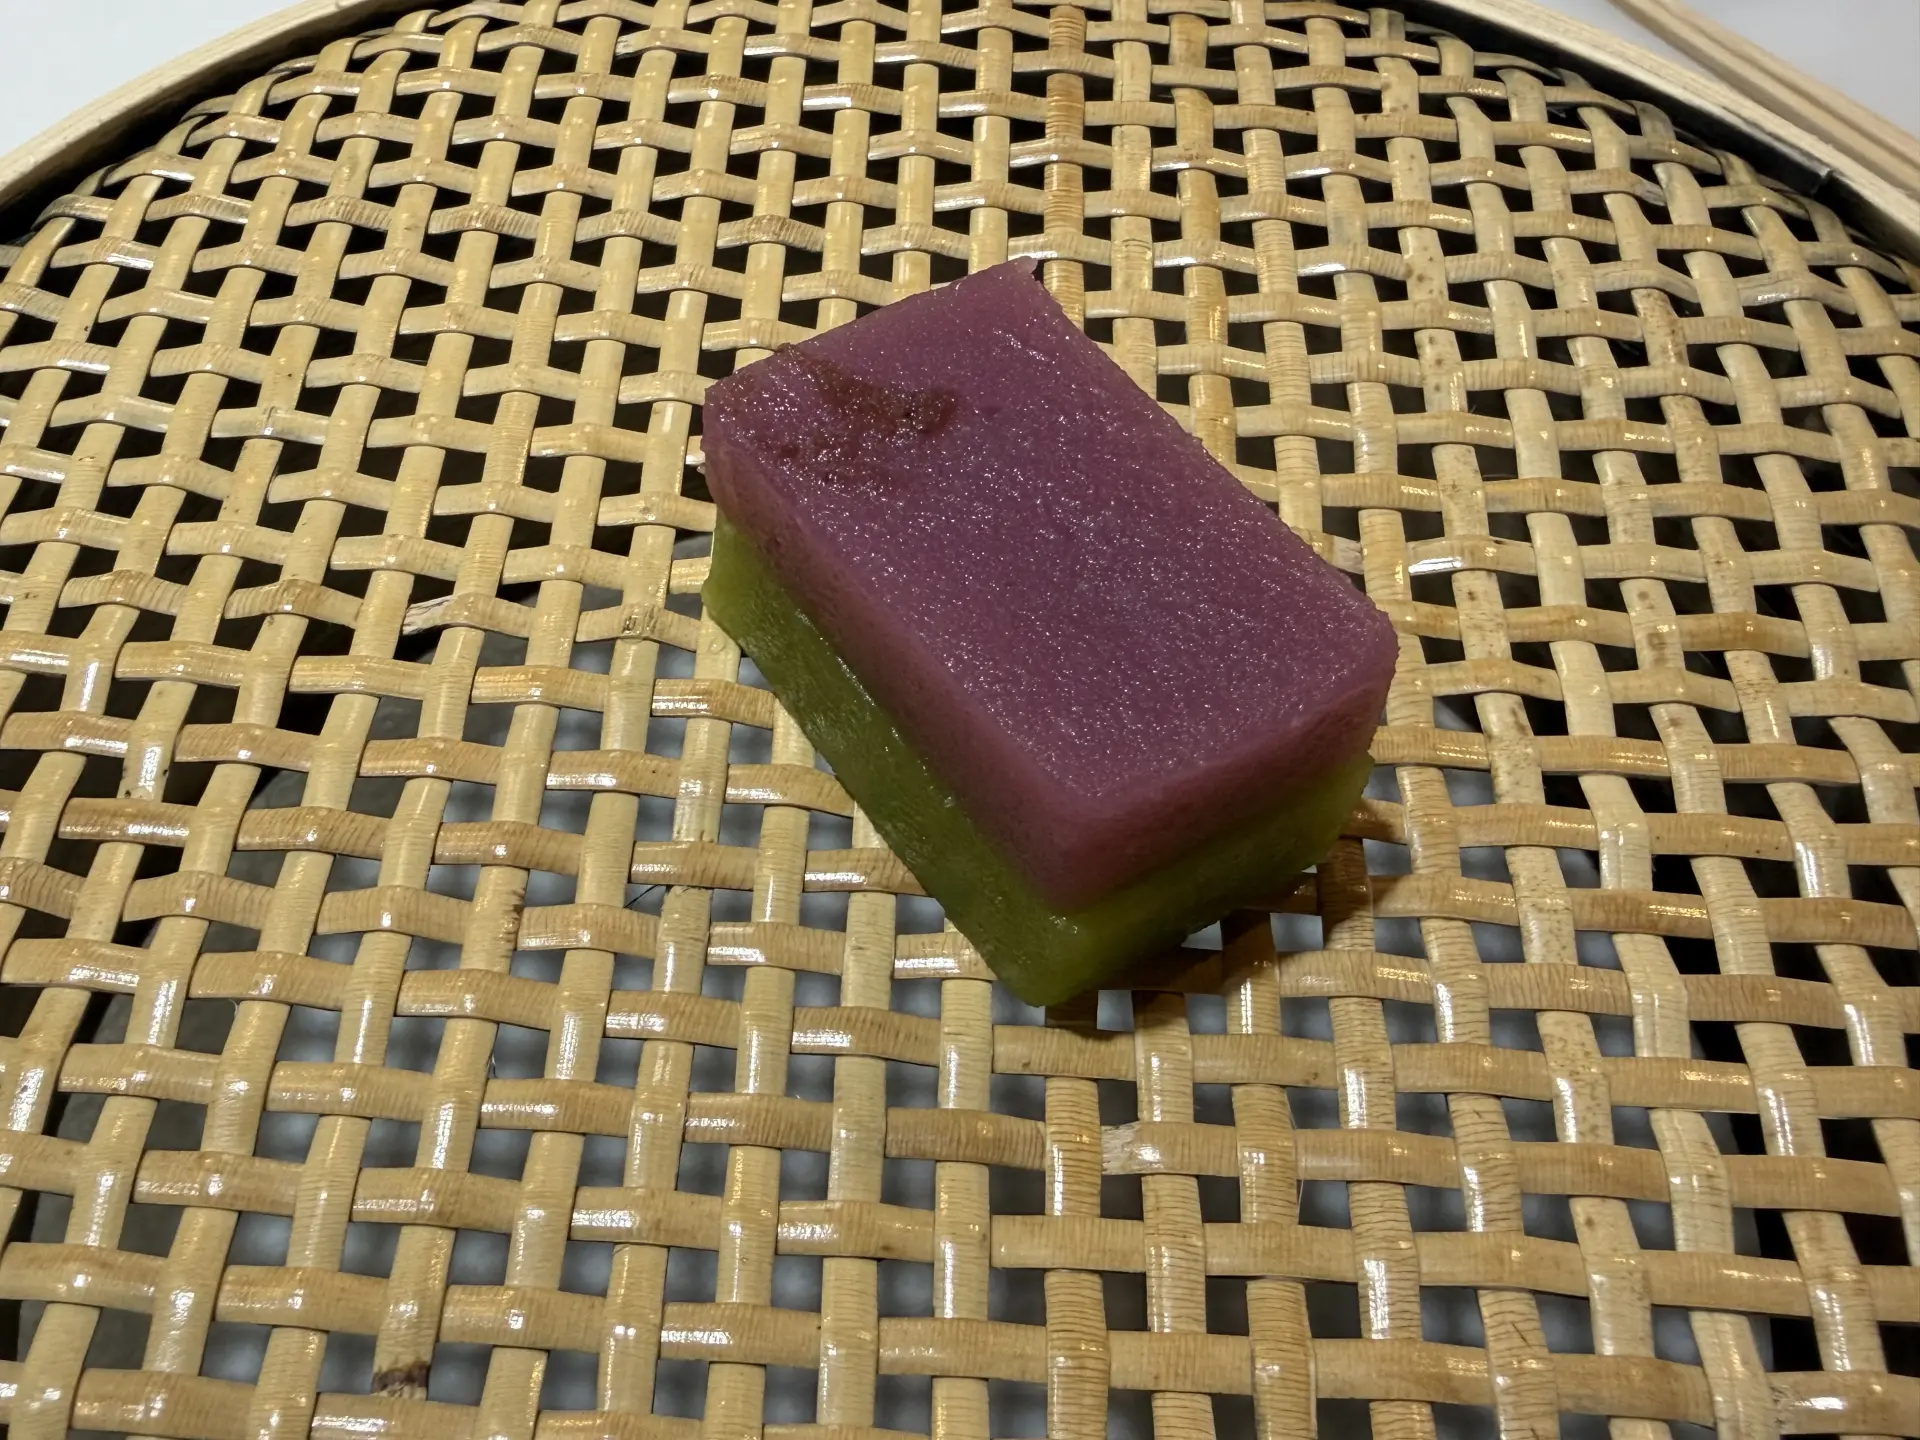
We were told that this yokan is made by cooking bean paste and agar together. It is pressed through a special kinton sieve made from rattan, a climbing plant.
Place the green and purple yokan on the sieve, then press down with the heel of your hand.
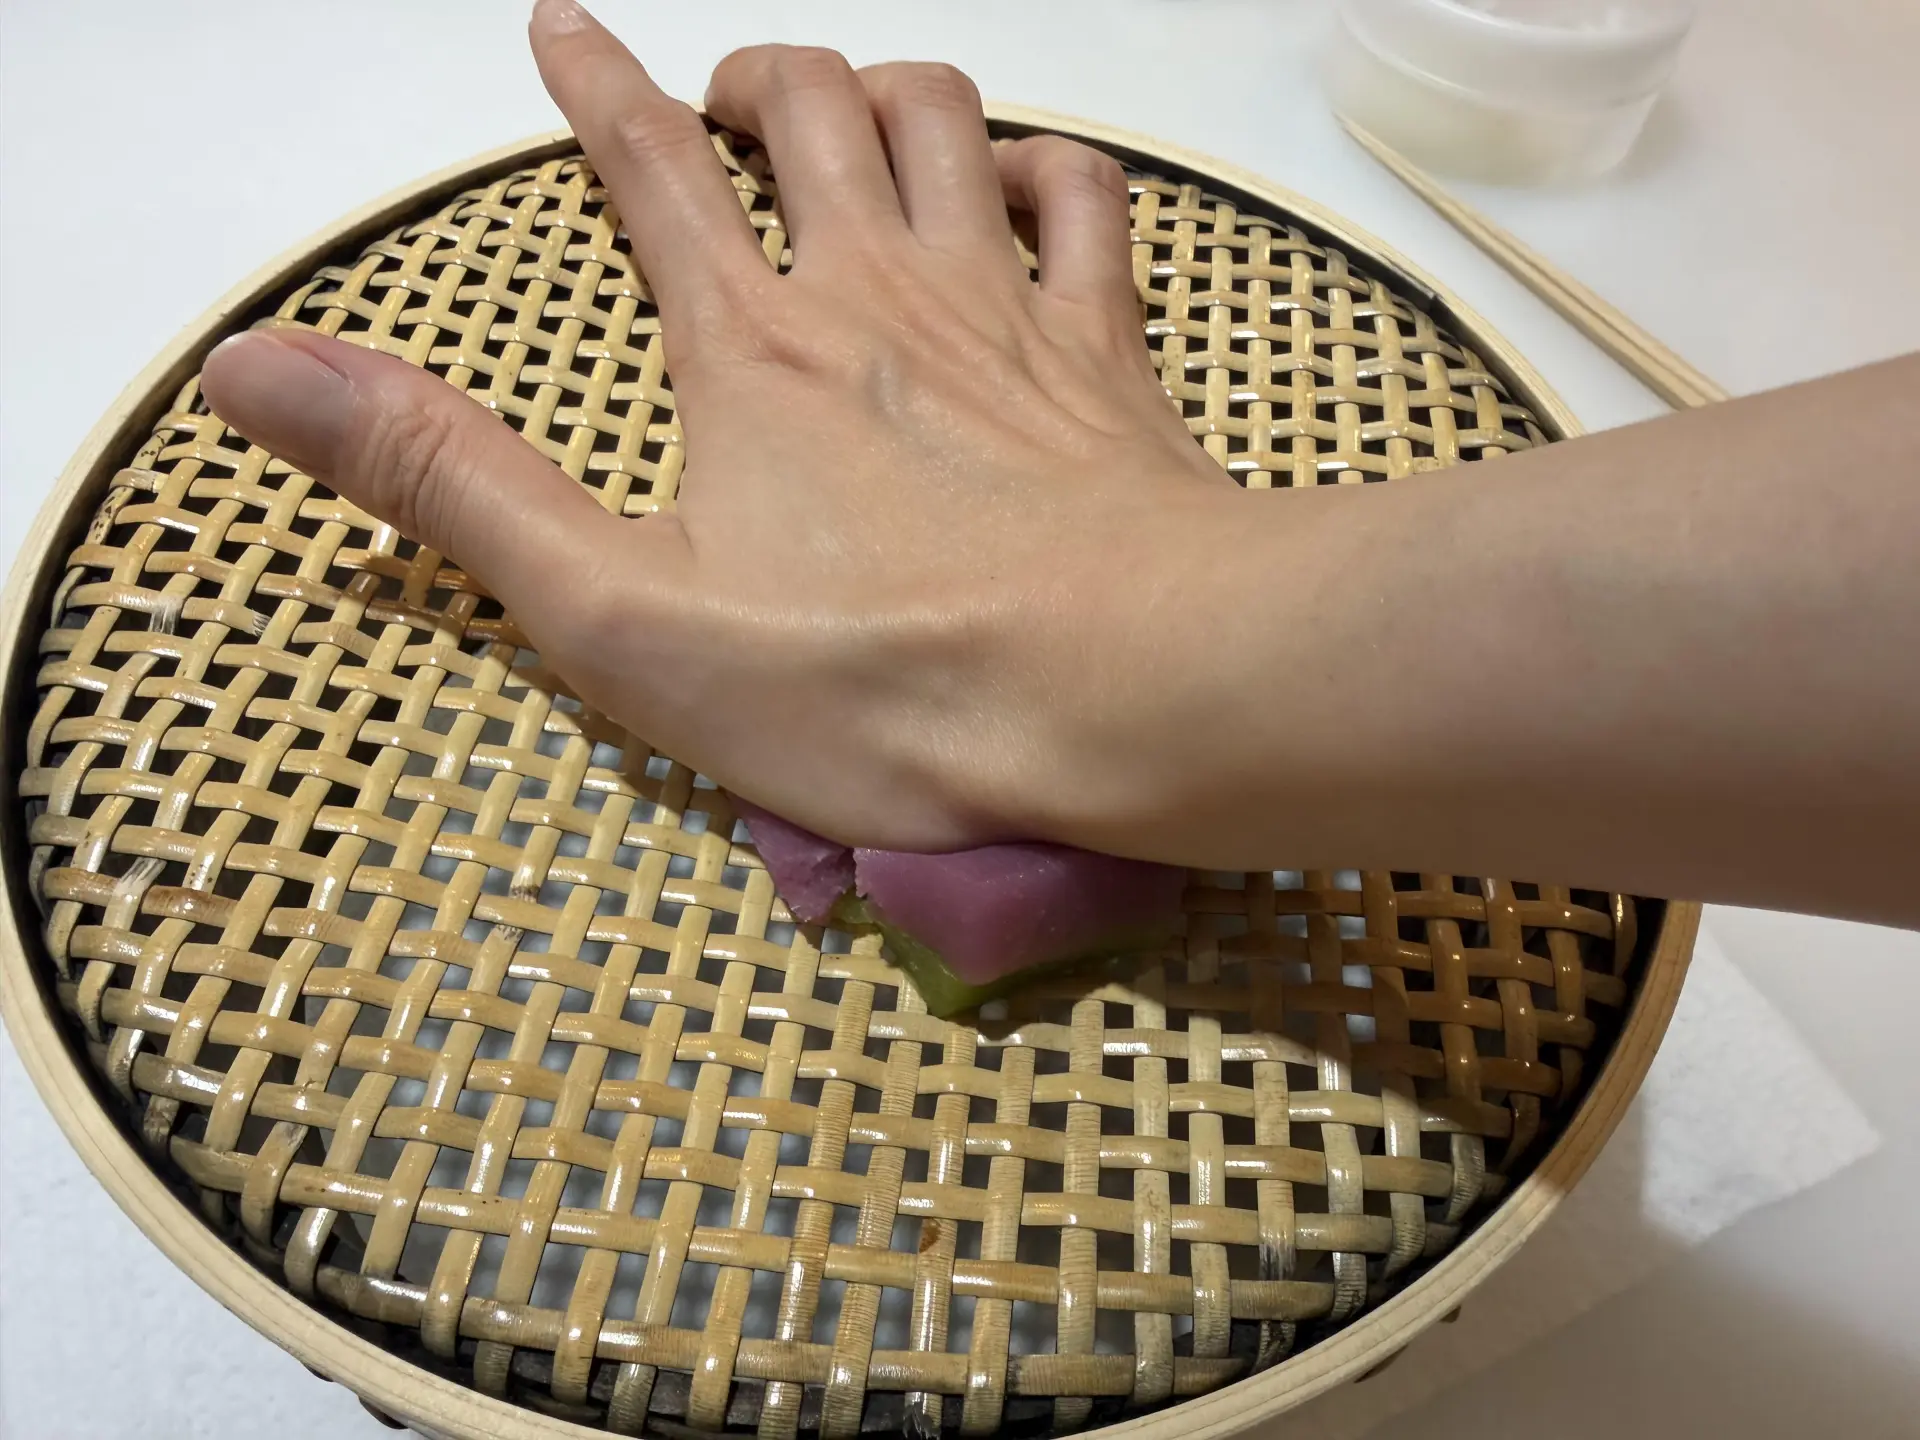
It is difficult unless you use the heel of your hand firmly; otherwise, the yokan slips into the hollow of your palm. As it passes through the kinton sieve, the paste emerges in crumb-like pieces.
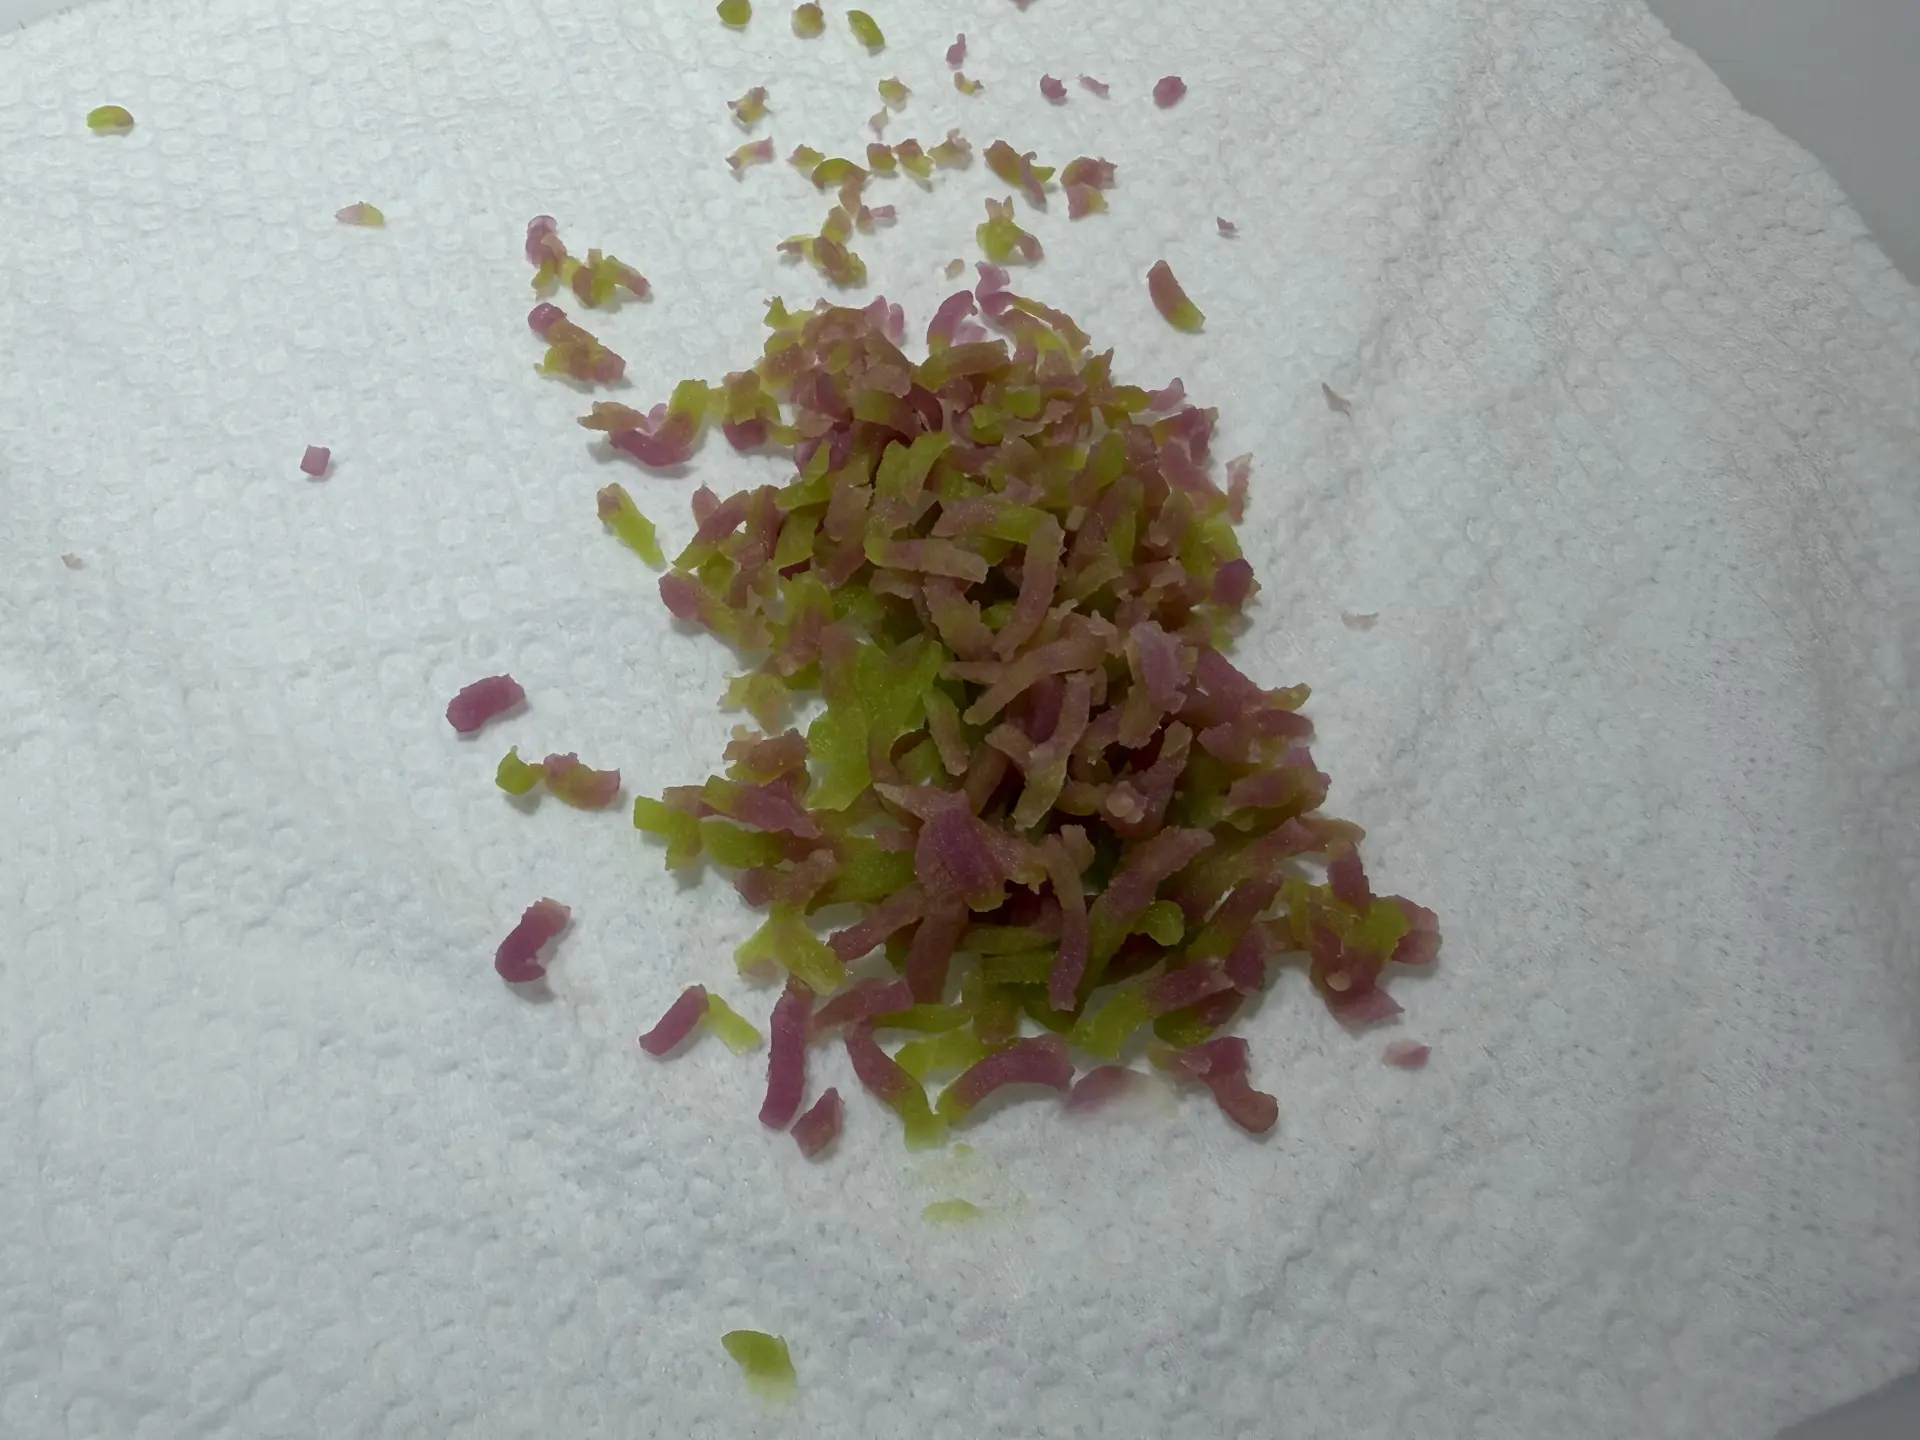
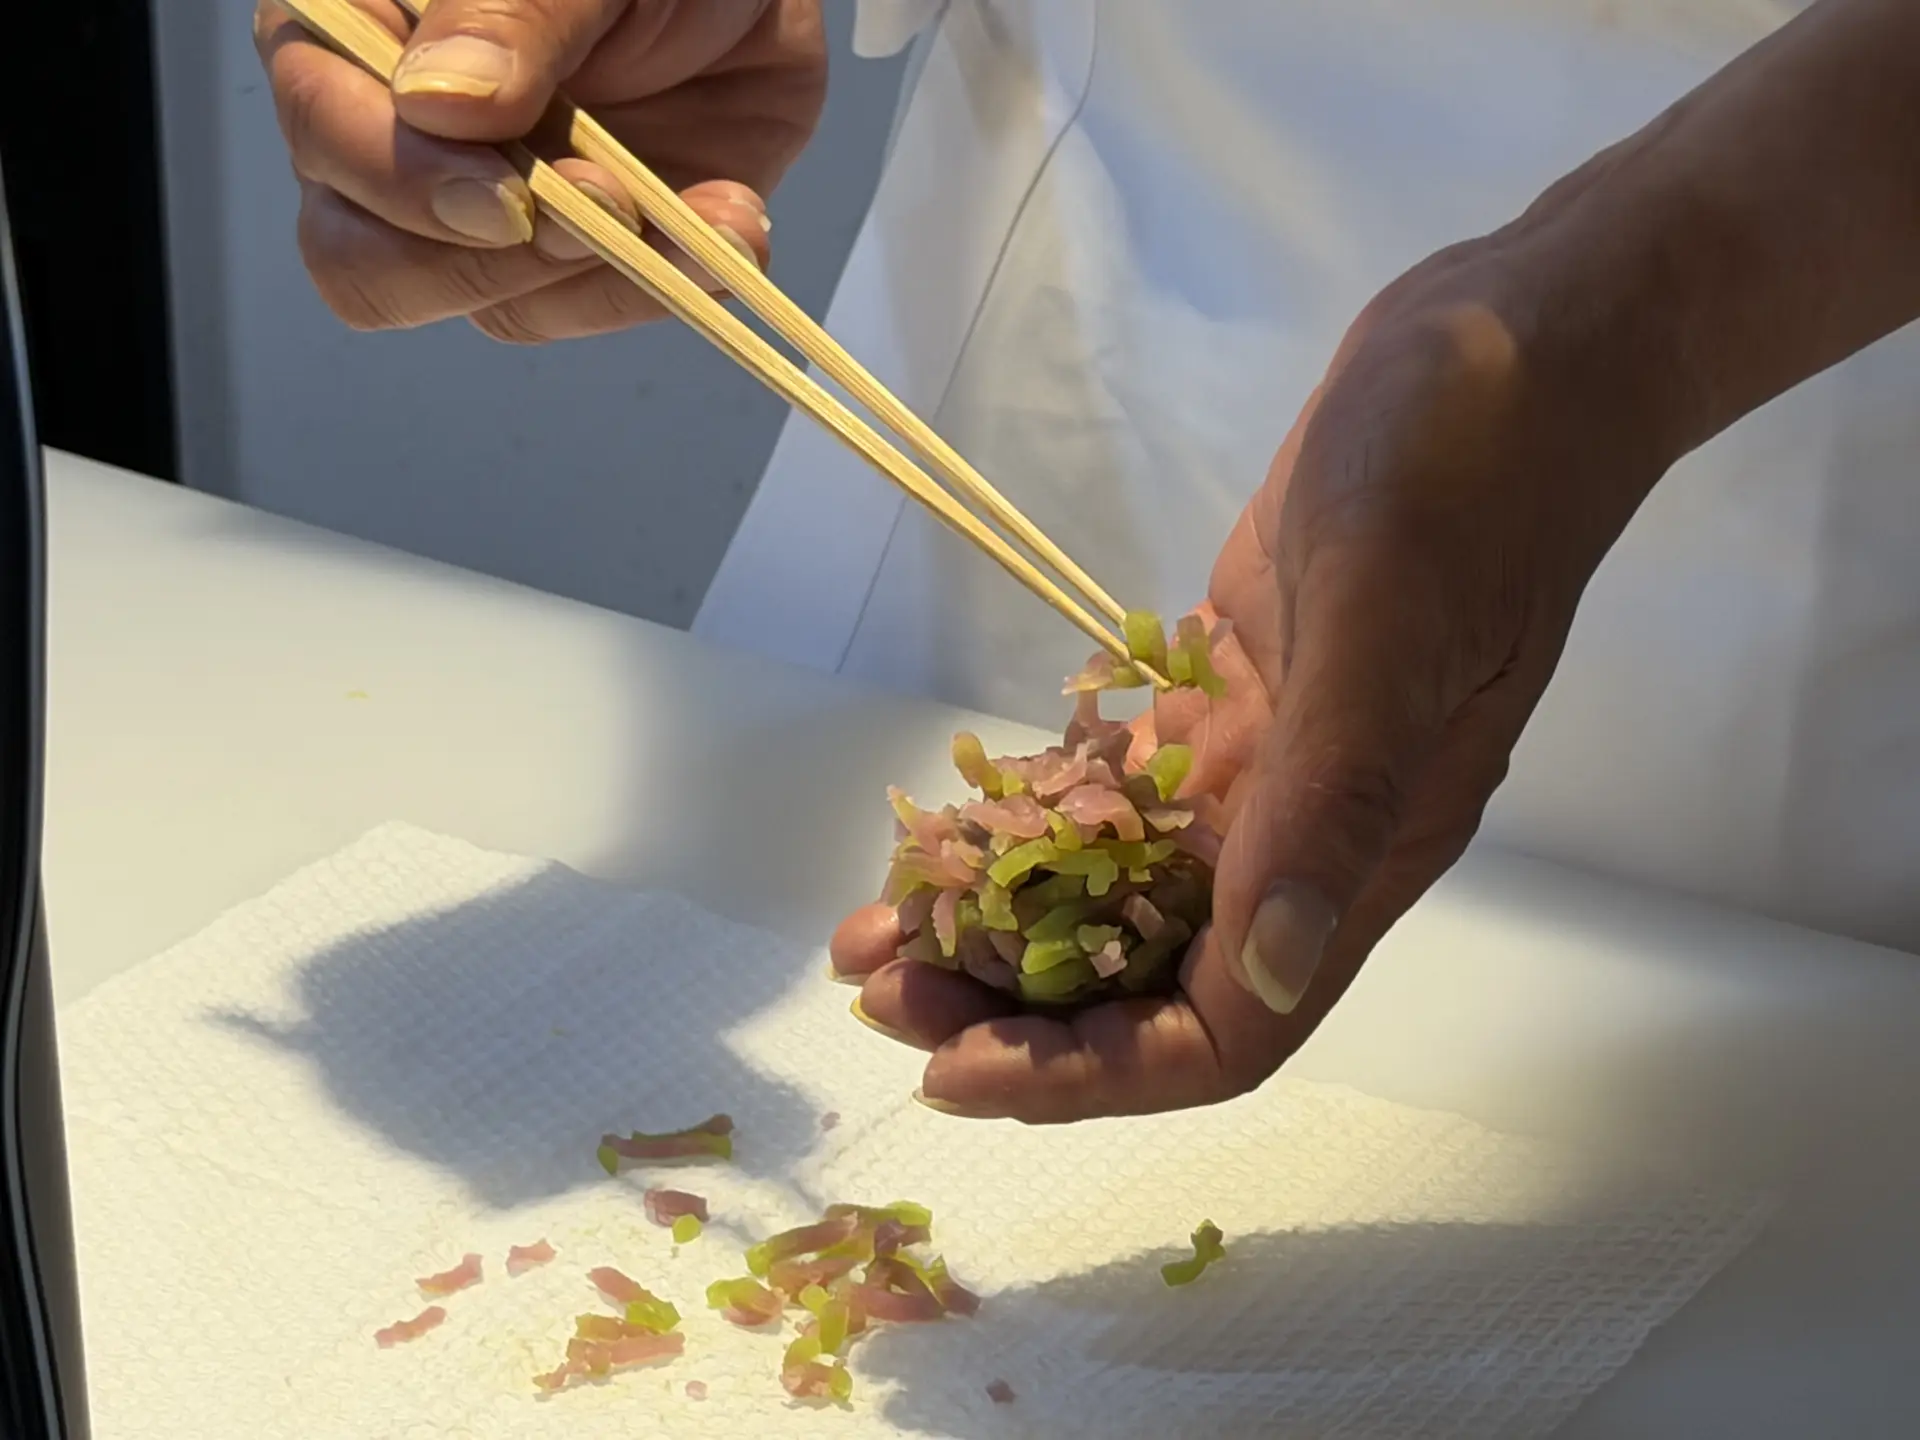
Attach these pieces to a ball of chunky azuki bean paste. Work gently and lightly, taking care not to crush them. The key is to cover the entire ball, including the sides, not just the top.
Finish by adding about 4 small pieces of agar to resemble raindrops on the hydrangea.
In other seasons, kinton designs include azaleas and Japanese ardisia.
(7) Have Matcha and Kinton
That completes all the wagashi-making.
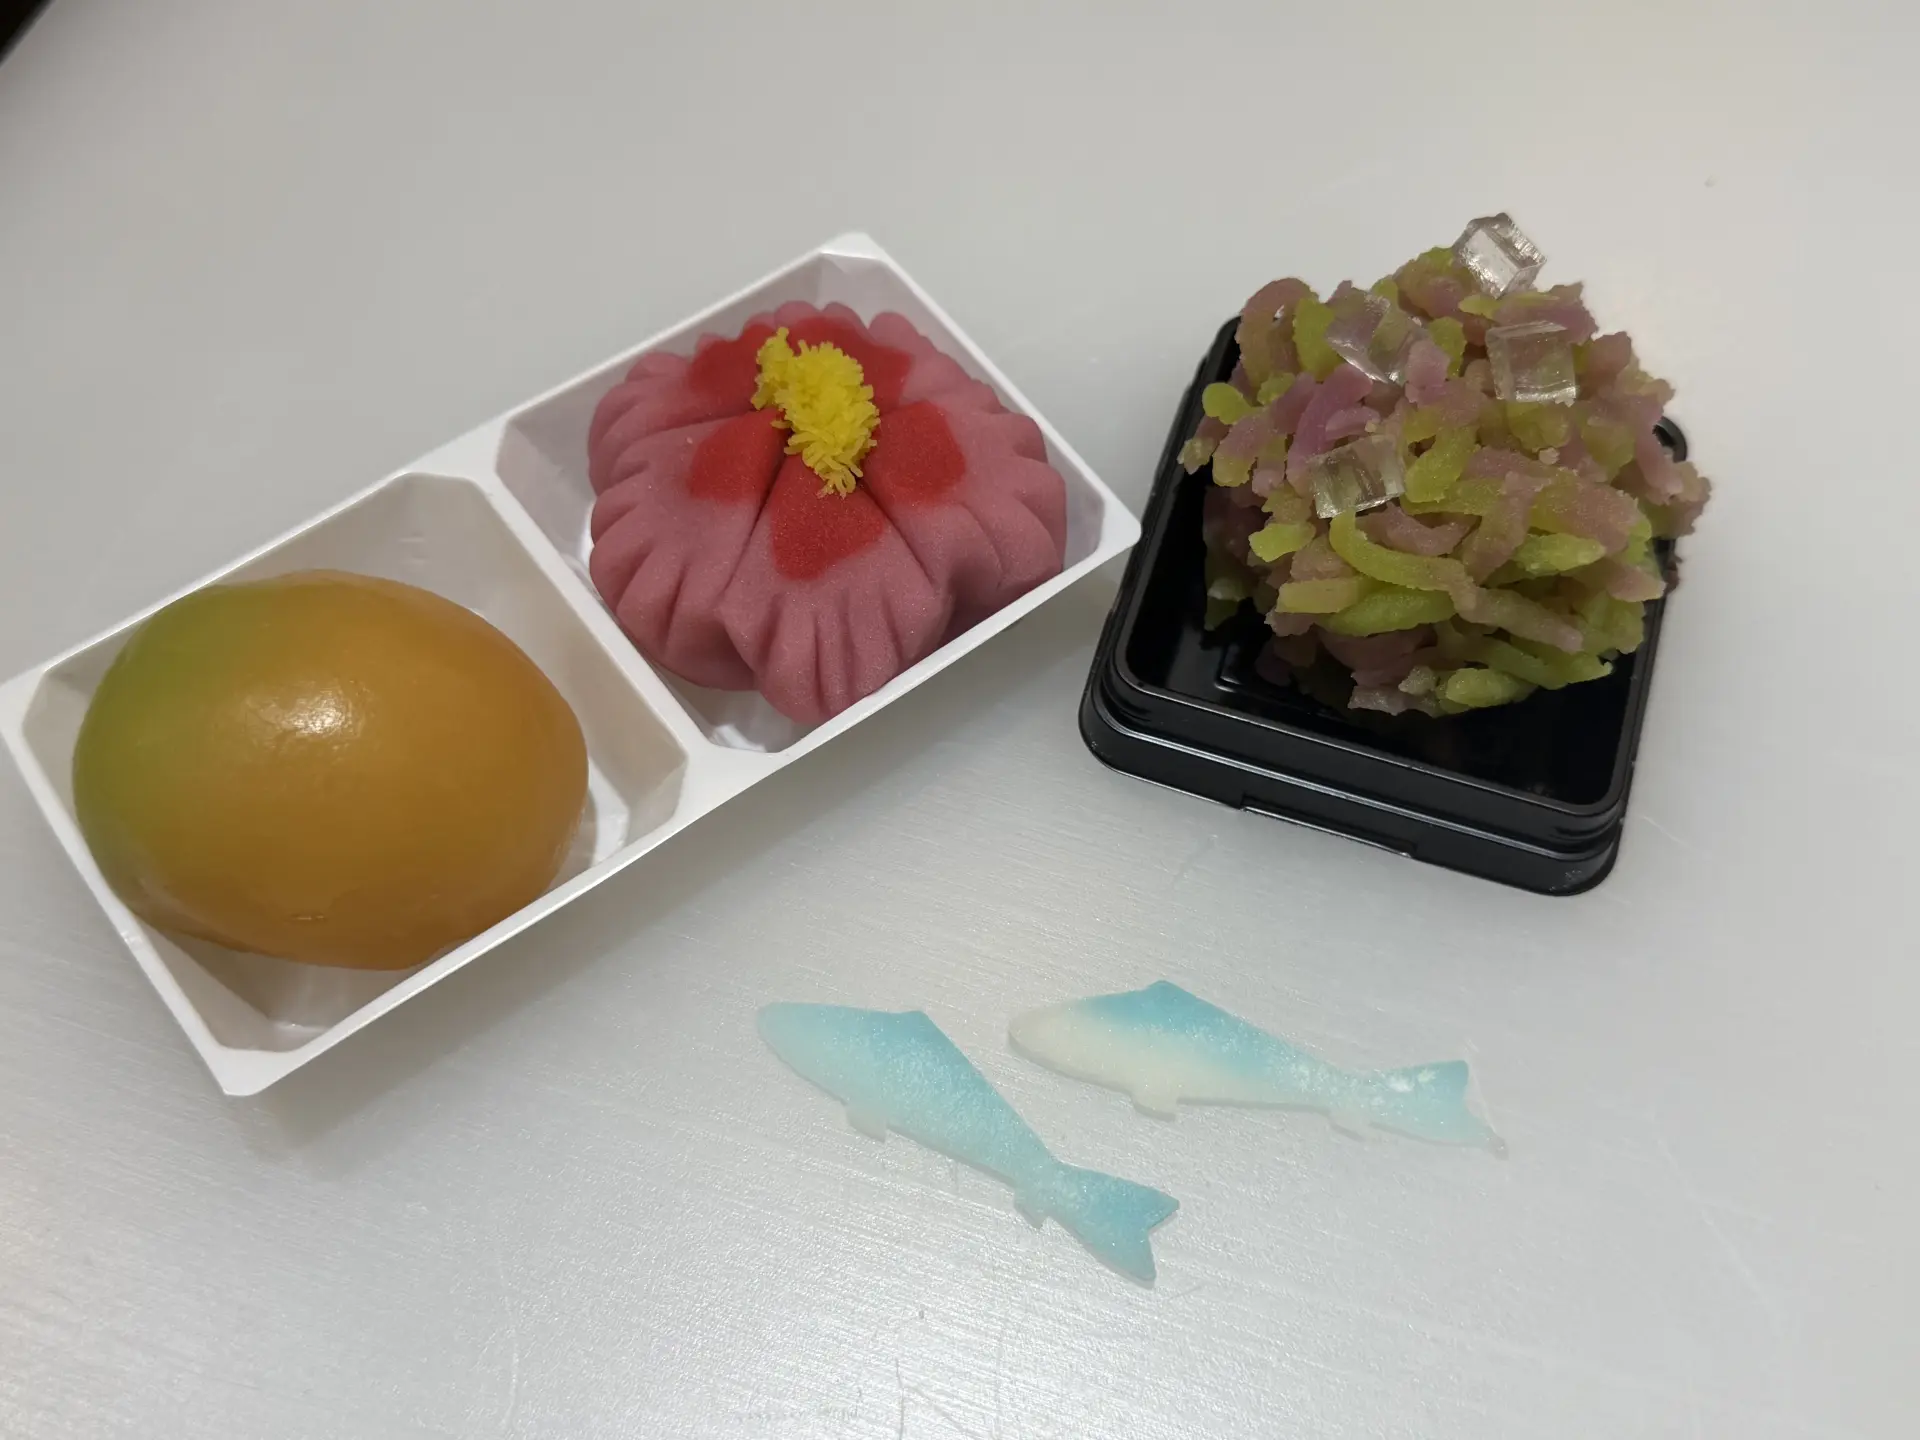
We made a range of sweets, from higashi to fine fresh wagashi. Creating sweets that are not only delicious but also colorful and beautiful was challenging, giving us a renewed appreciation for the craftsmanship involved.
You can sit down with matcha and the kinton you made last.
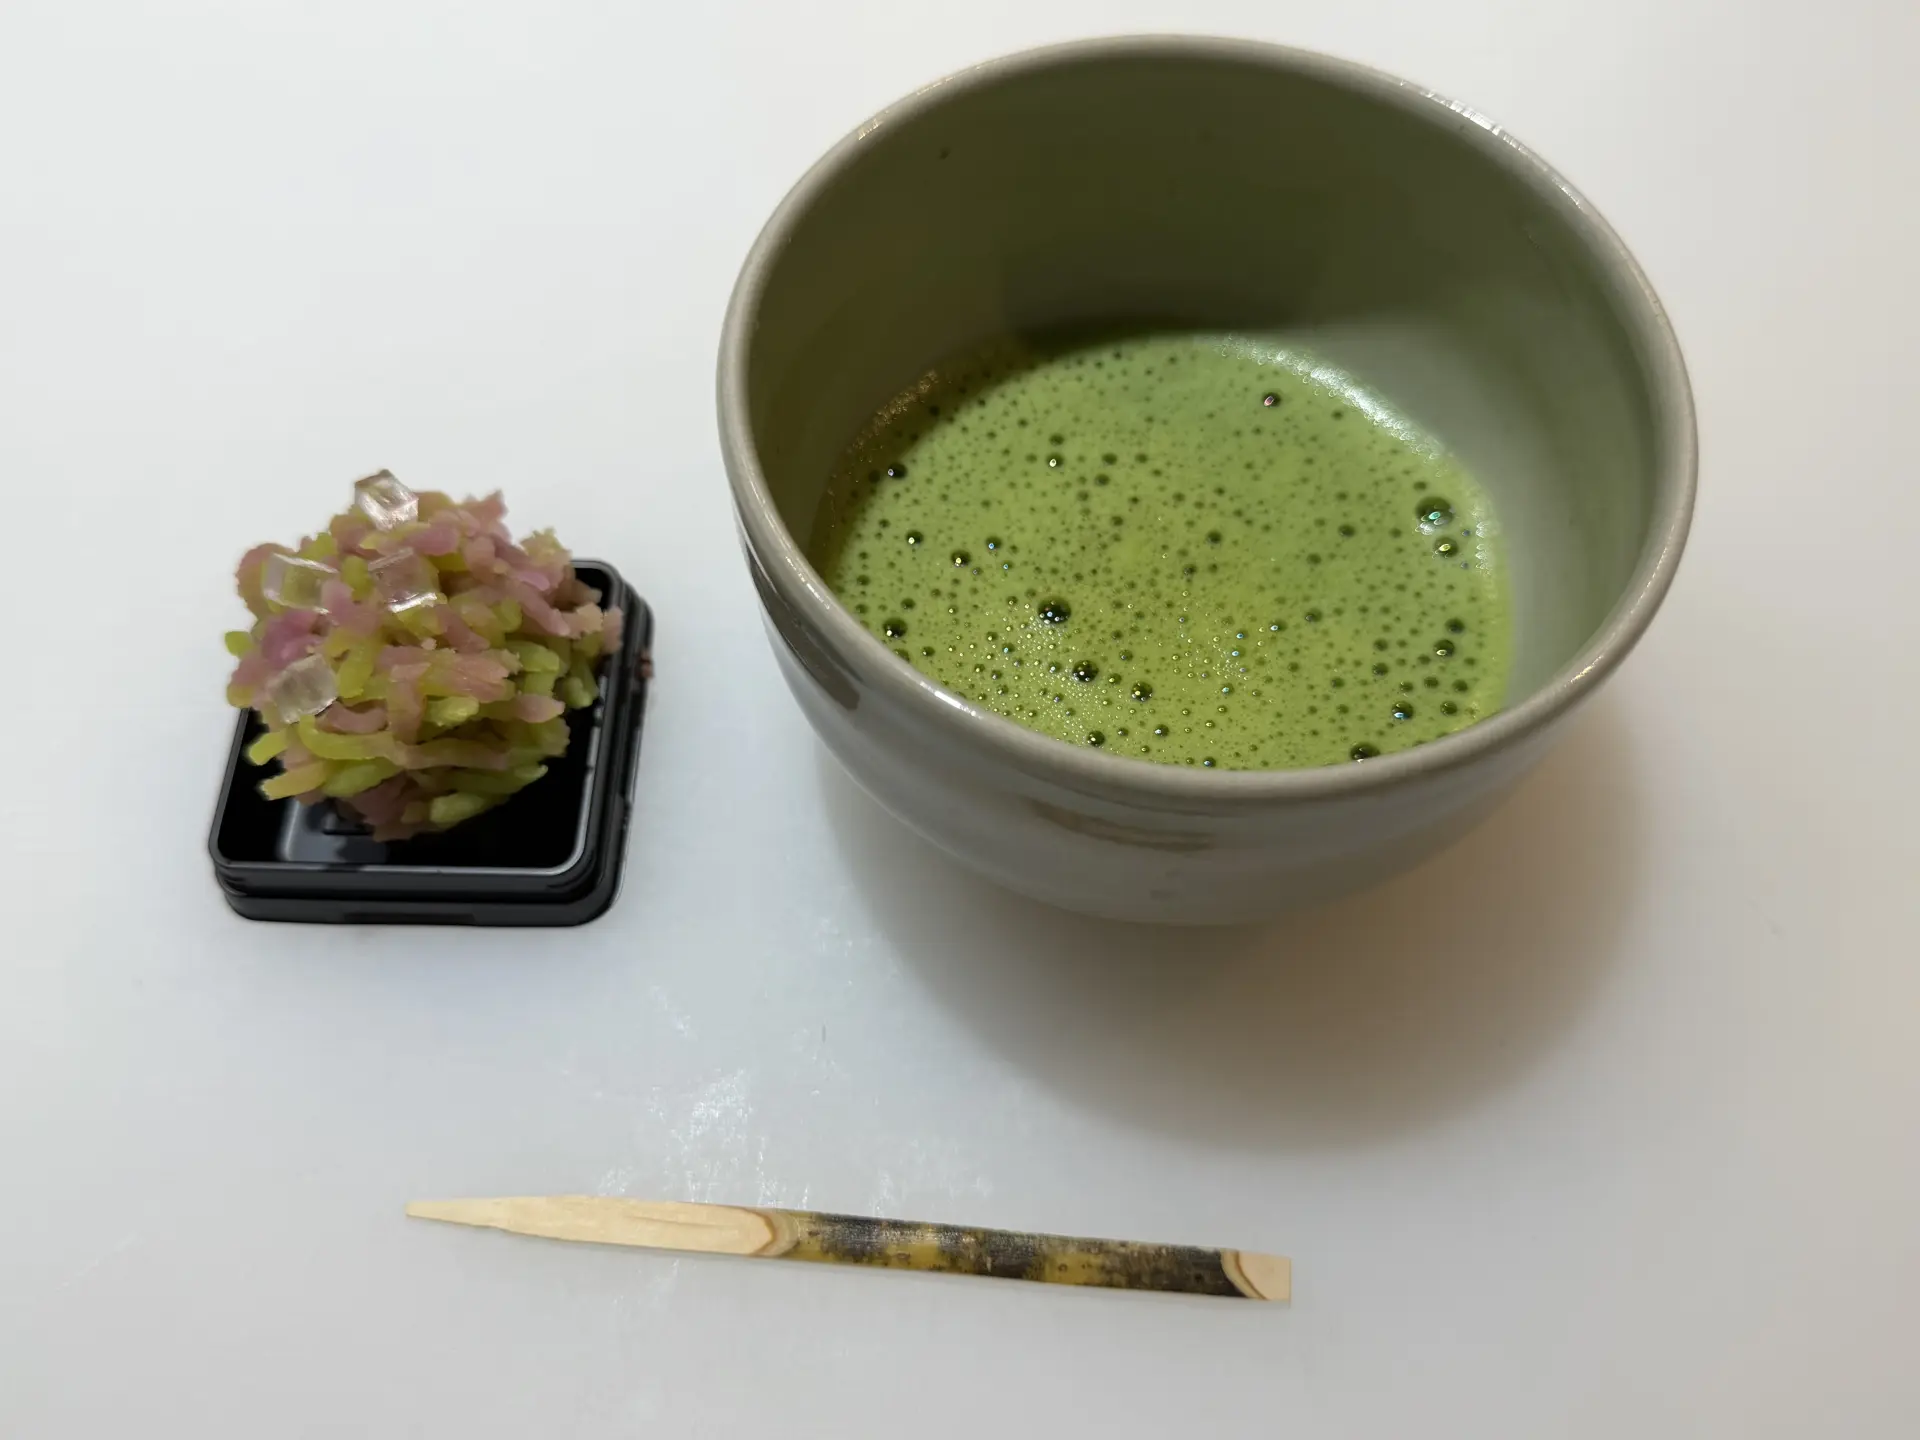
You eat the sweet with a kuromoji, a wooden pick used for wagashi. It is carved from the wood of the kuromoji shrub and releases a pleasant citrus scent when rubbed with your fingers. Use it to cut the sweet or pick up a piece. It can be washed and reused several times, so take it home and try using it for your remaining wagashi.
The freshly made kinton was delicious. The bean paste had a delicate sweetness that spread through the mouth without being overly sweet. However, we had attached the outer pieces so gently that they crumbled off. That never happens with the kinton we usually buy. It gave us an appreciation for the artisan's skill: the pieces must be handled gently, yet attached securely to the ball of bean paste inside. This is the craftsmanship behind wagashi, which place equal importance on flavor and a colorful appearance that reflects the seasons.
Take a Break in the Tea Room
Both the East and Sagano stores have tea rooms. Options include a matcha set with a fine fresh sweet, thin-style matcha, and higashi, as well as a set of fresh warabi mochi and matcha. There are also many seasonal and store-exclusive menu items, so consider stopping in.
Shop for Souvenirs
Wagashi also make a lovely souvenir of your trip.
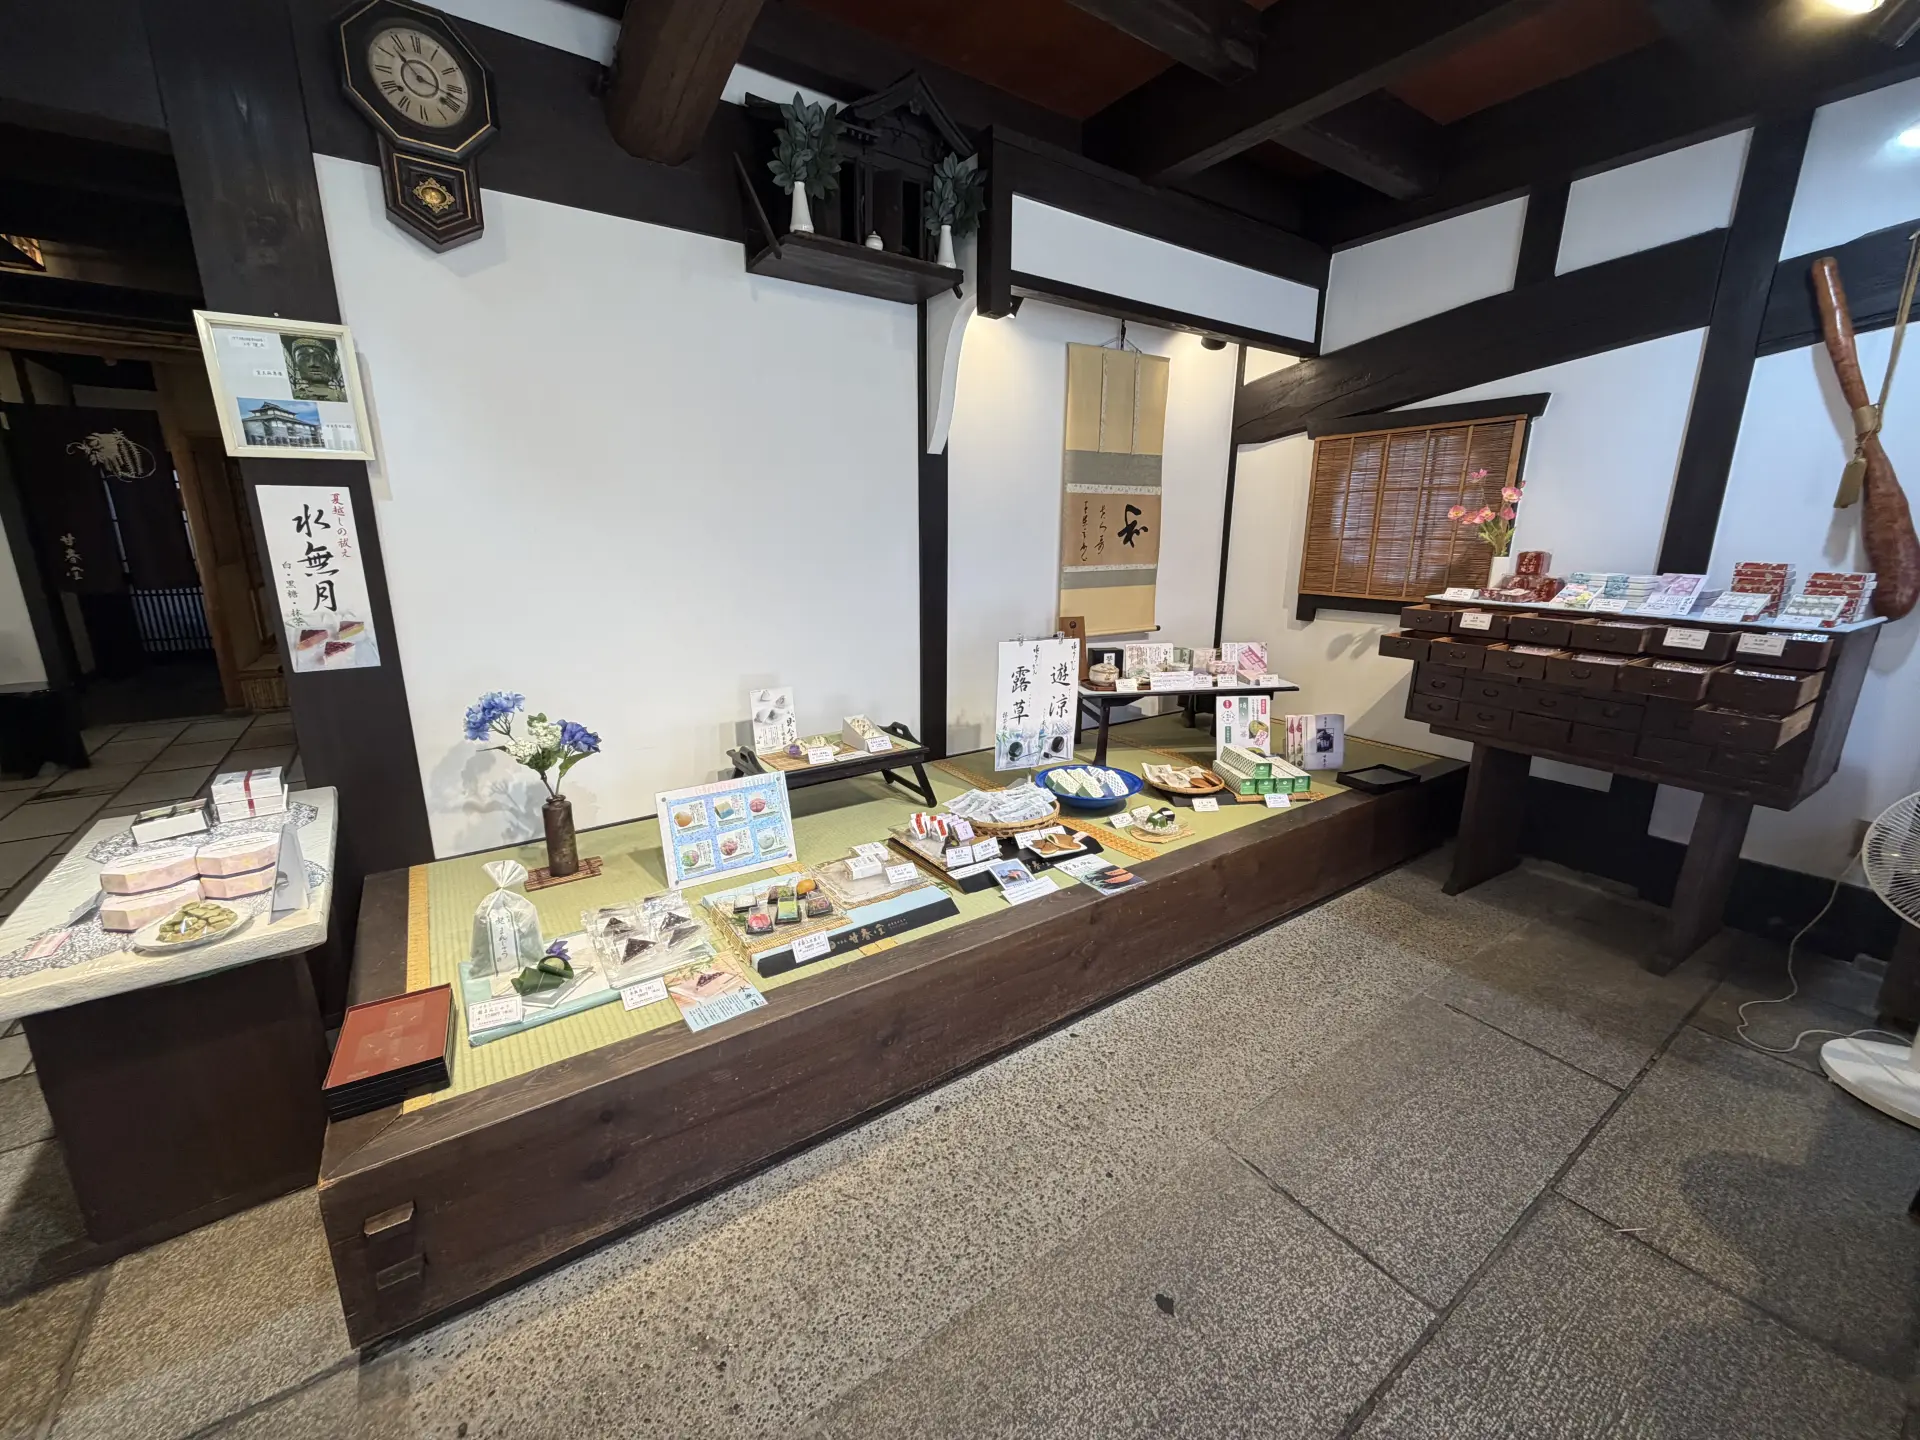
Many fresh sweets should be eaten on the day they are made, but plenty of other wagashi keep longer. Higashi, in particular, last for about 2 months because they are made mainly from sugar. They come in a wide range of shapes and colors, including flowers, ripples, and fish, making for a colorful display. They are sure to be appreciated as gifts.
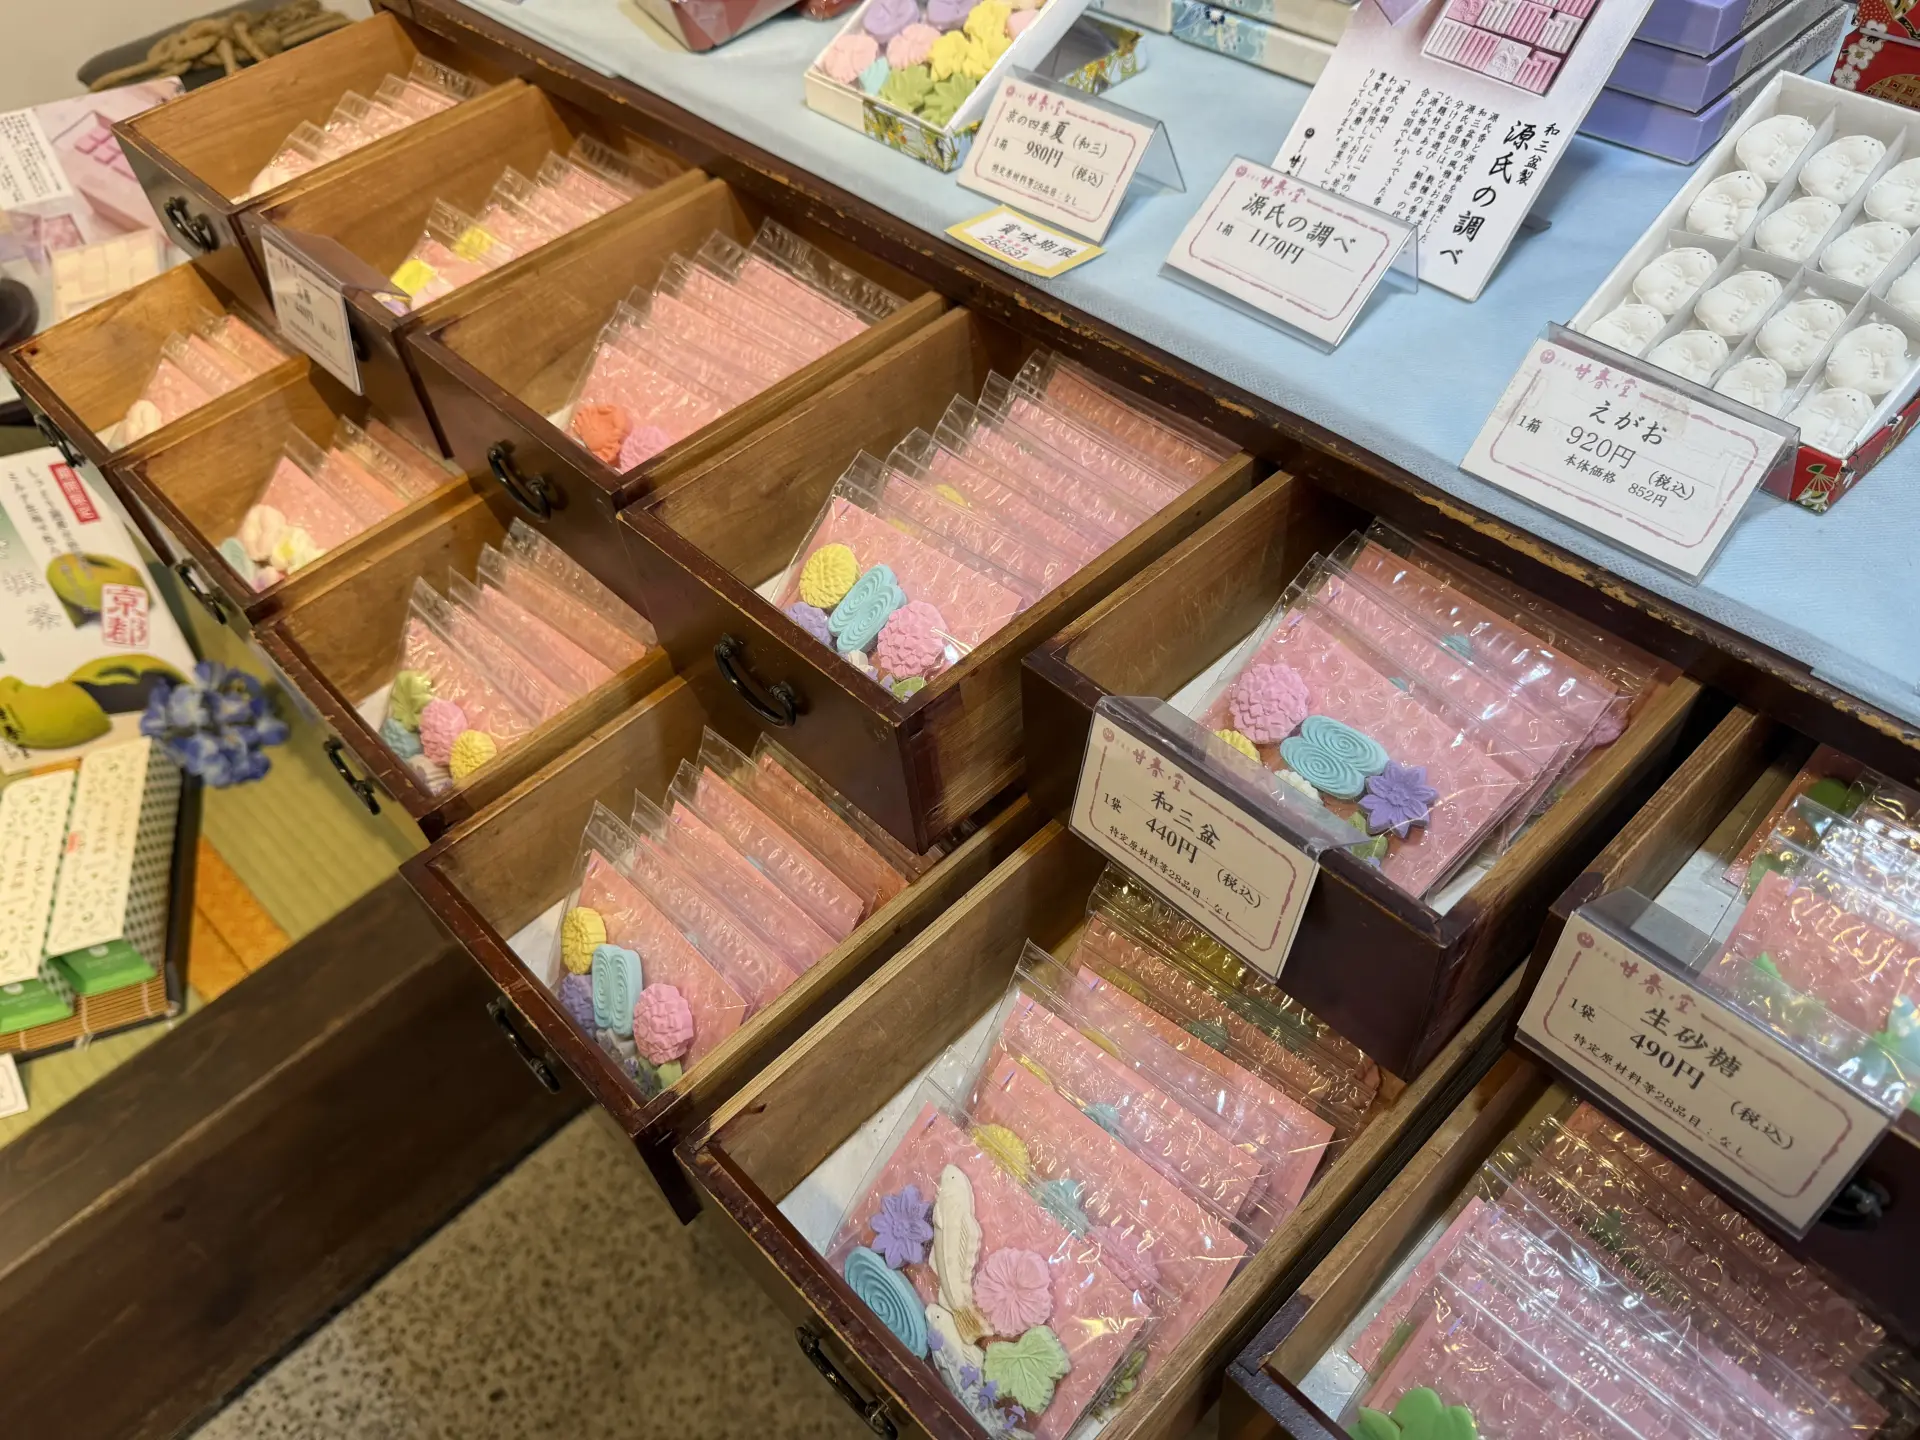
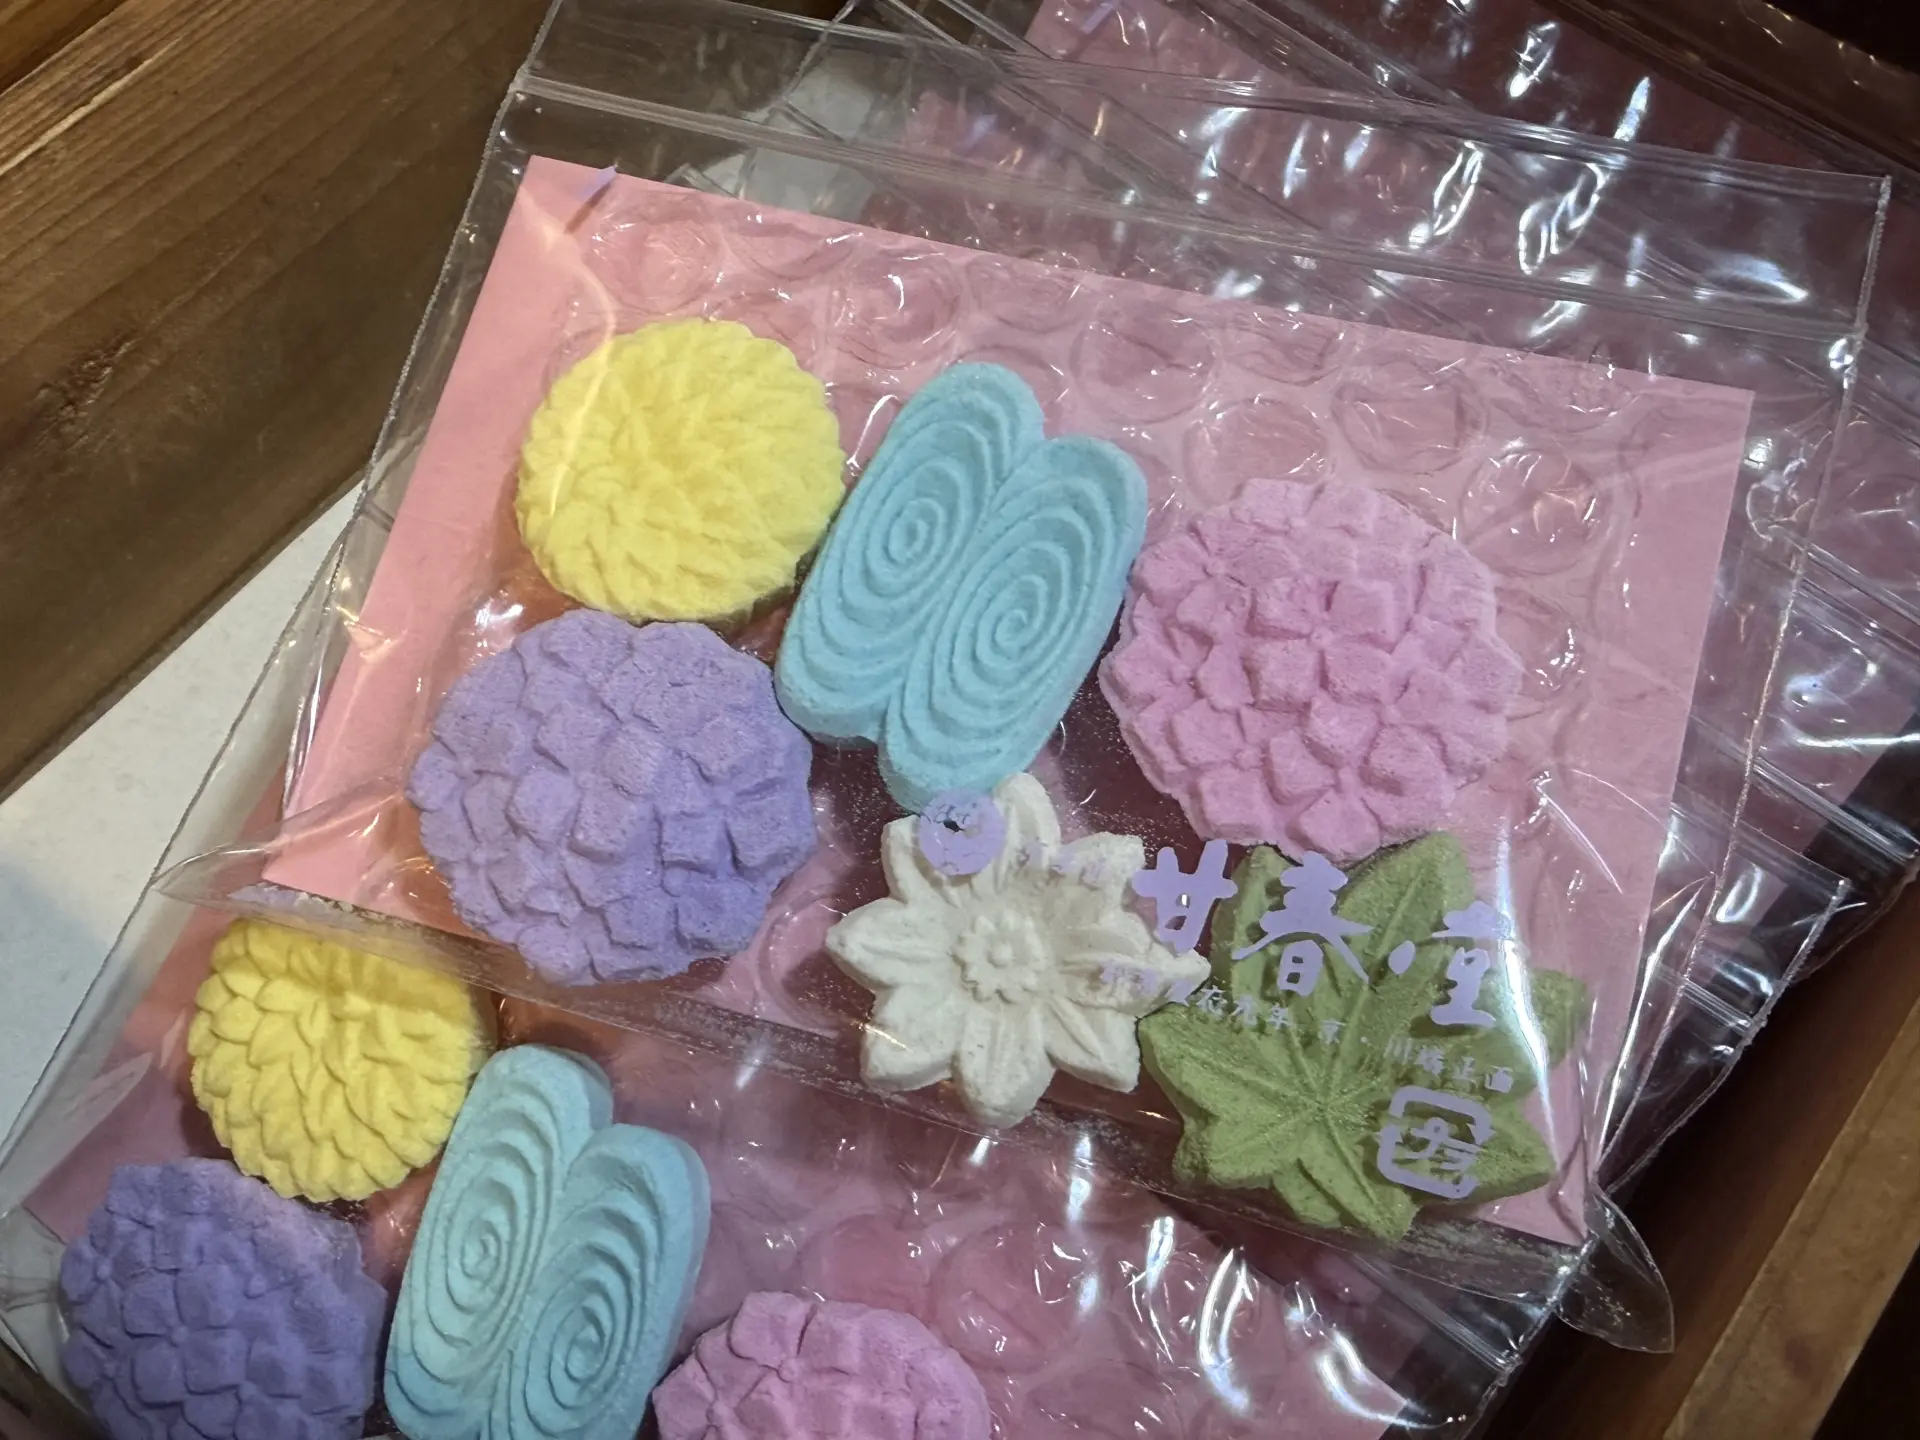
Kanshundo is said to have about 1,000 varieties of seasonal wagashi in all. They make you want to return with every season.
At the Main and East stores, Daibutsu Mochi is especially recommended.
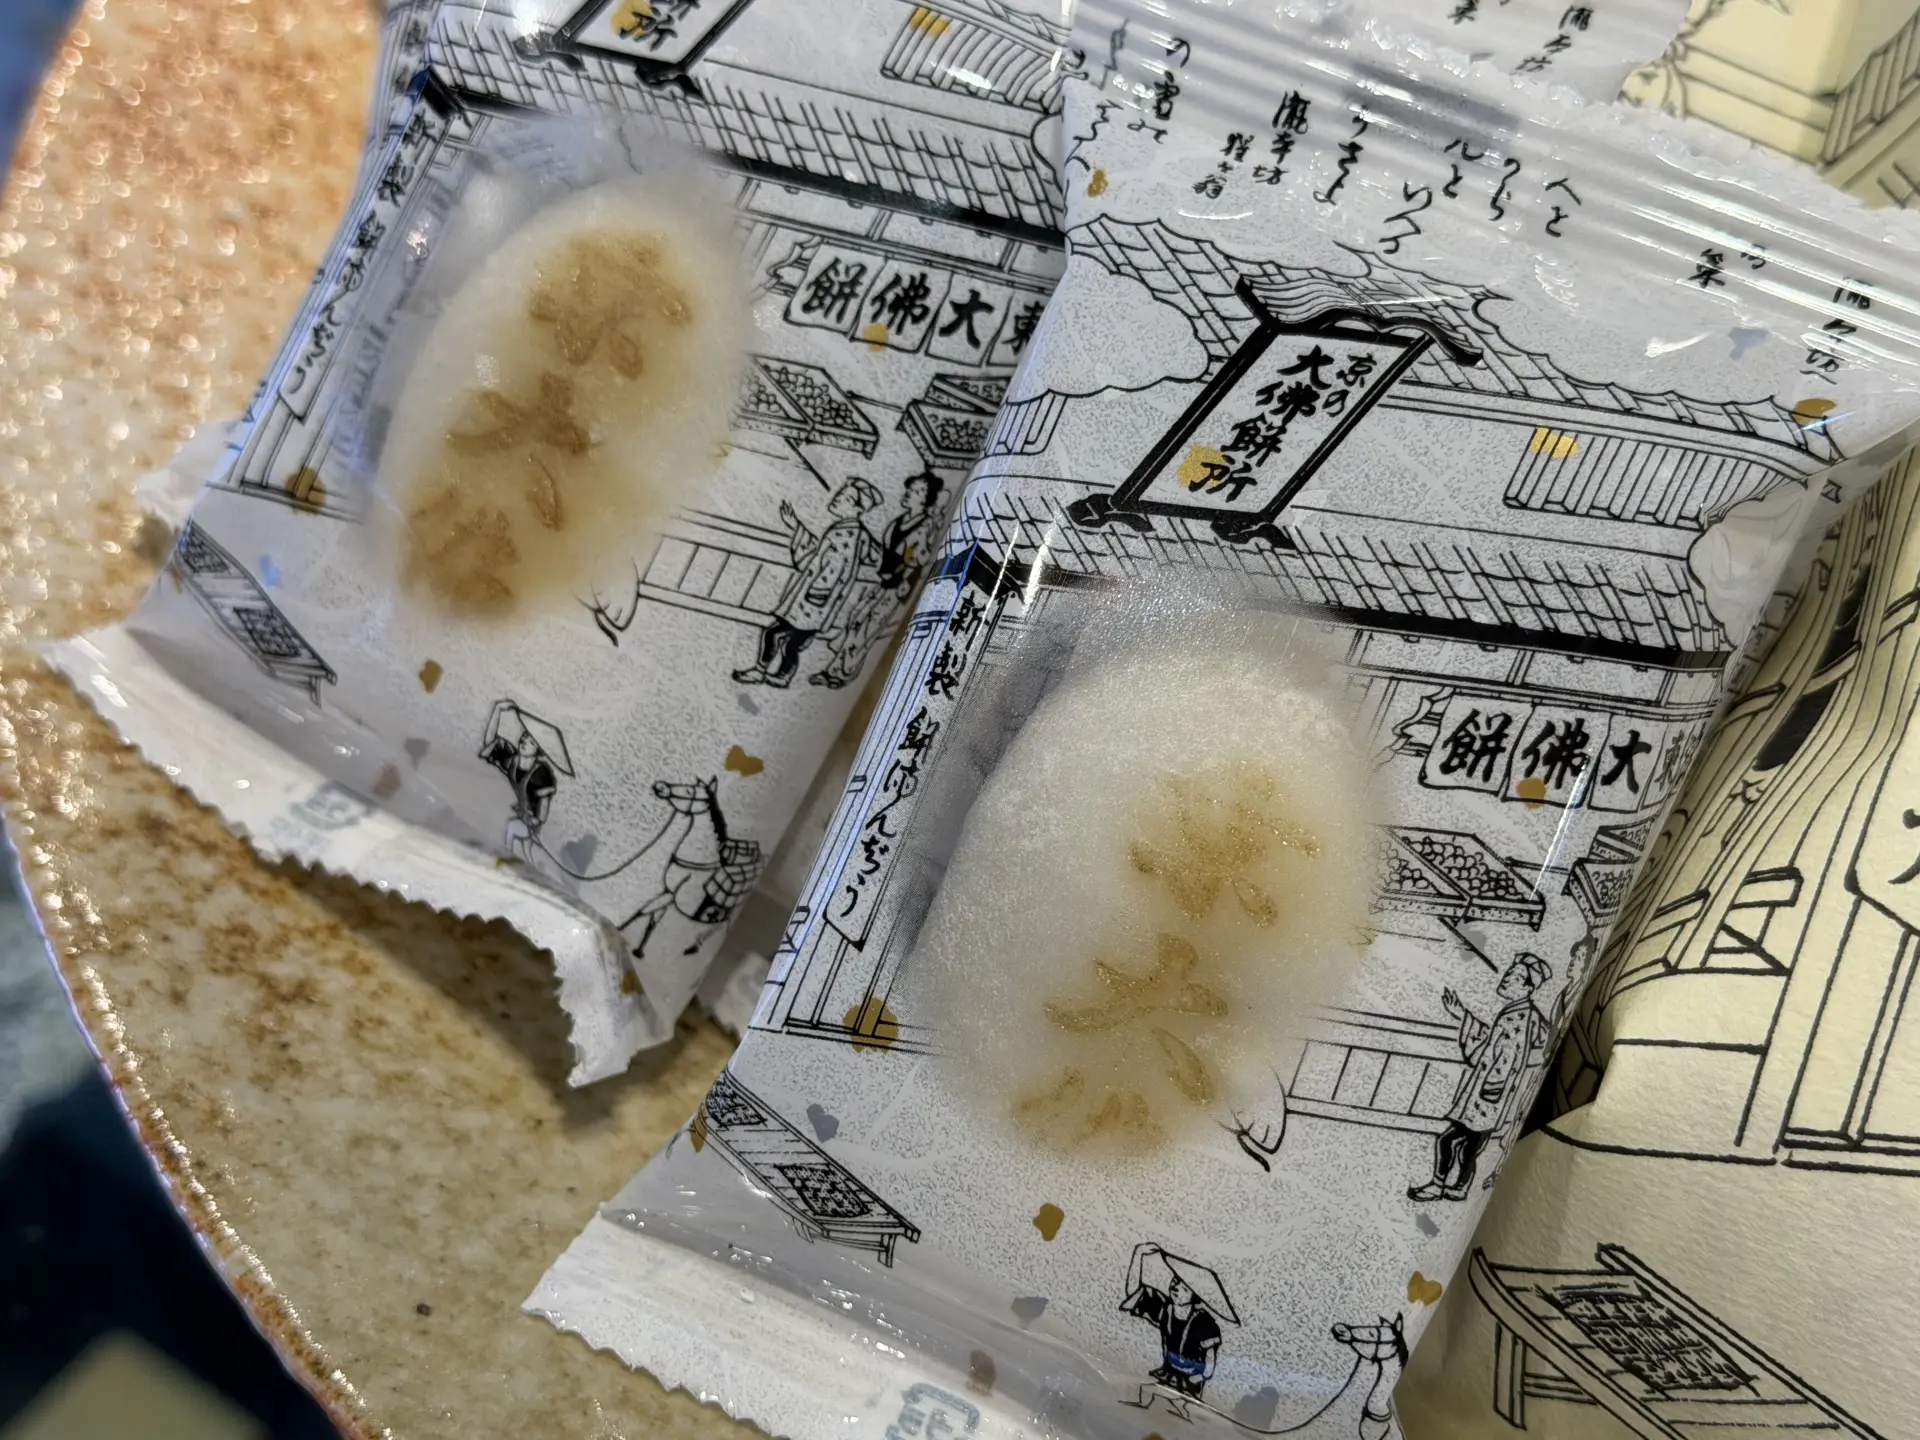
Hokoji Temple, near the Main and East stores, once housed a large statue known as the Great Buddha of Kyoto. The Miyako Meisho Zue, an illustrated guide to Kyoto published in 1780, mentions Daibutsu Mochi sold near the temple.
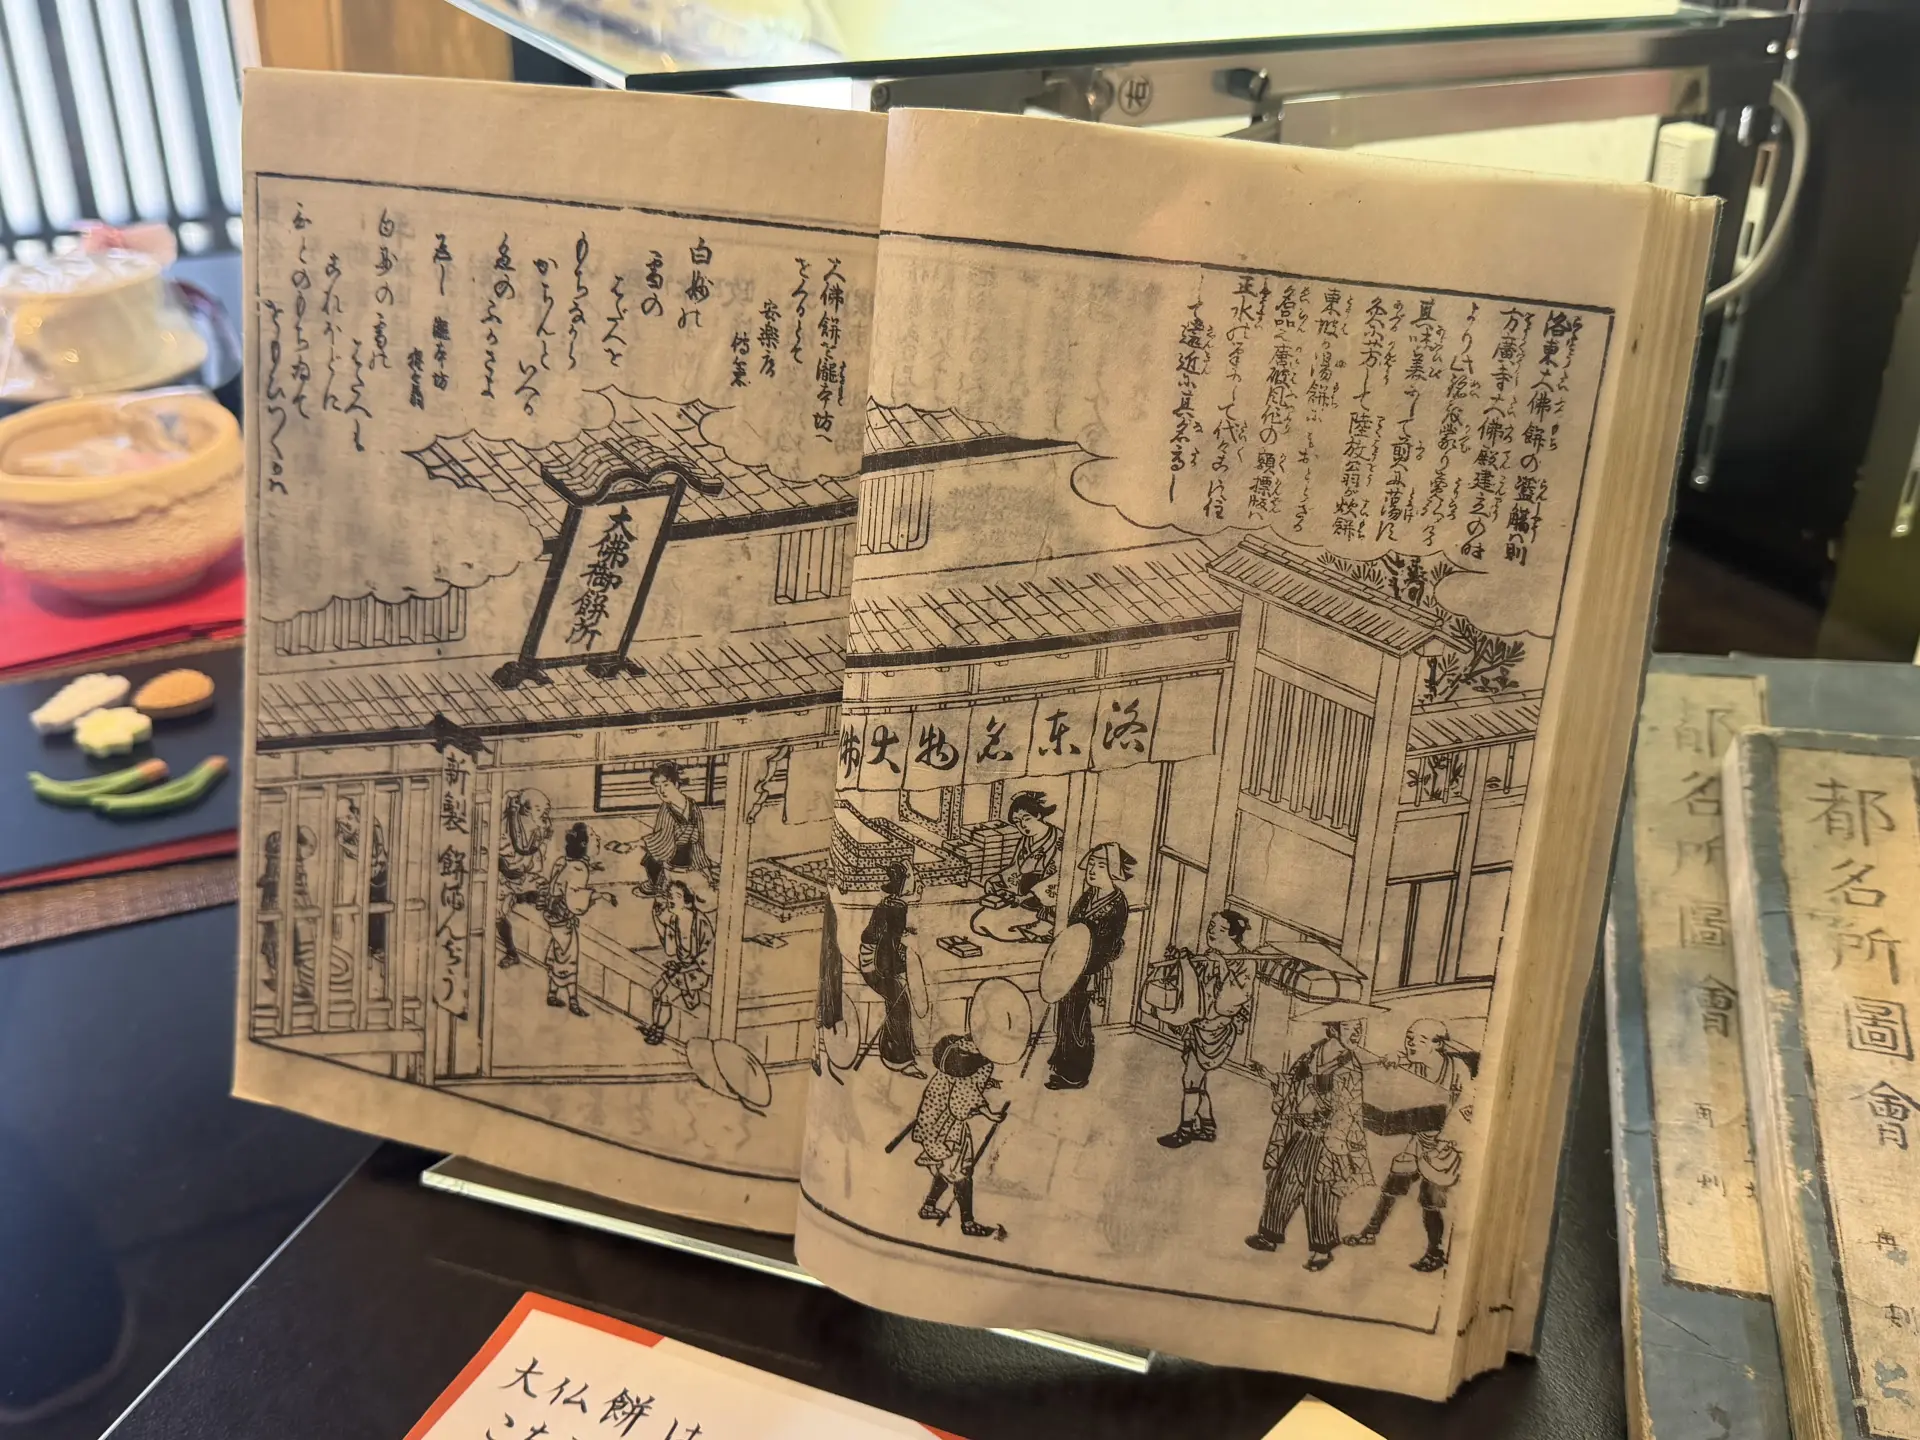
Daibutsu Mochi is said to have been a sweet made by wrapping bean paste in soft mochi. People visiting the Great Buddha reportedly ate it as a snack or bought it as a souvenir. The Miyako Meisho Zue depicts the bustle outside the shop and people buying Daibutsu Mochi, suggesting its popularity as a sweet sold near the temple gates.
Production eventually ceased, but Kanshundo revived this long-lost temple-gate sweet. Staying true to the original method, it is made by pounding mochi with a wooden mallet and mortar, then wrapping it around high-quality bean paste.
Summary
Wagashi are more than sweet, delicious treats. Their rich variety of designs feels like an expression born of Japan's many changes in nature throughout the four seasons. The skill of delicately capturing cherry blossoms, autumn leaves, or snowy landscapes in a small sweet seems to embody the Japanese affection for the changing seasons. Why not discover a sense of the season and Japan's beautiful culture through wagashi? When you taste them, take a moment to appreciate the background and stories behind each sweet.

Author
Freelance Announcer
Sayaka Motomura
Focused on sharing insights related to traditional culture, performing arts, and history.