
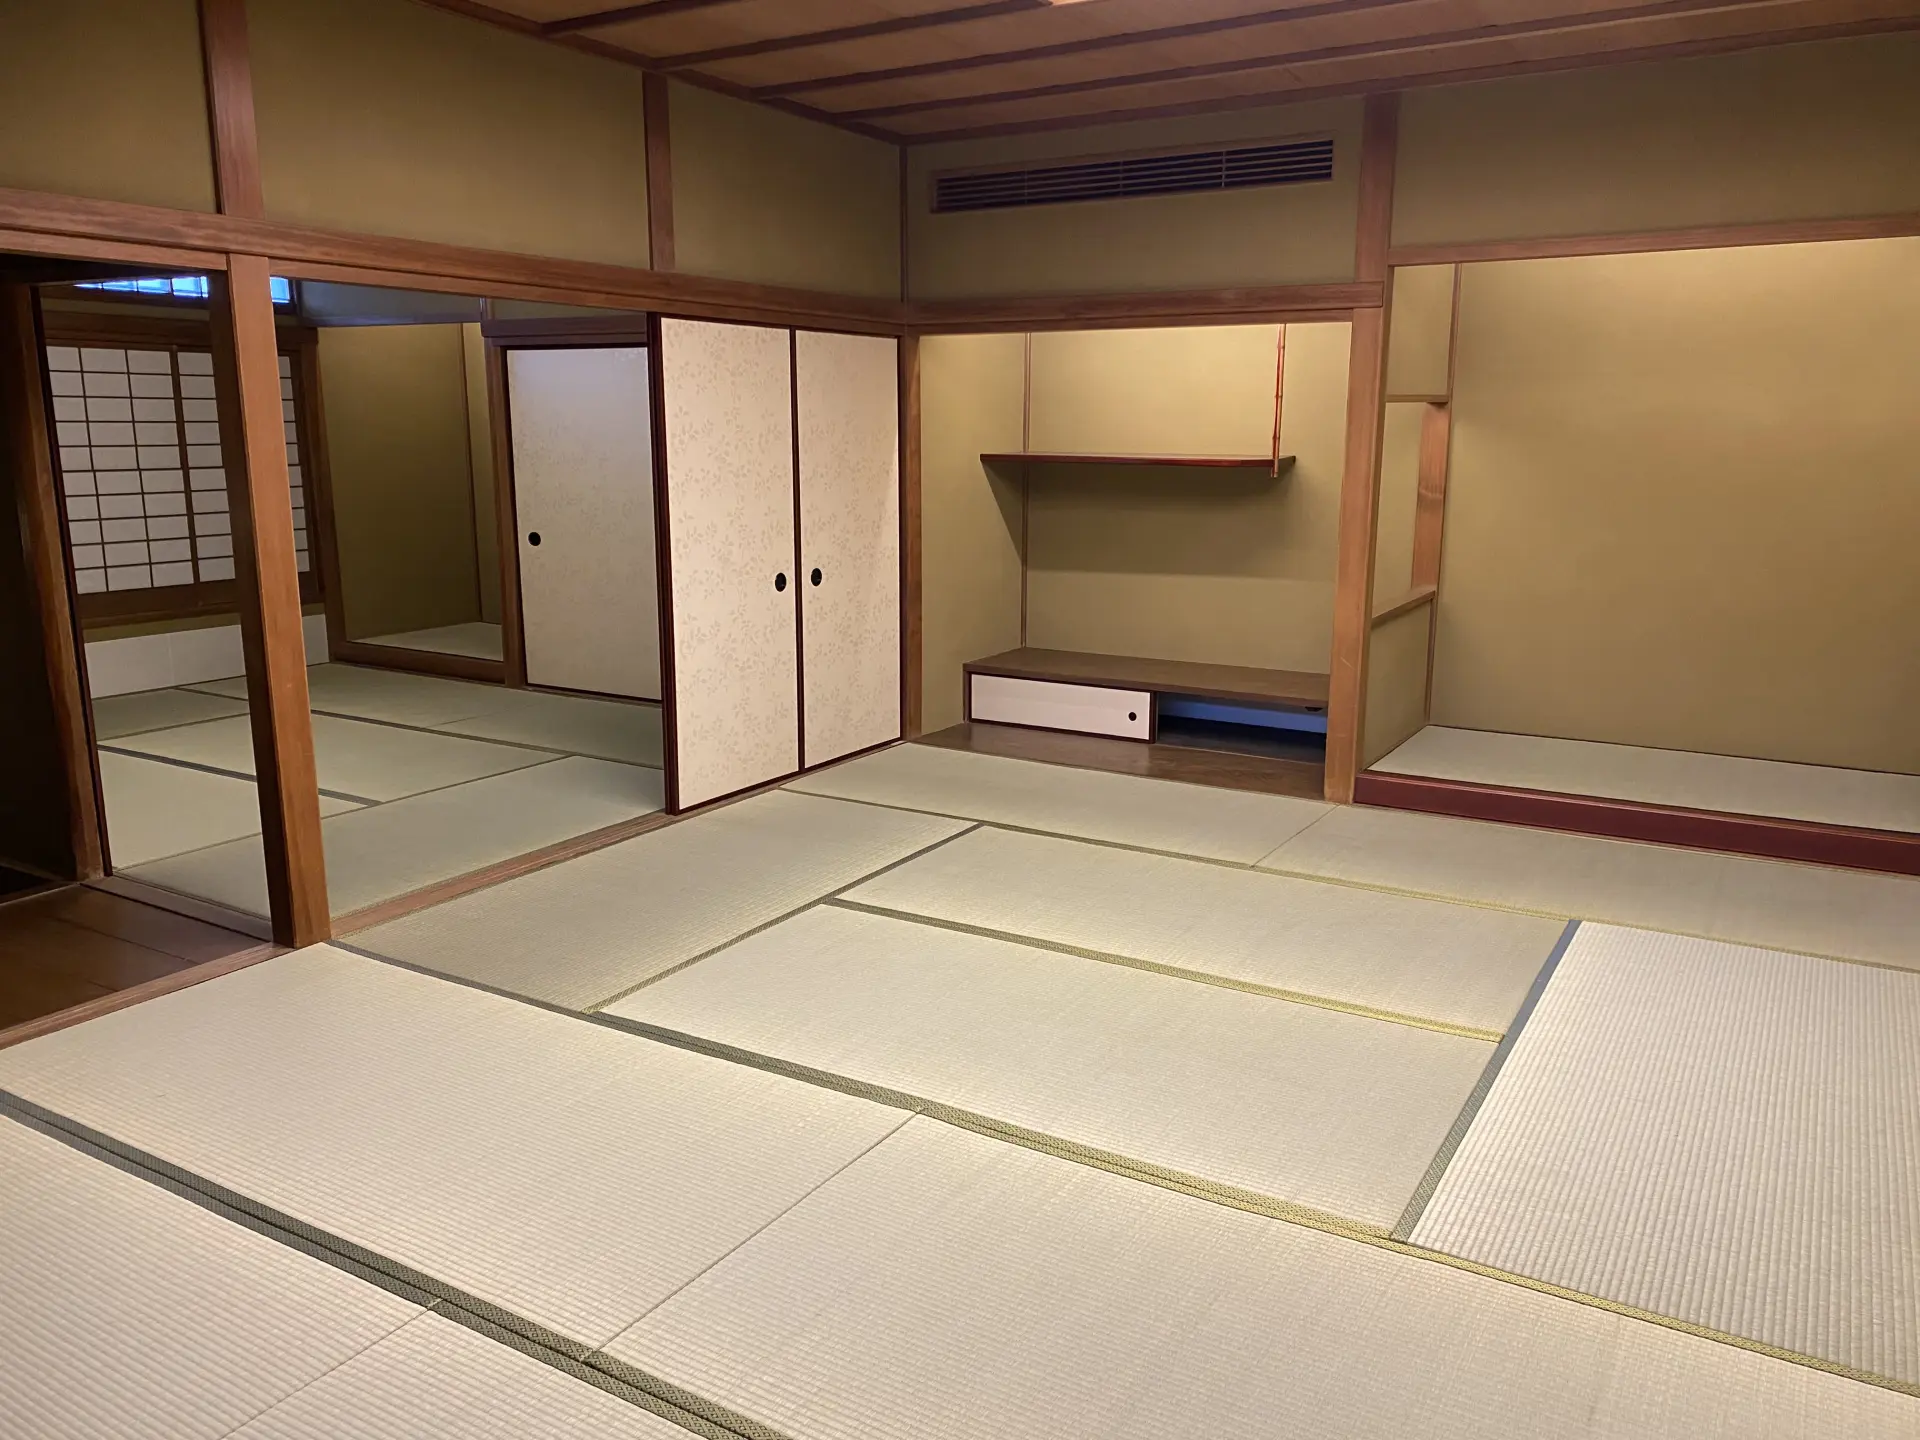
The Complete Guide to Tatami, a Traditional Flooring Essential to Japanese Life
Tatami is a traditional flooring used in Japanese-style rooms in homes, as well as in ryokan inns, shrines, temples, and tea rooms. Made from a plant called igusa rush, it is known for its distinctive fragrance and soft texture.
Tatami generally consists of three parts: the tatami-omote surface, the tatami-doko core, and the fabric tatami-beri edging that protects the sides. Used in Japan for around 1,300 years, tatami is more than just flooring—it is deeply connected to the Japanese way of life and the country’s residential culture.
However, as Japanese lifestyles have changed and fewer homes have Japanese-style rooms, opportunities to experience tatami have also declined. In response, workshops where participants can experience the craftsmanship of tatami artisans have been introduced to help more people rediscover the appeal of this traditional flooring.
This article introduces the history of tatami, the igusa rush used to make it, and a workshop where you can experience tatami making. When visiting Japan, you are sure to see tatami in many different places. Learning more about its rich traditions will give you a deeper understanding of Japanese culture.
What Is Tatami?
Here, we take an in-depth look at tatami, Japan’s traditional flooring, through its history, construction, materials, and more.
The History of Tatami
Plants have long been used as essential materials in everyday life in Japan. In addition to tatami, they have also been used to make bags and other items. The custom of living on plant-based floor coverings dates back to the Jomon period, which began around 13,000 years ago and lasted for approximately 10,000 years. The word “tatami” came into use around 1,300 years ago during the Nara period. The Kojiki, Japan’s oldest historical chronicle, completed in 712, contains a reference to suga-tatami, an early form of tatami. Shosoin at Todaiji Temple also preserves Gosho-no-Tatami, the oldest surviving tatami mat in Japan. It is said to have been used by Emperor Shomu during the Nara period (710–794).
During the Heian period (794–1185), tatami was used in the residences of aristocrats and other members of the upper class. Although it is believed to have gradually developed into its present form, tatami was not yet laid across entire rooms as flooring. Instead, individual mats were placed only where needed, such as beneath a person’s seat. Igusa rush was already being used at the time, and tatami was considered a luxury. It also served as a symbol of authority, with the thickness of the mat and the pattern and color of its edging indicating the user’s social rank or status.
Today, changes in the Japanese way of life mean that many condominiums and other multi-unit residences no longer have Japanese-style rooms. As a result, the supply of tatami-omote, the essential flooring material for these rooms, continues to decline. Annual production in Japan has fallen from a peak of 42.88 million sheets to around 1 million today. Because tatami remains essential to Japan’s traditional architecture and culture, various initiatives are underway to expand demand.
The Parts of a Tatami Mat
A tatami mat consists of three parts. Each part is made by specialized artisans through a division of labor, and a tatami shop completes the final process of assembling them into a single mat.
Tatami-omote Surface
Tatami-omote is the material covering the surface of a tatami mat. High-quality tatami-omote has a fine, even weave with little variation in color, and it retains its luster even after fading in the sun. It also feels comfortable underfoot and is highly durable.
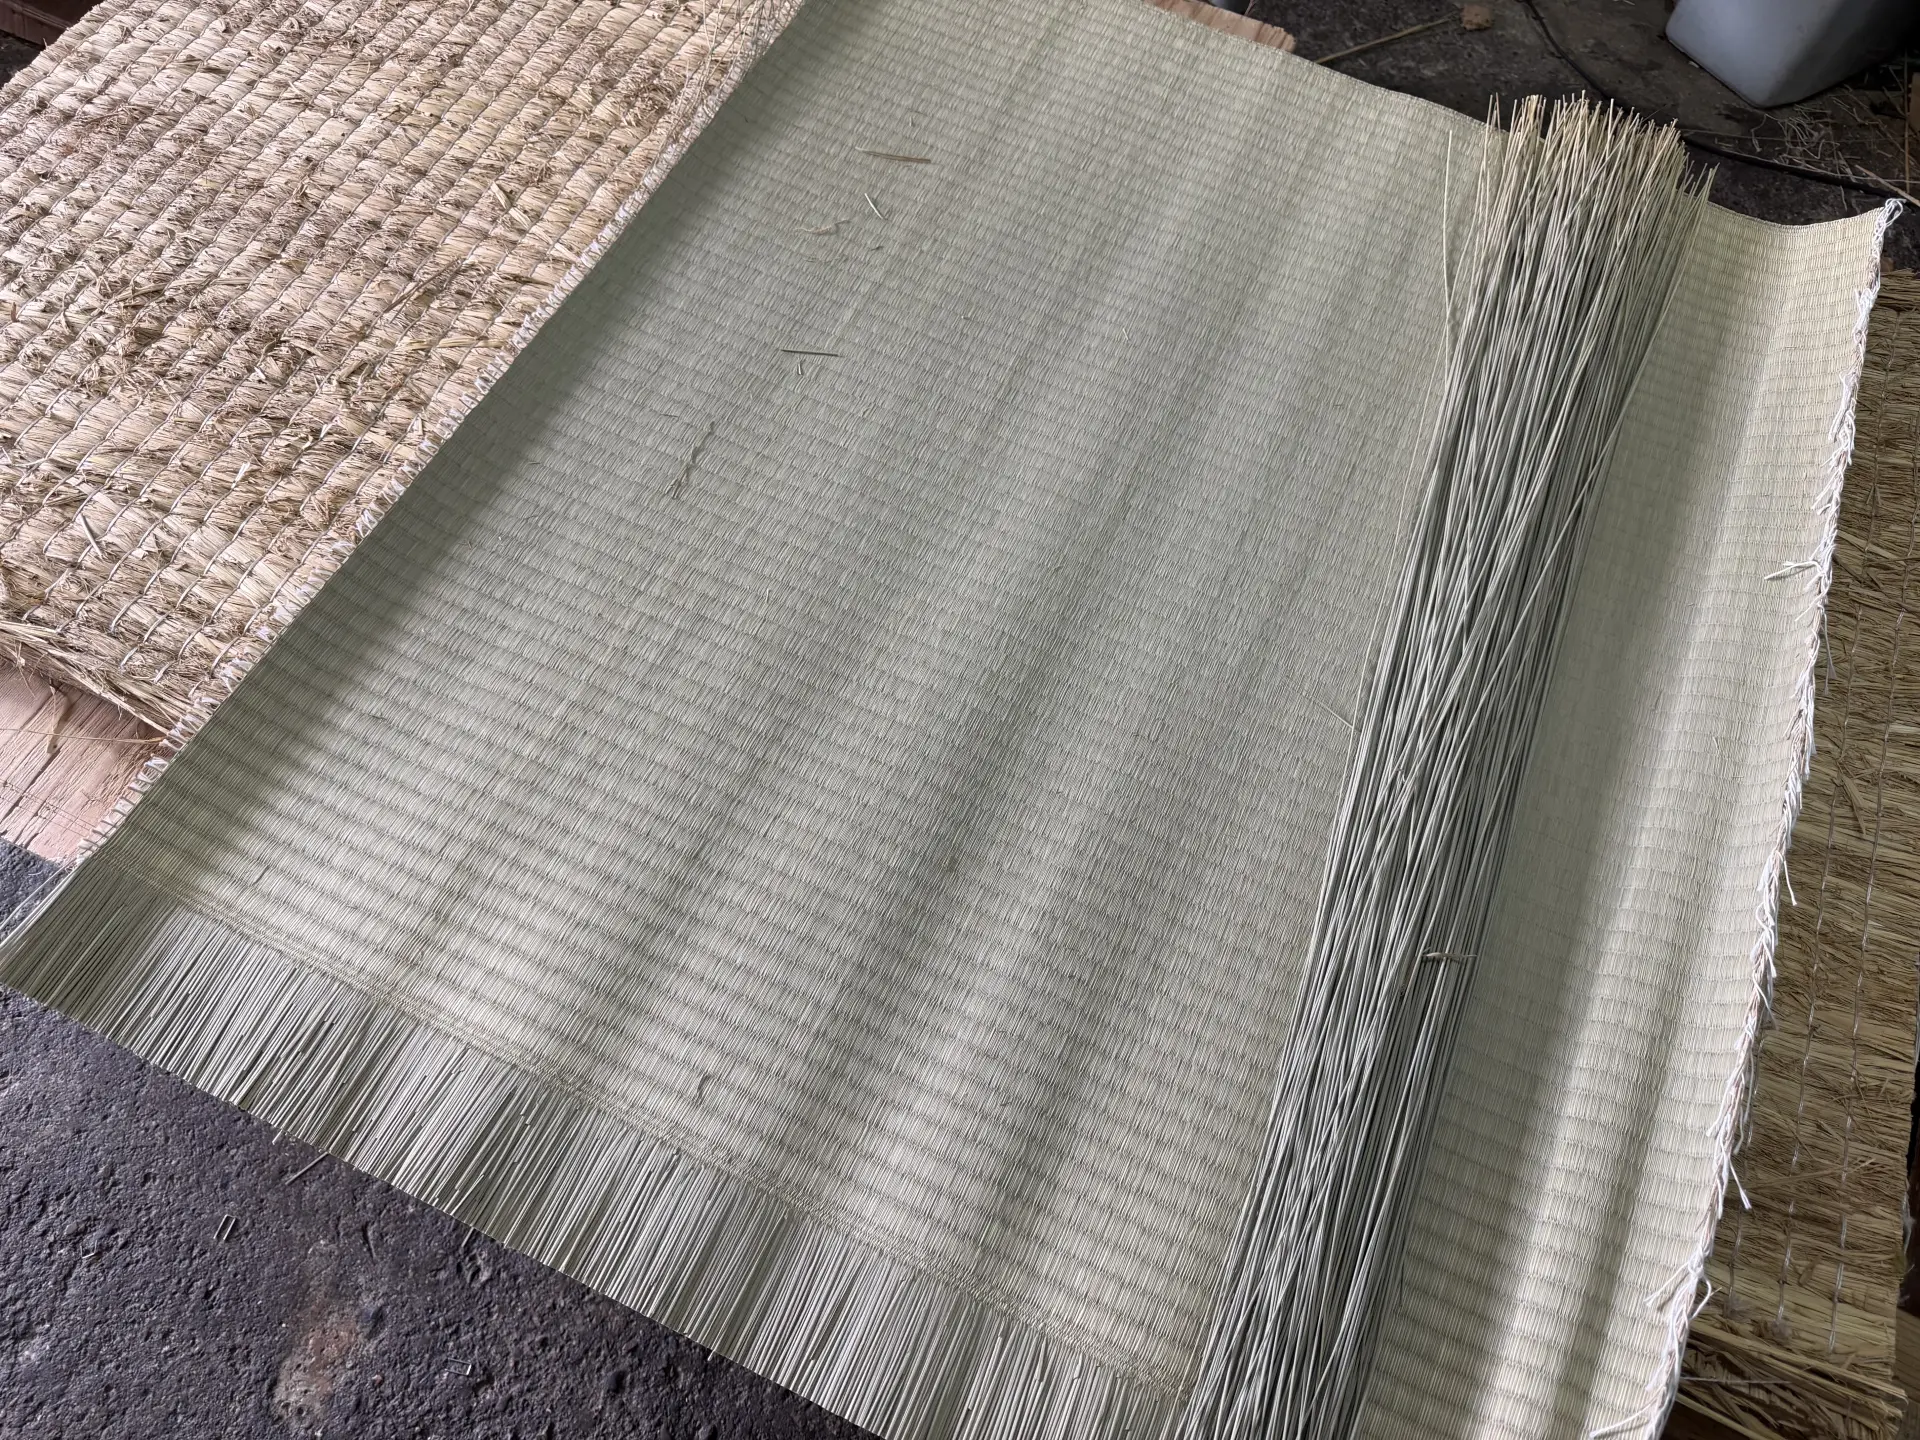
Tatami-omote is made from igusa rushes measuring 1–1.4 m in length. Longer rushes are used for higher-quality tatami-omote. This is because the strongest and greenest part of each rush is near its center, while the tip and base are drier and more yellowish. Longer rushes therefore provide more of the strong, green central section. Around 4,000–7,000 rushes are woven into a single tatami mat, with higher-quality surfaces containing more rushes.
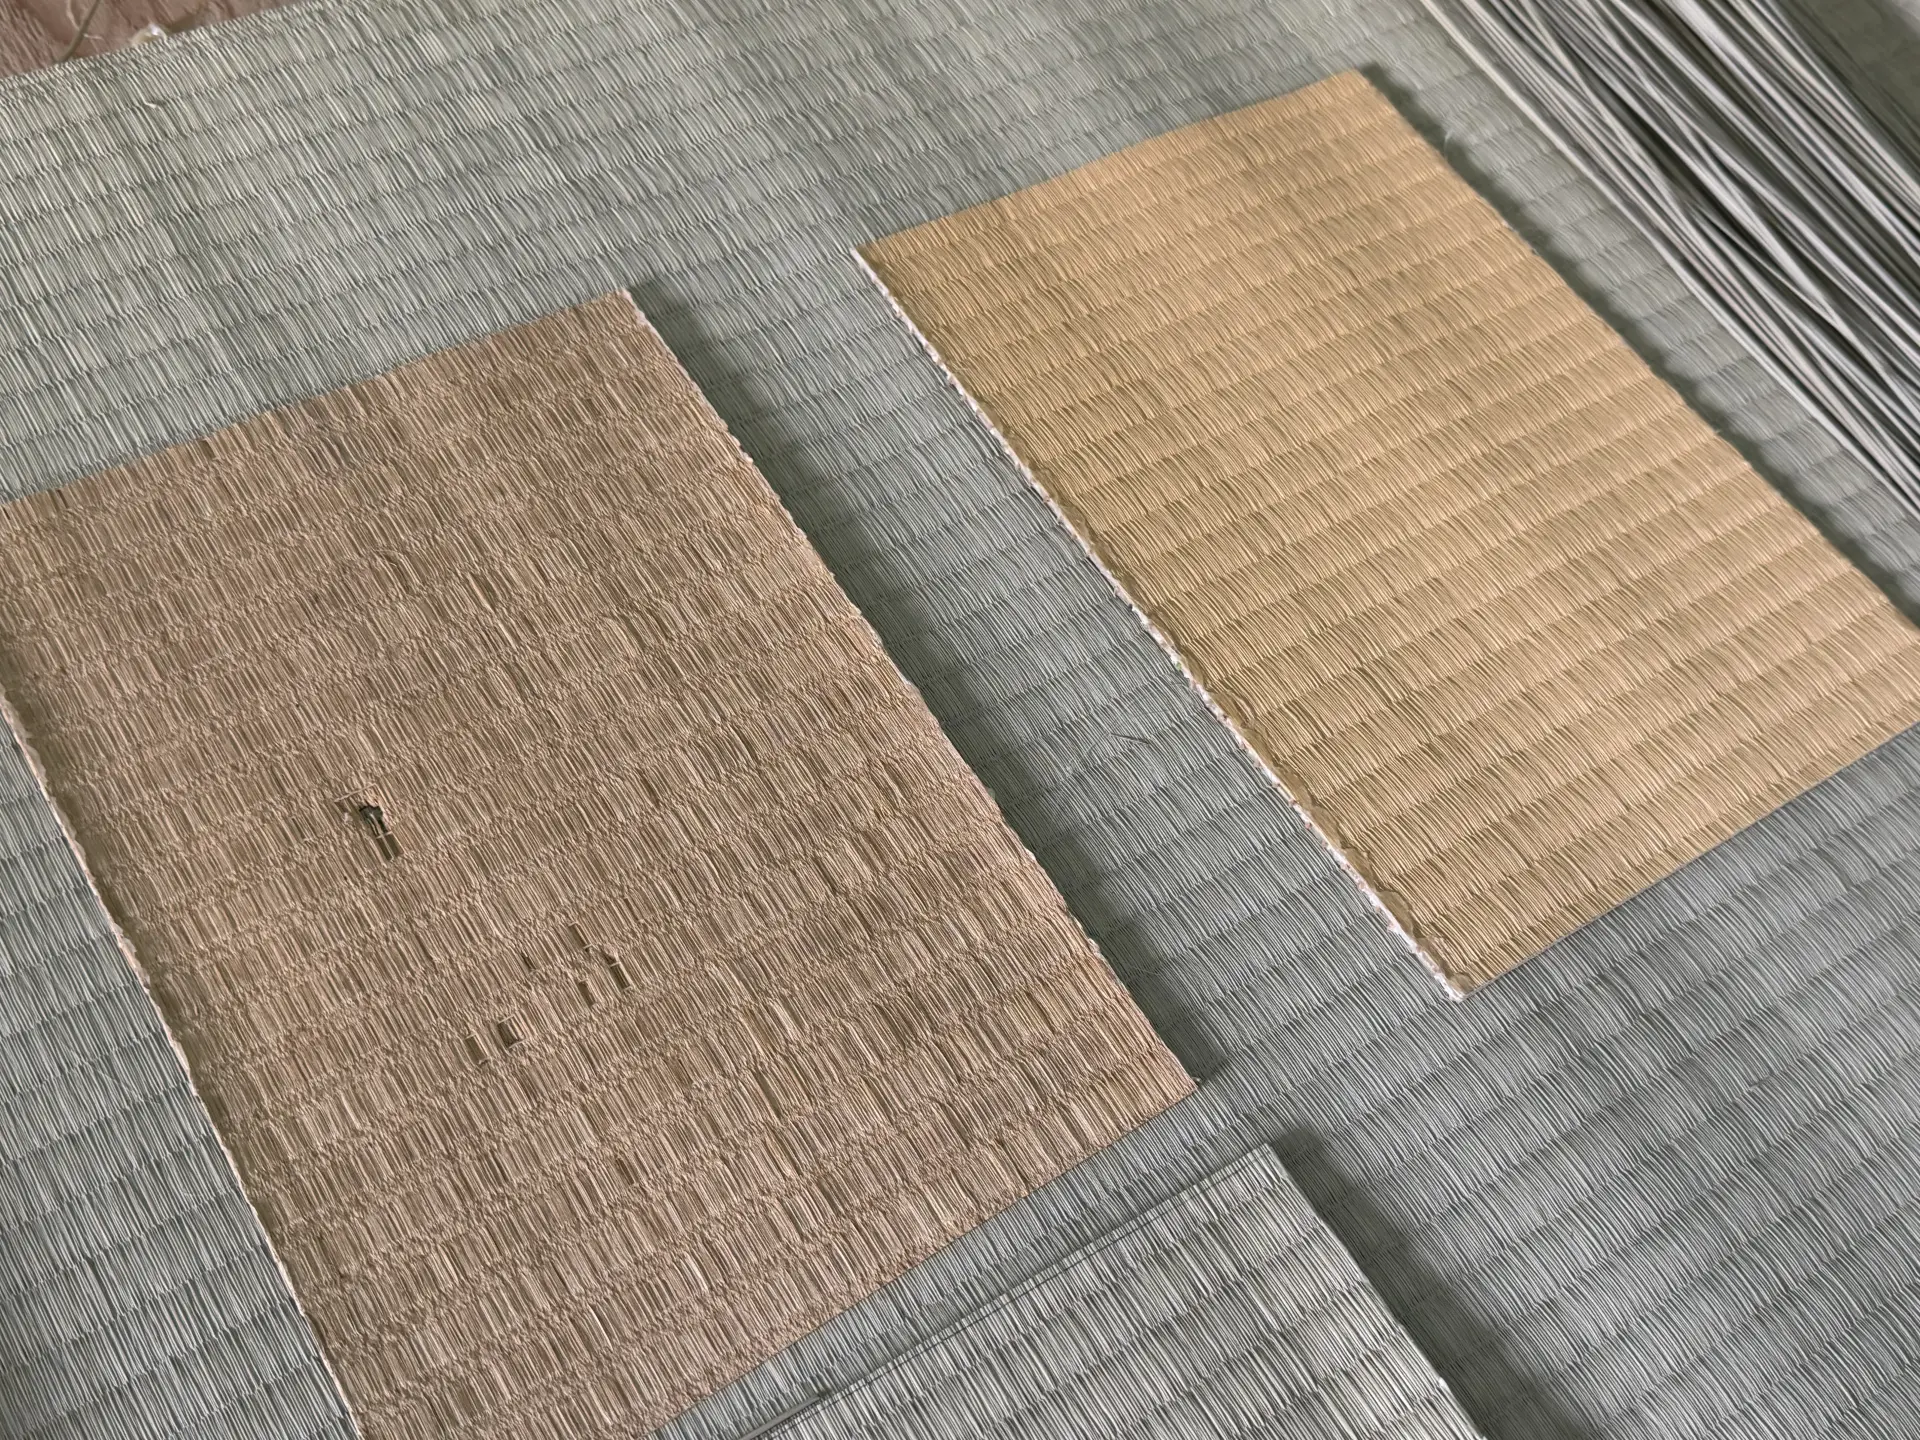
Tatami-omote is also known for its pleasant fragrance. The forest-like scent that greets you when entering a Japanese-style room comes from the tatami surface. It contains some of the same compounds experienced during forest bathing and is said to promote relaxation, improve concentration, and help neutralize odors.
The cross section of an igusa rush reveals a sponge-like center. This part repeatedly absorbs and releases moisture from the air, giving tatami-omote a natural ability to regulate humidity. Japan has hot, humid summers and severely cold winters. Tatami flooring absorbs moisture during the summer and helps retain humidity in the dry winter months. This makes it particularly well suited to Japan’s climate. A single tatami mat is said to absorb and release 500 ml—the equivalent of one plastic beverage bottle—of moisture. A six-mat room can therefore regulate as much as 3 liters of moisture.
Tatami-doko Core
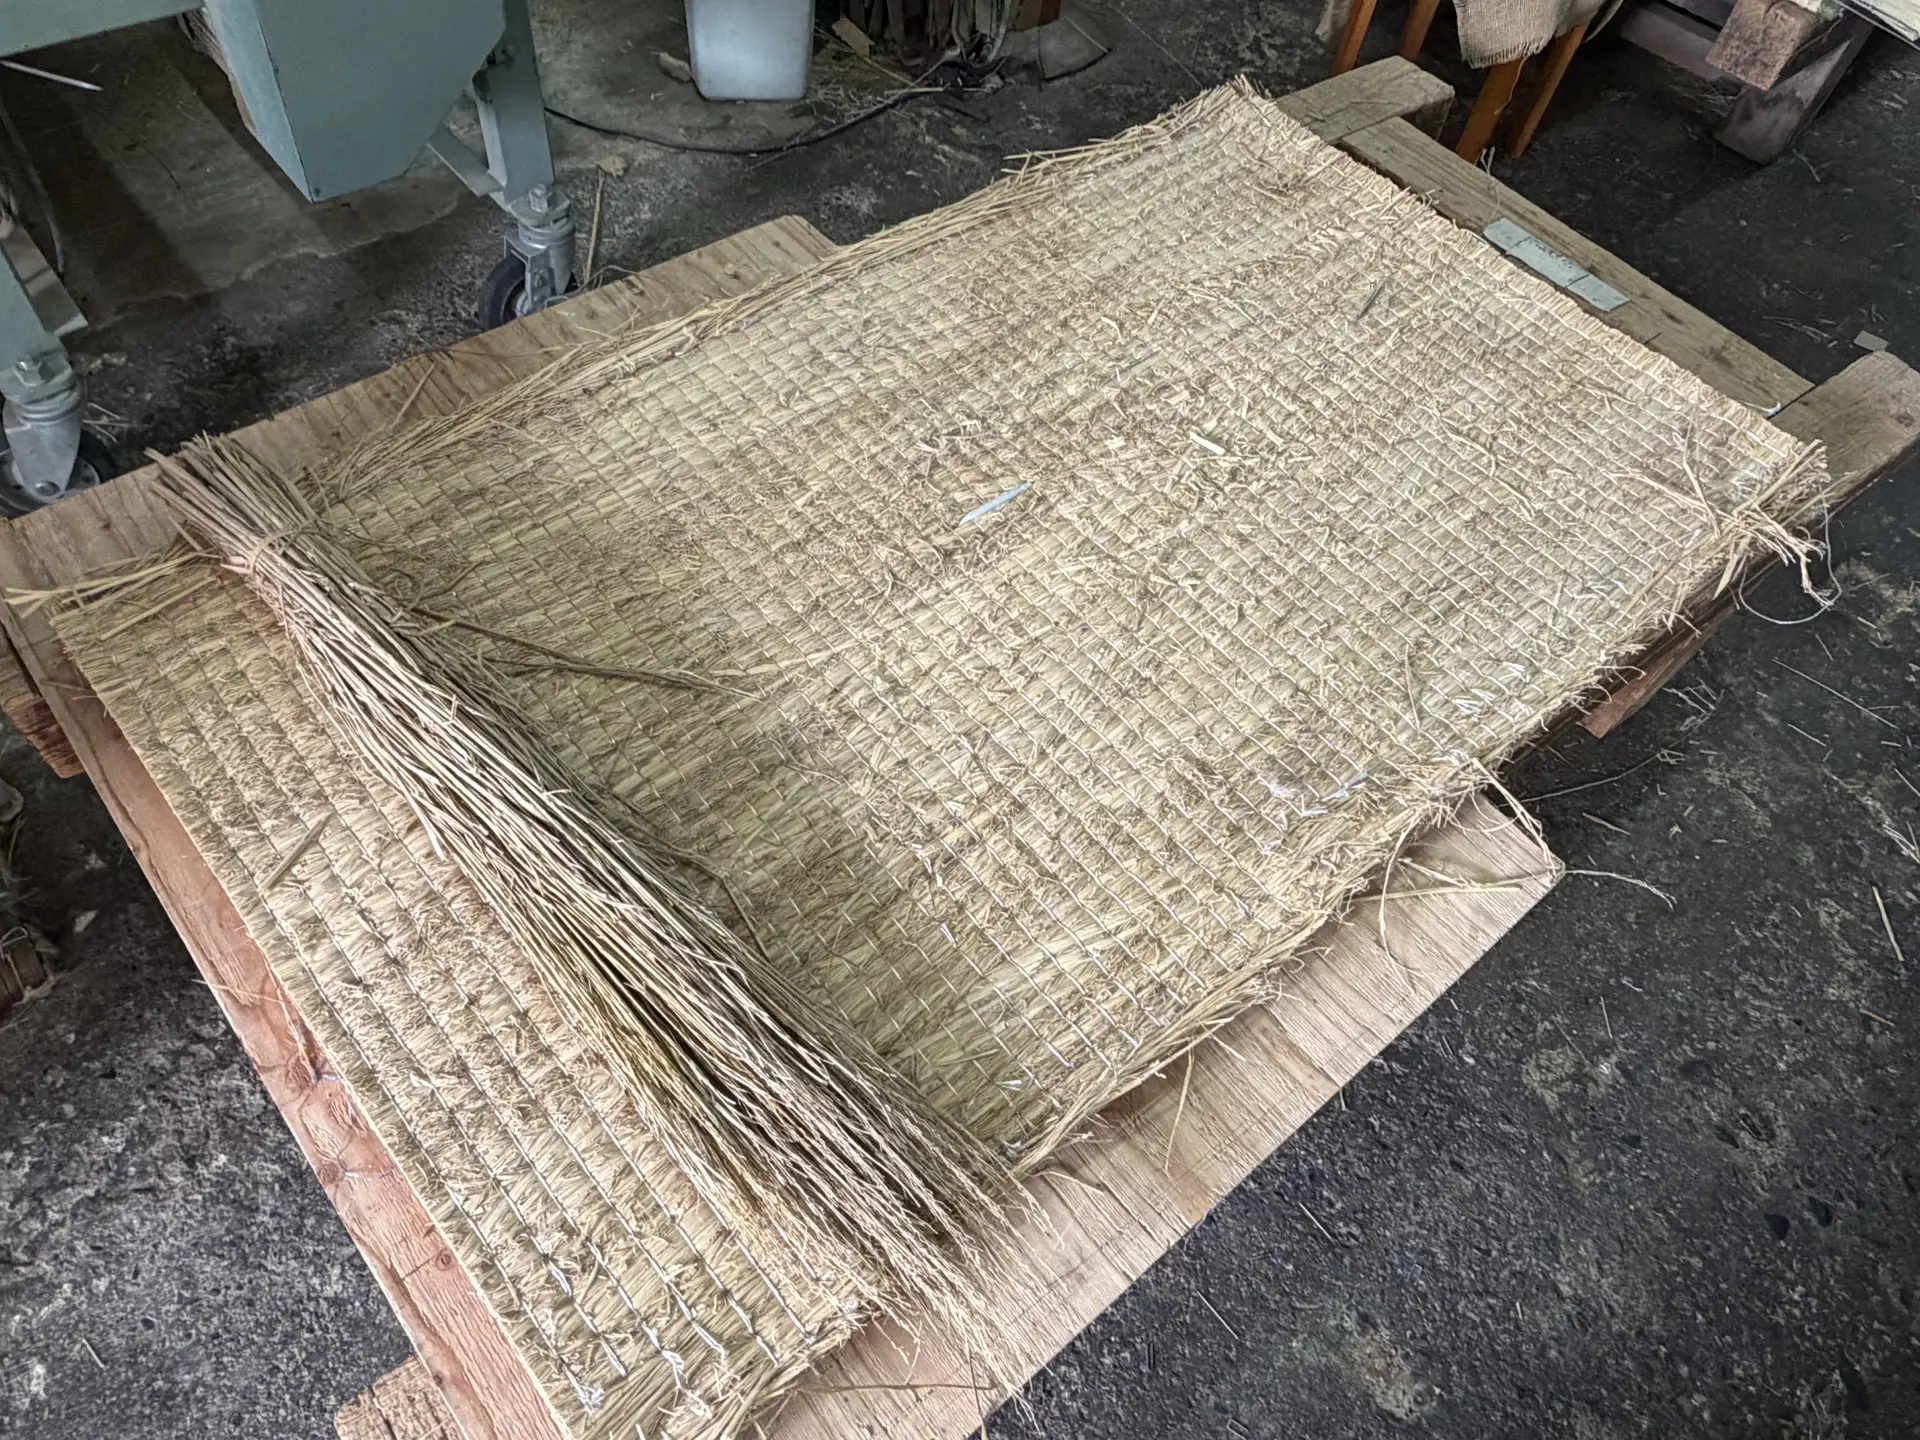
The tatami-doko is the foundation of a tatami mat and is traditionally made from rice straw. Straw is first laid vertically across the entire surface, followed by a horizontal layer. Alternating vertical and horizontal layers are added until they reach a thickness of approximately 40 cm. The layers are then bound with thread and compressed to a thickness of 5 cm. Straw comes in different quality grades, and higher-quality straw provides better cushioning. The finished core is also notably heavy, weighing around 30–40 kg. In the past, the thickness of the tatami-doko symbolized the authority of aristocrats and samurai.
Tatami-beri Edging
Tatami-beri is the fabric edging attached to the long sides of a tatami mat and is generally made from cotton. Traditional tatami-beri is made from Kyoto’s Nishijin-ori brocade, which is also used for kimono obi sashes. There are approximately 1,200 tatami-beri patterns. In the past, their patterns and colors also symbolized the authority of aristocrats and samurai. The most prestigious pattern is ungen-beri, which was traditionally reserved for the emperor.
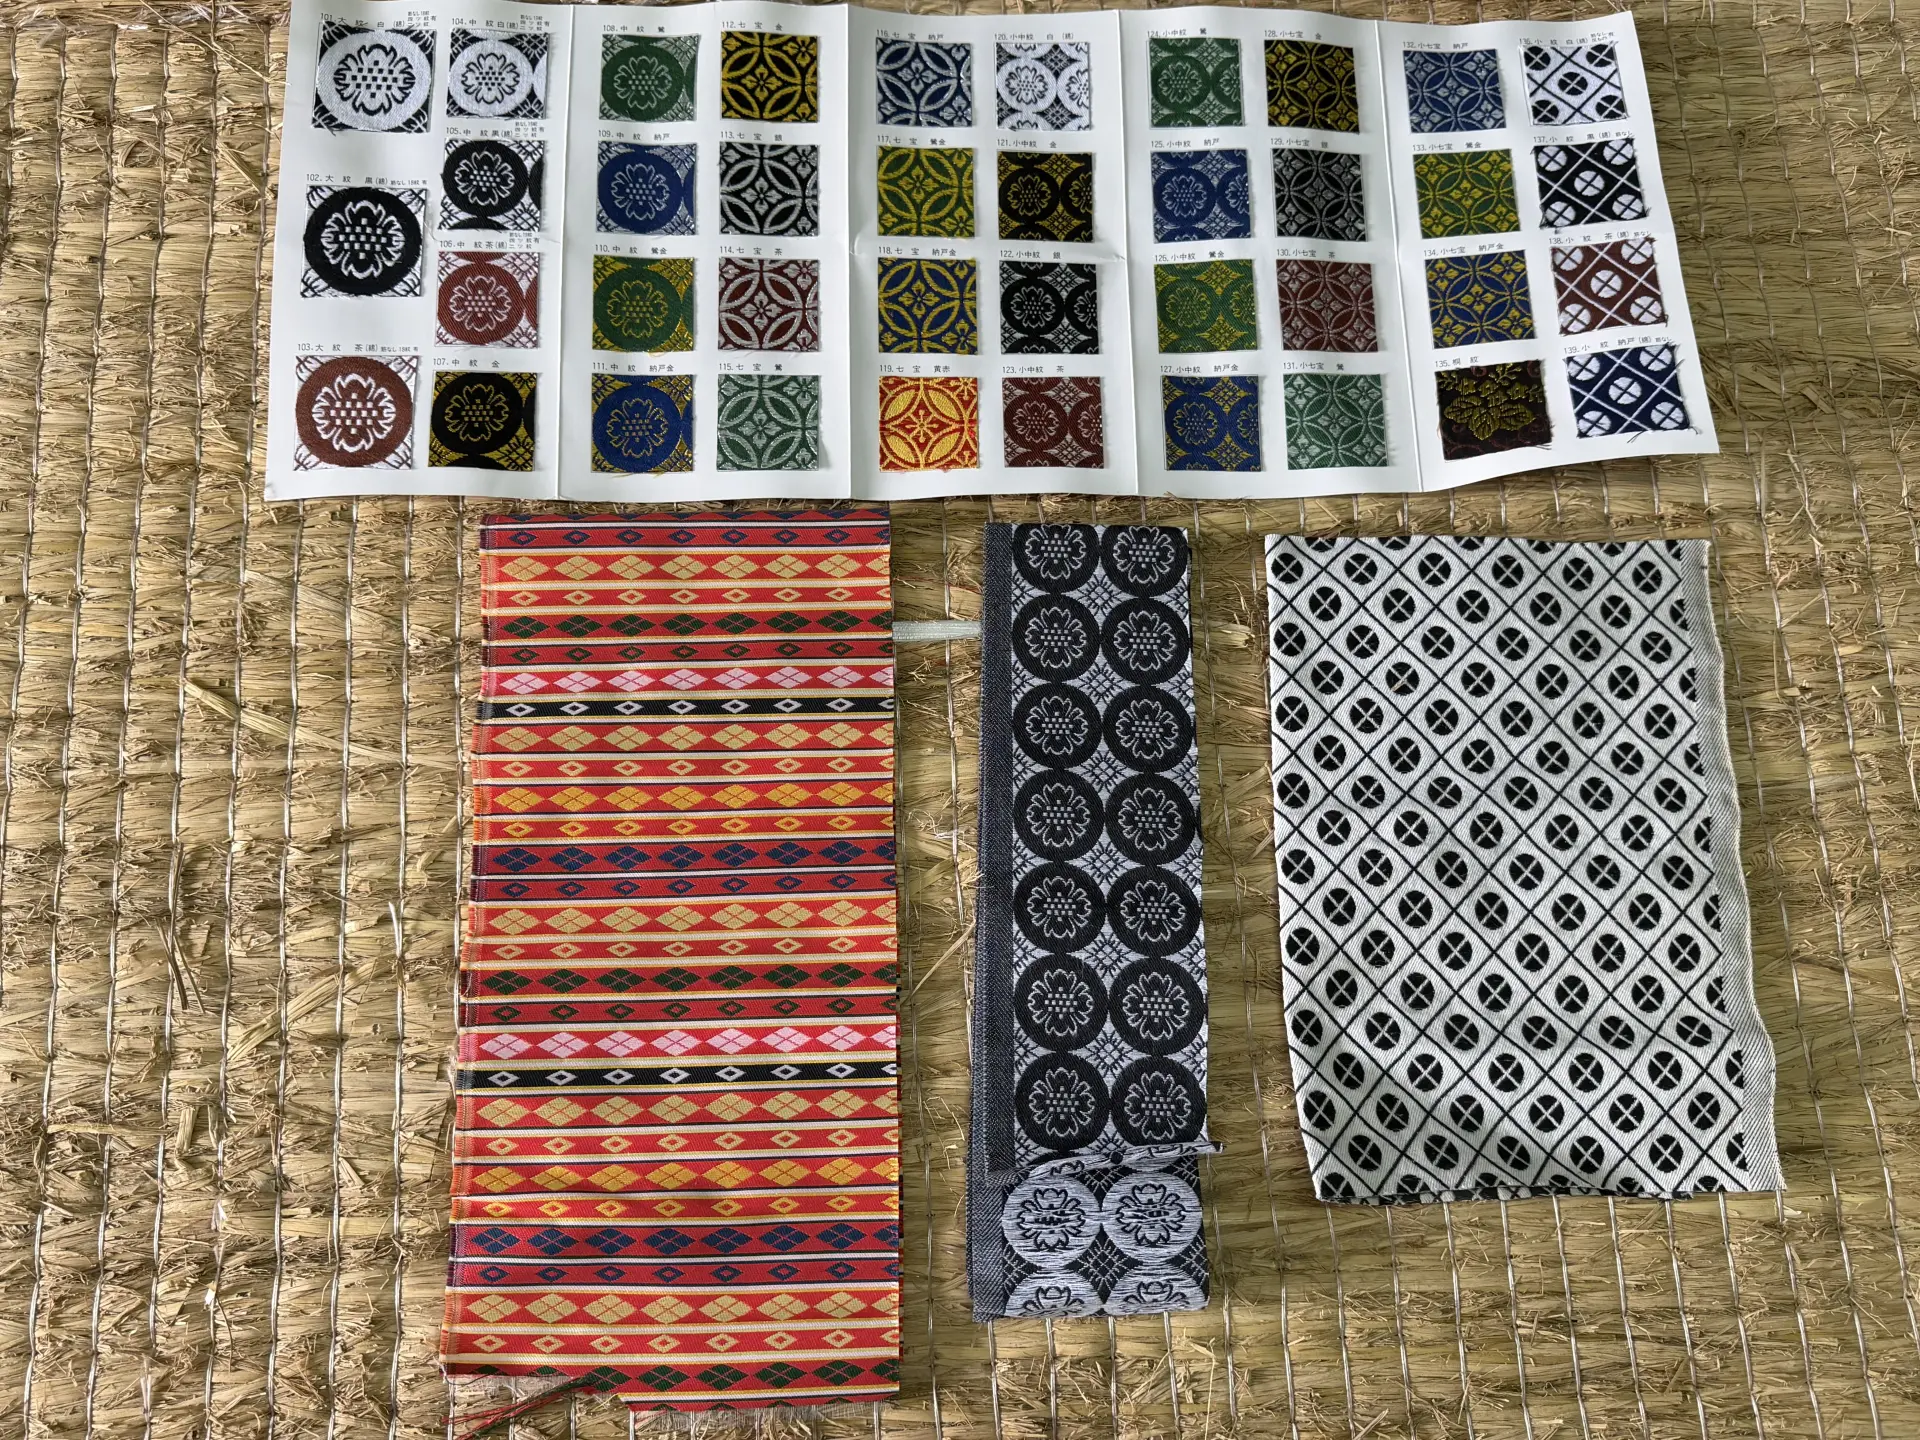
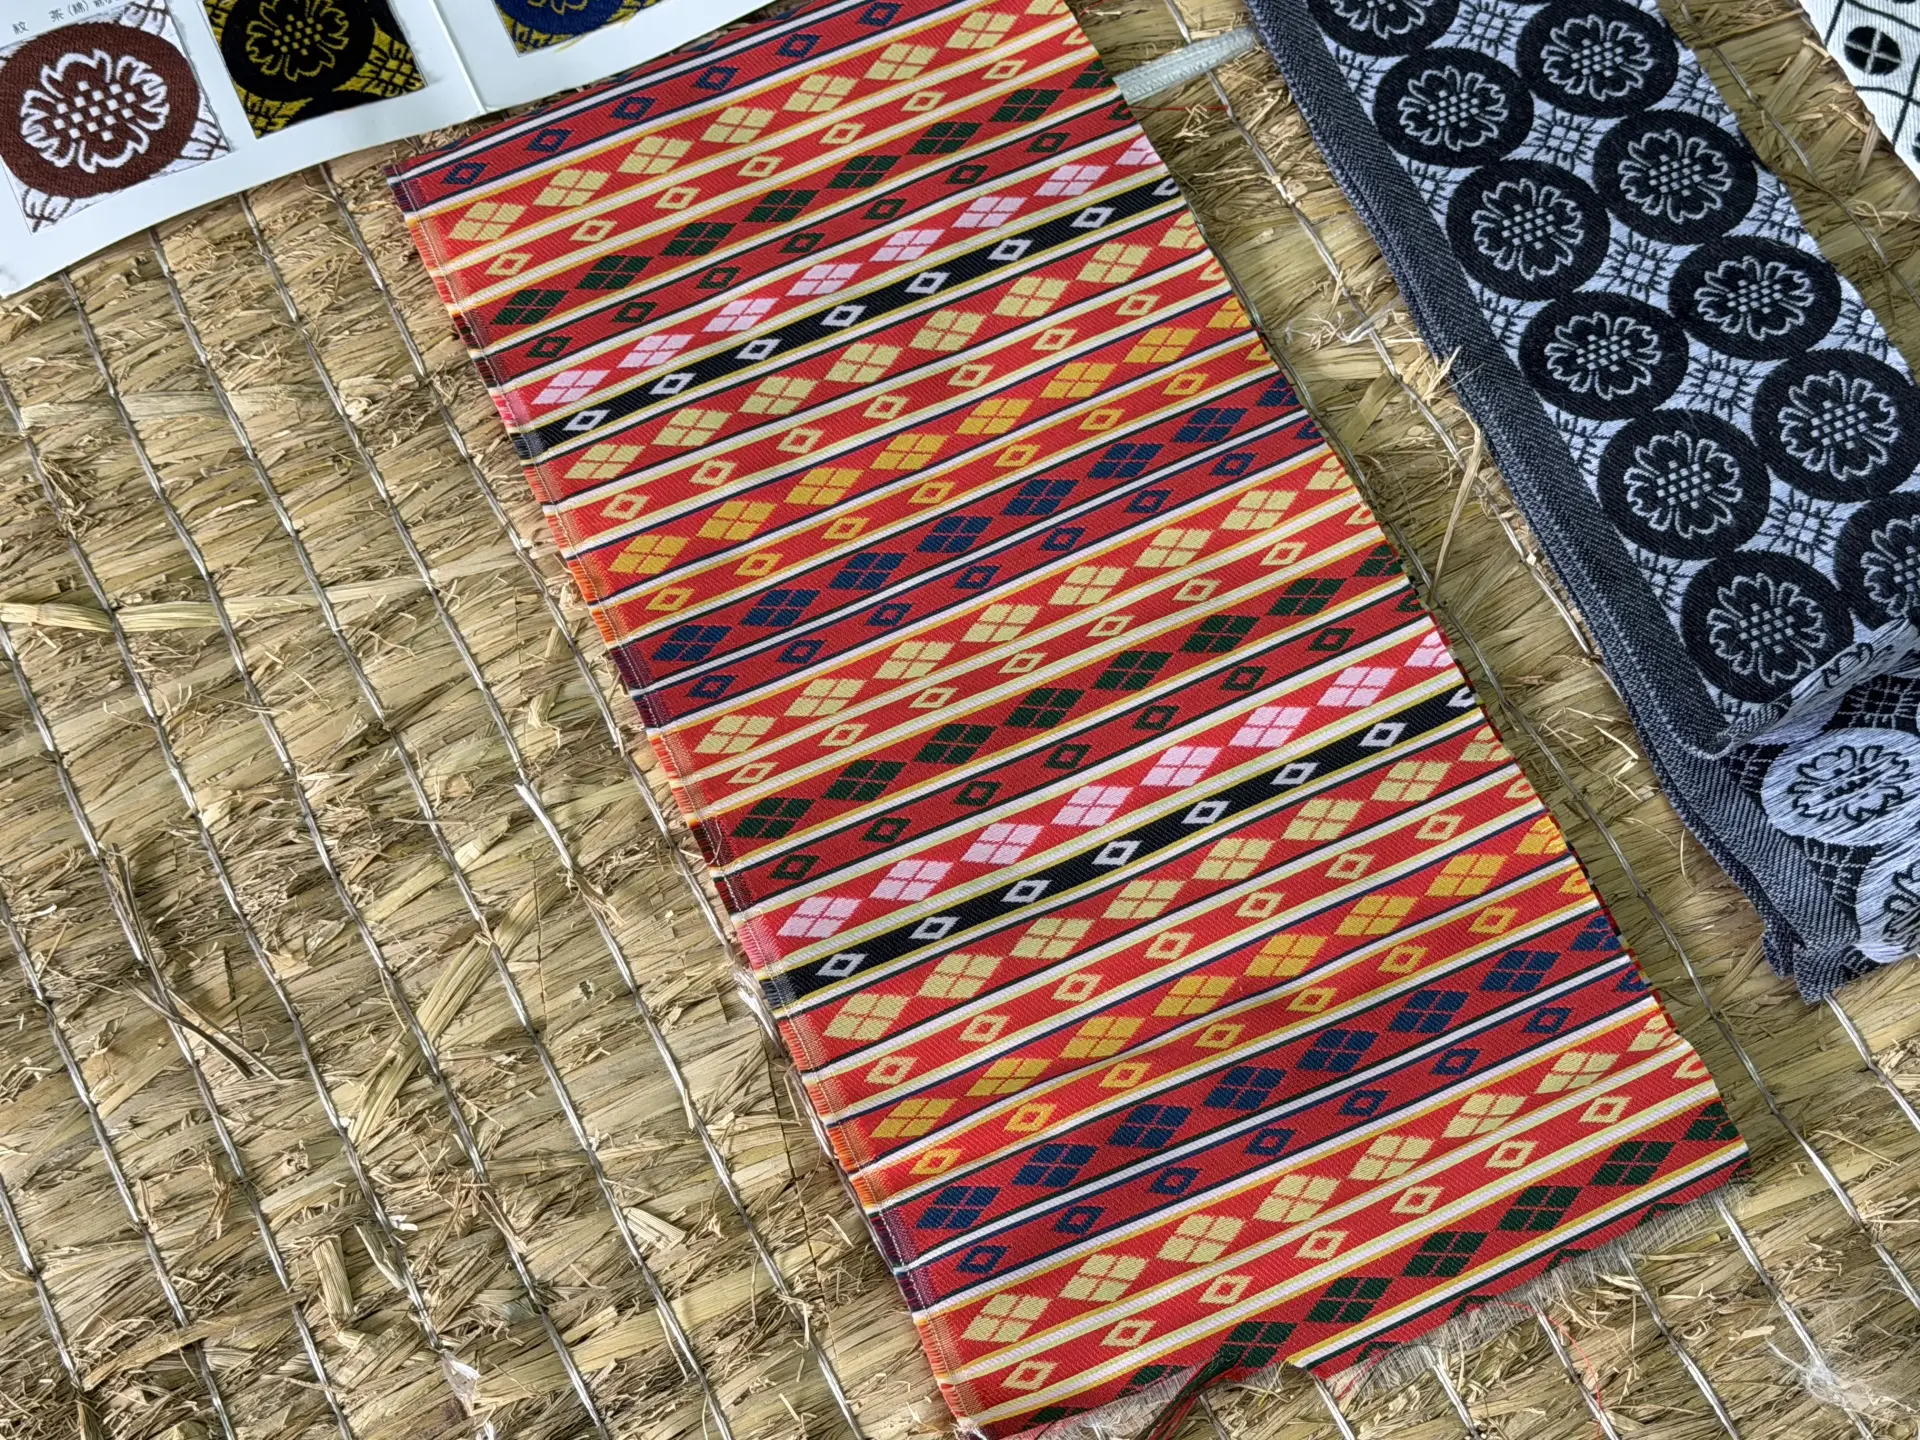
Daimon Korai-beri features a chrysanthemum design and is considered highly prestigious. It is still used in temples and tea rooms today.
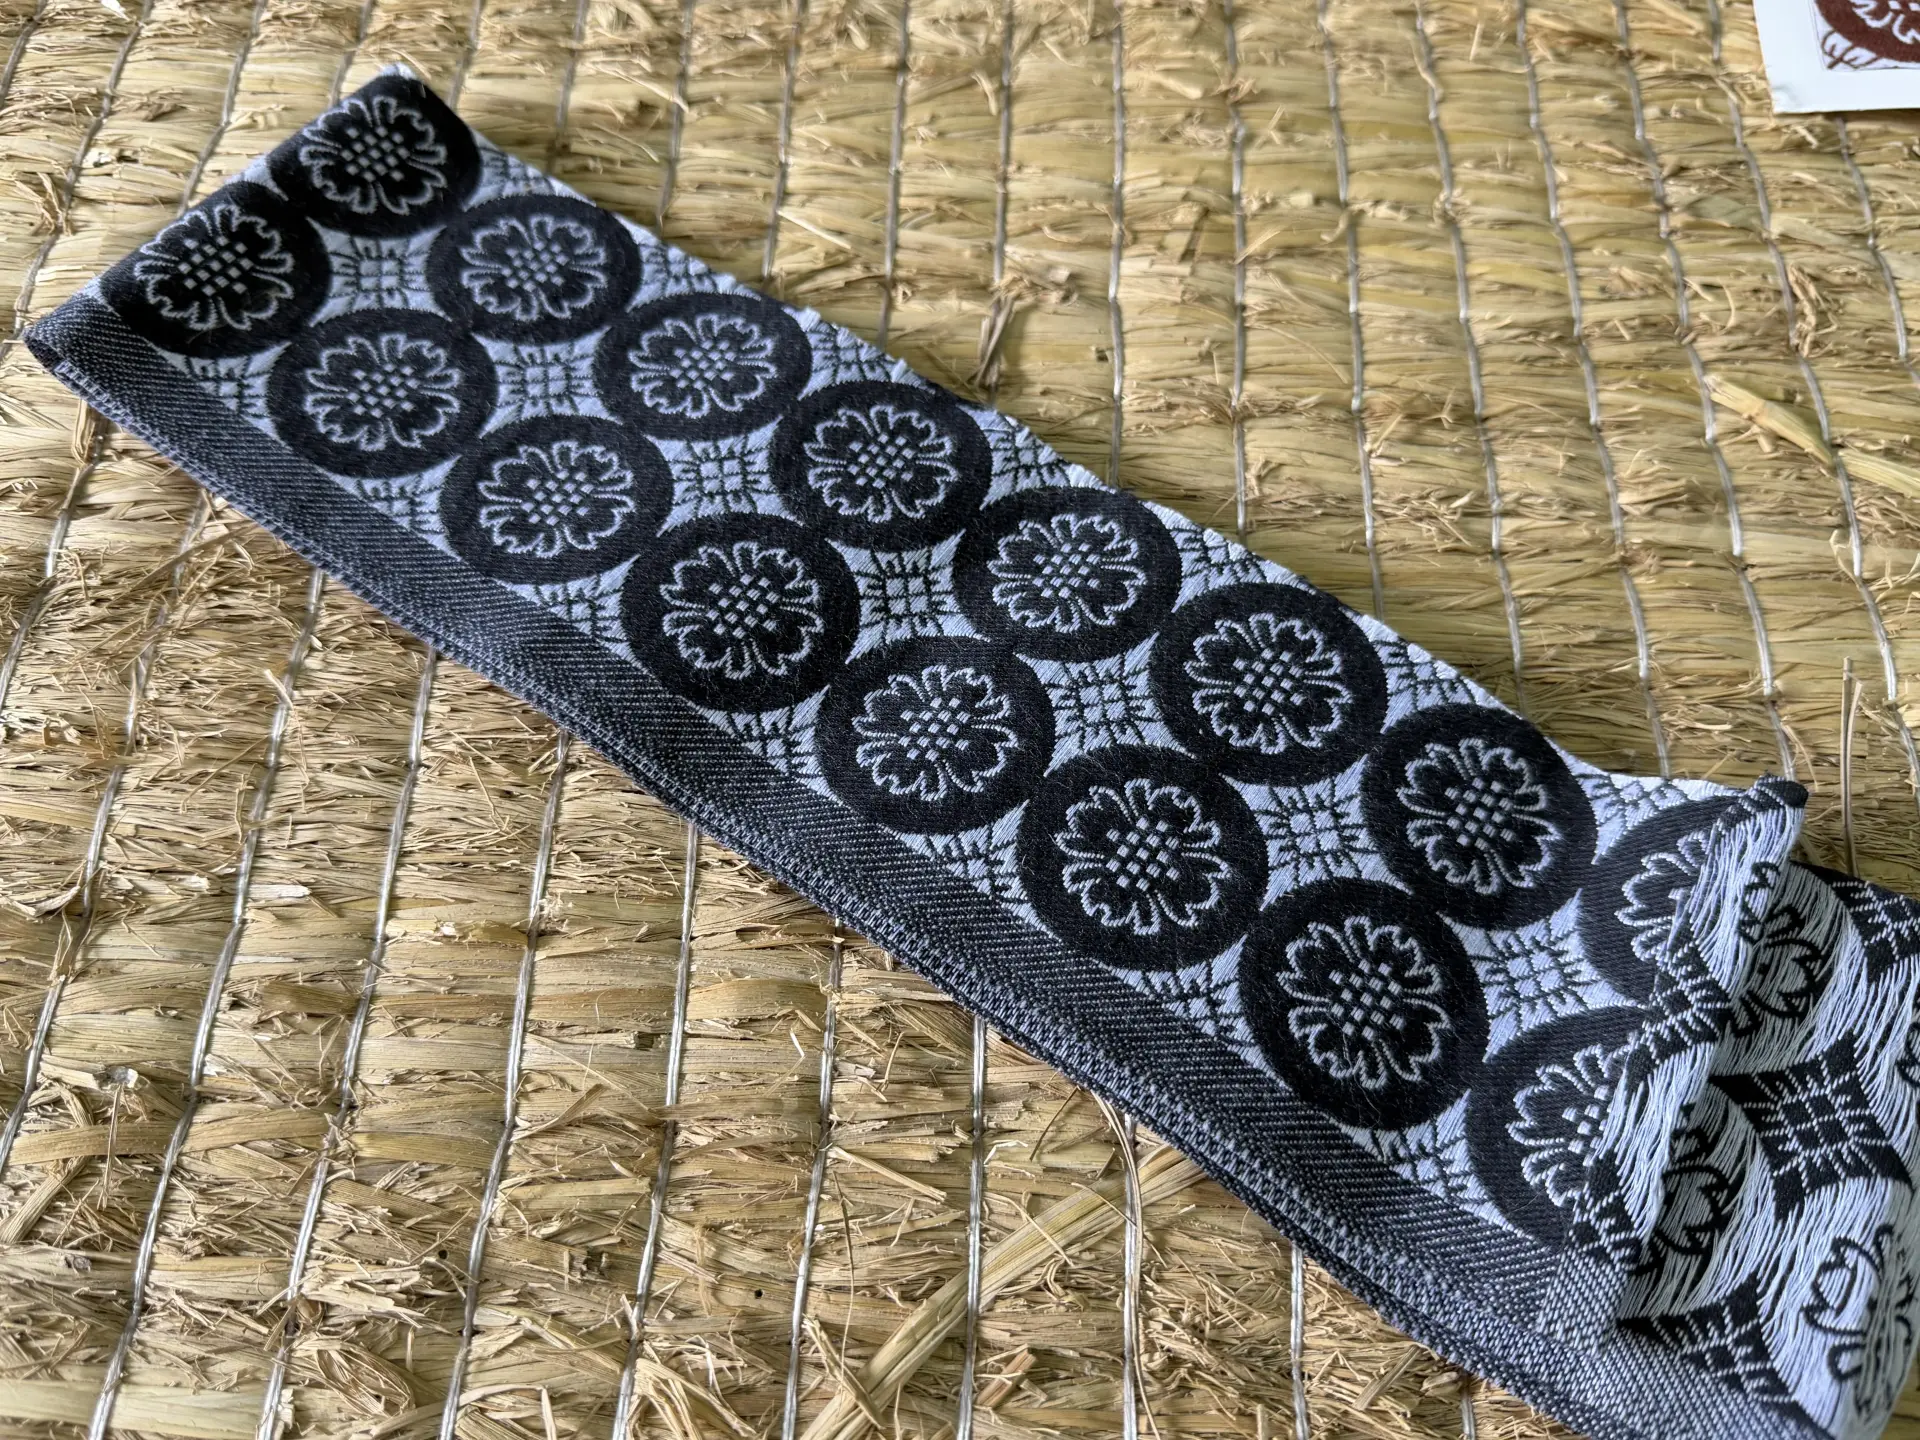
One useful point of etiquette to remember in a Japanese-style room is not to step on the tatami edging. The corners of tatami mats are vulnerable, so the edging helps protect them. Tatami-beri may also feature family crests or patterns associated with social rank. Avoiding the edging is therefore considered part of proper behavior and etiquette in a Japanese-style room. As people now spend less time in such rooms, many Japanese people, particularly younger generations, are unfamiliar with this custom. If you have an opportunity to enter a tatami room at a shrine, temple, or tea room, try to be mindful not to step on the edging.
Tatami mats without edging have also become available in recent years.
Igusa Rush, the Material Used for Tatami-omote
Tatami-omote is made from a plant called igusa rush. Igusa is a perennial herb of the Juncaceae family and Juncus genus that grows naturally in wetlands, including areas around lakes in Japan.
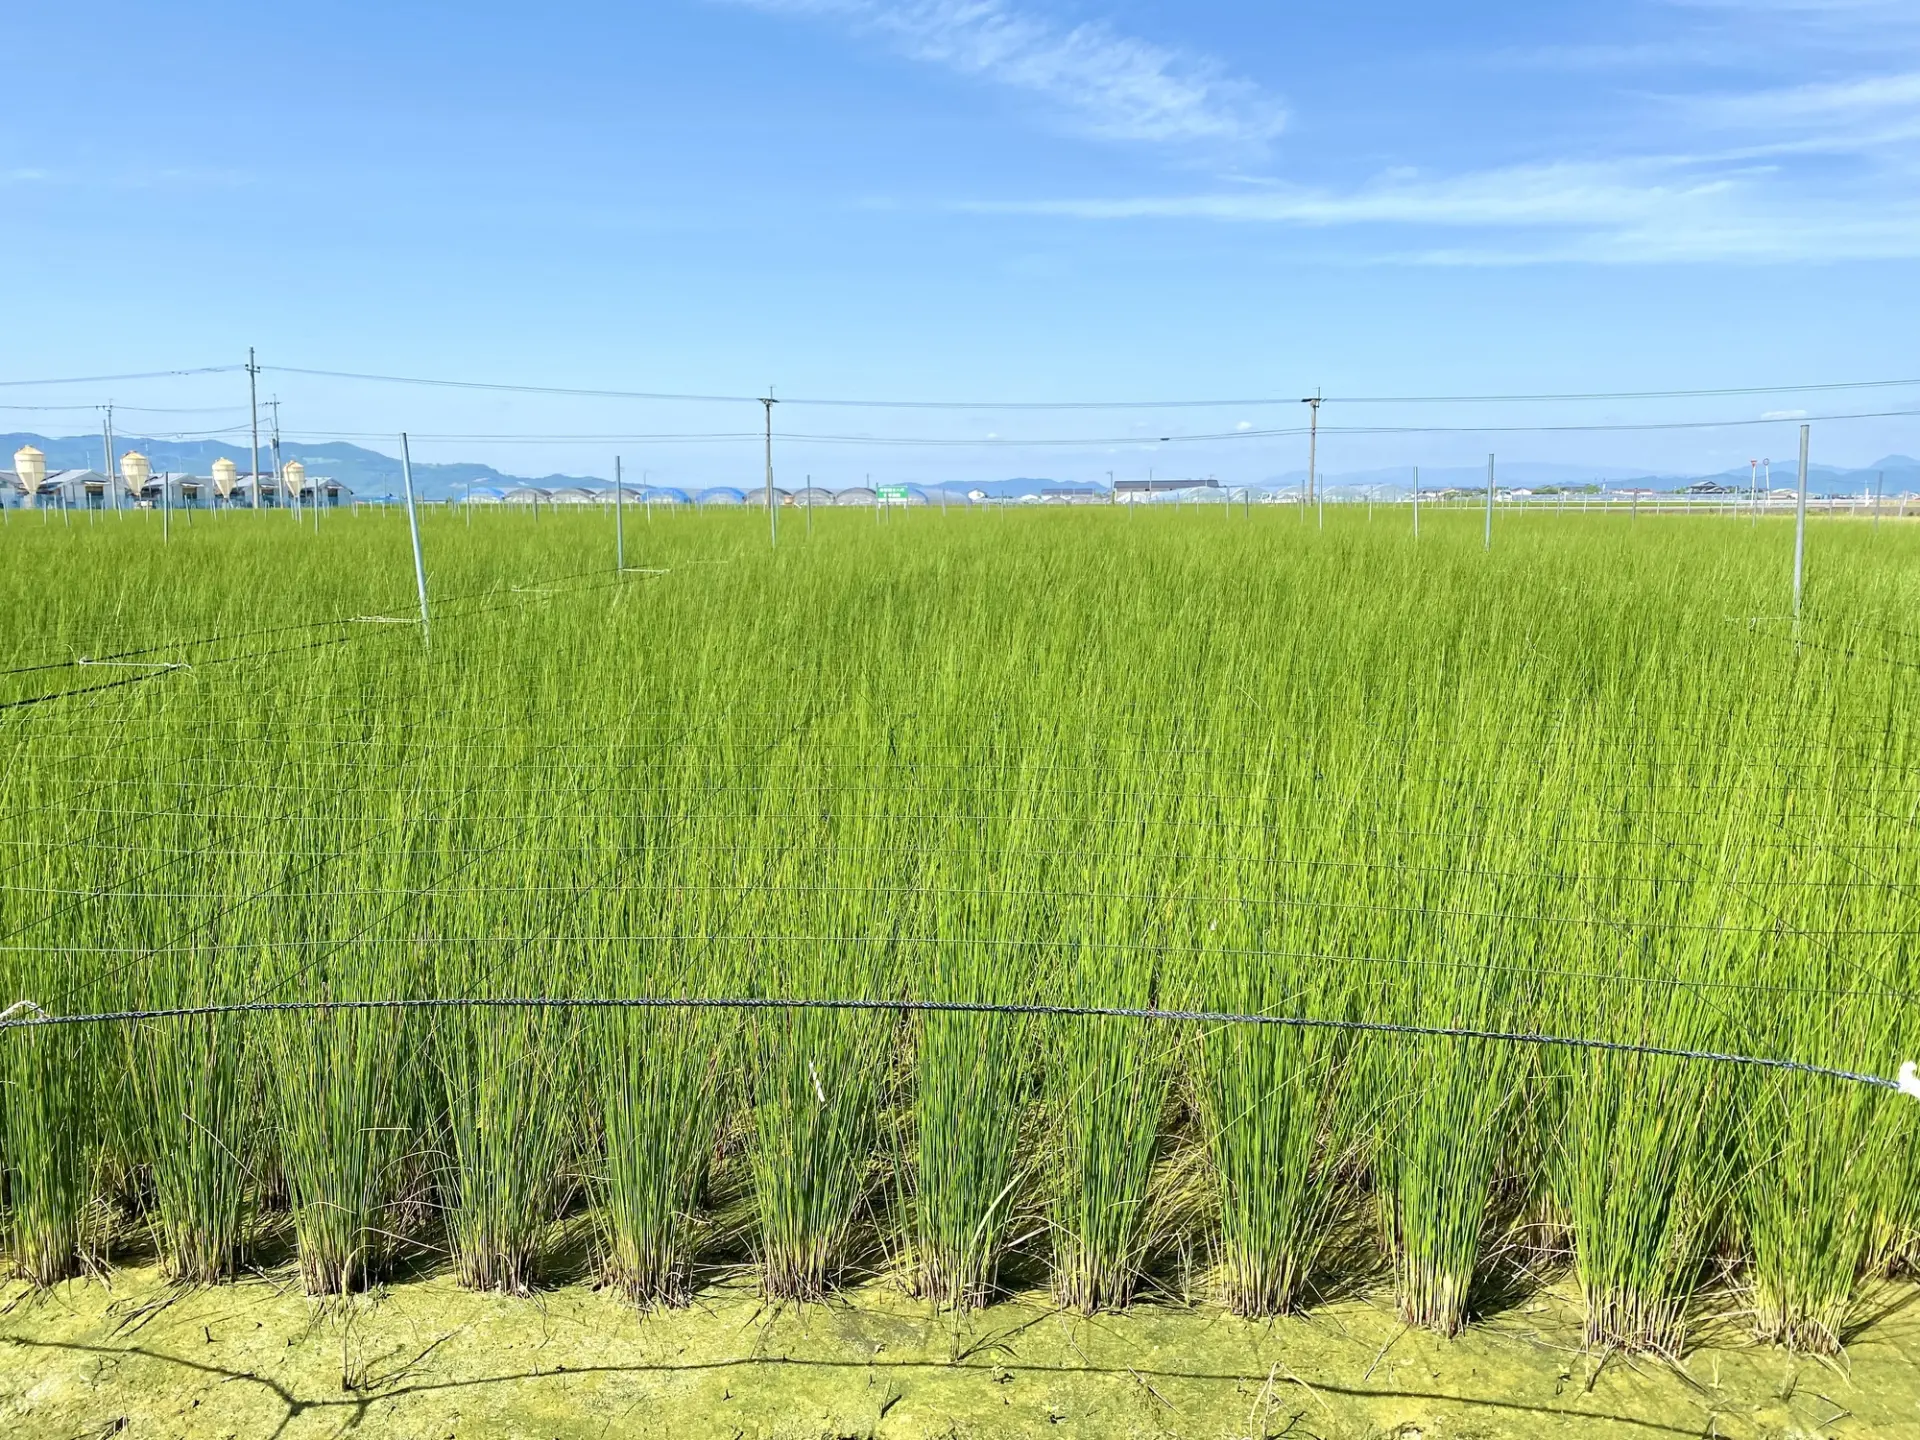
Farmers handle the entire process, from cultivating the igusa to weaving it into tatami-omote. Igusa has been grown in Kumamoto Prefecture for around 500 years, and the prefecture accounts for more than 90% of Japan’s domestic production of igusa and tatami-omote.
After the rushes are grown and harvested, they undergo a process called mud dyeing. The freshly cut igusa is soaked in sendo, a mixture of water and high-quality natural clay, to bring out its distinctive color, fragrance, and sheen. Coating the surface of the rushes with clay also helps them dry evenly. After being mud-dyed, the igusa is dried and sorted by length. Farmers then spend a year weaving it into tatami-omote.
In recent years, industrial tatami-omote made from materials such as polypropylene resin or paper has also become available alongside traditional igusa surfaces.
Natural igusa has a pleasant fragrance and texture, feels cool in summer and warm in winter, regulates humidity, and has antibacterial properties. However, as a natural material, its color changes over time and some people may find it difficult to maintain.
Industrial tatami-omote was developed as an option that resists discoloration and is easier to care for. Its disadvantages include the lack of natural moisture regulation and a surface that may feel sticky. Natural igusa and industrial tatami-omote are selected according to the living environment and intended use.
Discovering the Appeal of Tatami at a 300-Year-Old Shop
Genroku Tatami manufactures and sells tatami in Kyoto’s Sakyo Ward, near Heian Jingu Shrine and Okazaki Park. For 300 years, it has continued to adapt its tatami production and sales to the changing times. As Japanese lifestyles have changed and the number of Japanese-style rooms with tatami has declined, the shop has begun offering hands-on classes to introduce more people to the appeal of this traditional Japanese flooring. Here is what you can experience.
About Genroku Tatami
Genroku Tatami is a long-established Kyoto tatami shop founded in Genroku 3 and has been in business for 300 years. It manufactures and sells tatami. Since its founding, the shop has remained in the same location, preserving and sharing the traditions and culture of Kyoto’s tatami artisans. In addition to tatami for Japanese-style rooms in private homes, it manufactures and repairs mats for historic shrines, temples, ryokan inns, and other establishments.
Upon entering the workshop, you are greeted by the pleasant fragrance of igusa, the material used to make tatami. This familiar scent has a soothing and calming quality for many Japanese people. The workshop is lined with tatami-making machinery as well as newly made and repaired mats.
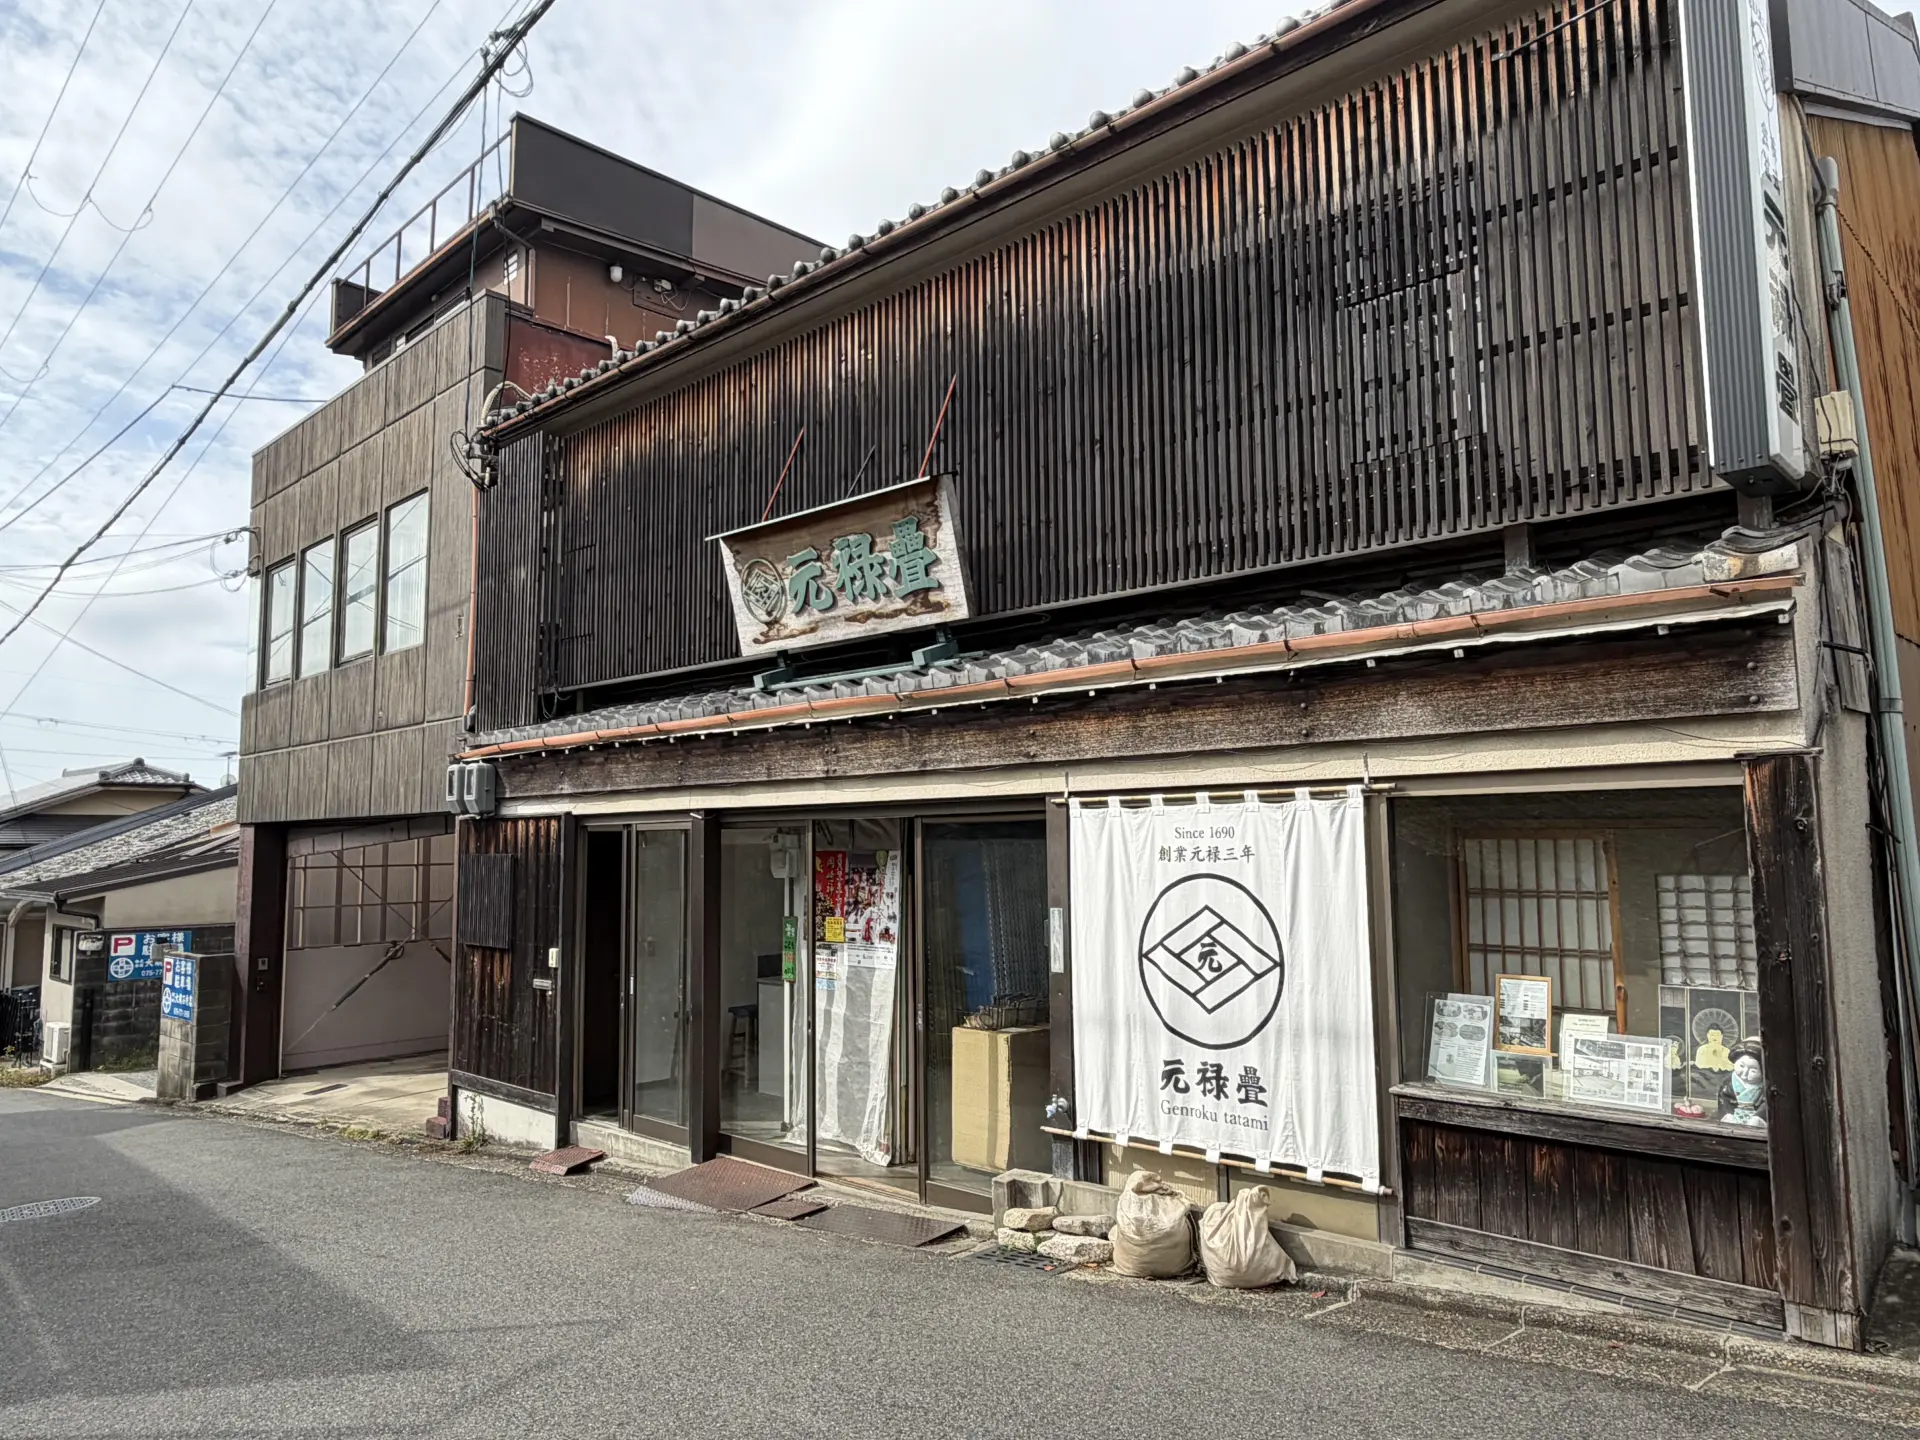
Learn About the Appeal of Tatami from Artisans at Genroku Tatami
Hands-on tatami classes are held inside the workshop, surrounded by the fragrance of igusa. Two experiences are available.
(1) A Special Hands-On Experience Exploring 300 Years of Craftsmanship and Tatami History (90–120 Minutes)
This plan includes a classroom lesson on the structure and history of tatami, a tour of the production area, and an opportunity to try hand-sewing a tatami mat. You will also make a tatami coaster, providing an in-depth introduction to the world of tatami.
- Activities
-
Lesson on tatami basics
Tatami production tour
Tatami hand-sewing experience
Make 1 tatami coaster - Duration
- Approximately 90–120 minutes (start times: 10:00 a.m.–3:00 p.m.)
- Group Size
- 1–20 people
- Price
-
Adults: ¥9,000 per person, including tax
Children: ¥6,000 per person, including tax - Reservations
- https://genroku-t.com/workshop/#workshop__form
(2) A Short Special Hands-On Experience Exploring 300 Years of Craftsmanship and Tatami History (60 Minutes)
This experience includes a classroom lesson on tatami basics and the opportunity to make 1 tatami coaster under the guidance of an artisan. Taking only 60 minutes, it is an ideal activity to fit between visits to Kyoto’s many sightseeing destinations.
- Activities
-
Lesson on tatami basics
Make 1 tatami coaster - Duration
- Approximately 60 minutes (start times: 10:00 a.m.–3:00 p.m.)
- Group Size
- 1–20 people
- Price
-
Adults: ¥7,000 per person, including tax
Children: ¥5,000 per person, including tax - Reservations
- https://genroku-t.com/workshop/#workshop__form
Our Experience: The Classroom Lesson
We tried the 90–120-minute plan.
The experience began with a classroom lesson. We received a handout about tatami and listened as an artisan explained its history in detail. The handout is available in both Japanese and English, so international visitors can participate with confidence. Around 80% of participants are apparently tourists from overseas, and we were told that they approach the experience with great enthusiasm.
During the lesson, we learned that tatami has been used as flooring in Japan for 1,300 years and that its ability to regulate humidity makes it ideally suited to Japan’s humid summers and dry winters. One particularly interesting point was that tatami making follows various rules. Tatami is generally laid across an entire room, but rooms are often slightly uneven, making it impossible to simply fill them with perfectly rectangular mats. For this reason, one side of a mat is cut as a straight right angle, while the other is shaped to match the room’s irregularities. The straight, right-angled side is positioned toward the center of the room. This prevents the space from appearing distorted, which could happen if the cut side faced inward. Although tatami may look as though it has simply been laid across the floor, we learned that its placement involves careful calculations. Another fascinating point was that the arrangement of the mats can carry different meanings. Tea rooms, rooms used for ritual suicide, and rooms prepared for celebrations all have their own tatami layouts. Even the classroom portion alone taught us many things about tatami that we had never known before.
Our Experience: Hand-Sewing Tatami
After the lesson, it was finally time to try hand-sewing tatami.
This shop combines machinery and hand-sewing techniques to make and repair tatami. This plan allows participants to experience the hand-sewing process. Making a single tatami mat entirely by hand takes approximately 5 hours.
We began by cutting the tatami-doko core. A ruler was placed along the section to be cut as a guide. Once the cutting line had been determined, it was temporarily secured with pins.
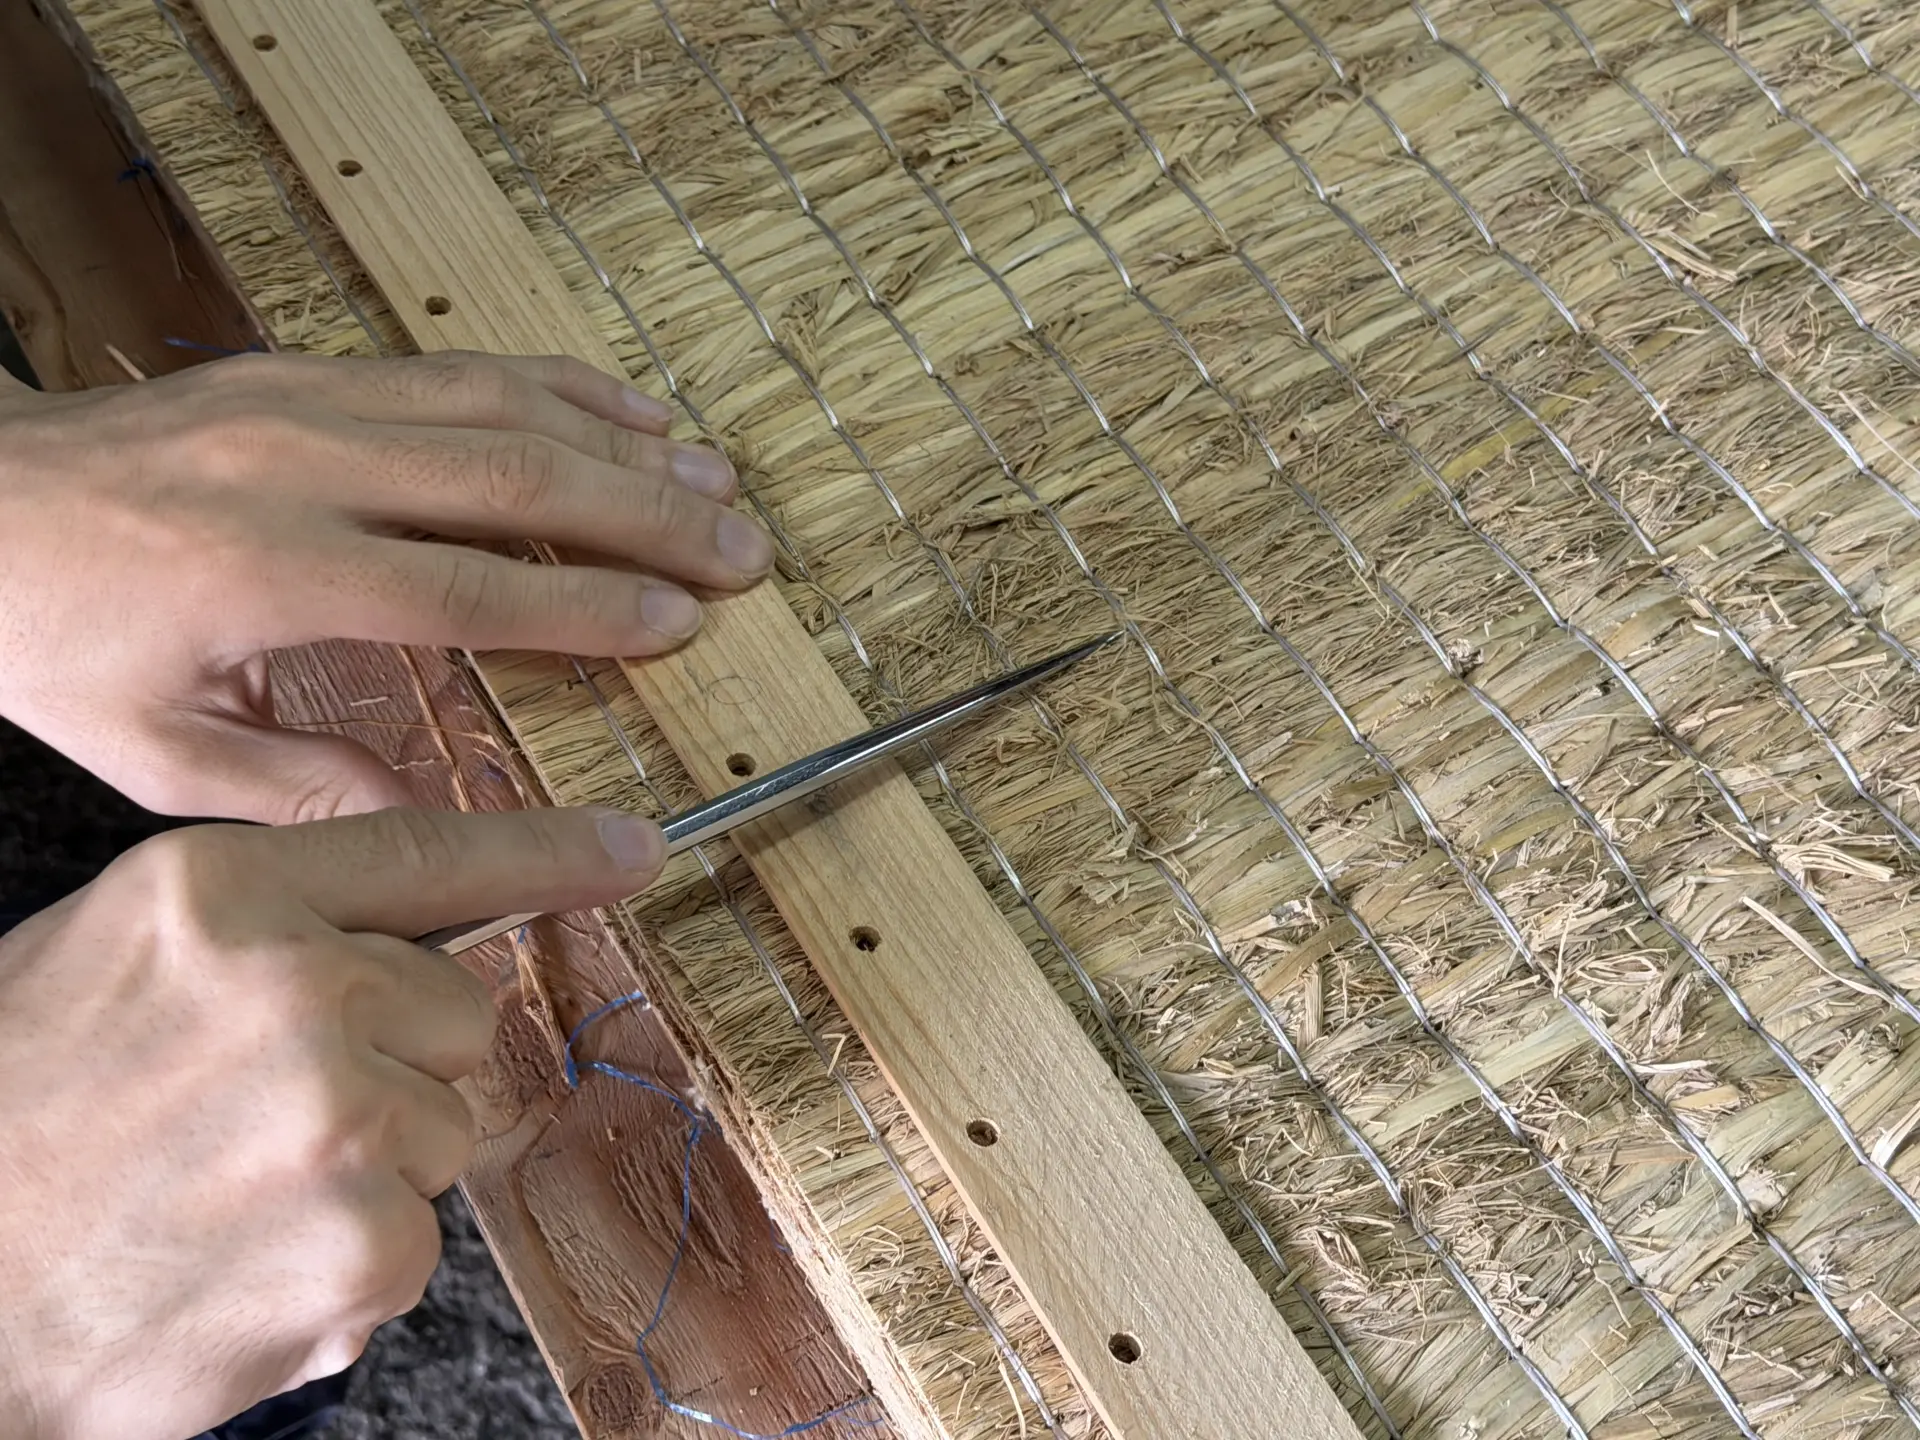
Two types of knives are used for cutting: an o-bocho, or large knife, and a sankaku-bocho, or triangular knife.
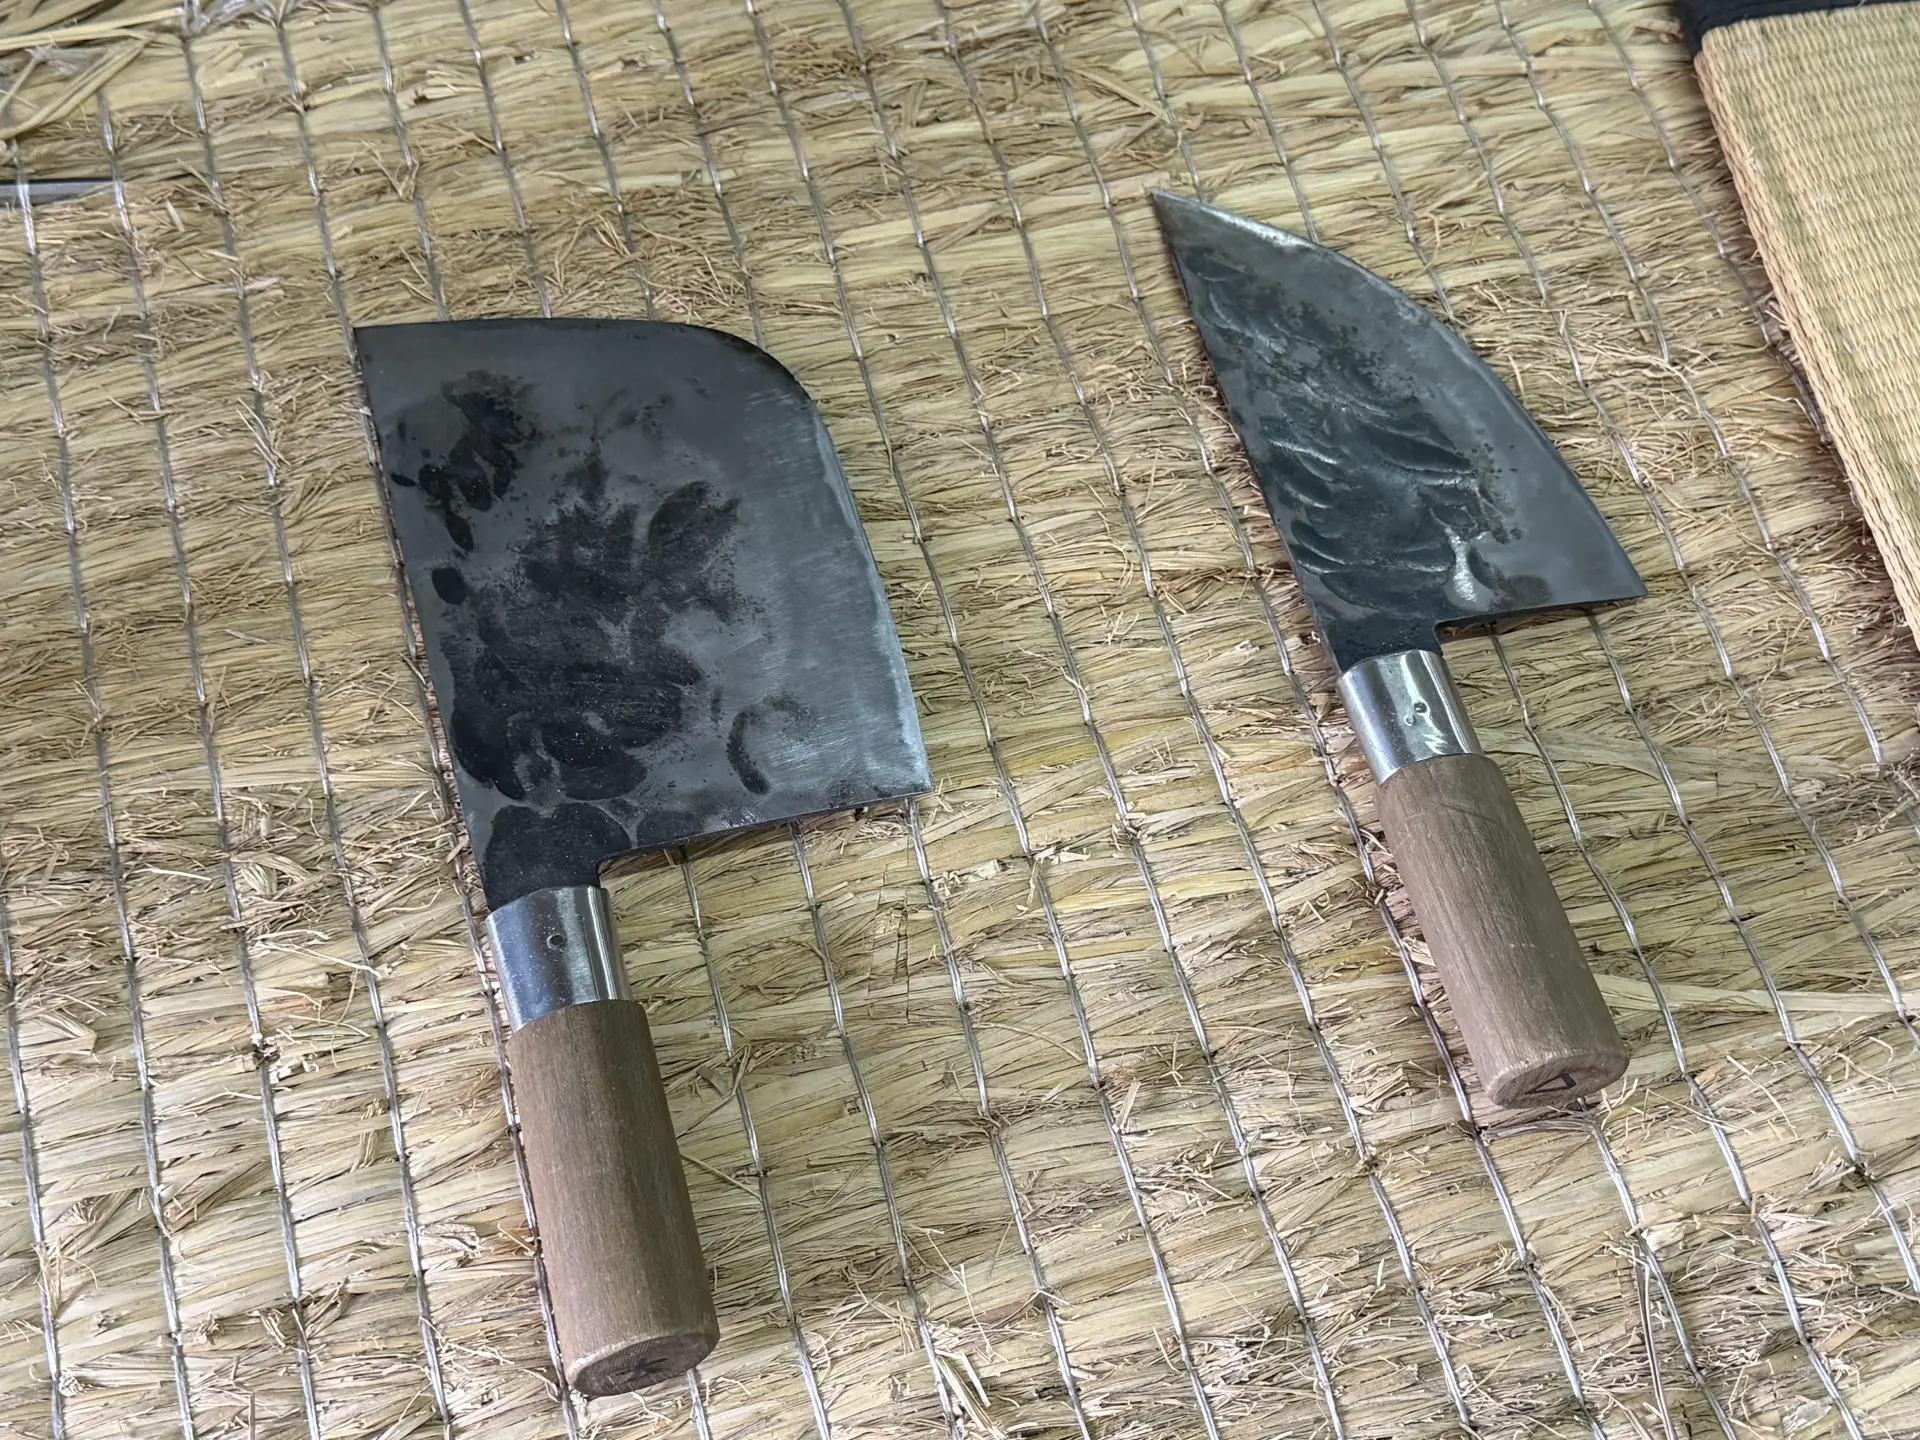
The large knife is used to cut the tatami-doko, while the triangular knife is used for more detailed work, such as cutting the tatami-omote and trimming thread. Because we were cutting the tatami-doko, we used the large knife. Cutting the core is physically demanding. You apply your full body weight to the blade and gradually cut through it with short back-and-forth movements rather than trying to slice through it all at once. The crisp cutting sound and sensation were surprisingly satisfying.
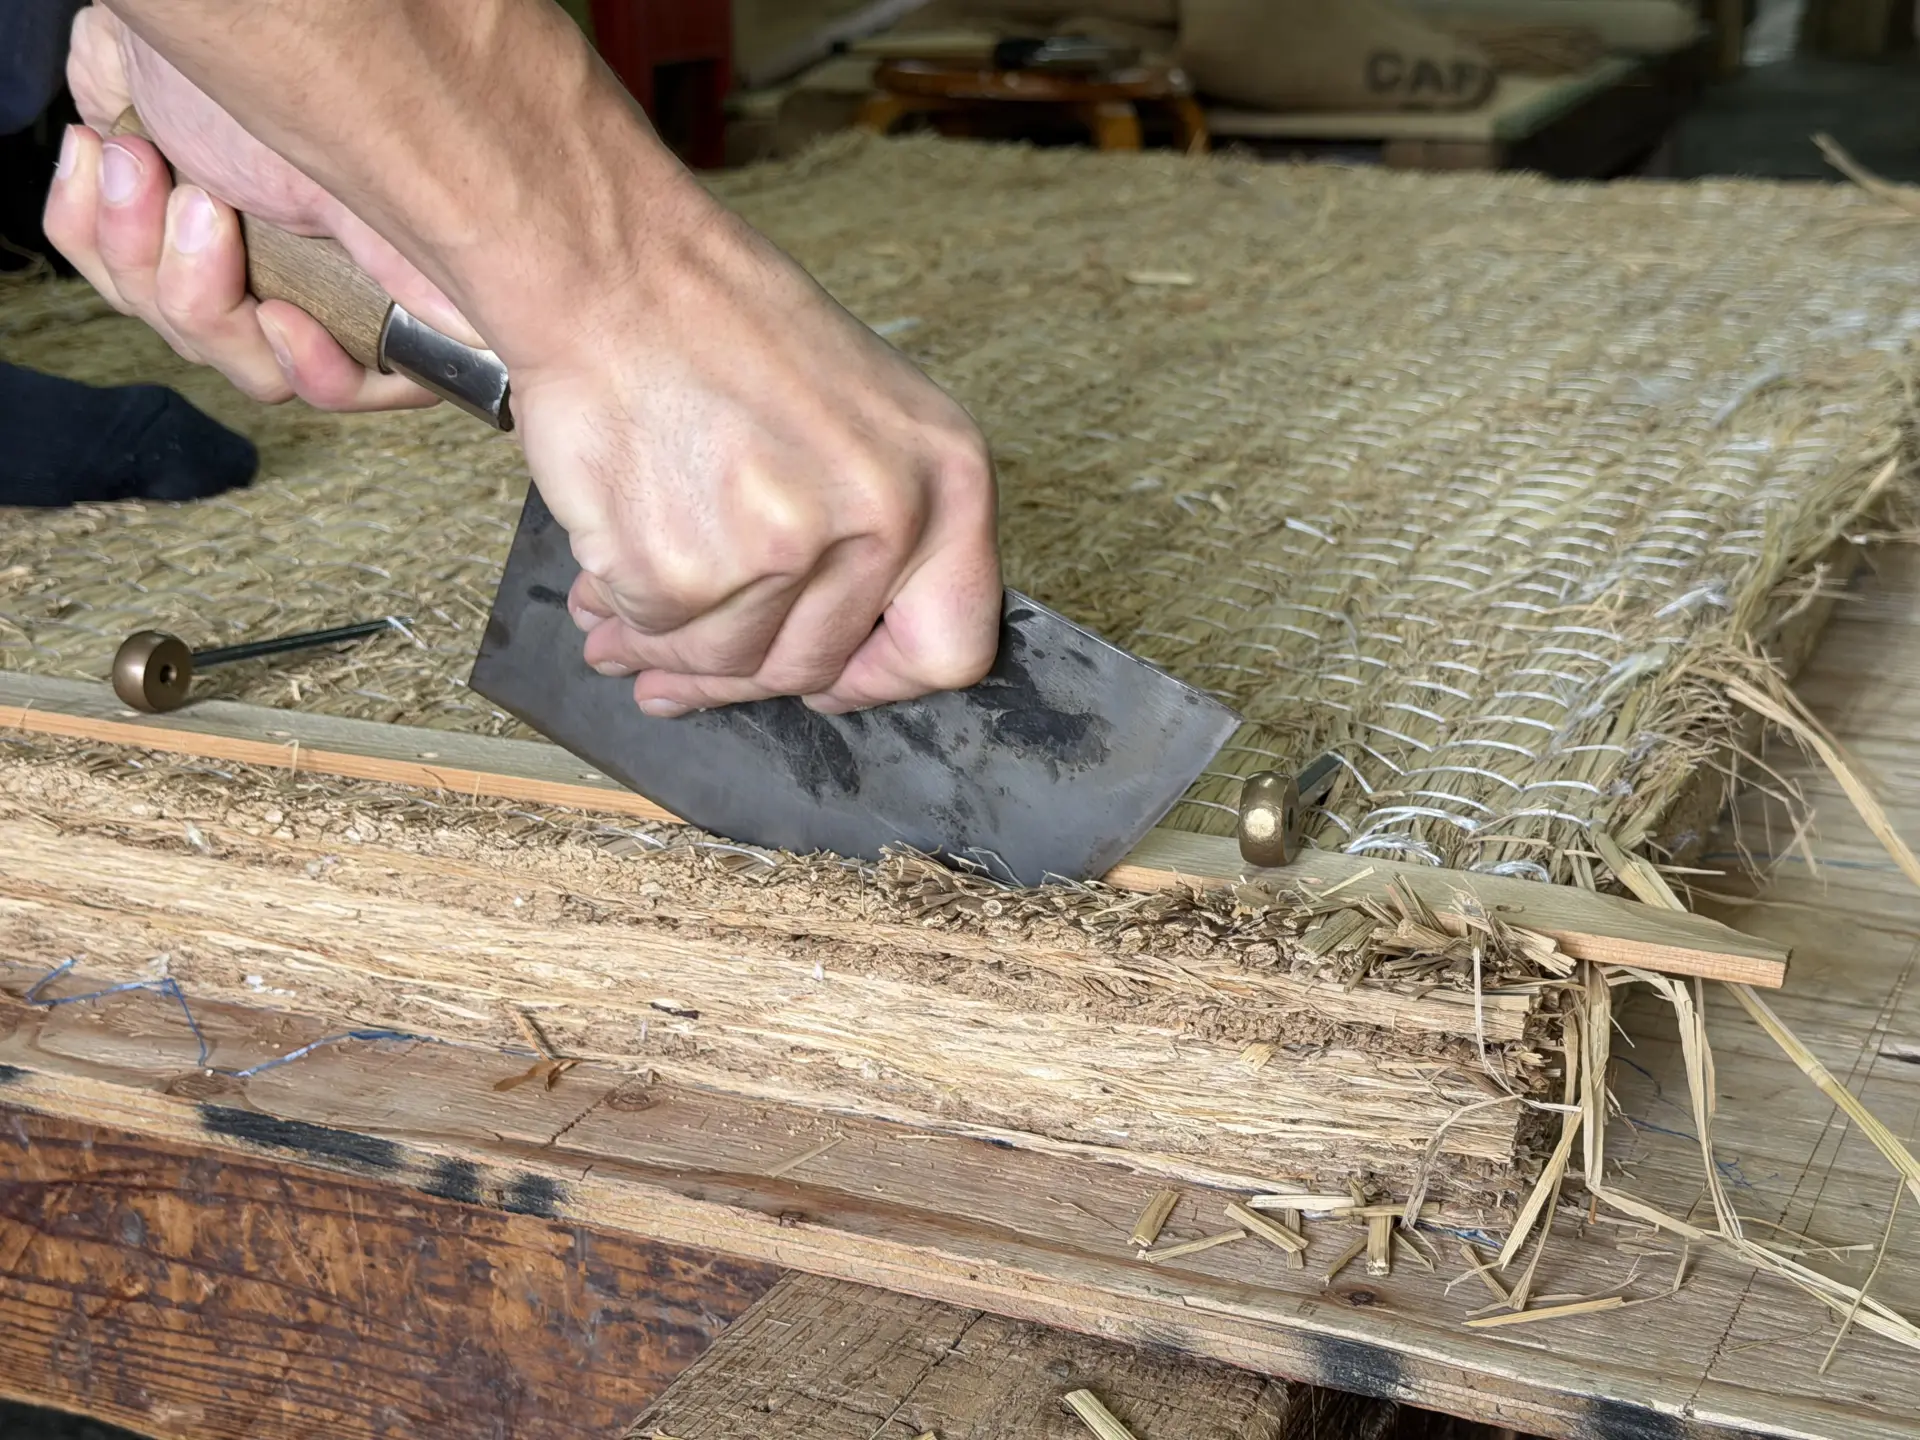
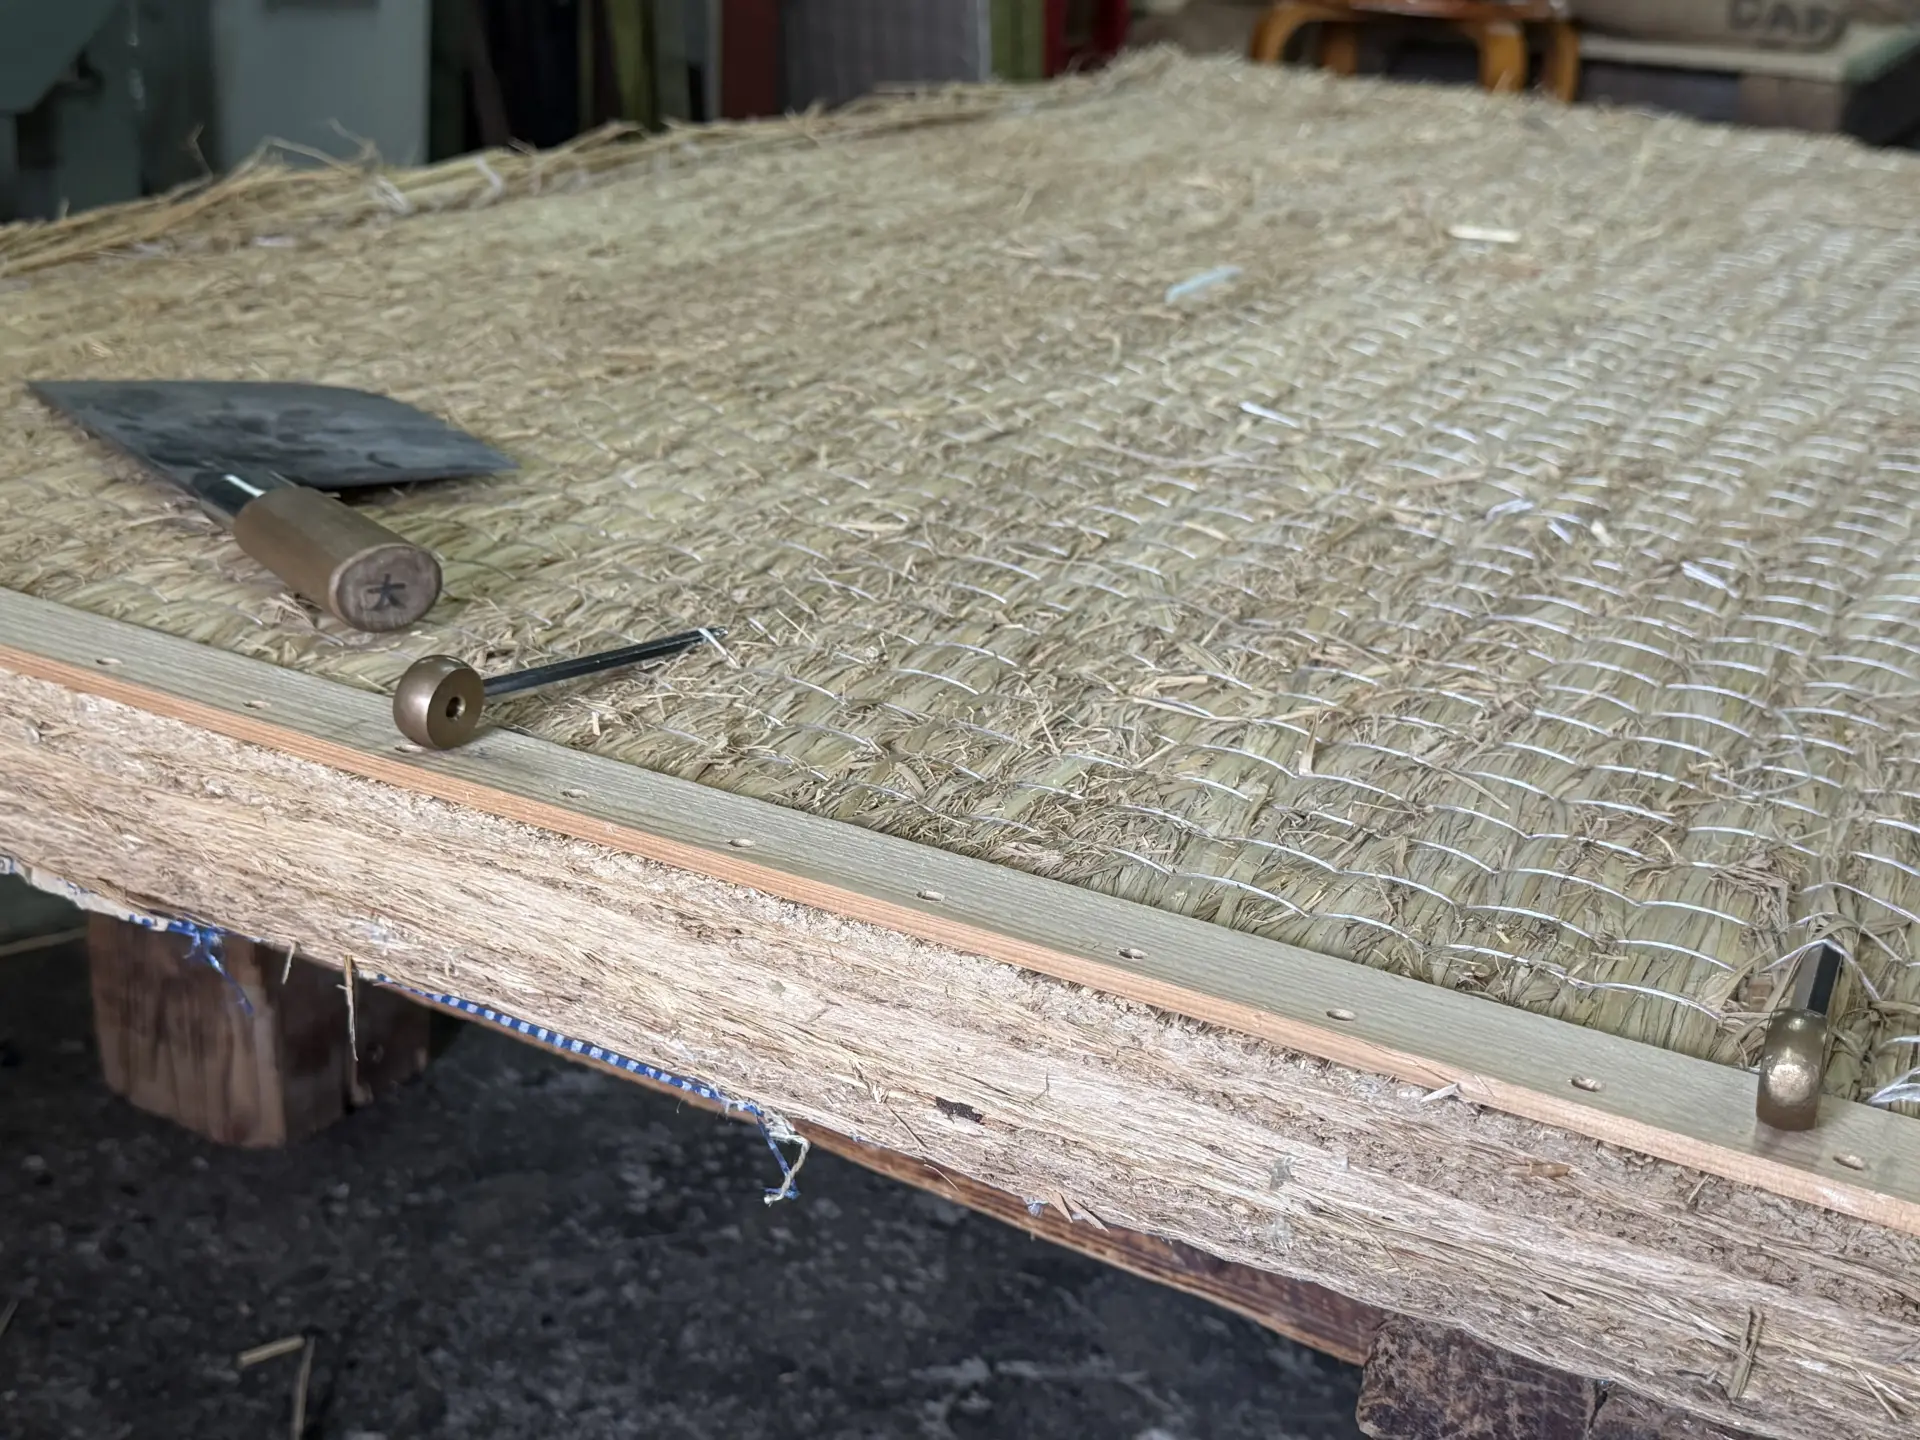
Next came kamachi-nui, a process in which a wooden board is inserted along the short side of the tatami-doko to reinforce the edge. After a thin wooden board is placed over the straw, it is covered with tatami-omote.
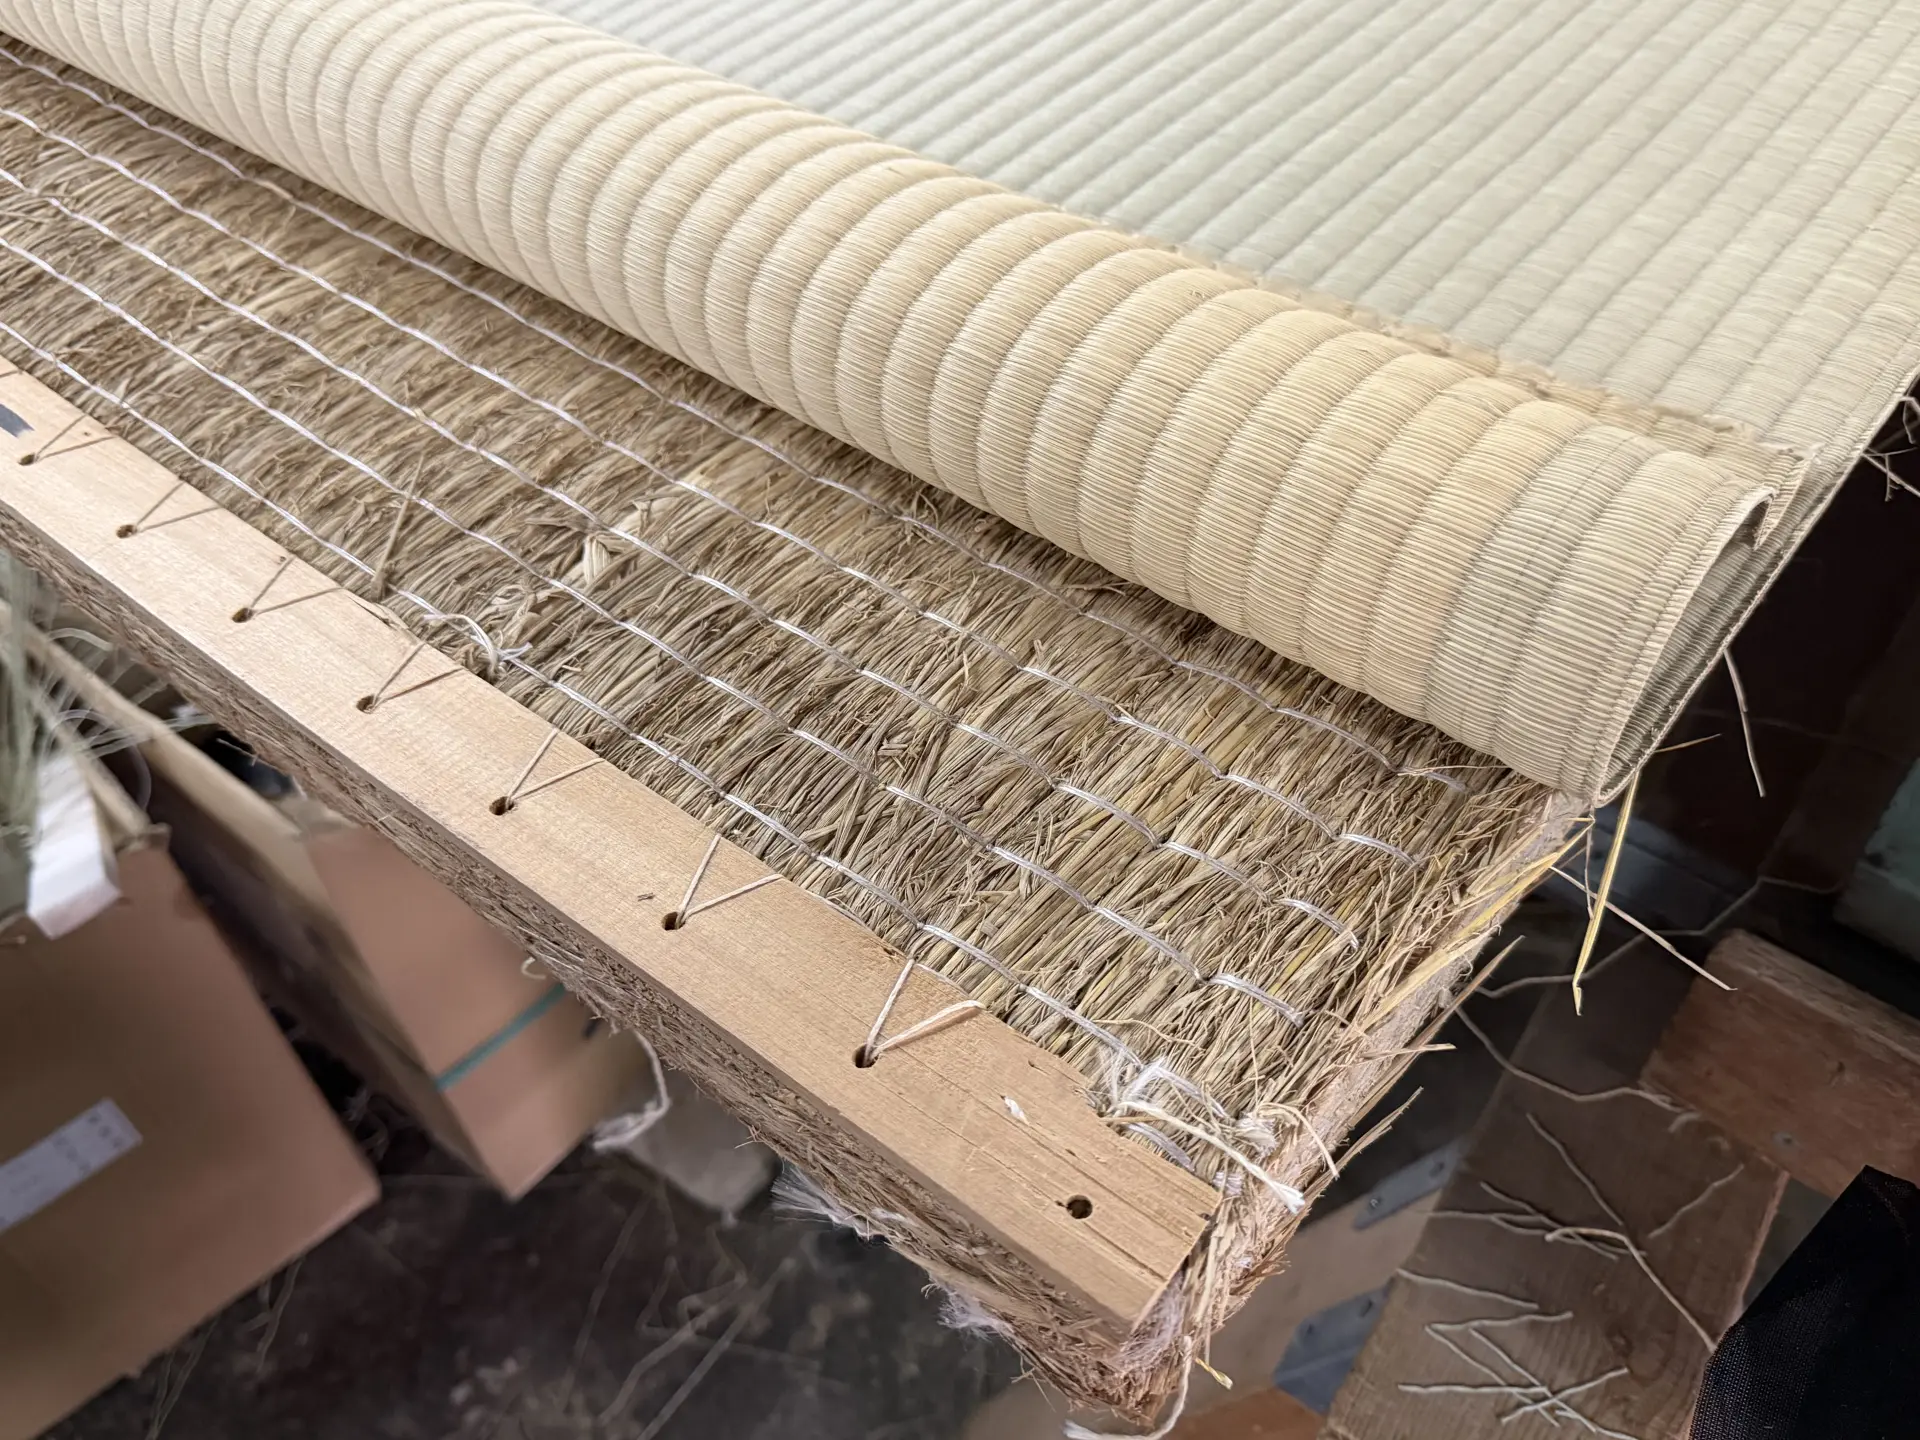
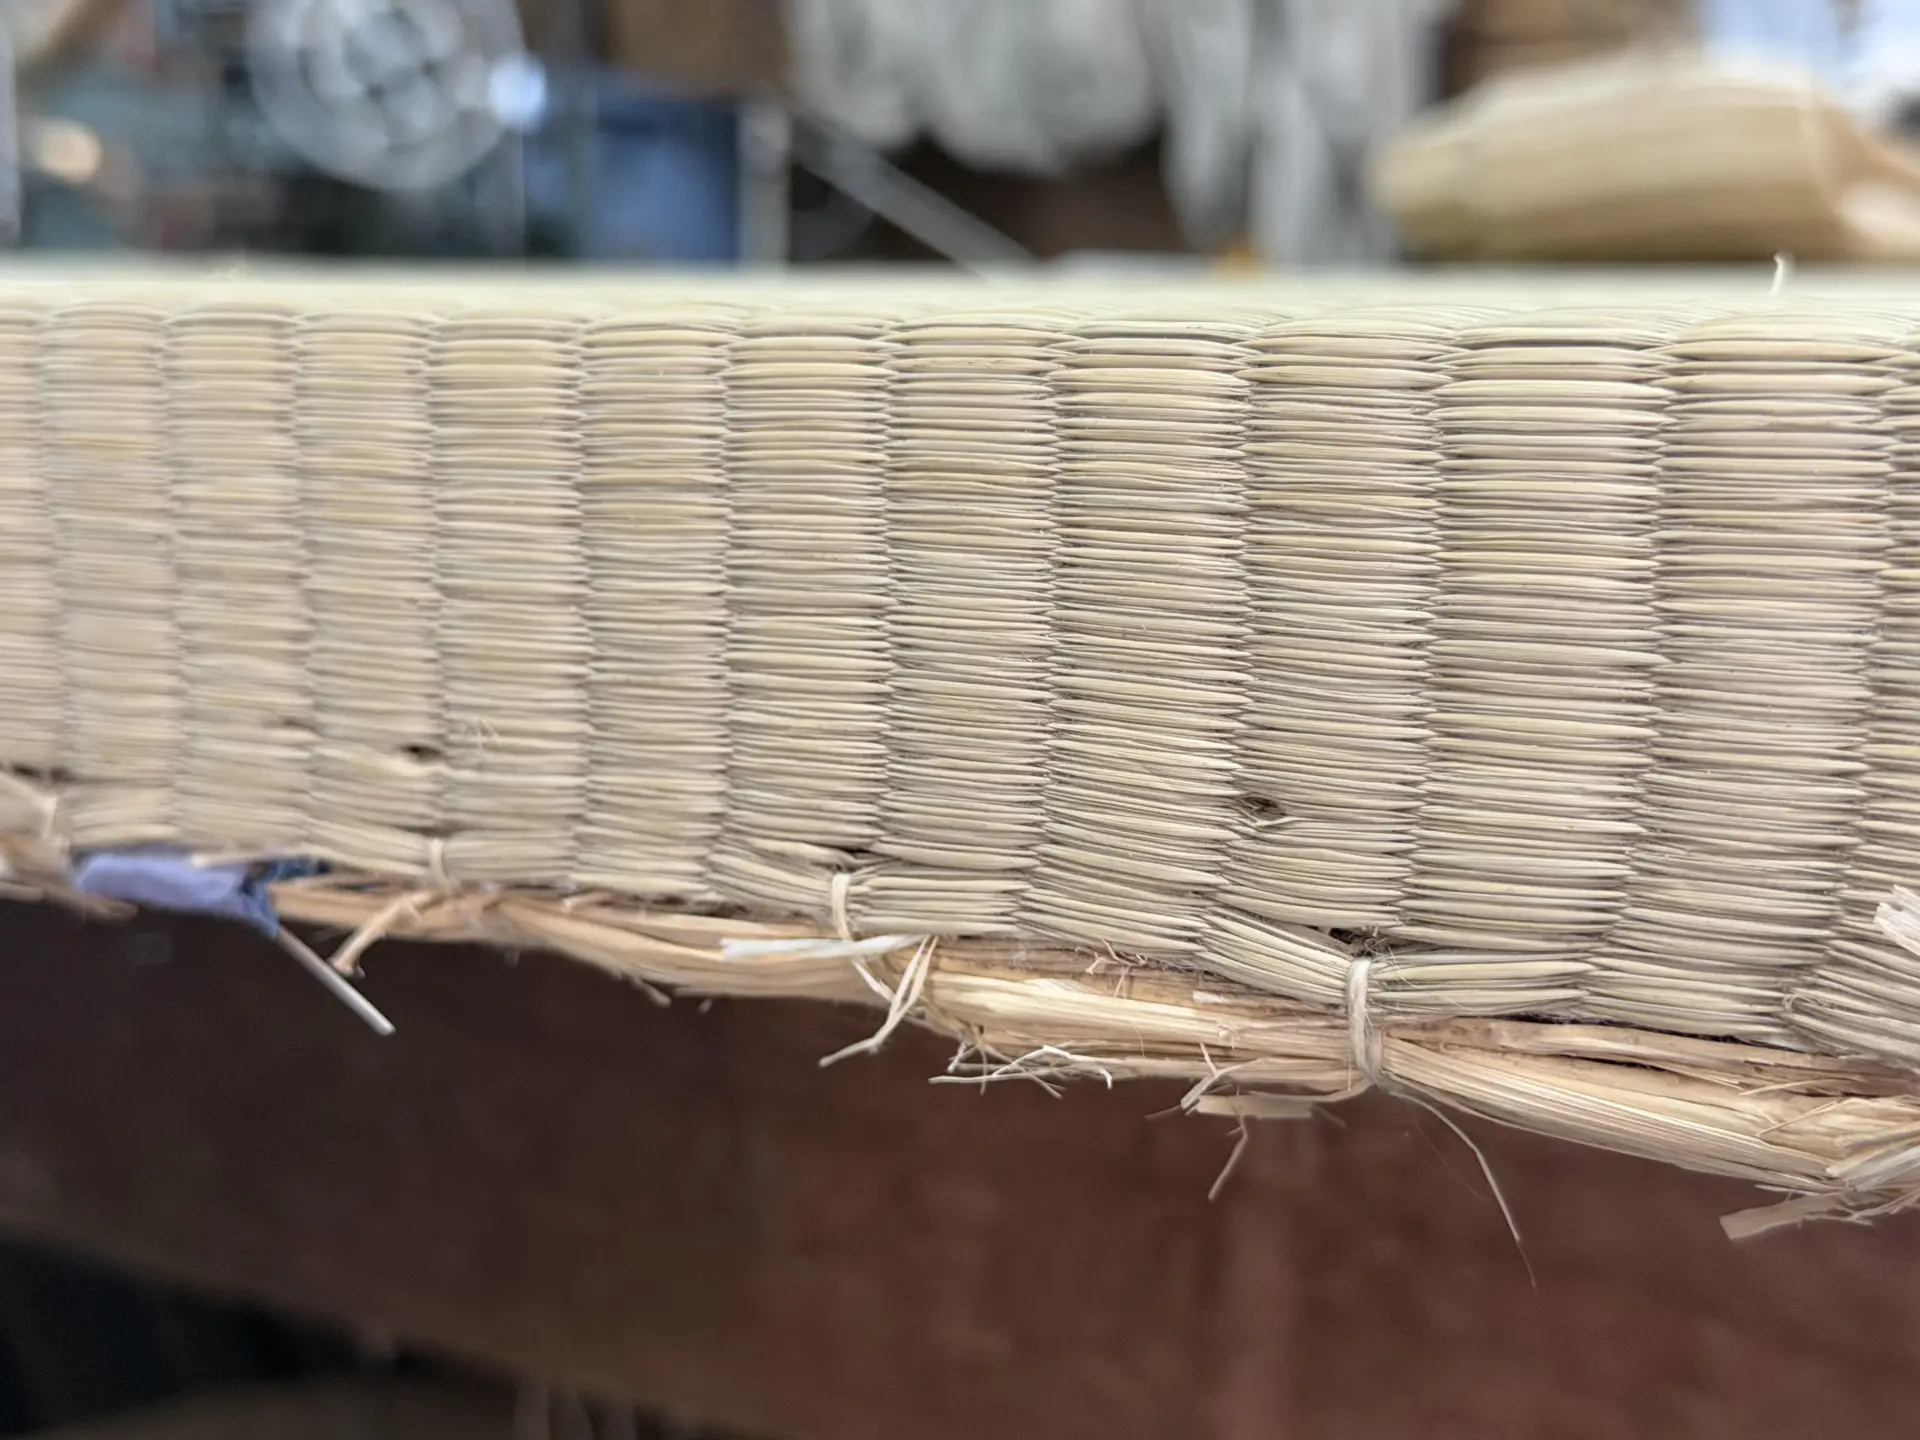
The next step was hira-zashi, the process of sewing on the tatami-beri edging. Because the palm is used to push the tatami needle through the mat, a triangular palm guard is worn for protection.
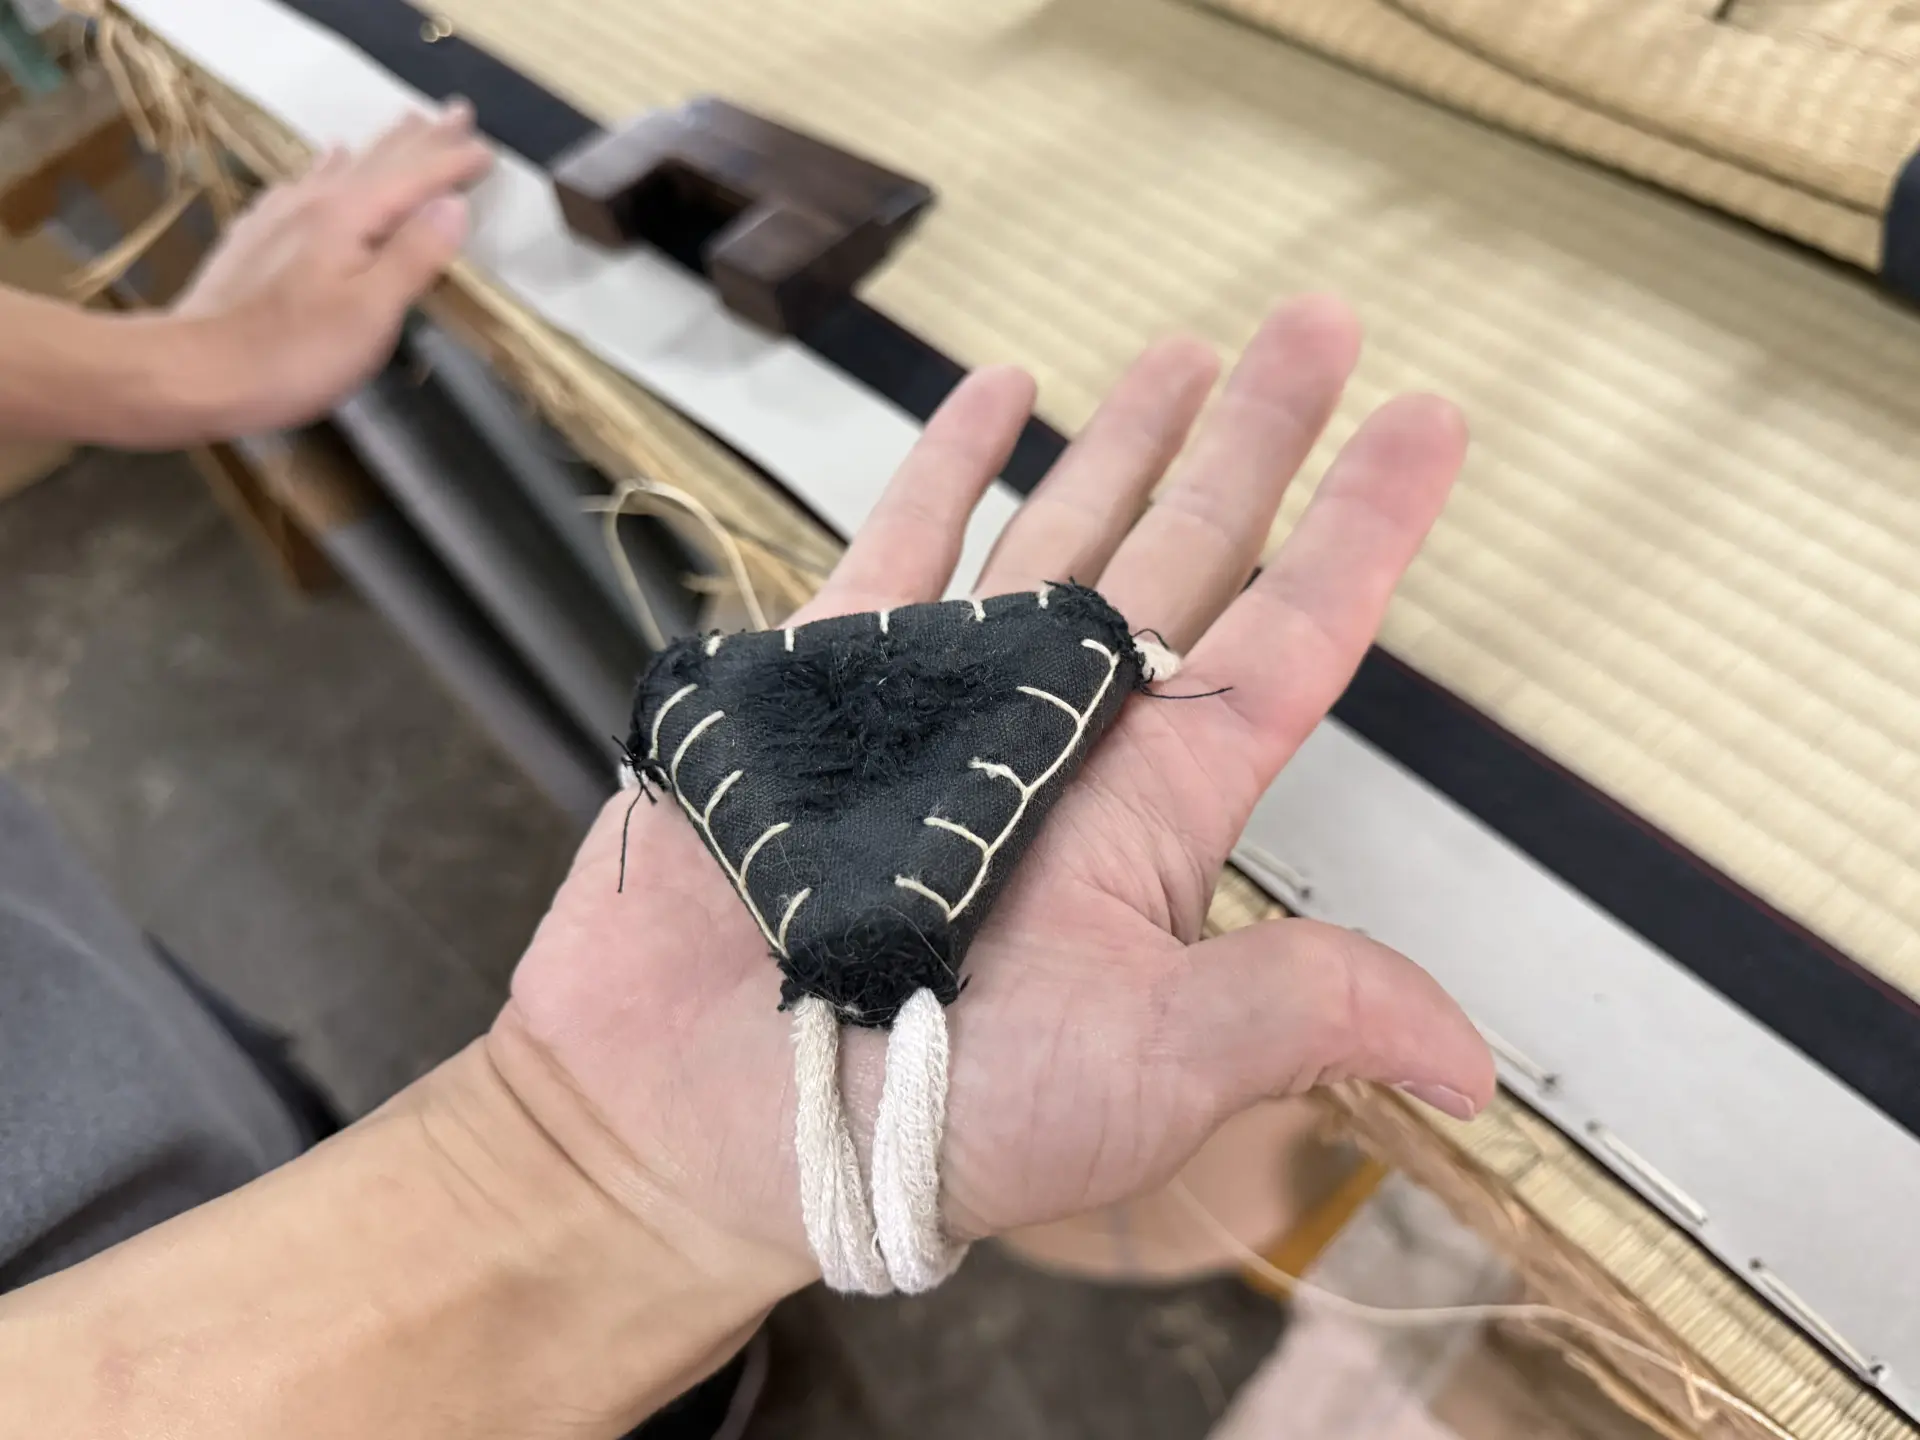
The tatami-beri is sewn on at regular intervals. Rather than pushing the needle straight down, it is angled slightly in the direction of the stitching. After the needle emerges from the back, it is pushed through toward the front again. This process is repeated many times.
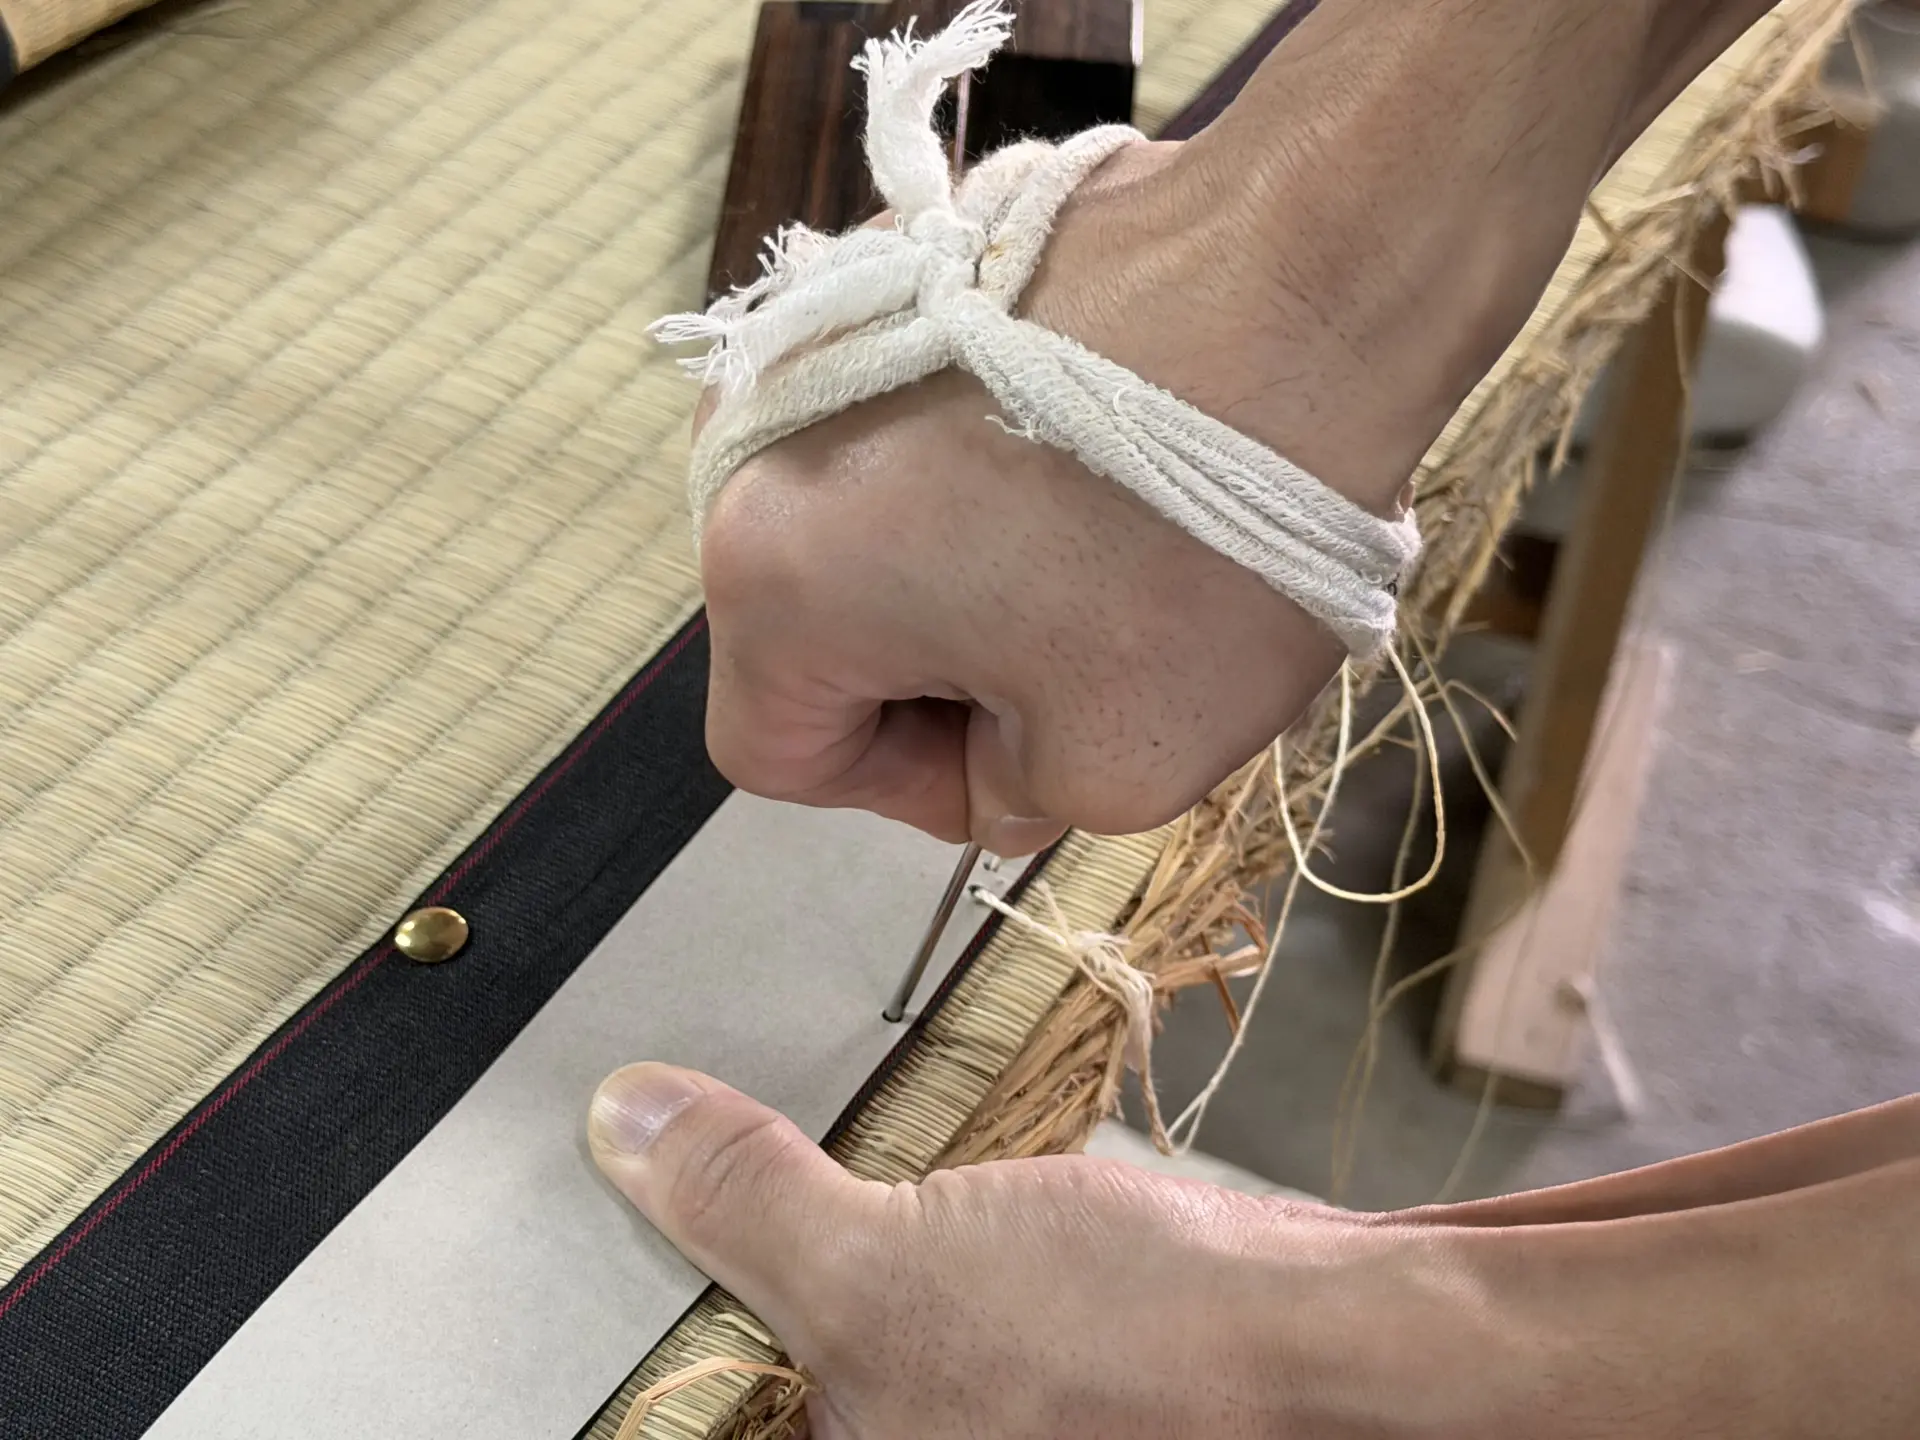
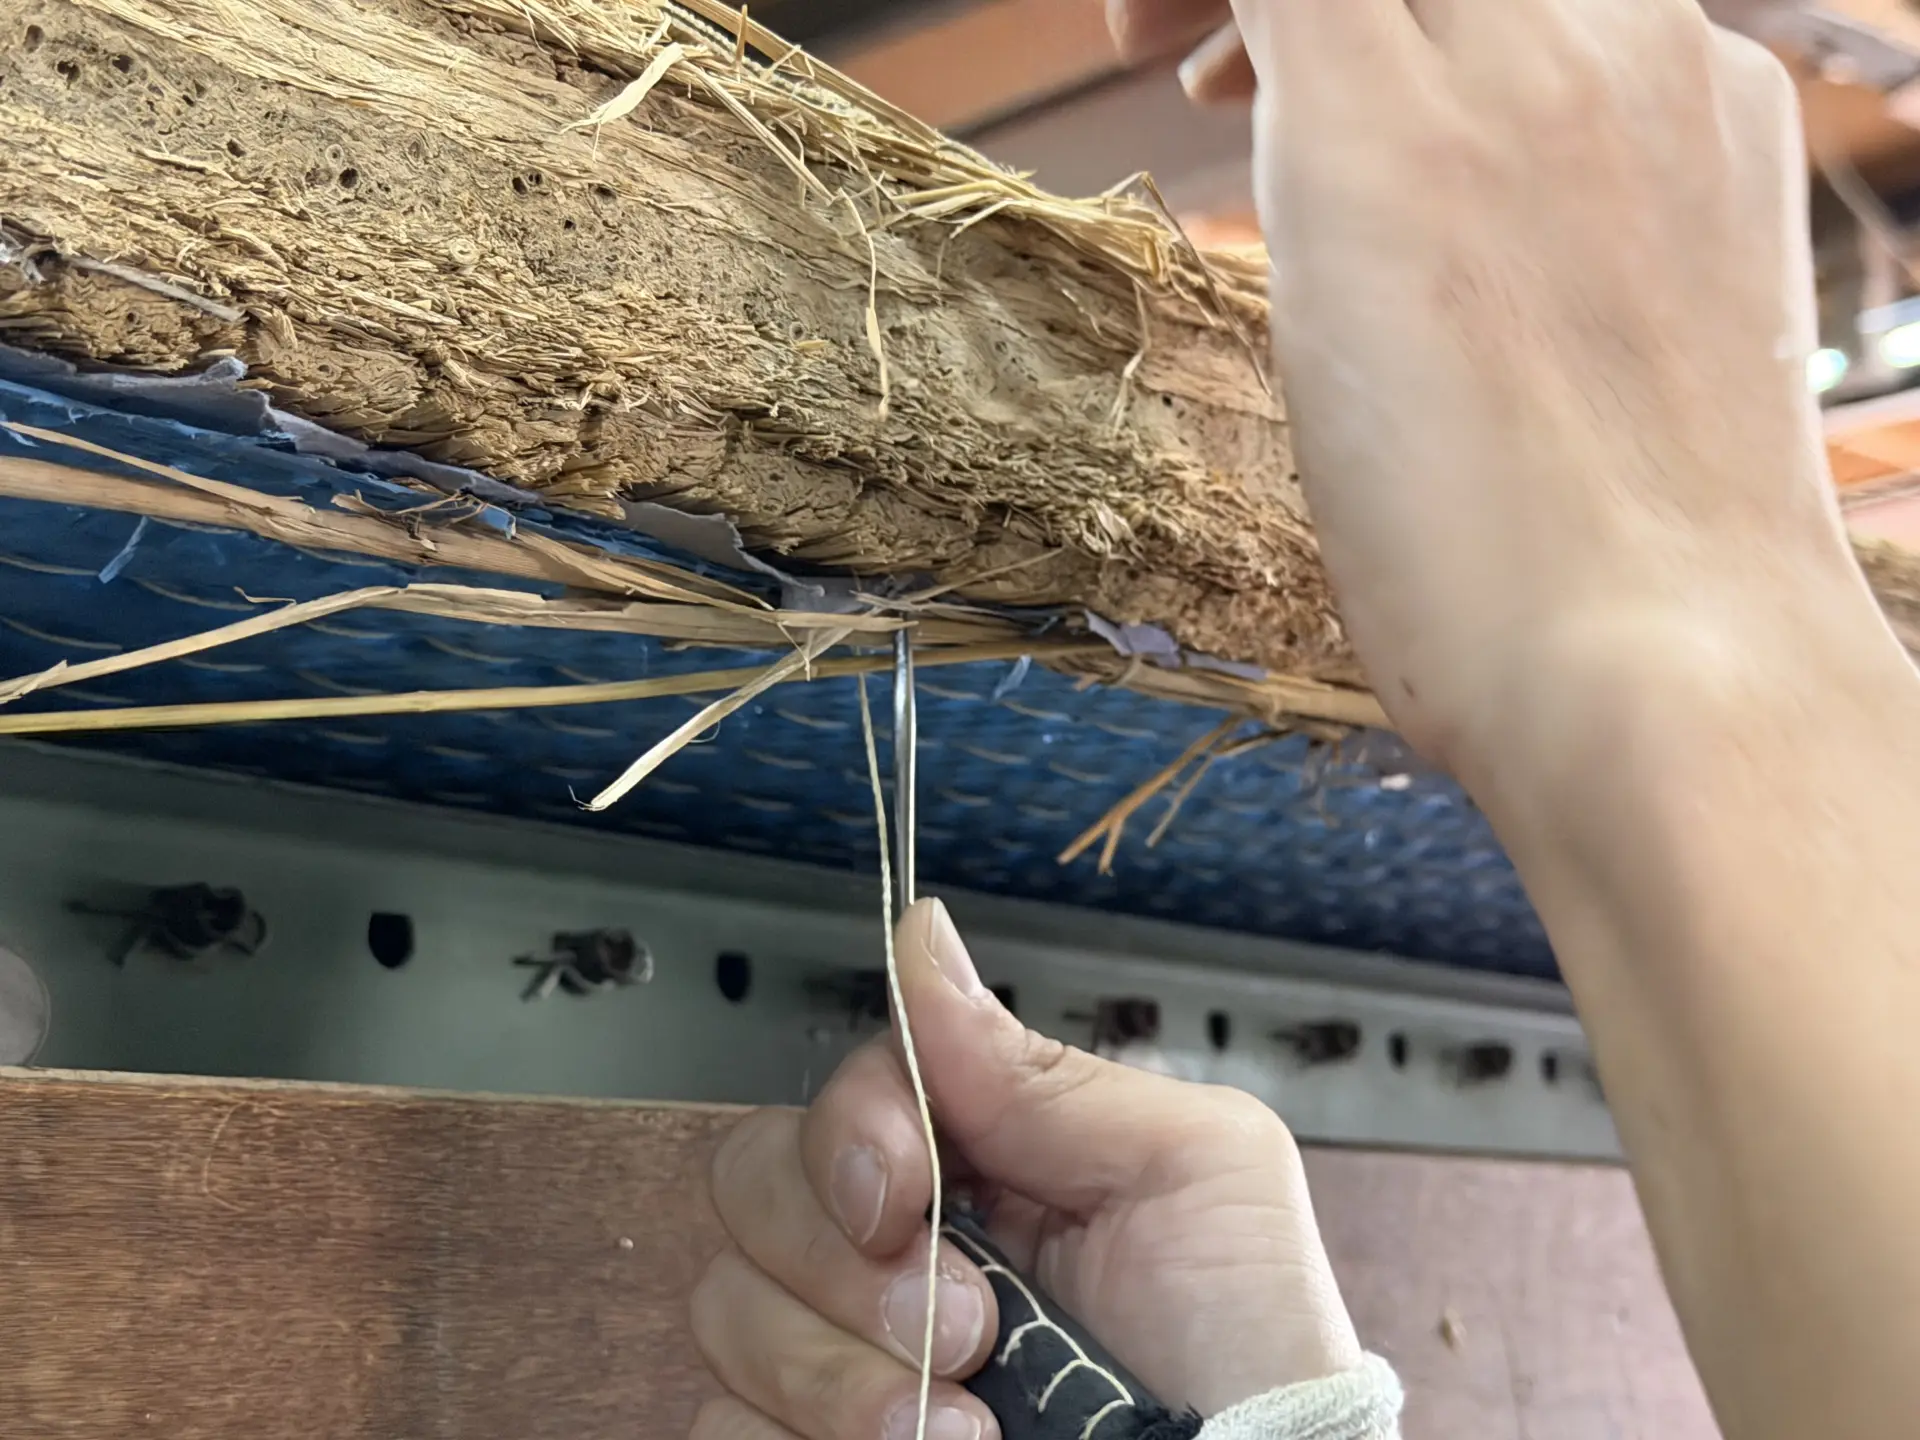
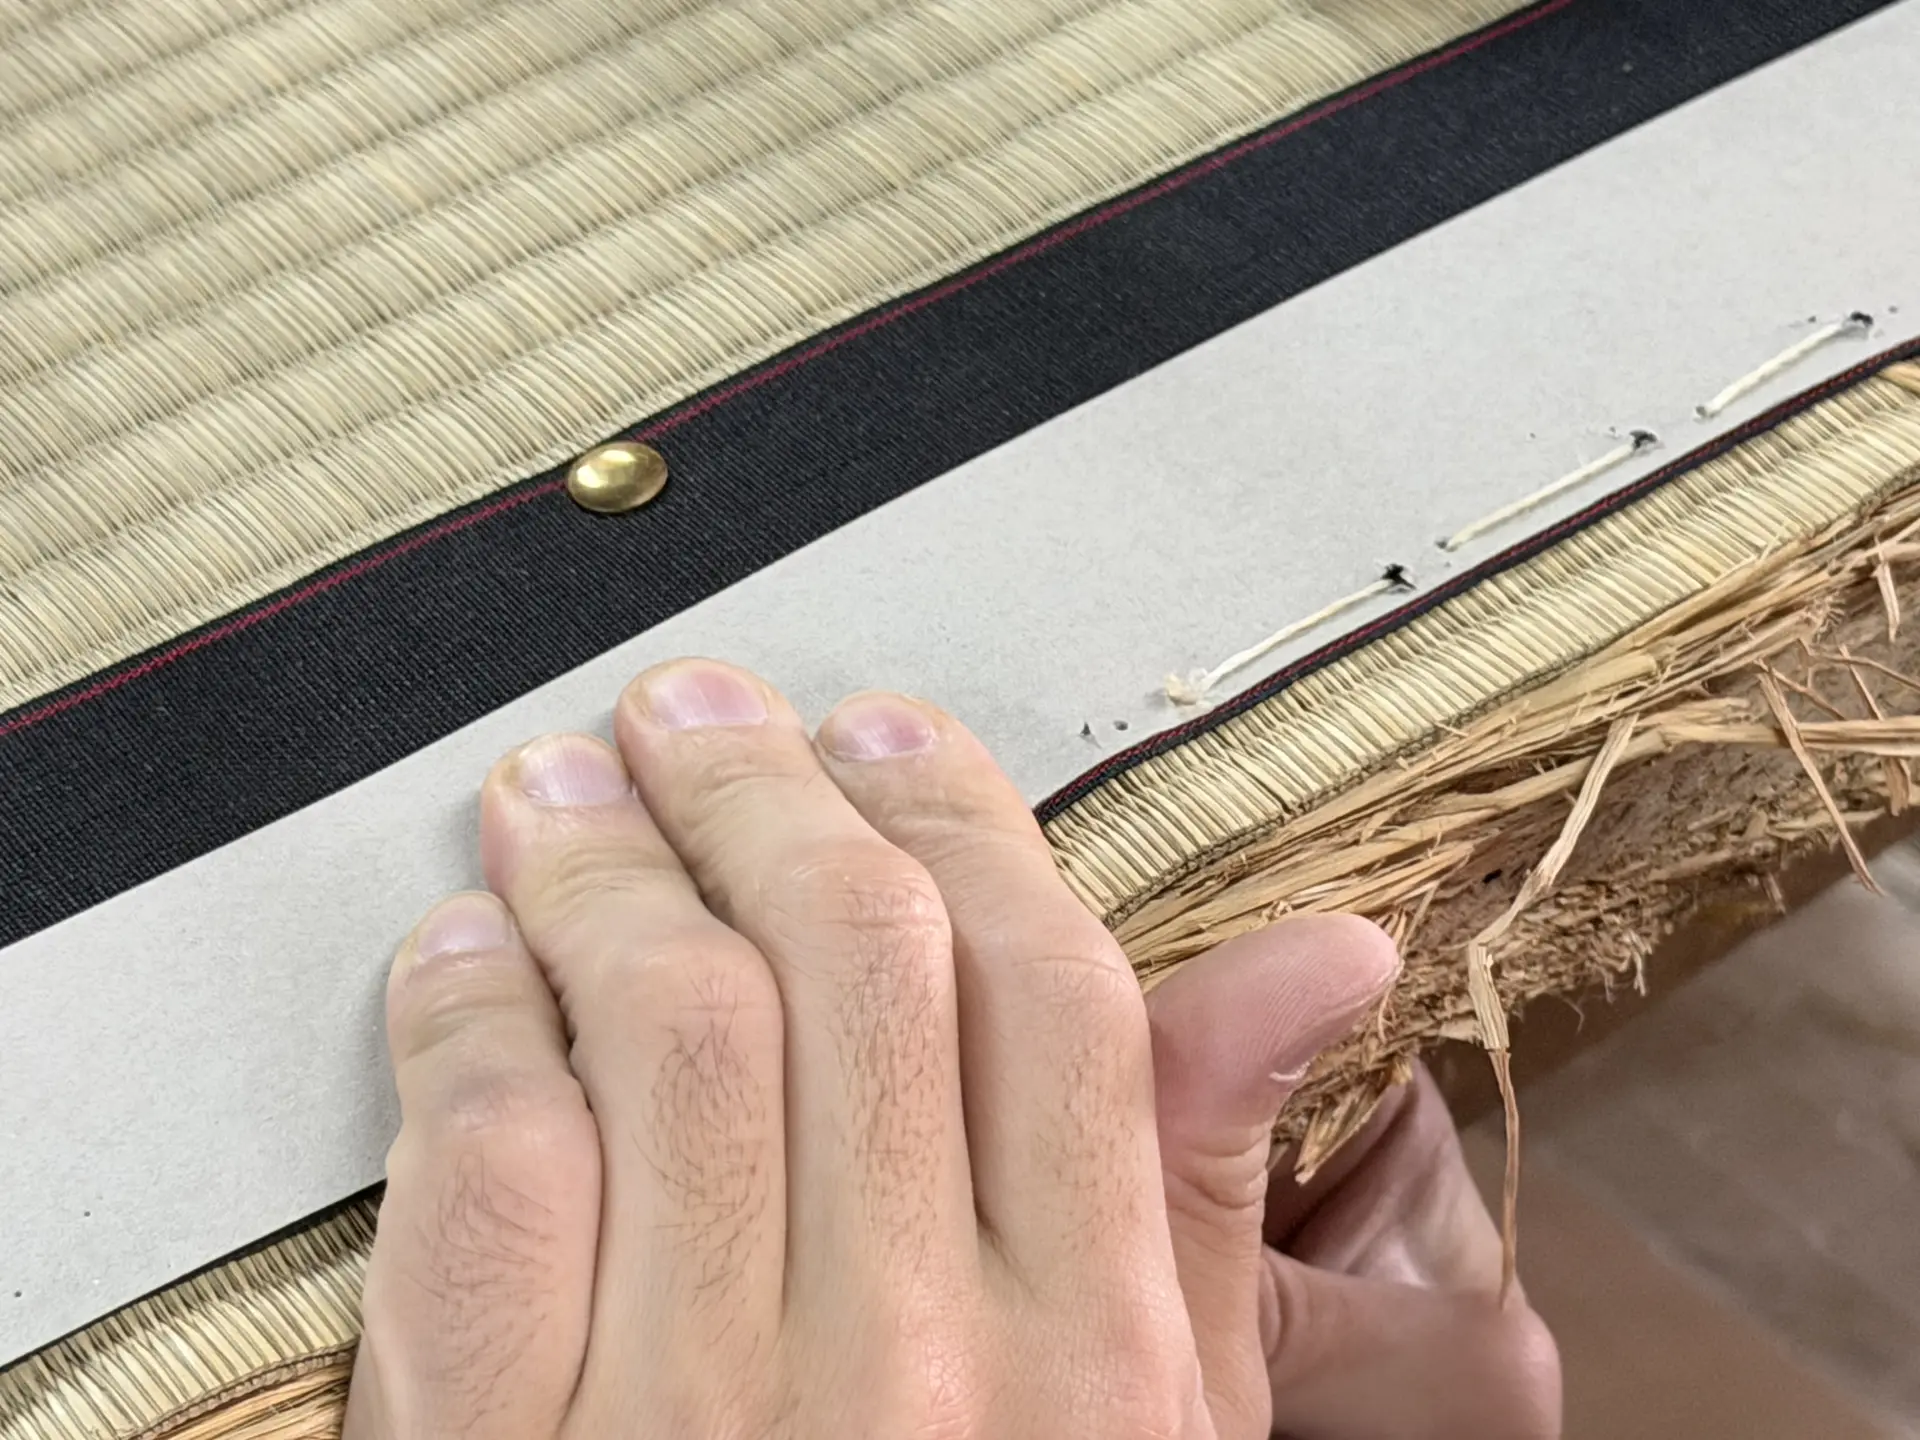
The final step is kaeshi-nui, in which the tatami-beri is folded over and sewn into place.
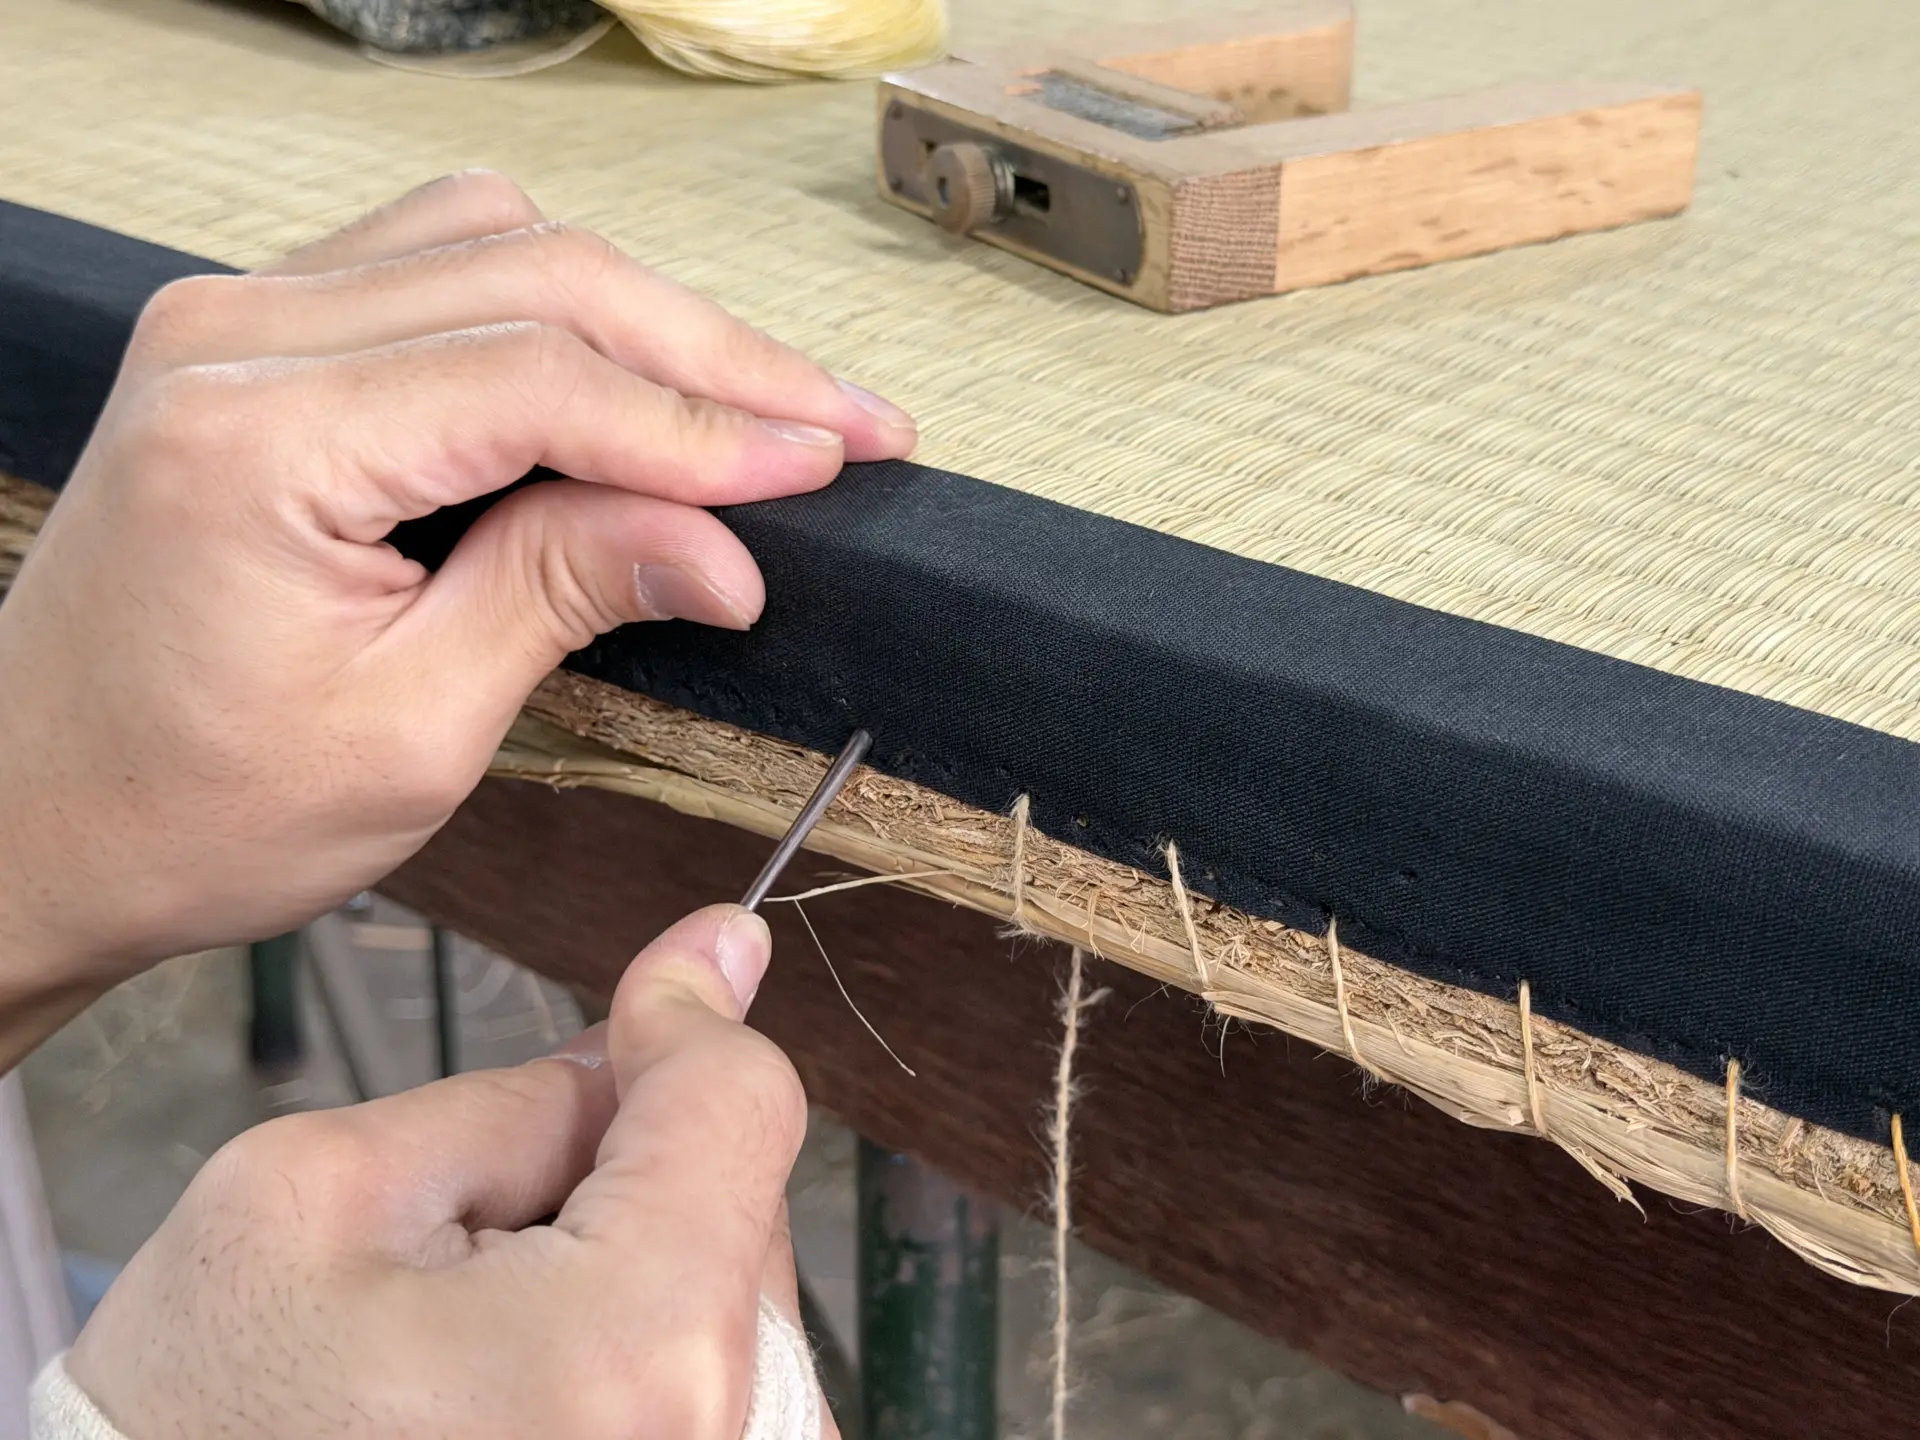
We realized just how many steps are involved in making a single tatami mat, and that both cutting the core and sewing with the needle require considerable strength. Opportunities to try hand-sewing tatami are rare, making this a valuable experience.
Our Experience: Making a Tatami Coaster
After the hand-sewing experience, participants can make 1 palm-sized tatami coaster. The first step is choosing the tatami-beri. With a wide range of patterns and multiple colors available for the same design, it can be difficult to decide.
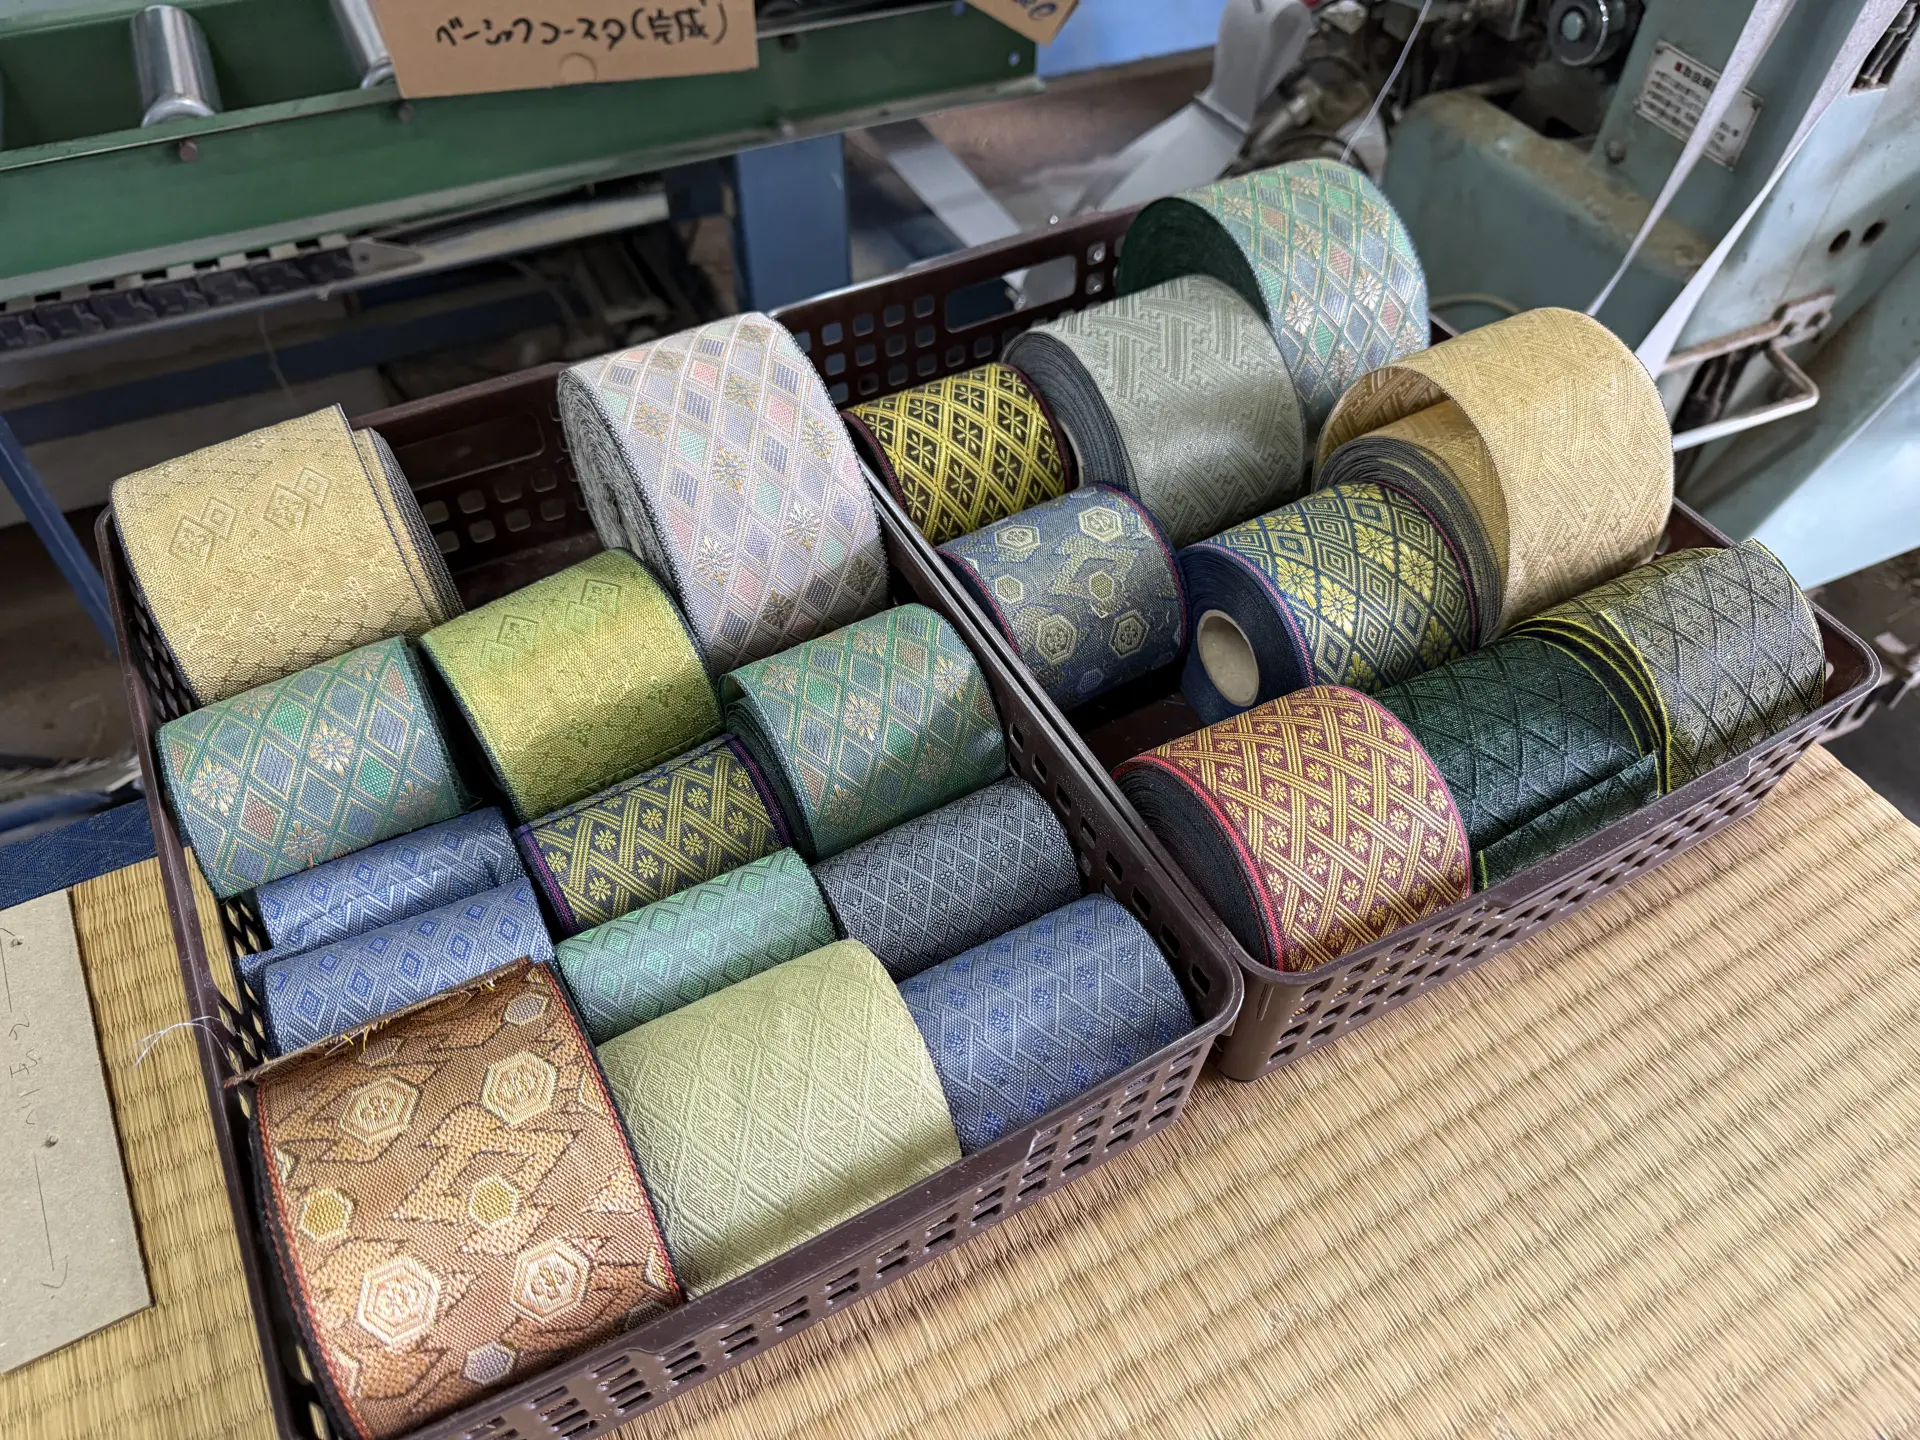
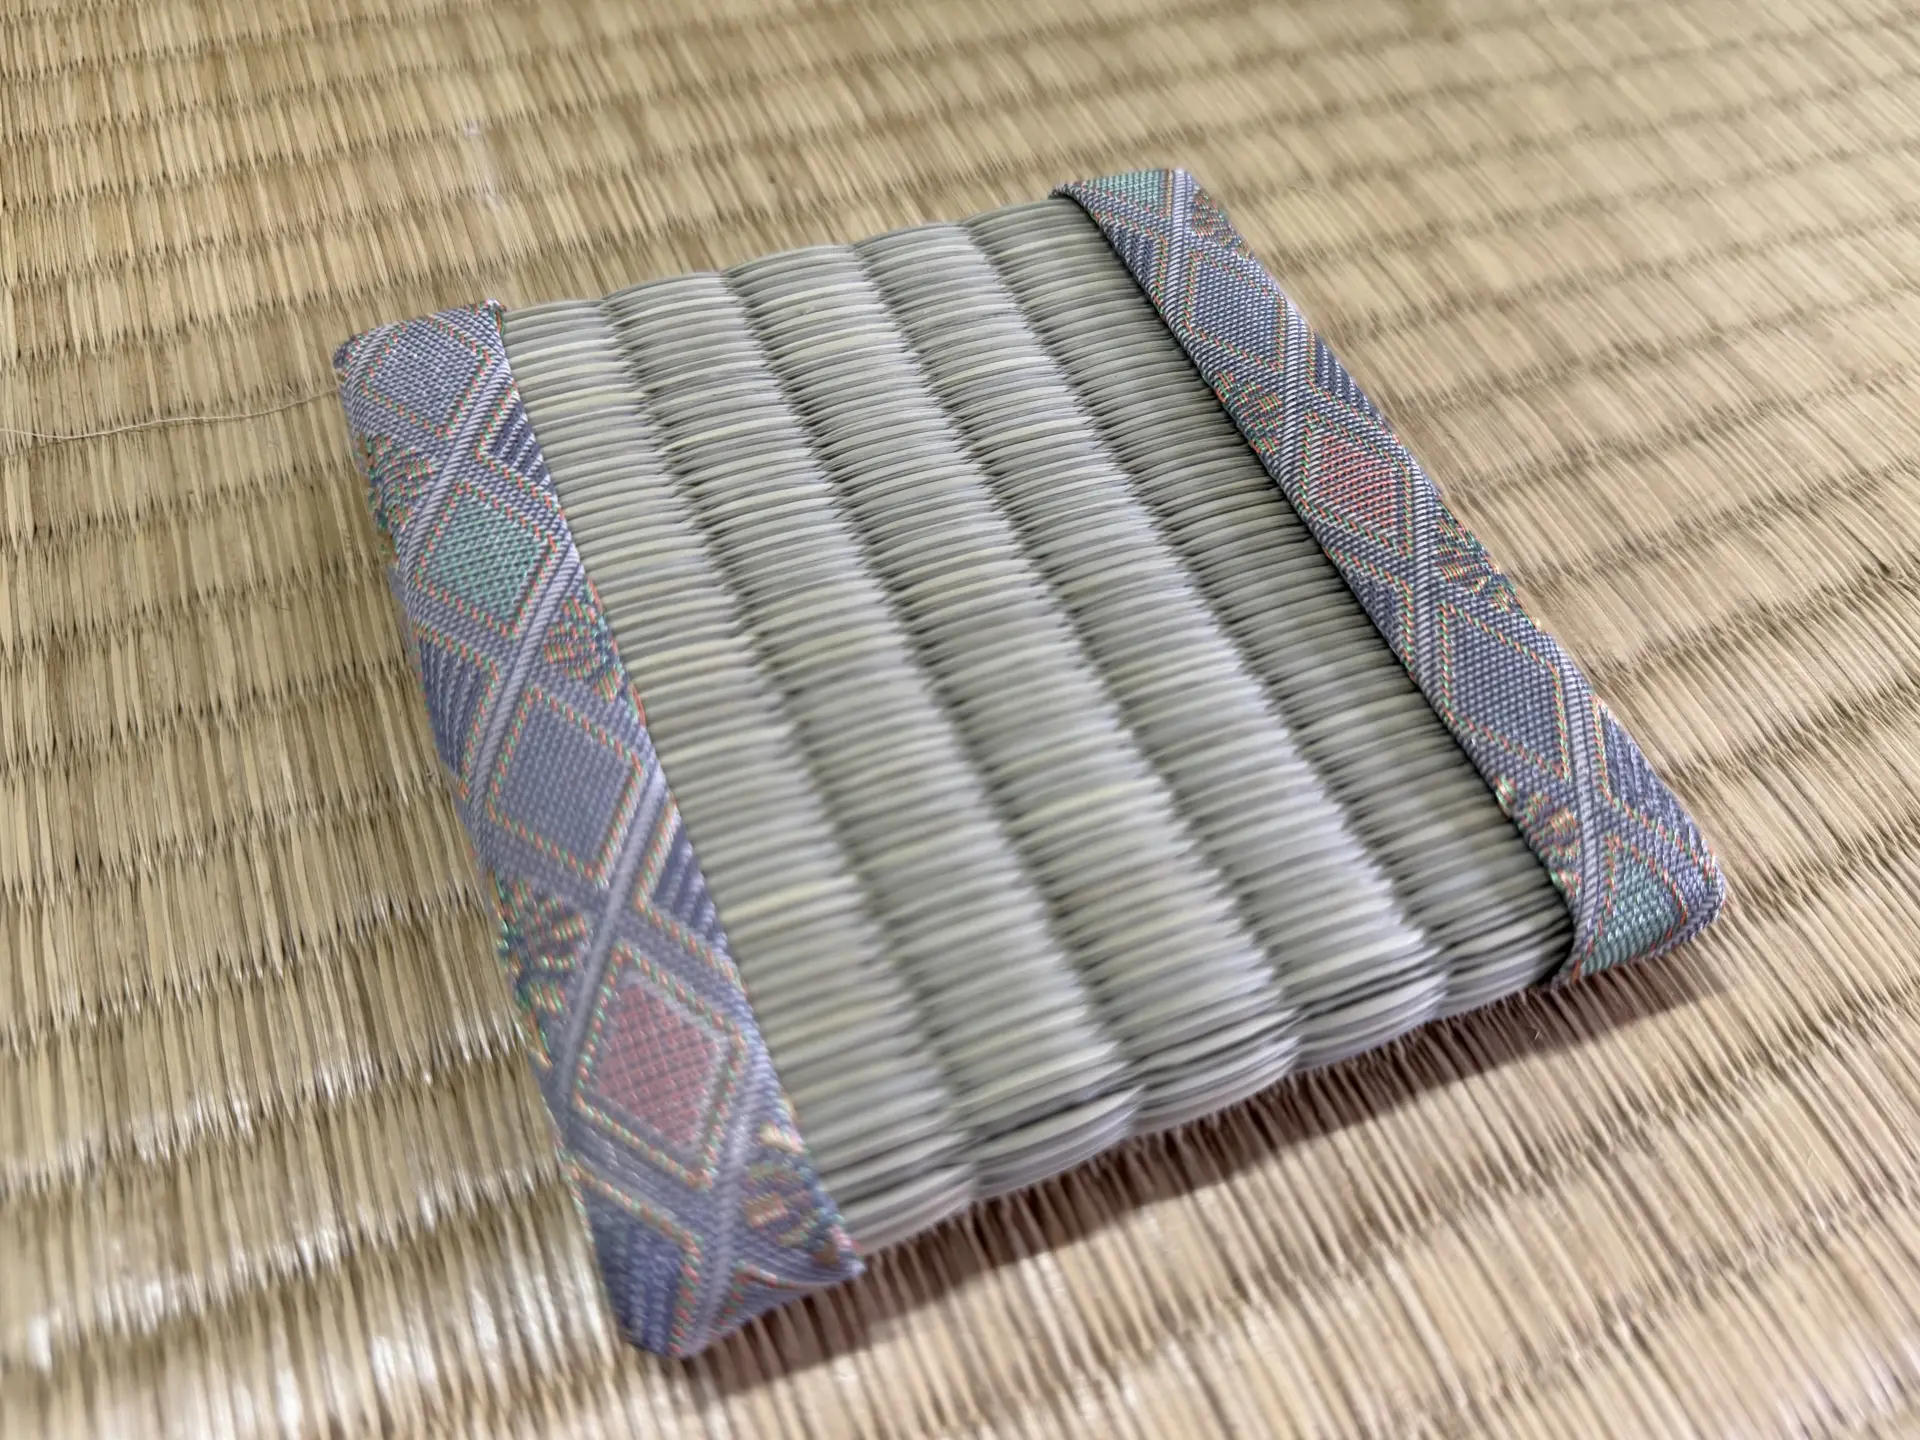
As we selected the tatami-beri, we also learned about the meaning behind each pattern. We chose a pale purple edging with a diamond-shaped design. The diamonds represent aquatic plants. Because these plants reproduce quickly, the pattern expresses wishes for prosperous descendants and the healthy growth of children. During the Heian period, when this pattern originated, giving birth and raising children could be life-threatening. People likely placed these wishes even into the tatami in the rooms where they spent most of their day. This also helped us understand why it is considered proper etiquette not to step on the tatami edging.
After choosing the tatami-beri, it was time to begin. The materials included the edging, tatami-omote, and a board serving as the tatami-doko core.
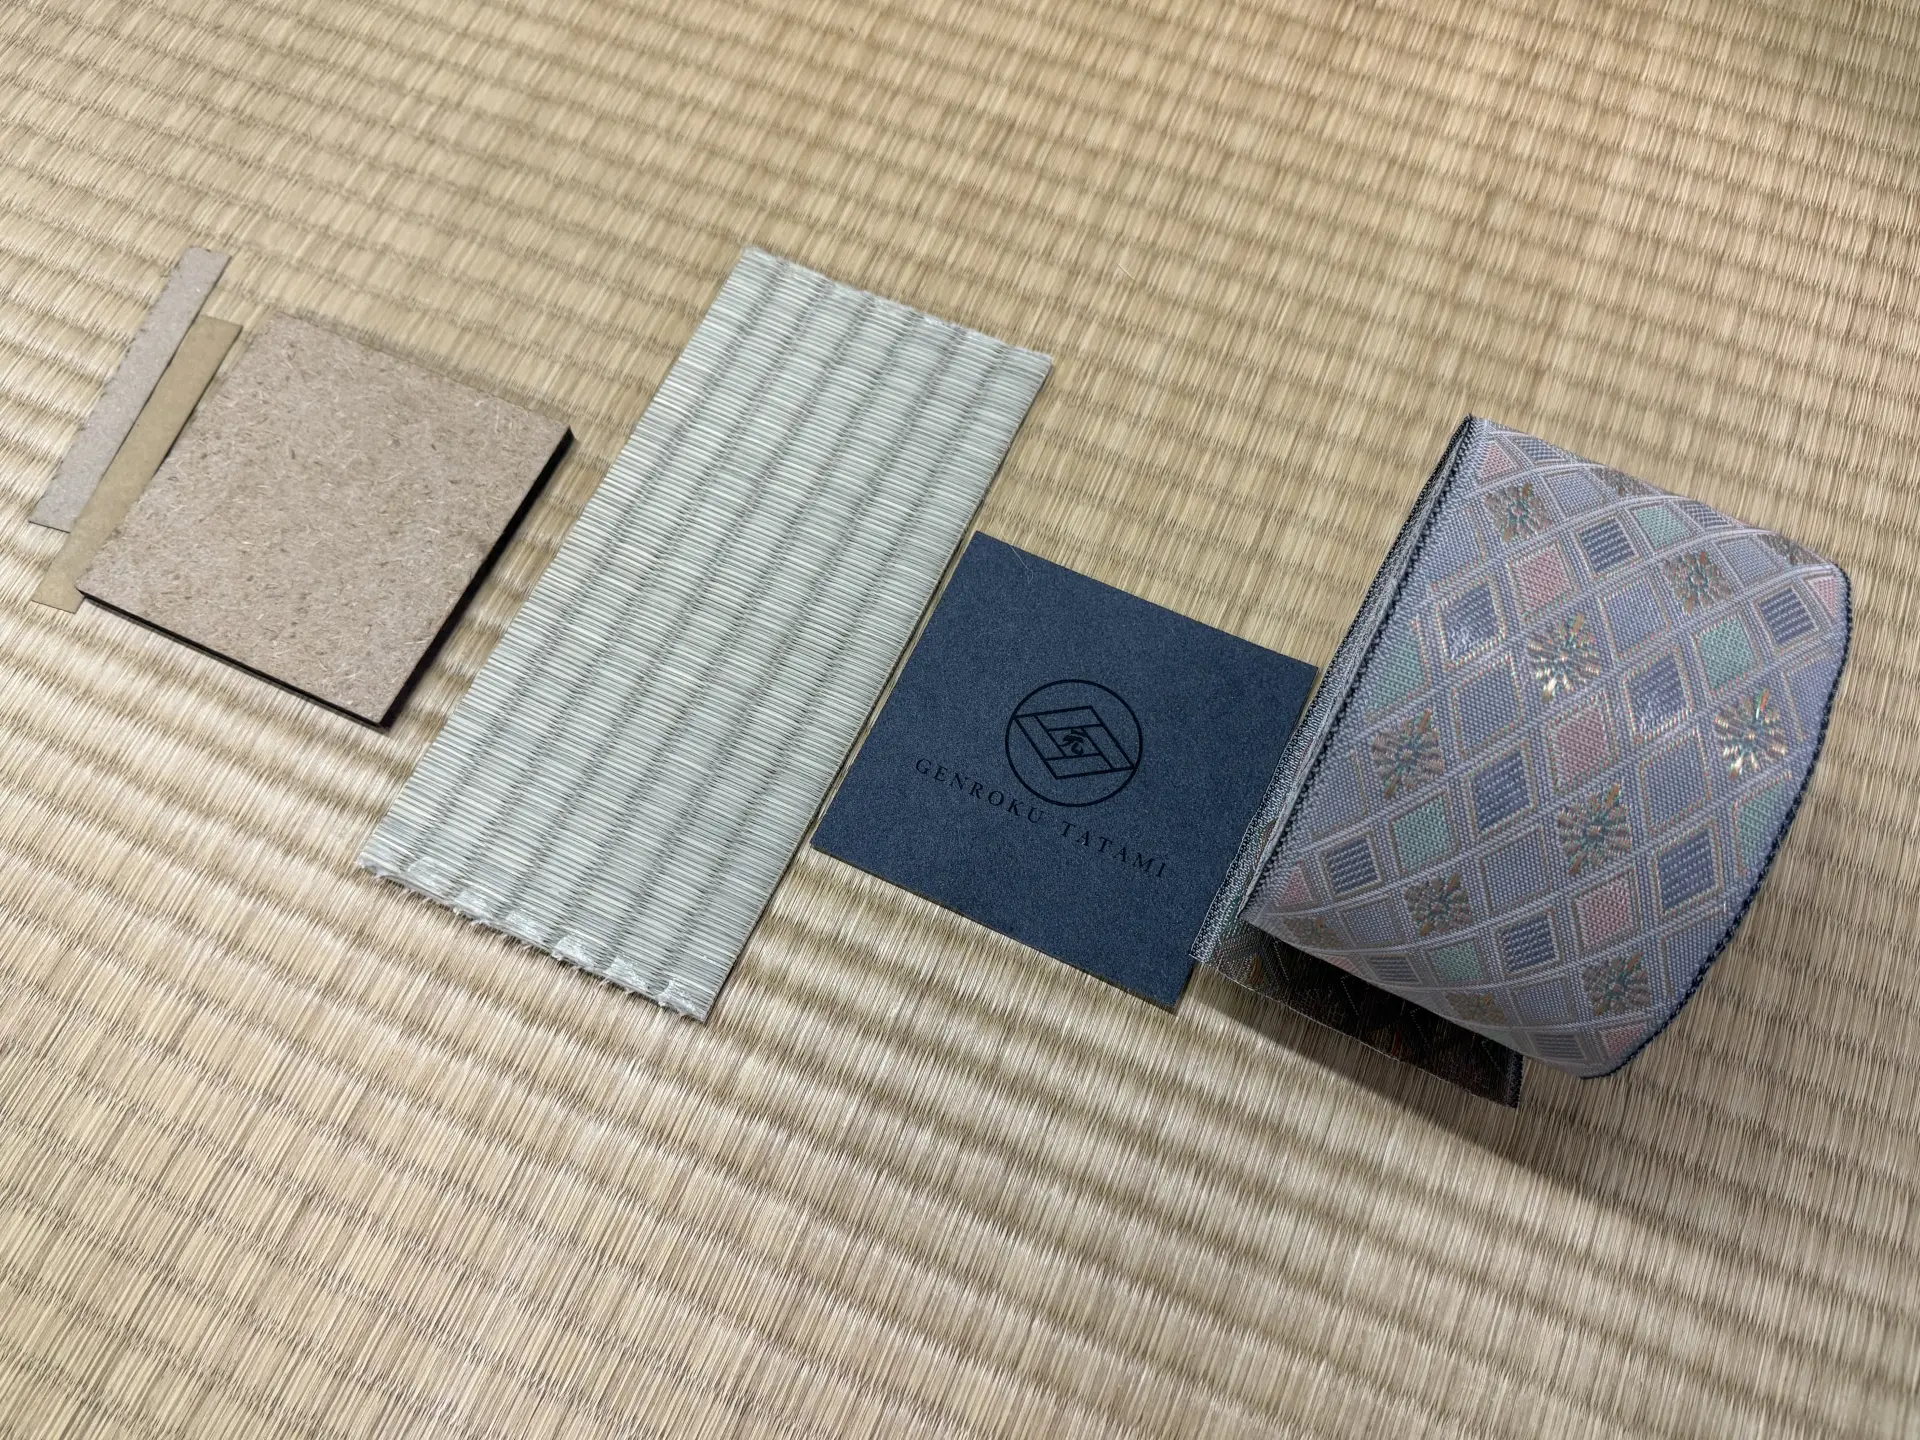
First, the tatami-omote is wrapped around the square tatami-doko.
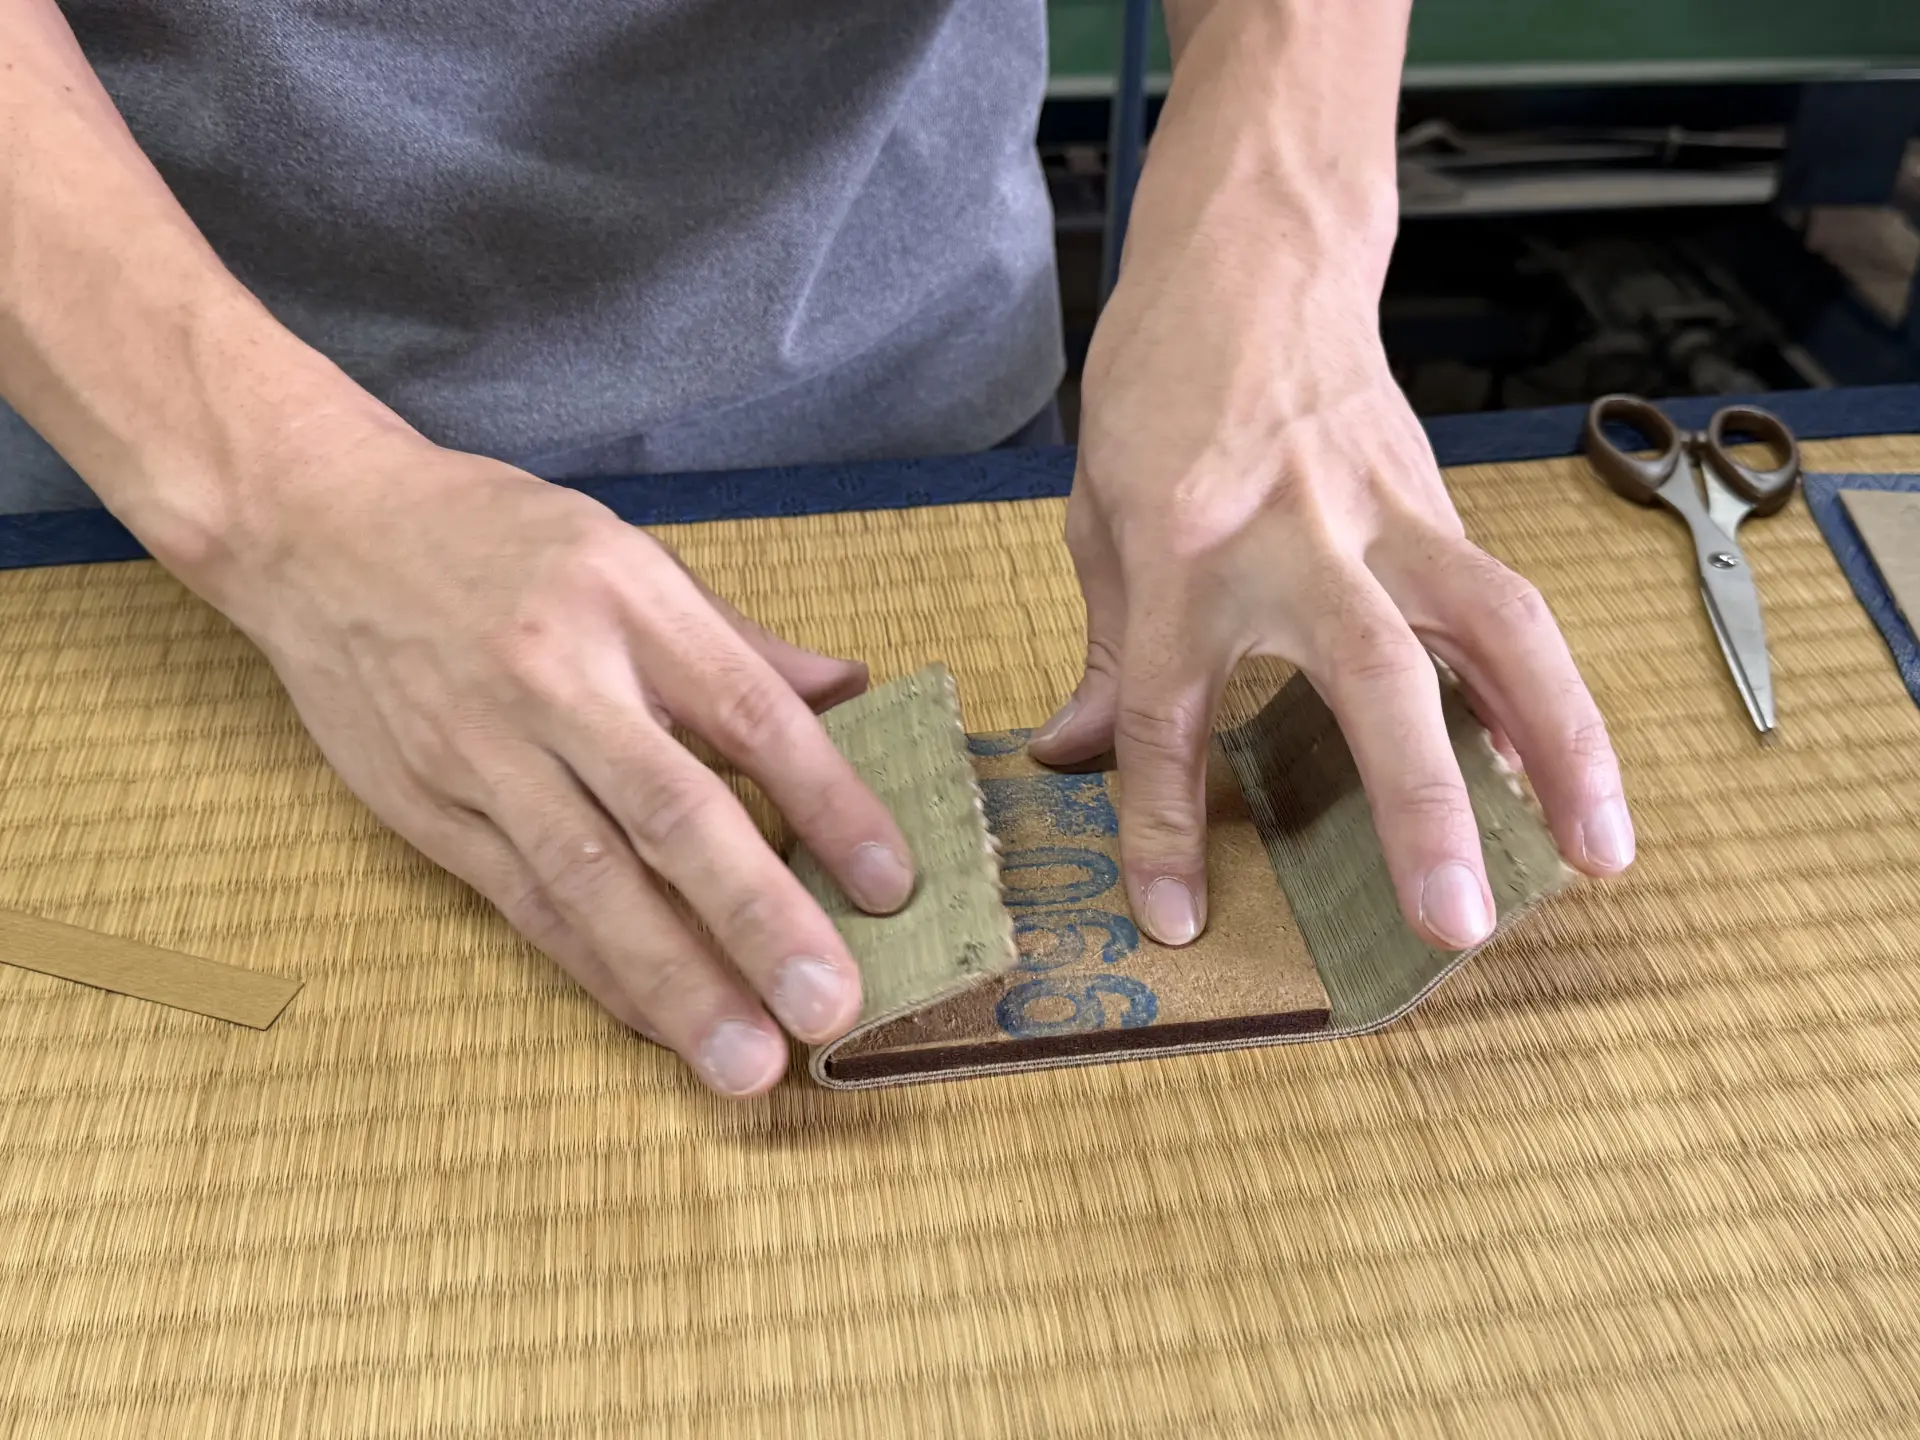
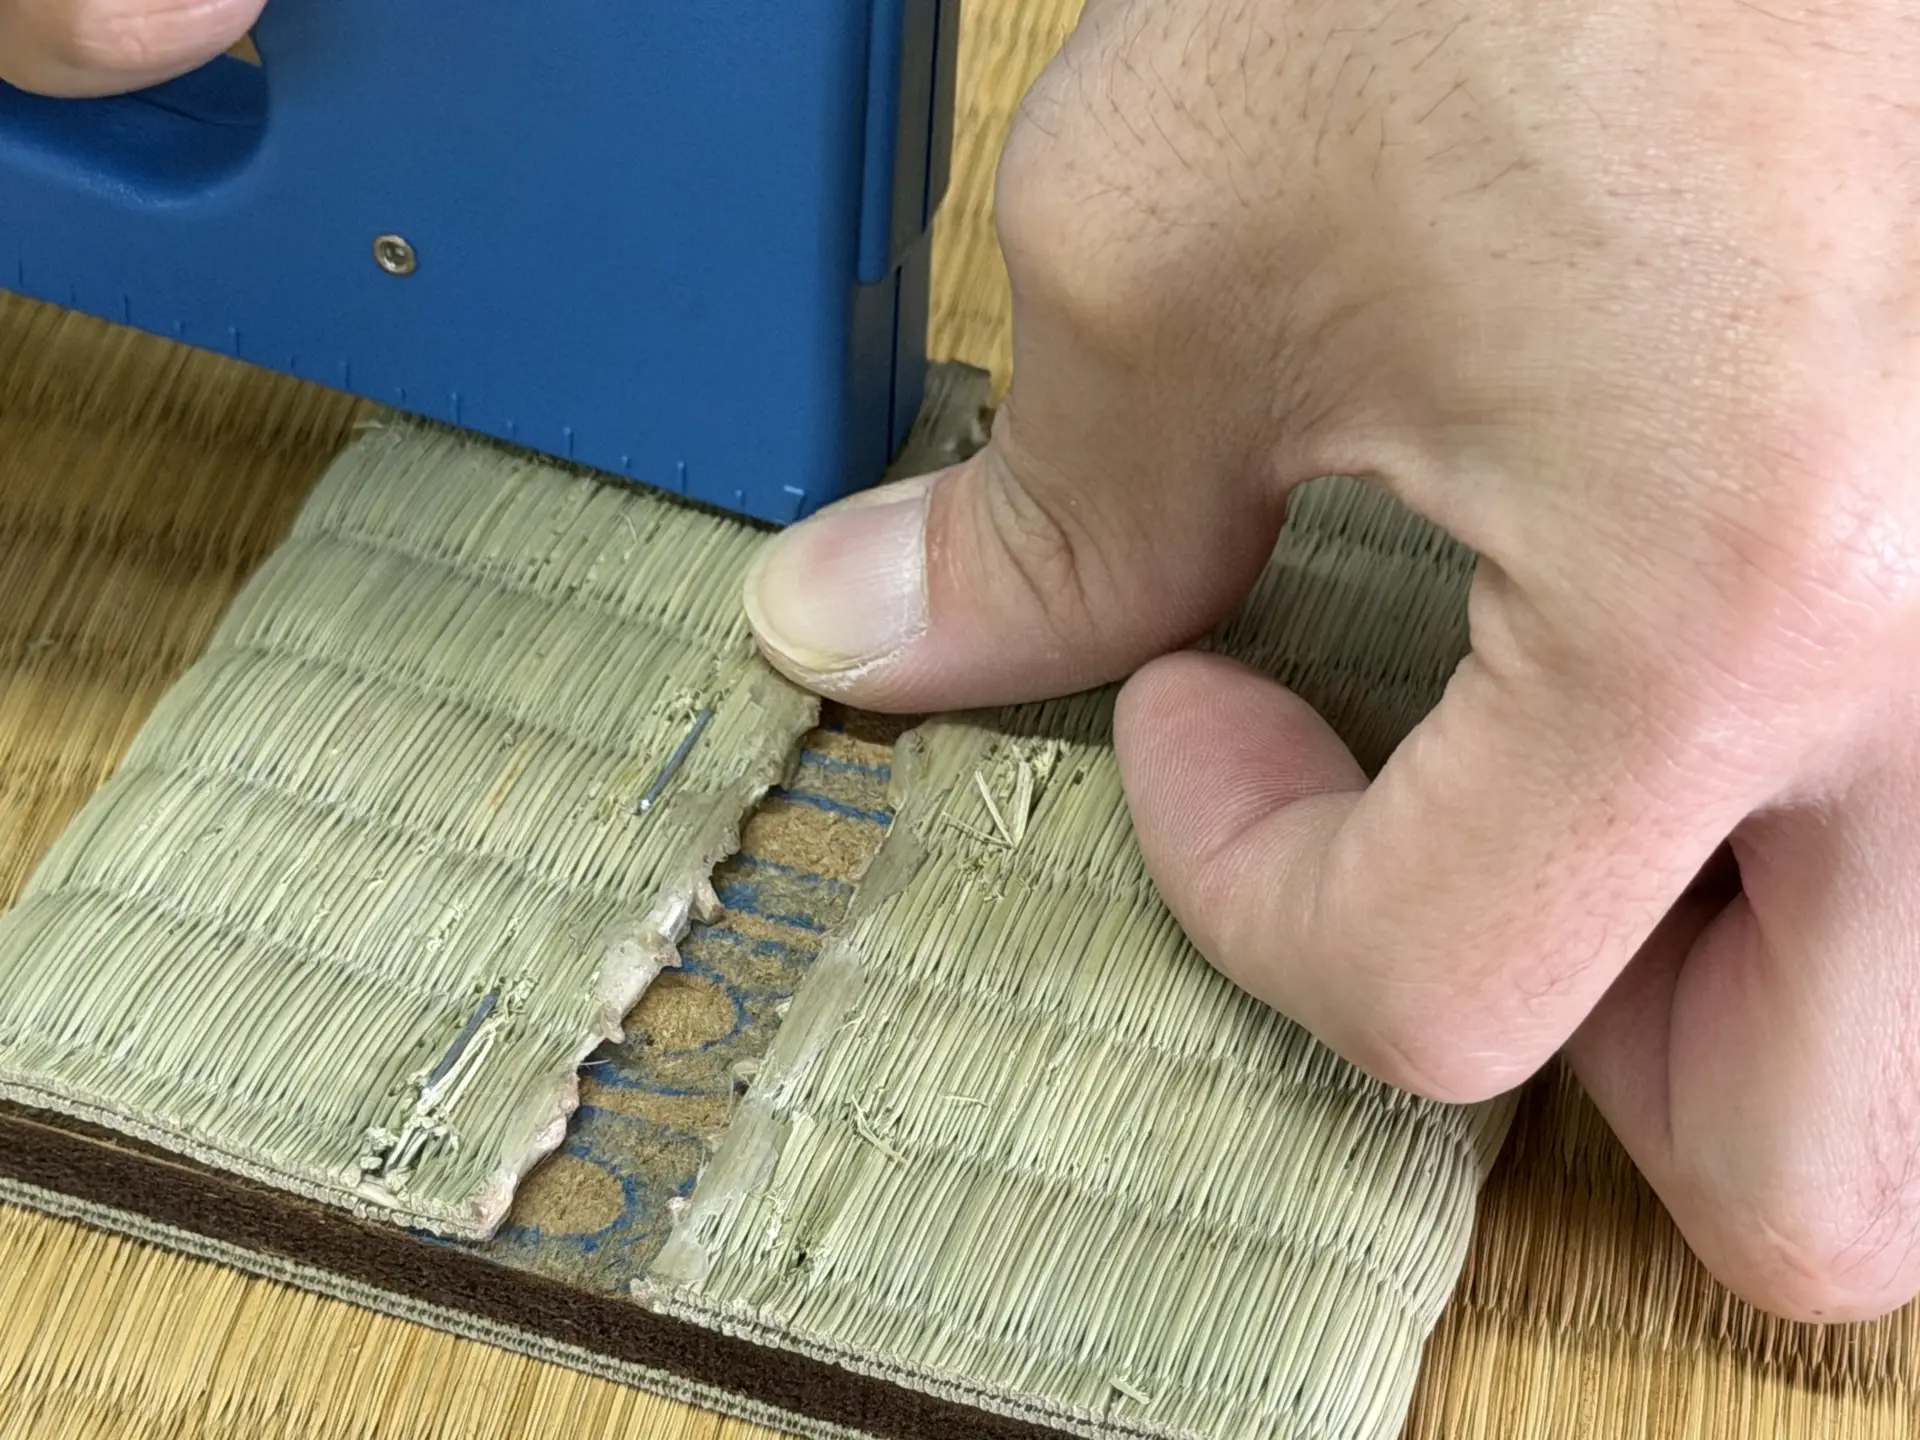
The tatami-omote is stapled to the tatami-doko on the back. Pulling it tight while stapling prevents sagging and produces a smooth finish.
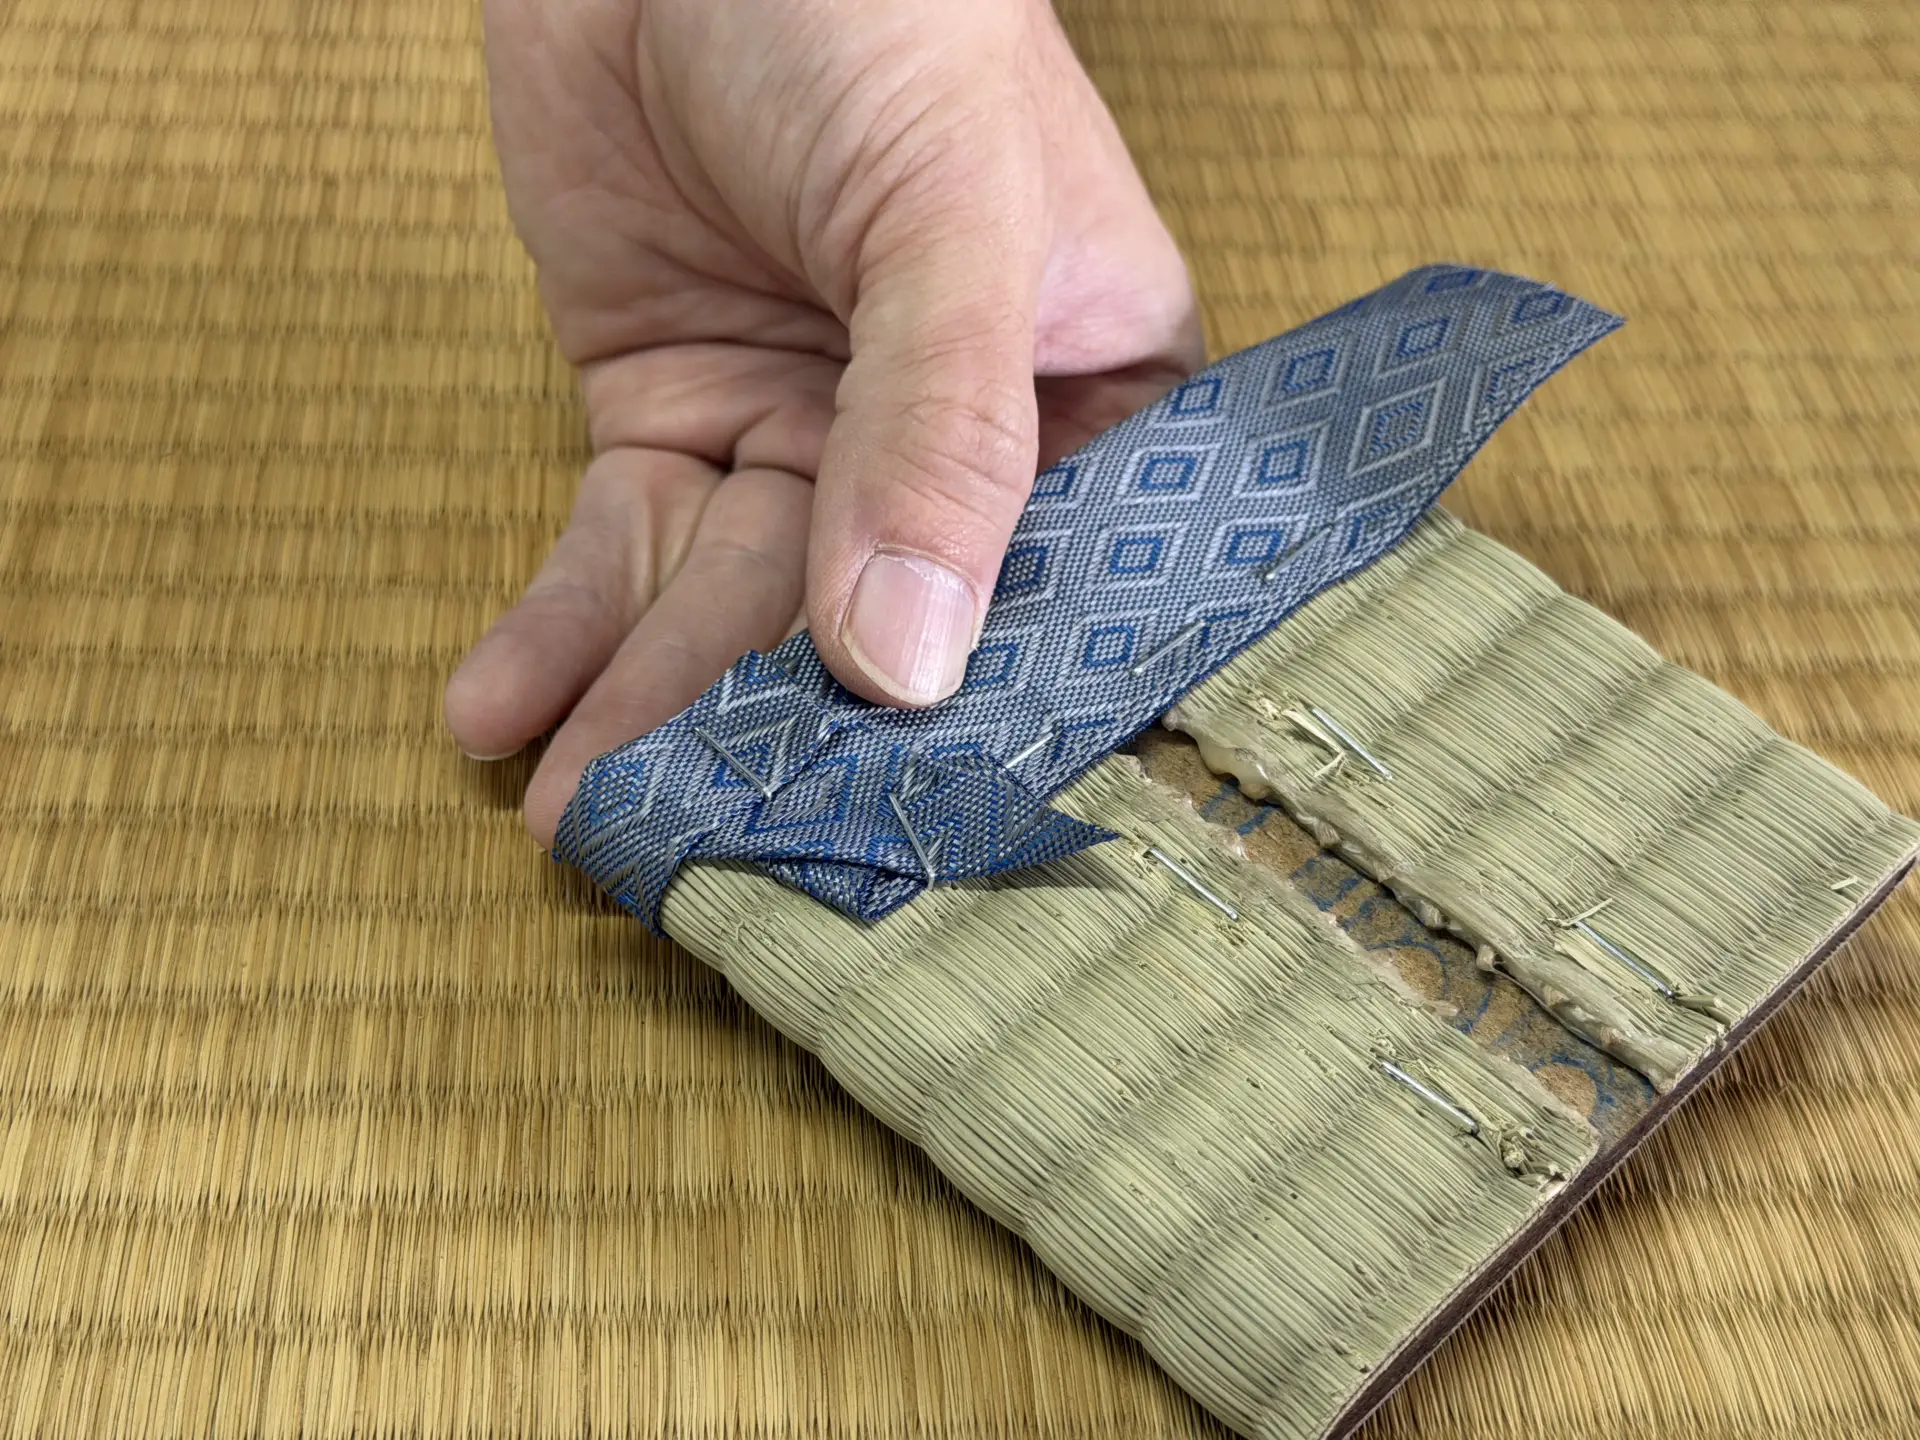
Tatami-beri is attached to the two sides of the tatami-doko not covered by the tatami-omote. The edging is placed face down and aligned with the edge. A narrow reinforcing strip is then placed along the edge, and the strip and tatami-beri are stapled together.
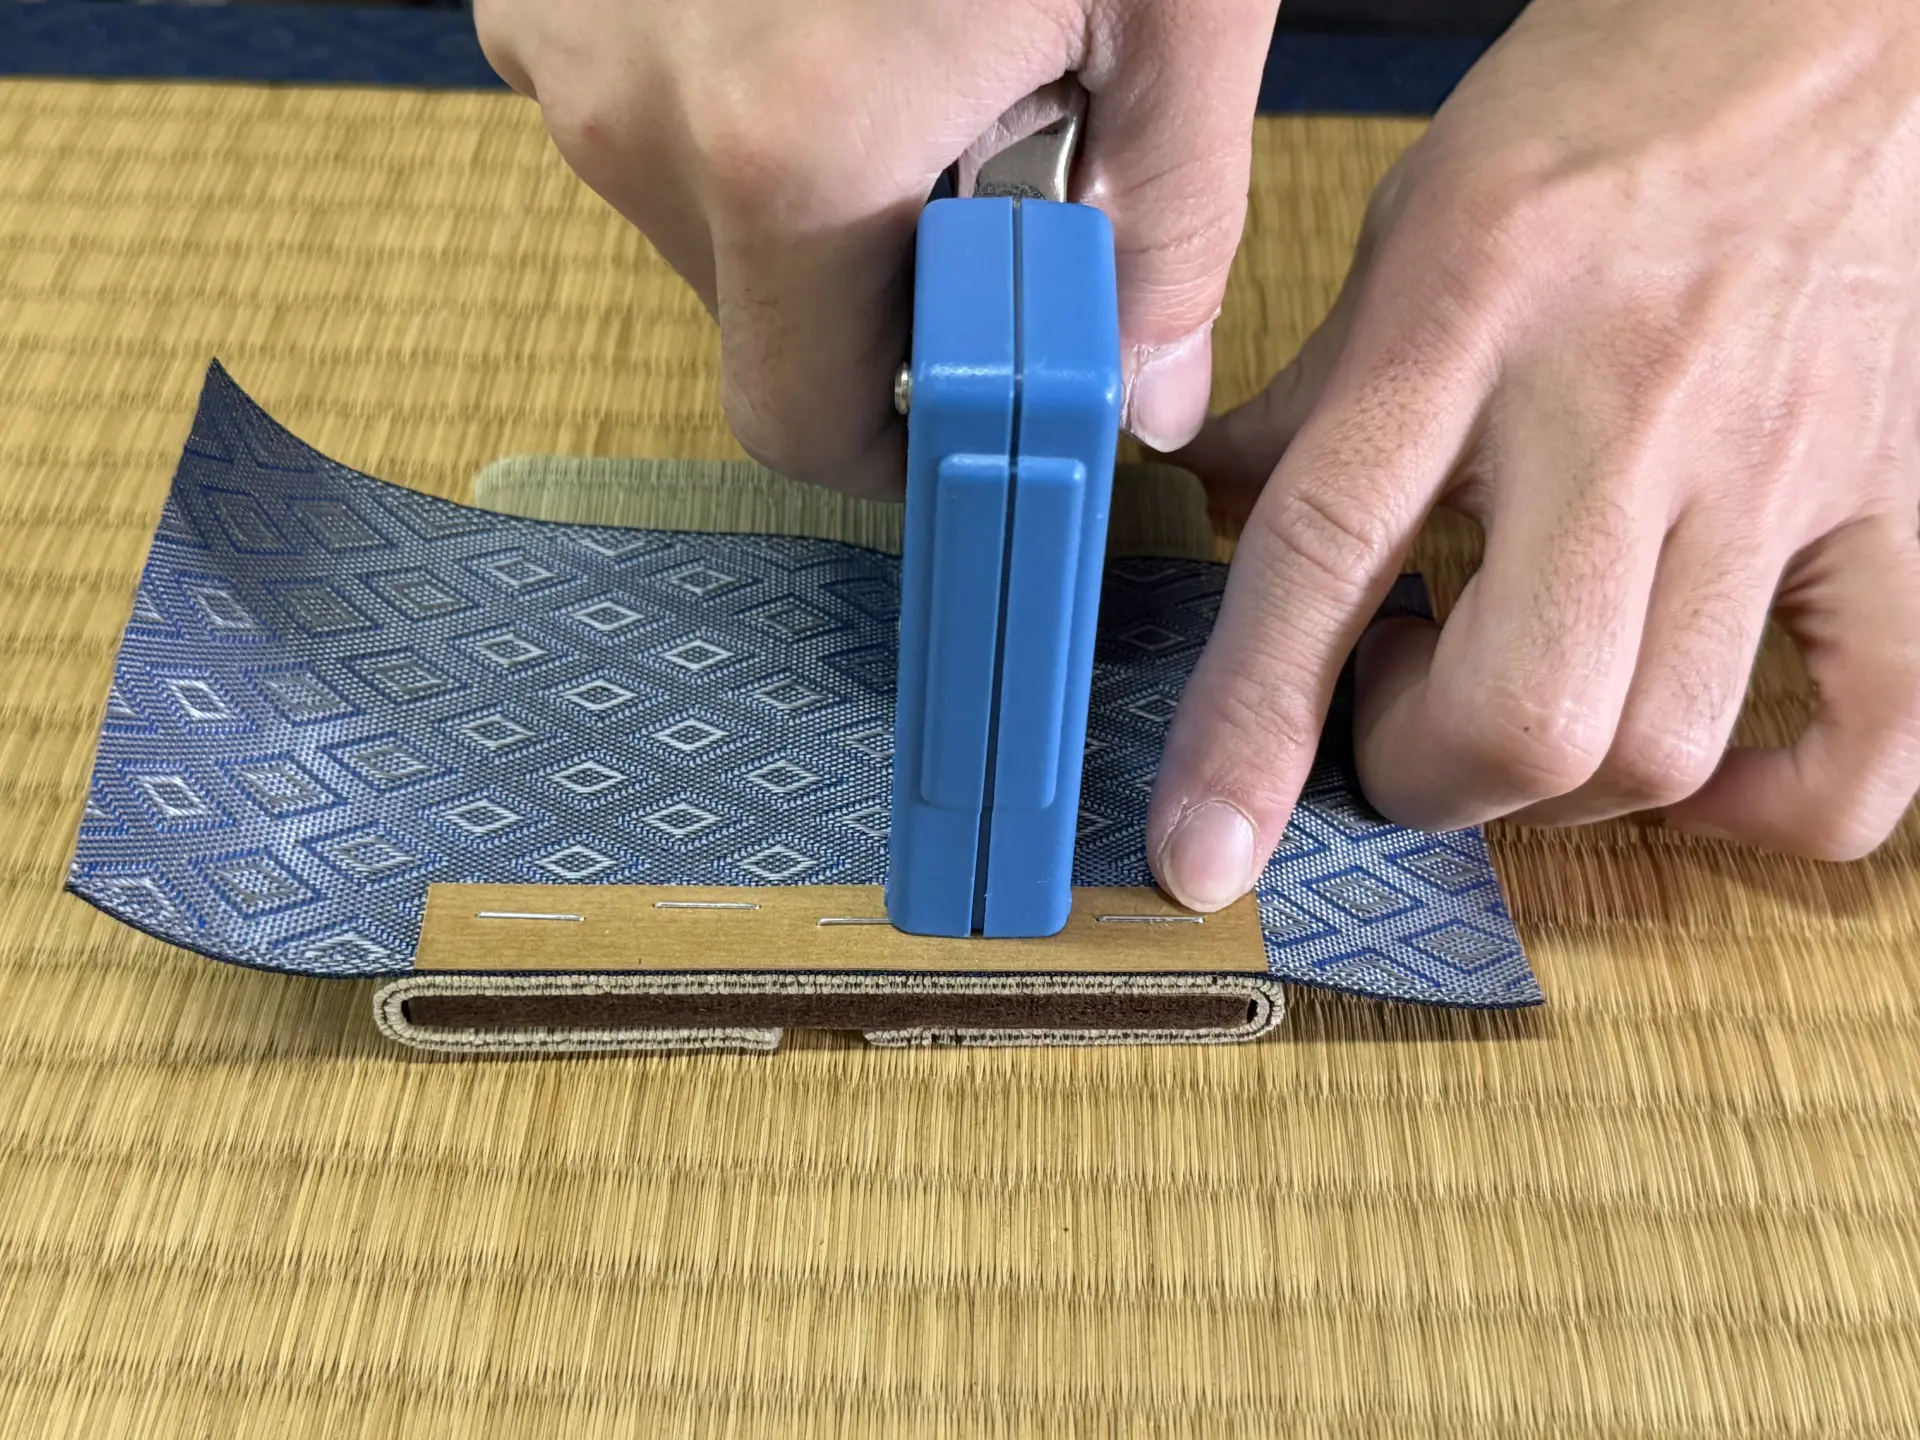
Once stapled, the tatami-beri is flipped over and pulled toward the back.
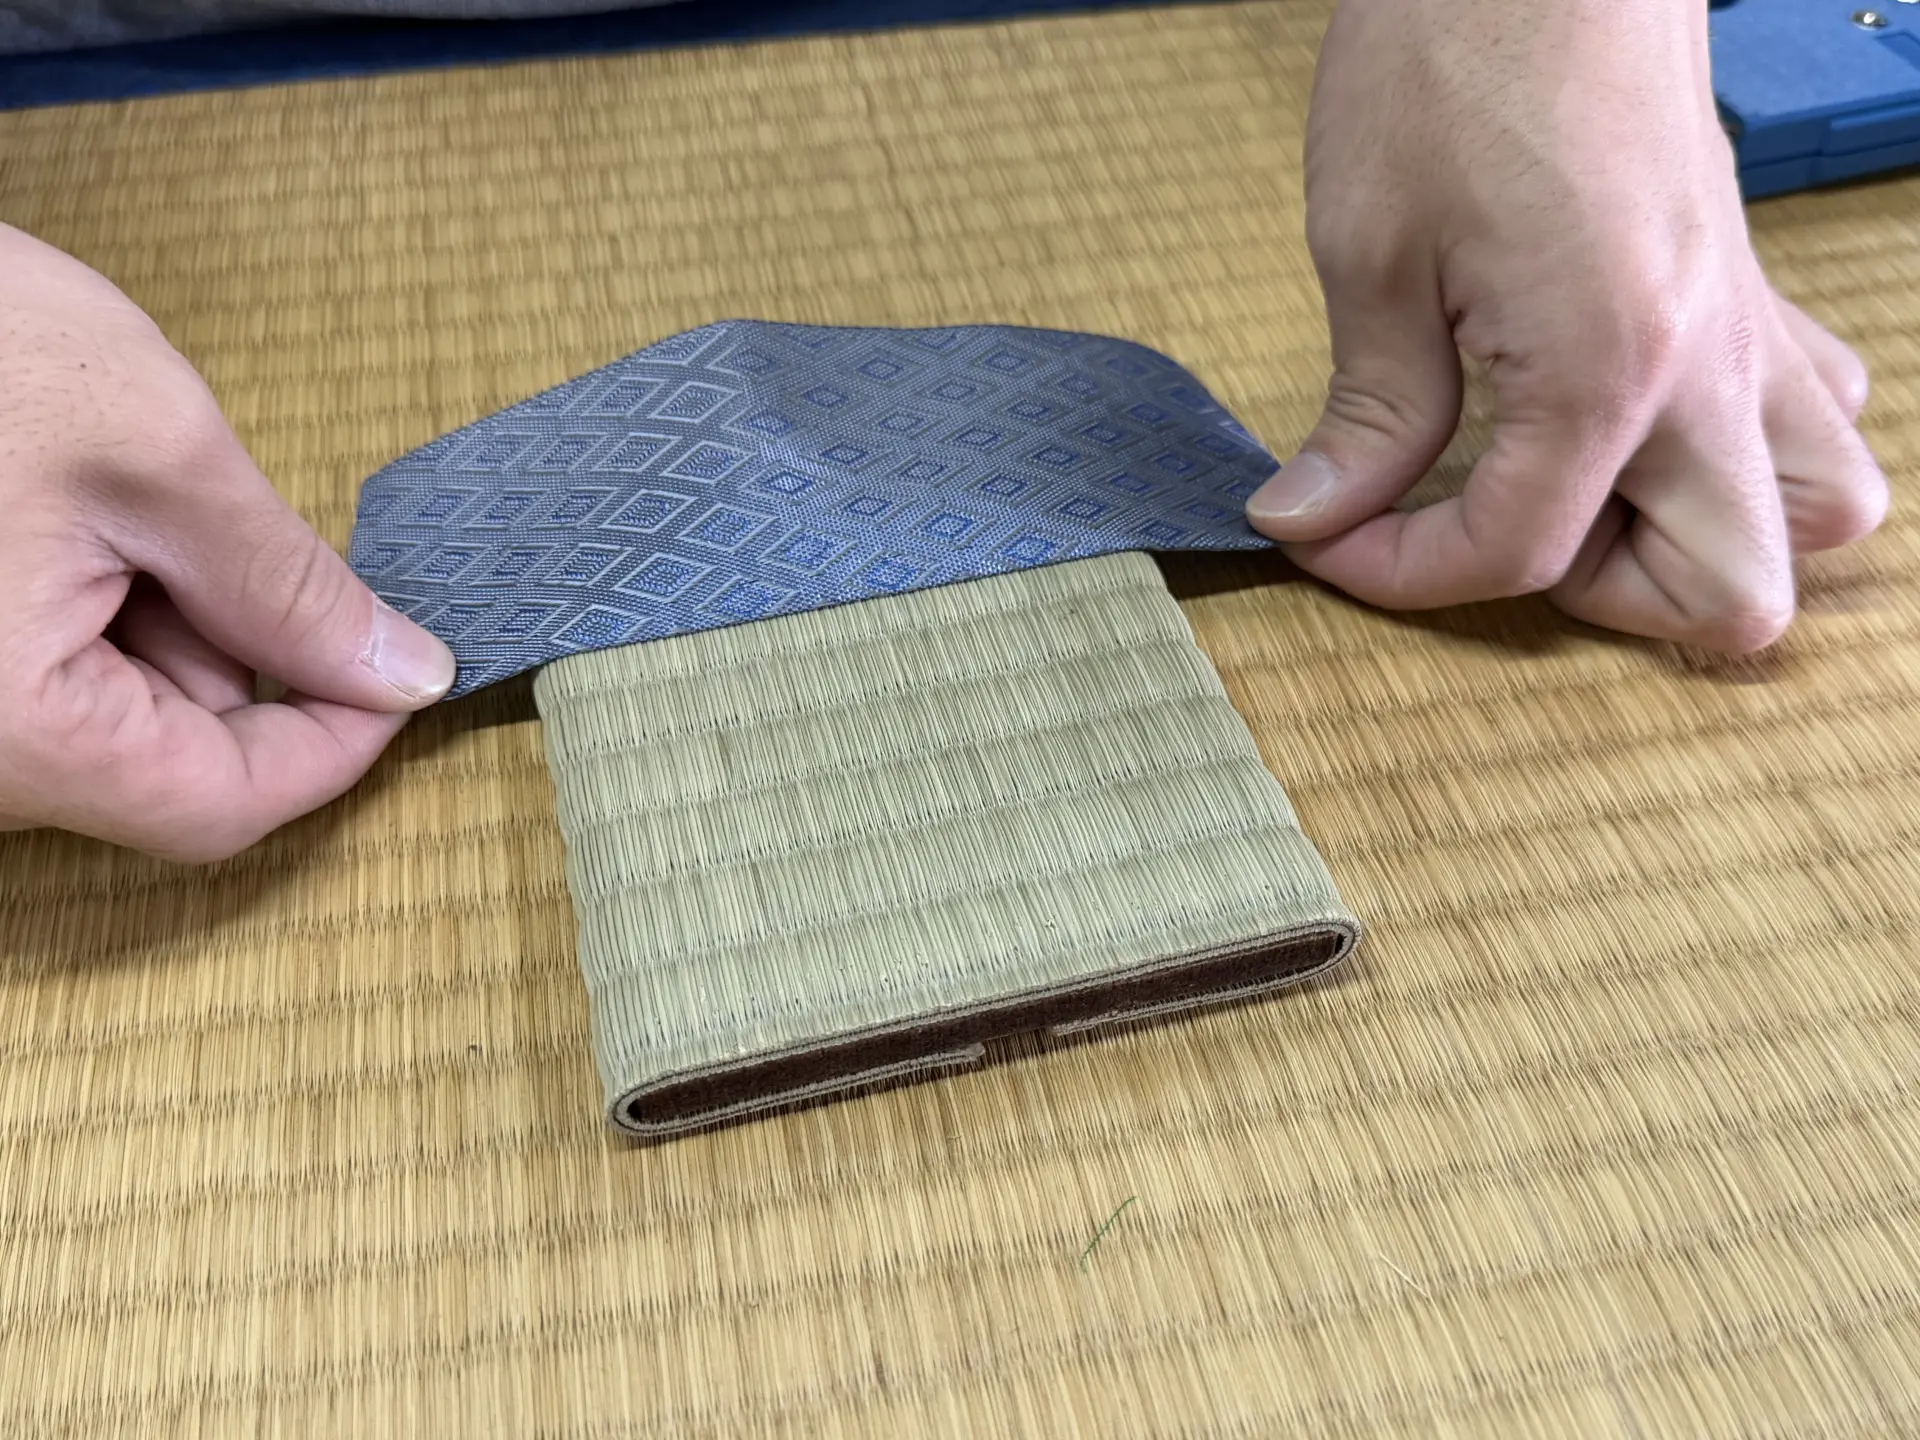
It is then stapled in place on the back.
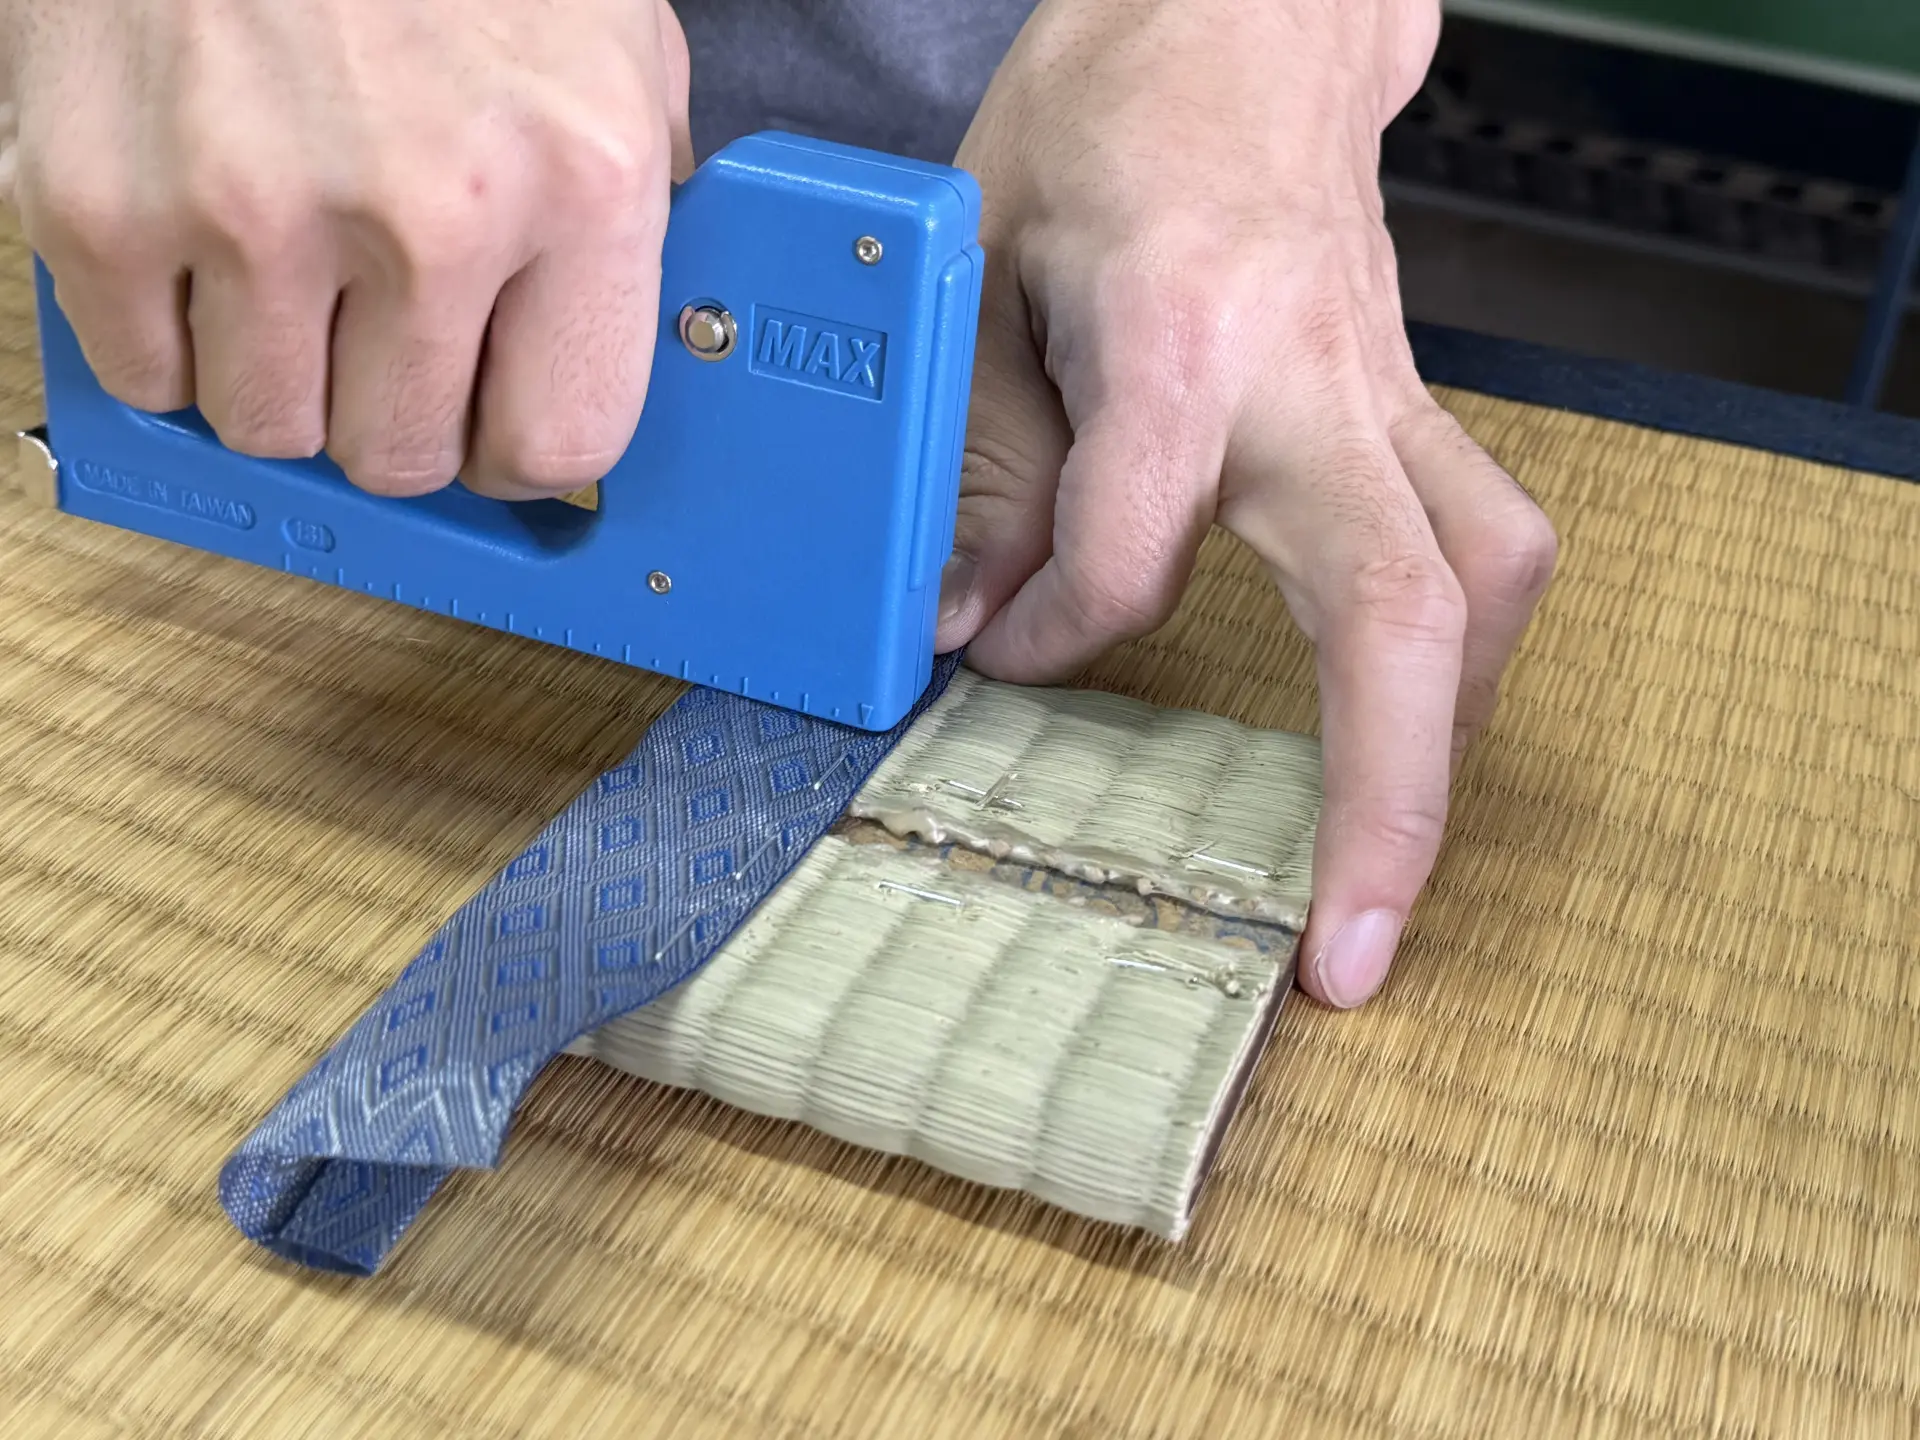
Next, the corners are shaped. The excess tatami-beri fabric must be pulled firmly toward the back.
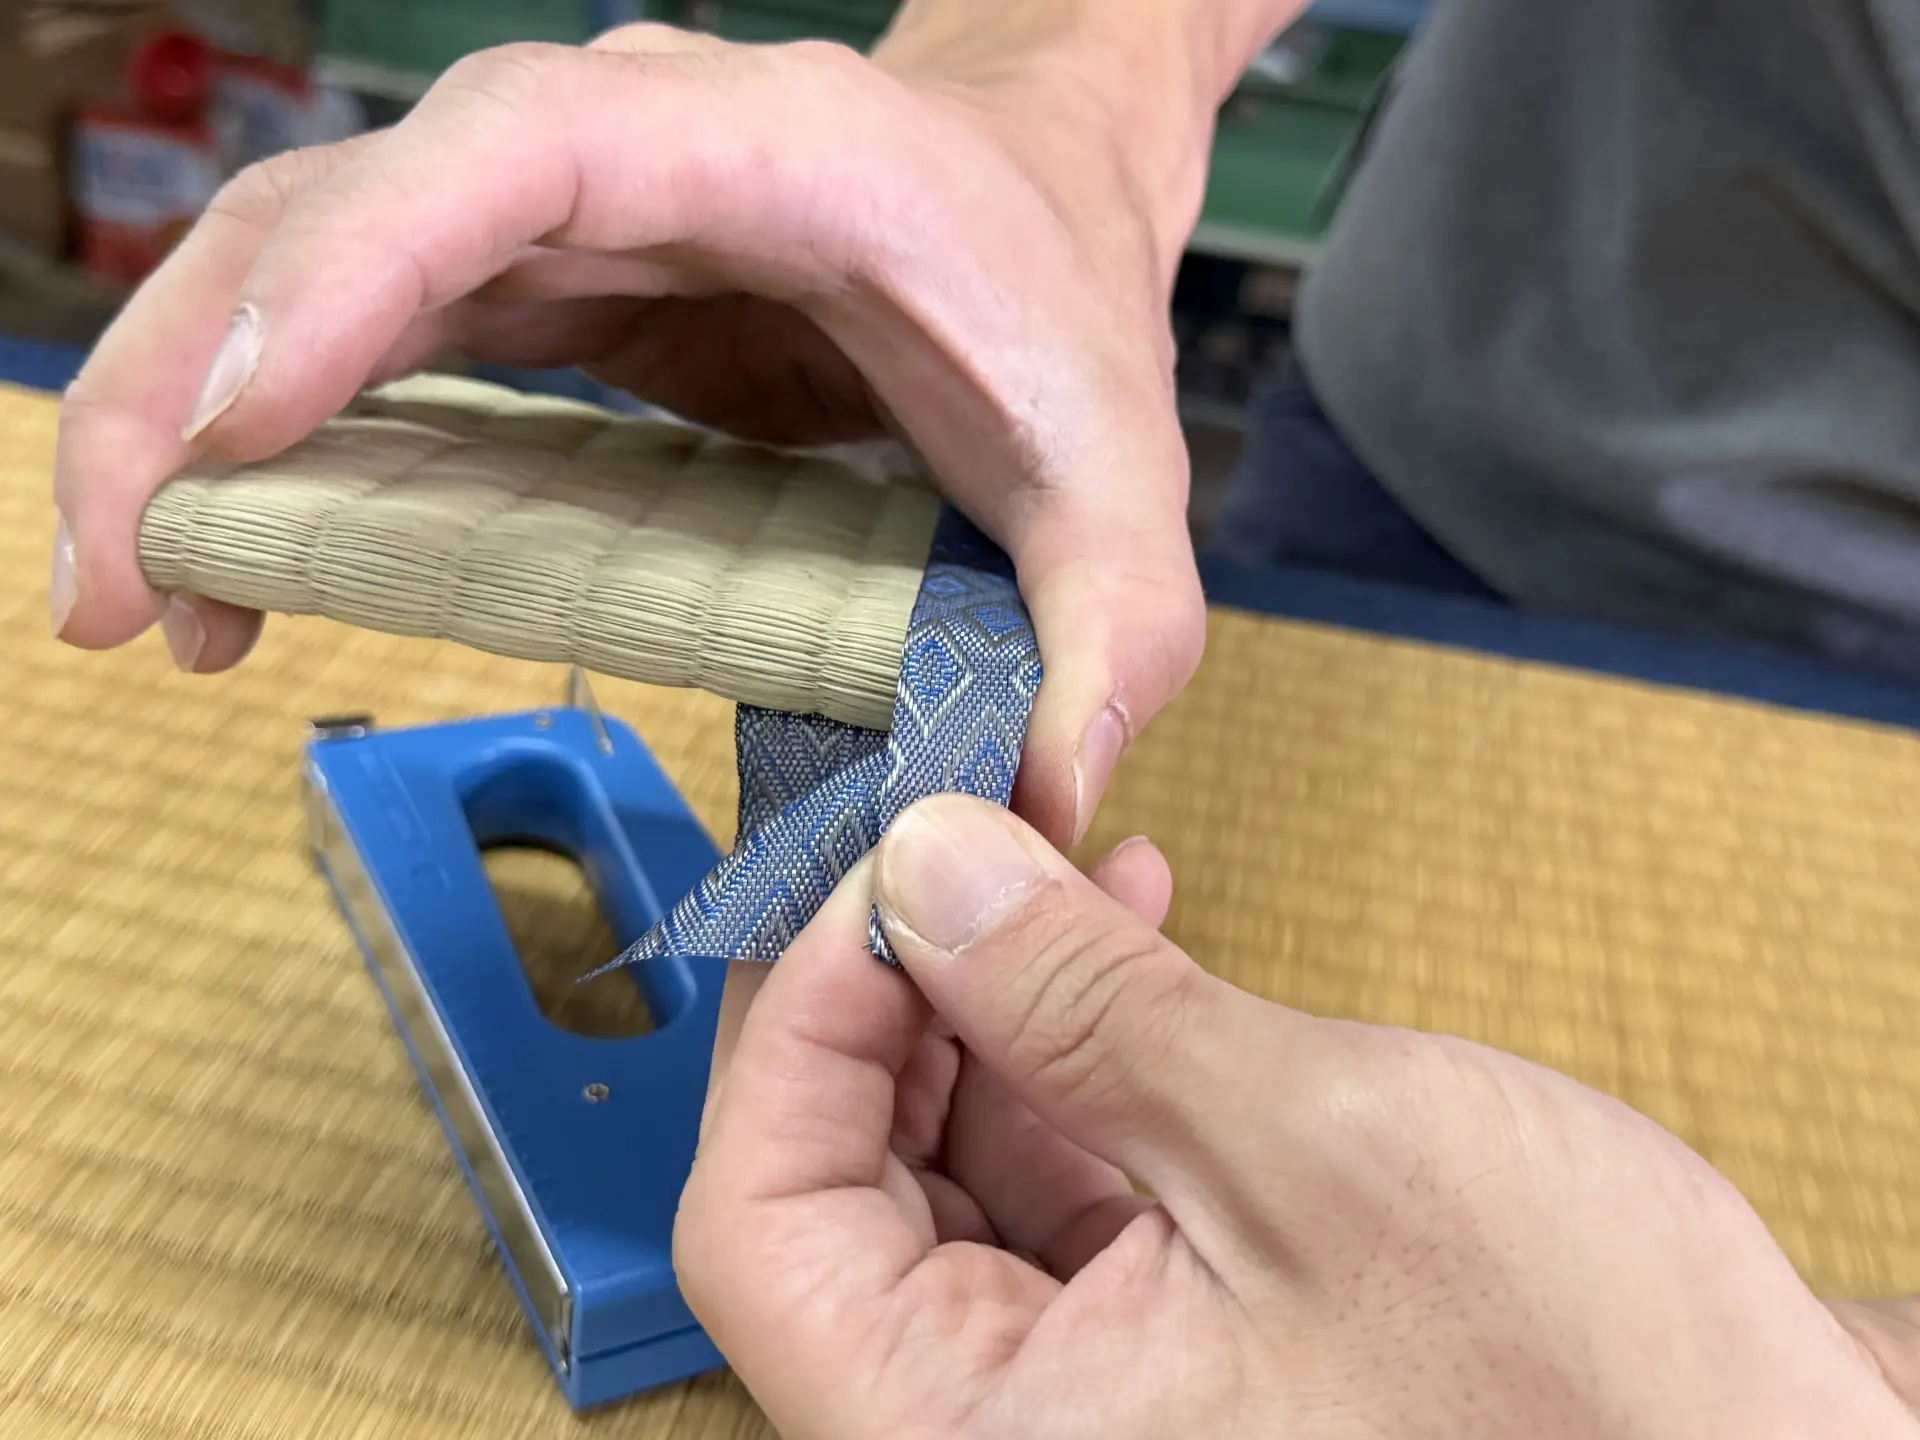
Pulling it tight creates a clean, defined corner. We were told that artisans also pay close attention to creating neat corners when making full-size tatami mats.
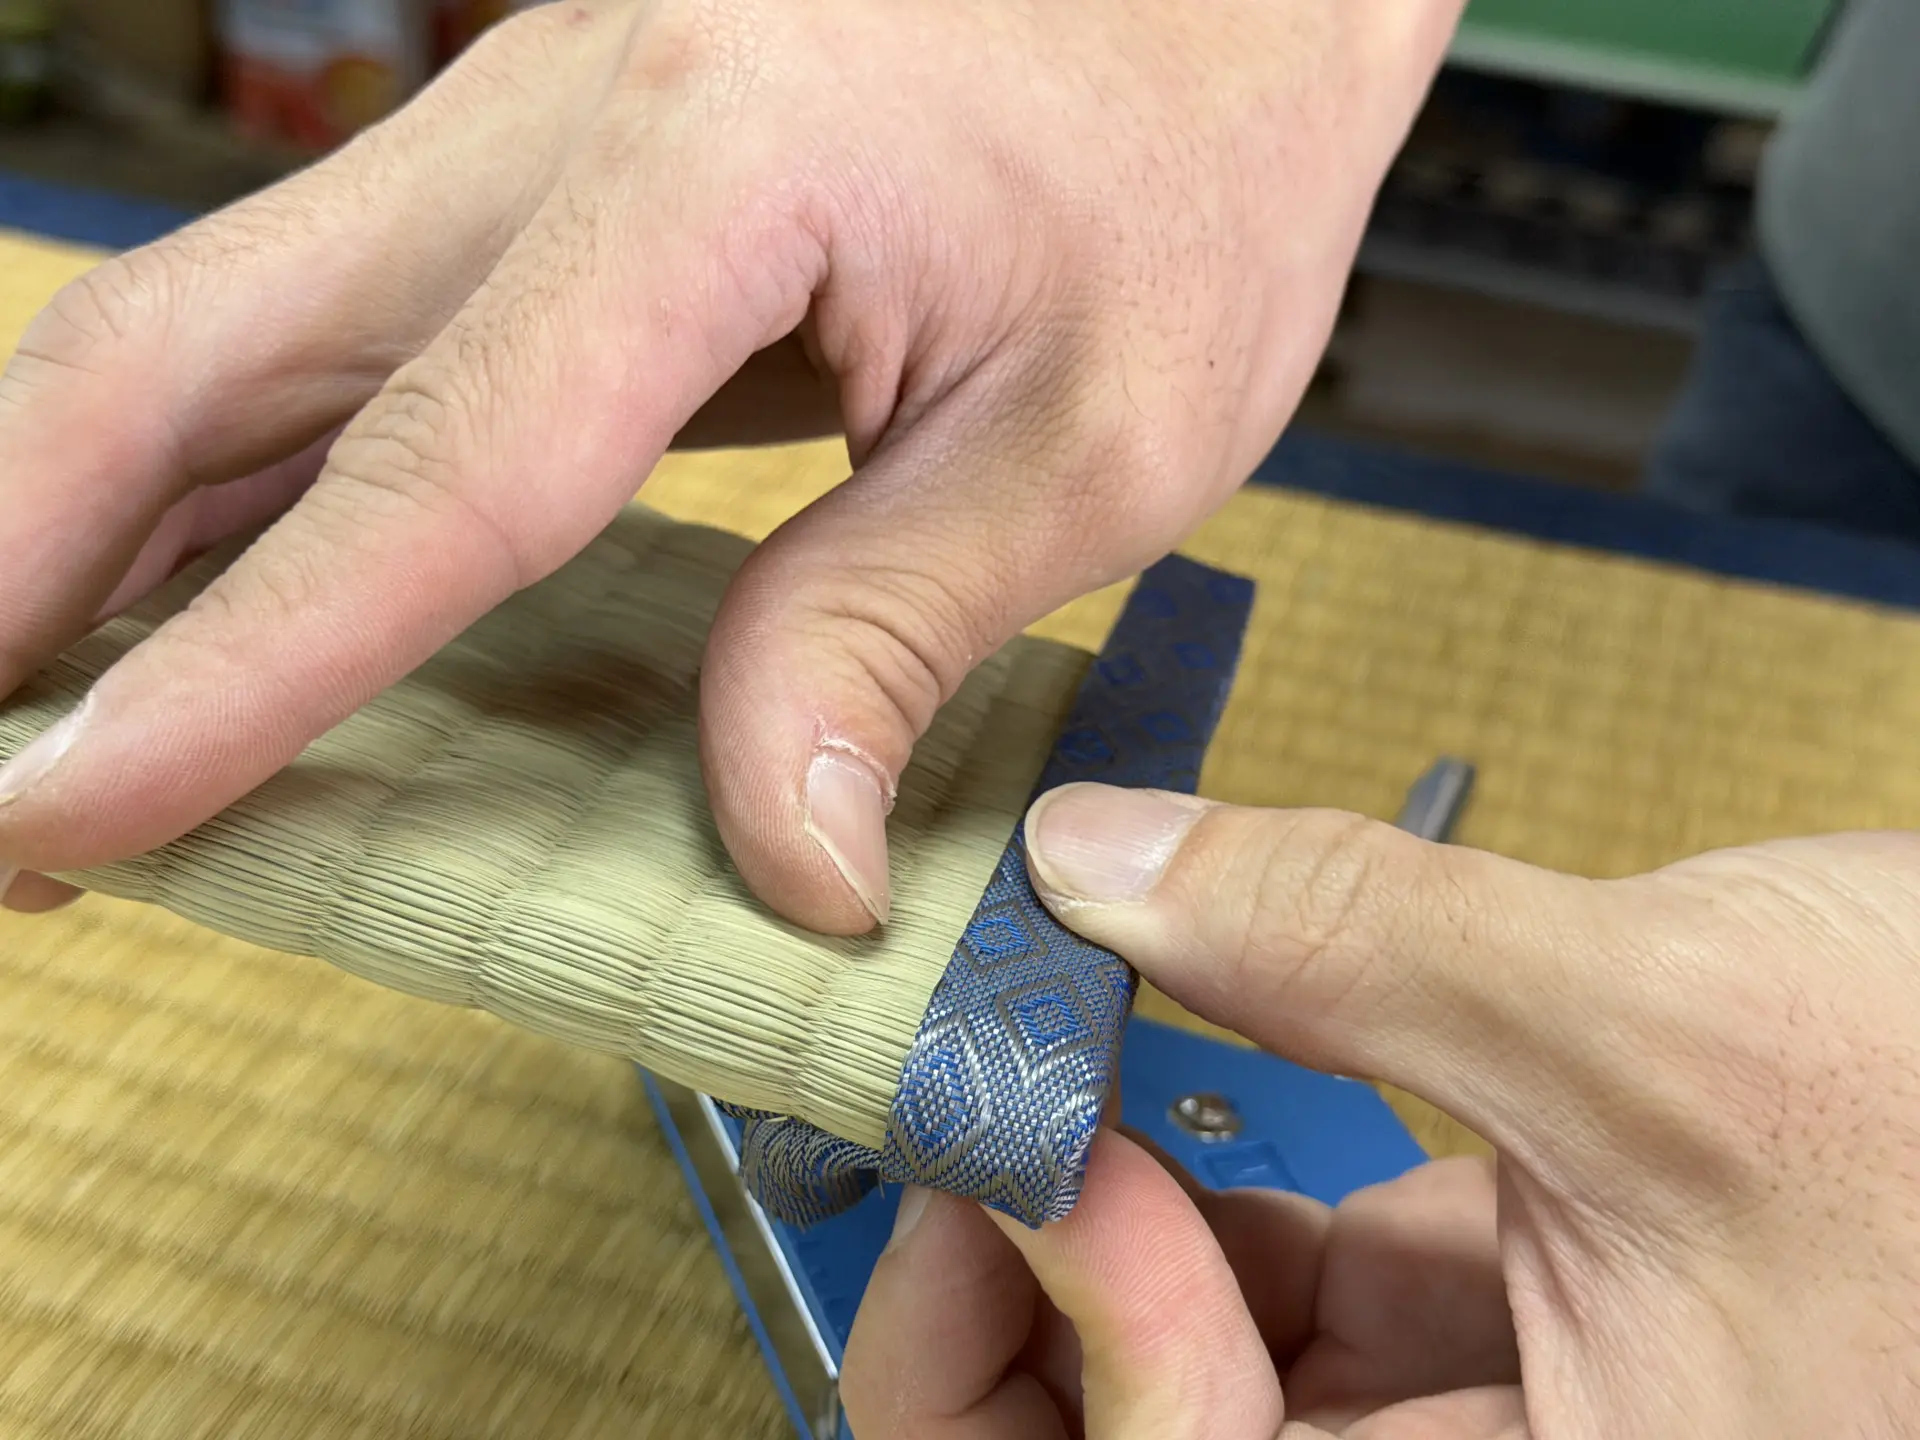
Once the corner has been neatly shaped, it is stapled in place on the back. The tatami-beri is then attached to the opposite side in the same way.
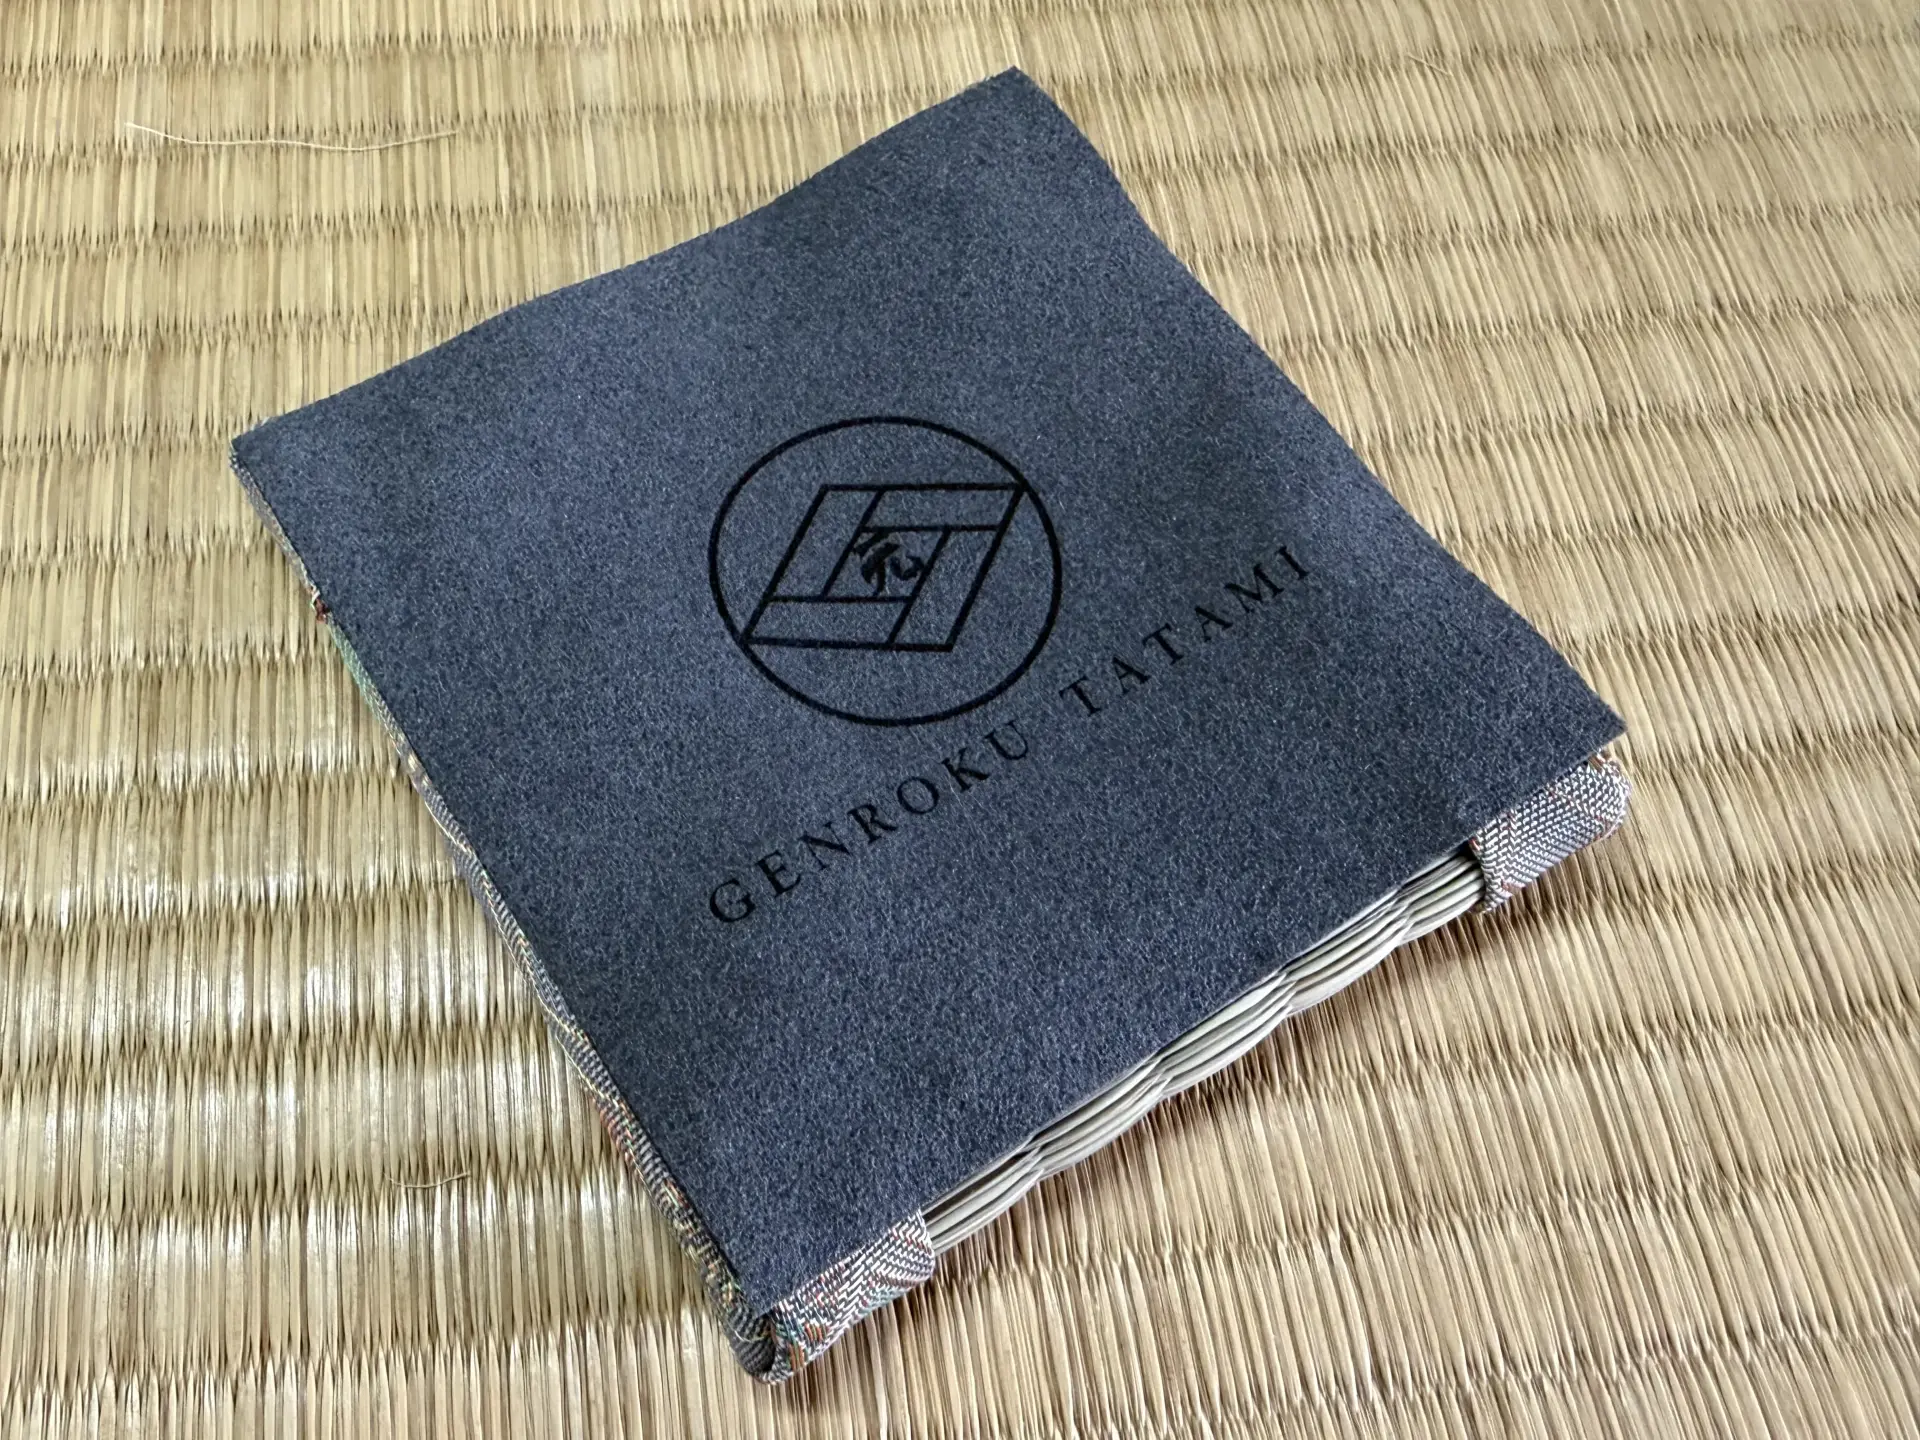
To finish, a piece of felt is attached over the staples on the back.
Reflections on the Experience
From the classroom lesson and hand-sewing activity to making a tatami coaster, we spent approximately 2 hours fully immersed in the world of tatami. Although tatami is a familiar part of life in Japan, there was a surprising amount we did not know. The hand-sewing activity in particular showed us how much effort is required to make a single mat. The palm-sized tatami coaster is easy to take home. It can be used for drinks, as a mat for displaying figurines, or as a place to keep keys near the entrance. It was a memorable experience that made tatami feel much more familiar.
Don’t Forget to Browse the Souvenirs
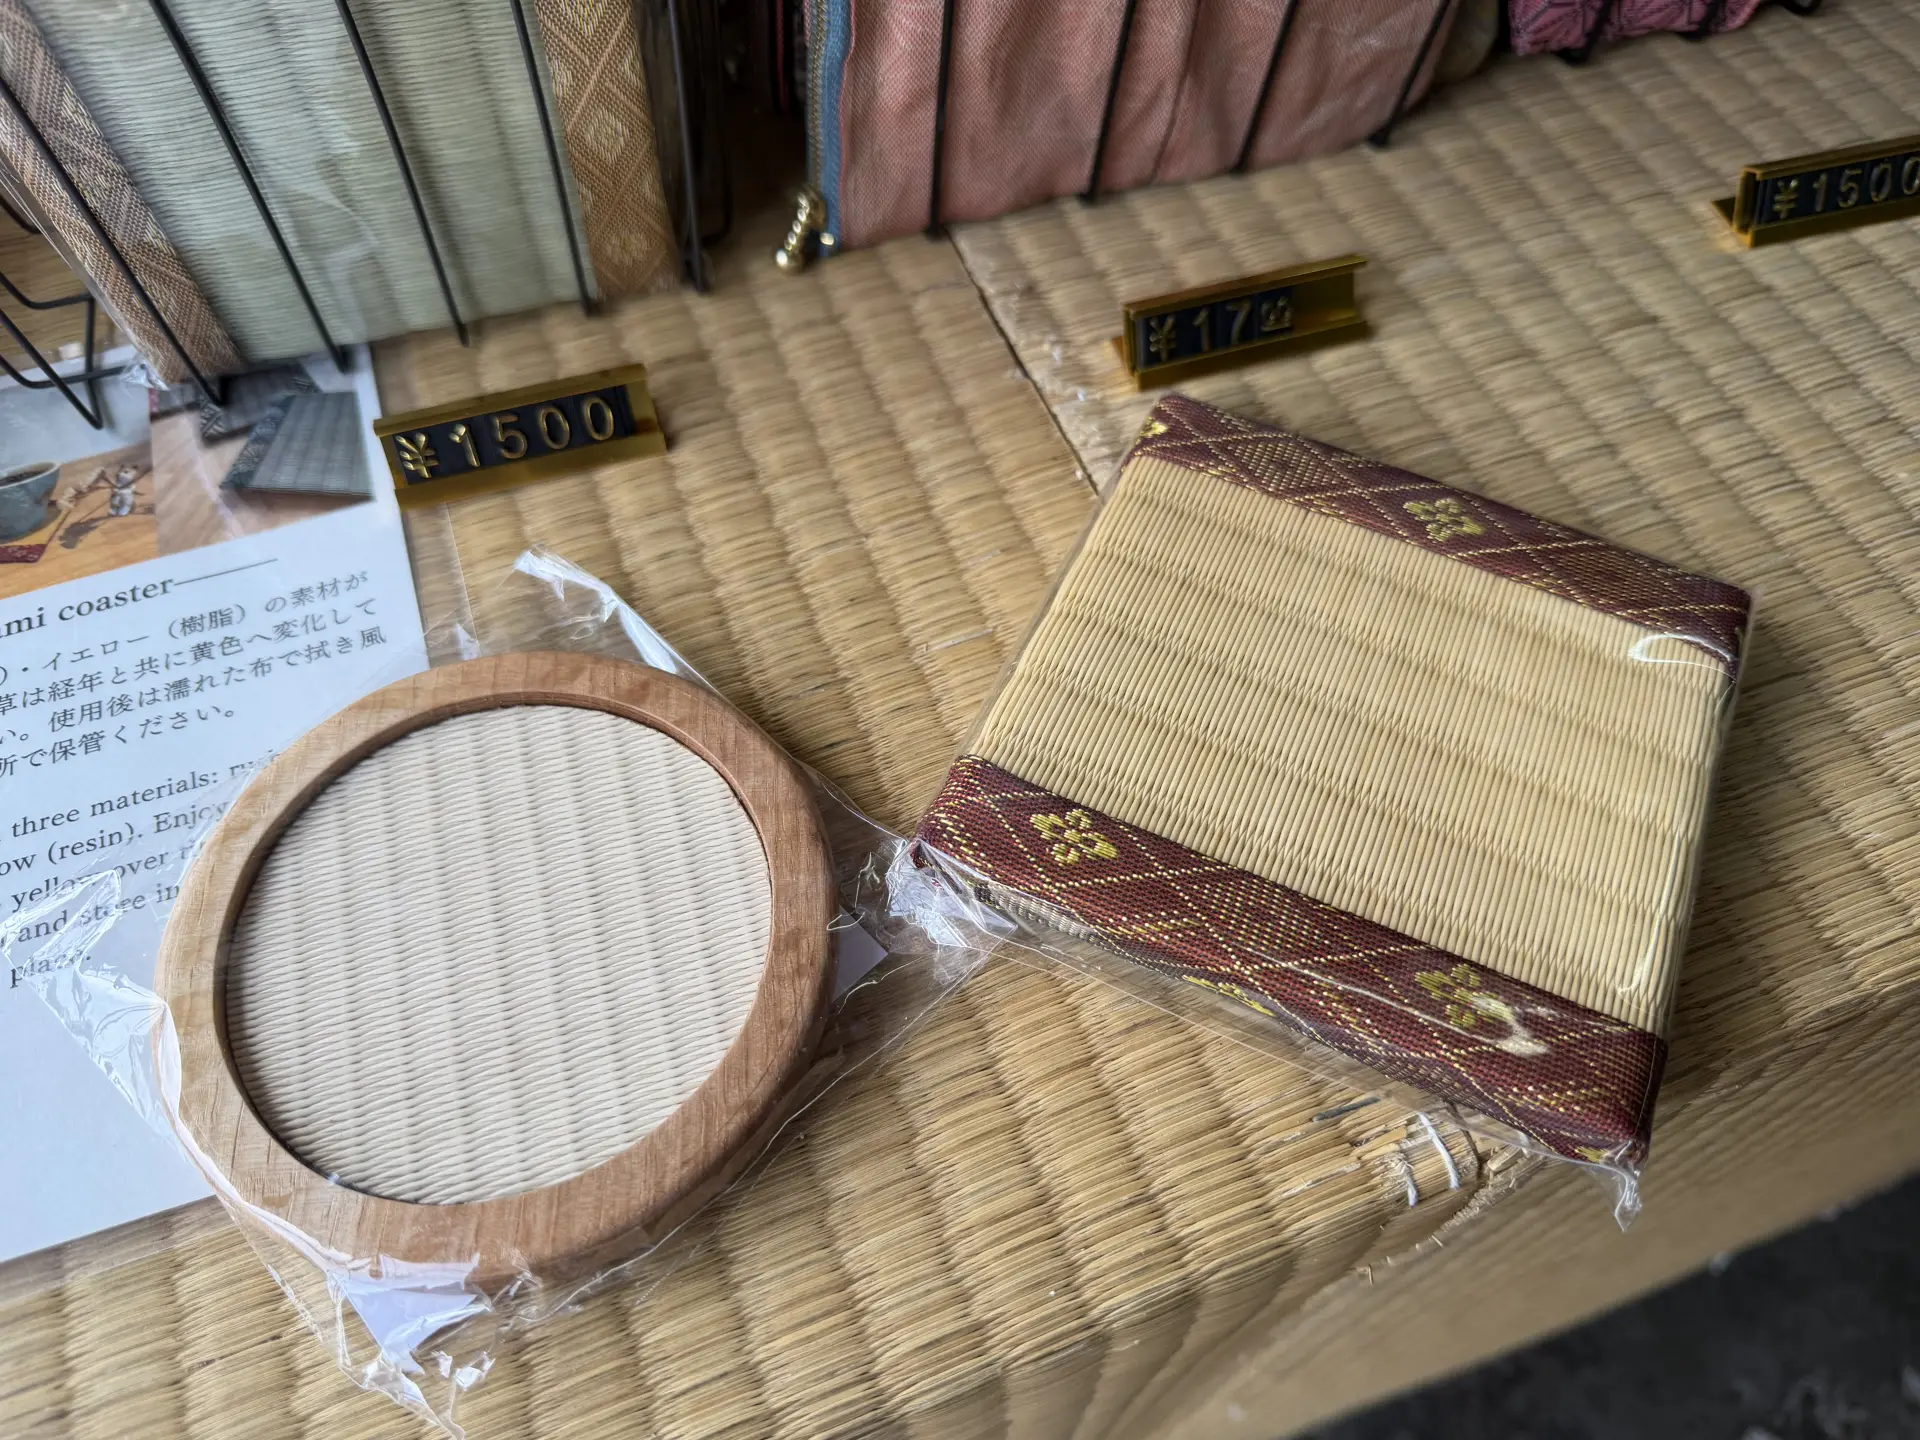
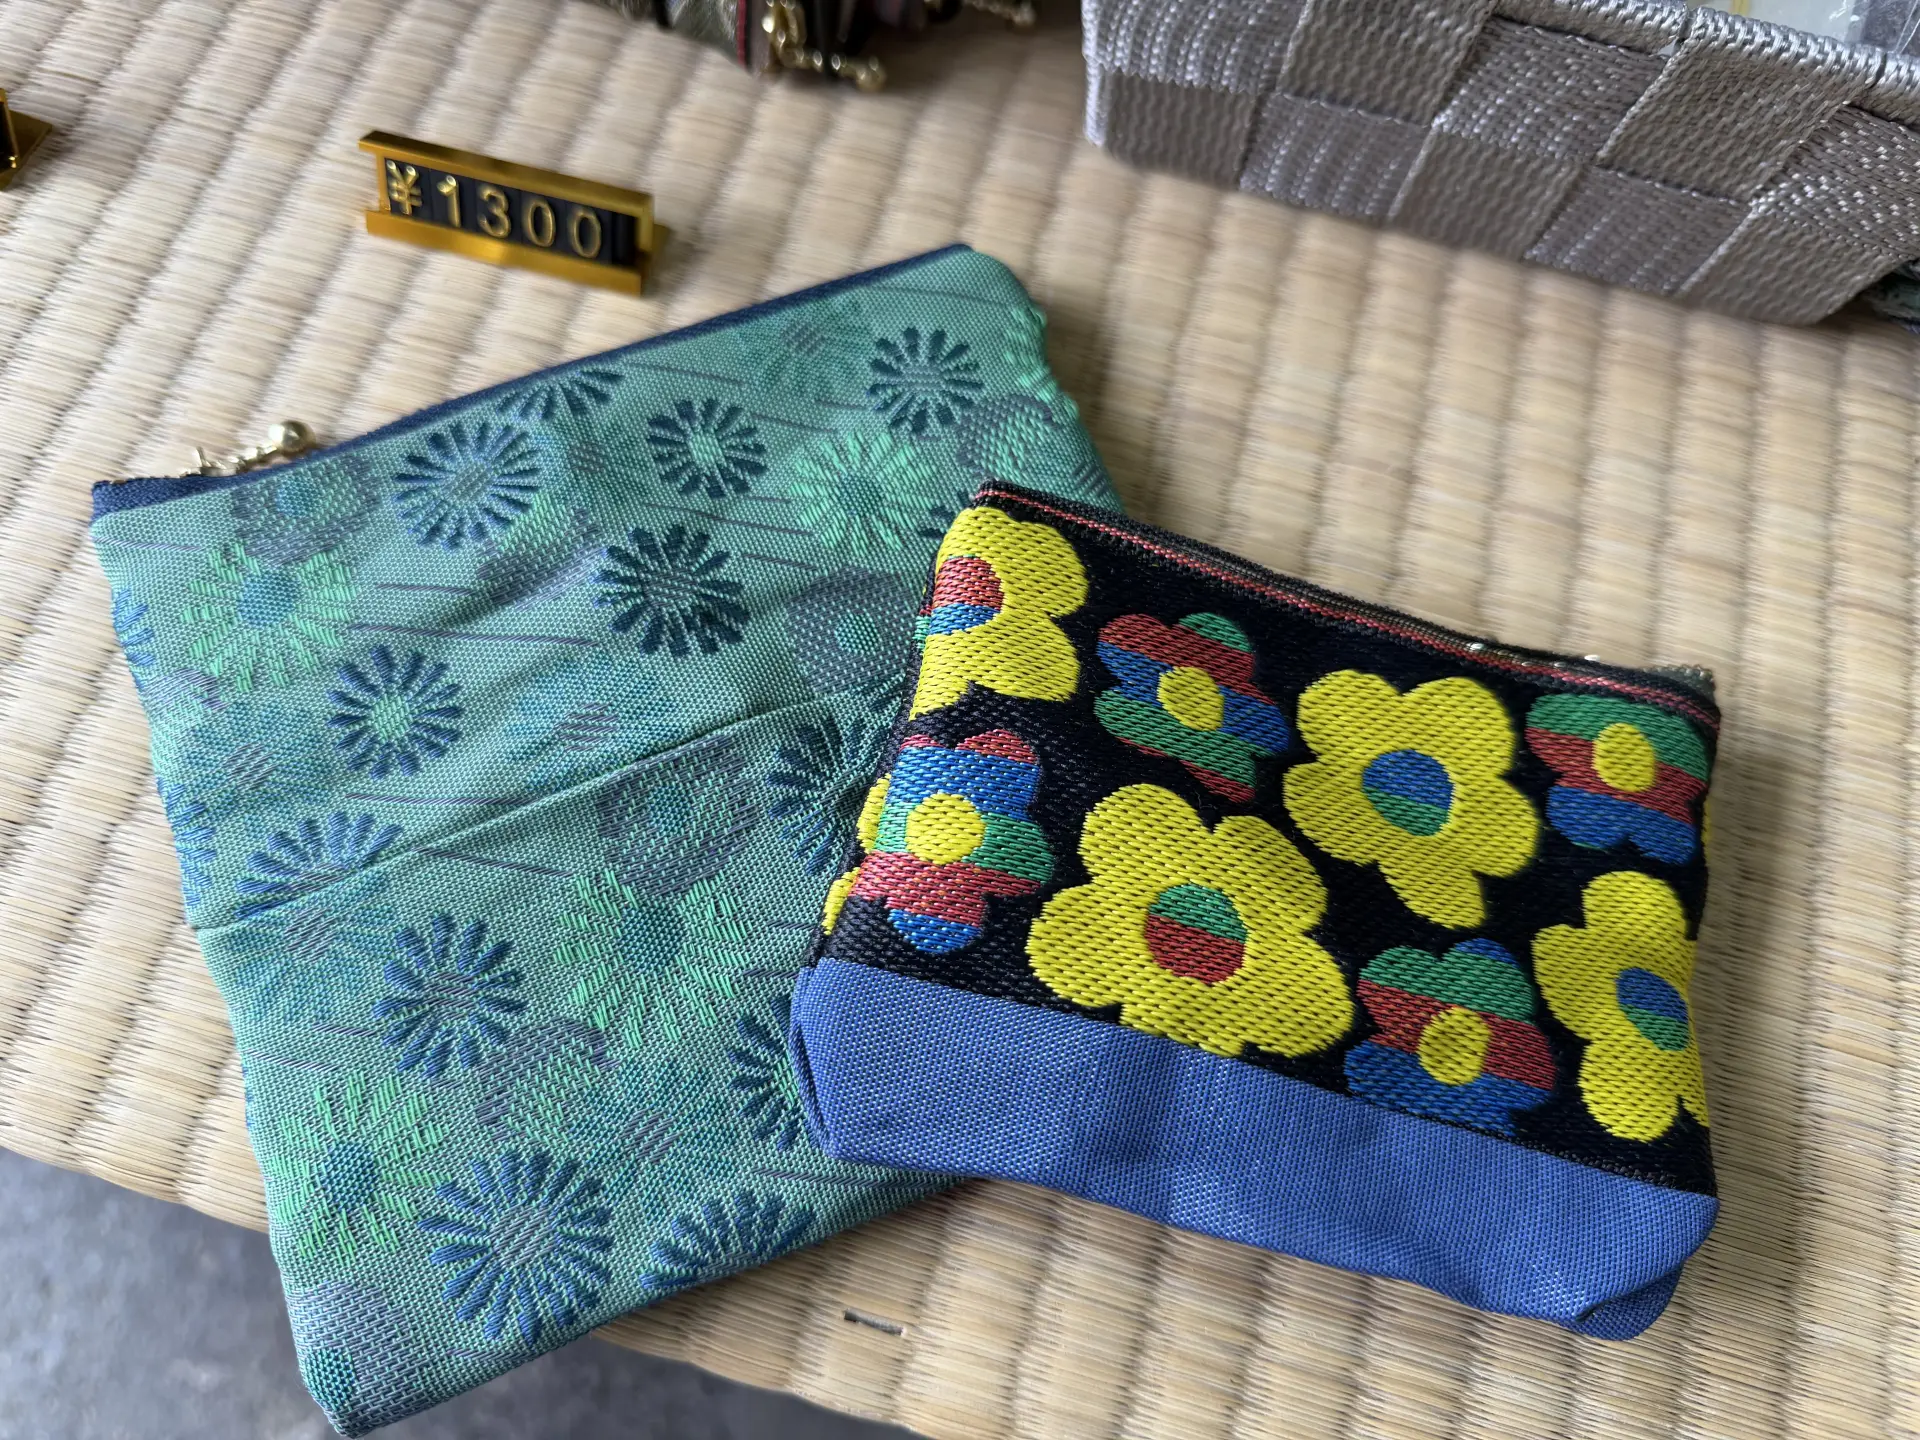
Souvenirs are also available for purchase here. In addition to tatami coasters, the shop sells pouches, accessories, and other items made from tatami-beri. The coasters are available in igusa and resin versions. One appeal of the igusa type is watching its color gradually change to yellow over time. Taking a full tatami mat home as a souvenir may be difficult, but a coaster is easy to use in everyday life. Consider picking one up as a gift for friends or family. When presenting your souvenir, you can also share what you learned about the appeal of tatami during your experience in Japan.
Summary
Tatami has long been an essential part of Japanese living spaces. This article has shown how it also serves as one of the symbols of Japanese culture. Although people now spend less time in rooms with tatami, experiencing its fragrance and pleasant texture offers a reminder that it has been passed down through the centuries because it is so well suited to Japan’s climate and way of life. Japanese wisdom accumulated over a long history—and a respect for objects and etiquette—can be seen not only in the careful craftsmanship of tatami artisans, but also in the rules for arranging the mats and the etiquette surrounding their edging. Making tatami yourself provides a closer appreciation of the artisans’ skills. Once you know the history, background, and production process of tatami, a Japanese-style room will likely look very different to you. When visiting Japan, be sure to experience tatami for yourself.

Author
Freelance Announcer
Sayaka Motomura
Focused on sharing insights related to traditional culture, performing arts, and history.